Chapters
Table of Contents

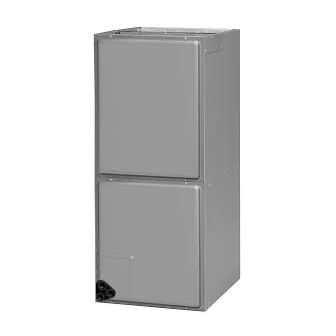
Related Manuals for Rheem RHMV2421MNACJA


Summary of Contents for Rheem RHMV2421MNACJA
- Page 1 R410A AIR CONDITIONER REFRIGERANT INVERTER Duct type SERVICE MANUAL INDOOR RHMV2421MNACJA RHMV3021SNACJA RHMV3621MNACJA RHMV4821SNACJA OUTDOOR RP1724HJVXA RP1736HJVXA RP1730HJVXA RP1748HJVXA SR_AR024EM_07 2021.02.12...
- Page 2 Notices: • Product specifications and design are subject to change without notice for future improvement. • For further details, please check with our authorized dealer.
- Page 3 CONTENTS 1. GENERAL INFORMATION 2. TECHNICAL DATA AND PARTS LIST 3. TROUBLESHOOTING 4. CONTROL AND FUNCTIONS 5. FILED WORKING...
- Page 5 R410A REFRIGERANT 1. GENERAL INFORMATION 2021.02.12 SR_CH01_AR024EM_03...
-
Page 6: Table Of Contents
CONTENTS 1. GENERAL INFORMATION 1. Specifications....................01-1 1-1. Indoor unit ........................01-1 1-2. Outdoor unit........................01-3 2. Dimensions....................01-5 2-1. Indoor unit ........................01-5 2-2. Outdoor unit........................01-8... -
Page 7: Specifications
1. Specifications 1-1. Indoor unit Duct Type Inverter heat pump Model name RHMV2421MNACJA RHMV3021SNACJA RHMV3621MNACJA RHMV4821SNACJA Power supply 208/230 V ~ 60 Hz Power supply intake Outdoor unit Available voltage range 187—253 V 7.03 8.79 10.55 13.36 Rated Btu/h 24,000... - Page 8 Duct Type Inverter heat pump Model name RHMV2421MNACJA RHMV3021SNACJA RHMV3621MNACJA RHMV4821SNACJA Liquid Ø 3/8 (Ø 9.52) Size in (mm) Connection pipe Ø 5/8 (Ø 15.88) Method Flare Flare Flare Flare Drain port Size in (mm) Ø 3/4 (19) [O.D.] Ø 3/4 (19) [O.D.] Ø...
-
Page 9: Outdoor Unit
1-2. Outdoor unit Type Inverter heat pump Model name RP1724HJVXA RP1730HJVXA Power supply 208/230 V ~ 60 Hz Power supply intake Outdoor unit Available voltage range 187—253 V Starting current 11.5 Cooling 2,119 (3,600) Airflow rate CFM (m Heating 2,119 (3,600) Type ×... - Page 10 Type Inverter heat pump Model name RP1736HJVXA RP1748HJVXA Power supply 208/230 V ~ 60 Hz Power supply intake Outdoor unit Available voltage range 187—253 V Starting current 20.1 Cooling 2,590 (4,400) Airflow rate CFM (m Heating 2,590 (4,400) Type × Q'ty Propeller ×...
-
Page 11: Dimensions
2. Dimensions 2-1. Indoor unit ¢ Models: RHMV2421MNACJA, RHMV3021SNACJA, RHMV3621MNACJA, and RHMV4821SNACJA Unit: in (mm) 7/8 (22), 1-1/16 (27), 1-15/16 (50) Flanges are provided Dia. knockouts. for field installation Gas pipe Auxiliary drain connection Primary drain connection Auxiliary drain connection... - Page 12 ¢ Installation space requirement Provide sufficient installation space for product safety. (Top side) Service access 4 (100) 24 (600) or more or more For installation method, the following 4 patterns • Pattern A: Vertical installation, air intake port at the bottom •...
- Page 13 • Pattern C: Vertical installation, air intake port at the top Reversing the evaporator coil and reattaching the thermistor are required • Pattern D: Horizontal installation, air intake port at the left Reversing the evaporator coil and reattaching the thermistor are required - (01-7) - 2-1.
-
Page 14: Outdoor Unit
2-2. Outdoor unit ¢ Models: RP1724HJVXA and RP1730HJVXA Unit: in (mm) Top view 1-1/4 3(77) 35-7/16 (900) 13 (330) (12) (31) 15-3/4 (400) Front view Side view 25-5/8 (650) Airflow 5-3/4 (147) 6-3/4 (170) Bottom view - (01-8) - 2-2. Outdoor unit 2. - Page 15 ¢ Models: RP1736HJVXA and RP1748HJVXA Unit: in (mm) 6-9/16 (166) 25-9/16 (650) 6-1/16 (154) 1-7/16 (36) 38-3/16 (970) 1-4/16 (32) 14-9/16 (370) 9/16 (14) Treminal blocks 3-Way valve (Liquid) 3-Way valve (Gas) Ø7/8 (22.2)(Cable port) Ø7/8 (22.2)(Cable port) Ø7/8 (22.2)(Cable port) Ø7/8 (22.2)(Cable port) Ø1-1/8 (27.8)(Cable port) Ø1-1/8 (27.8)(Cable port)
- Page 16 - (01-10) - 2-2. Outdoor unit 2. Dimensions...
- Page 17 R410A REFRIGERANT 2. TECHNICAL DATA AND PARTS LIST 2021.02.12 SR_CH02_AR024EM_07...
- Page 18 CONTENTS 2. TECHNICAL DATA AND PARTS LIST 1. Precautions....................02-1 2. Indoor unit parts list..................02-2 2-1. Models: RHMV2421MNACJA, RHMV3021SNACJA, RHMV3621MNACJA, and RHMV4821SNACJA .......................02-2 3. Outdoor unit parts list.................02-8 3-1. Models: RP1724HJVXA and RP1730HJVXA ..............02-8 3-2. Models: RP1736HJVXA and RP1748HJVXA ...............02-14 4. Accessories ....................02-20 4-1.
-
Page 19: Precautions
1. Precautions When you start servicing, pay attention to the following points. For detailed precautions, refer to the installation manual of the products. CAUTION • Service personnel – Any person who is involved with working on or breaking into a refrigerant circuit should hold a current valid certificate from an industry-accredited assessment authority, which authorizes their competence to handle refrigerants safely in accordance with an industry recognized as- sessment specification. -
Page 20: Indoor Unit Parts List
2. Indoor unit parts list 2-1. Models: RHMV2421MNACJA, RHMV3021SNACJA, RHMV3621MNACJA, and RHMV4821SNACJA ¢ Exterior parts and chassis - (02-2) - 2-1. Models: RHMV2421MNACJA, RHMV3021SNACJA, RHMV3621MNACJA, and 2. Indoor unit parts list RHMV4821SNACJA... - Page 21 RCH-3021SNAV RCH-3021SNAV RCH-4821SNAV RCH-4821SNAV Replacement Coil Horizontal Adapter Kit See specified RCH Coil Parts List Drain Pan - Vertical See specified RCH Coil Parts List - (02-3) - 2-1. Models: RHMV2421MNACJA, RHMV3021SNACJA, RHMV3621MNACJA, and 2. Indoor unit parts list RHMV4821SNACJA...
- Page 22 ¢ Blower assy - (02-4) - 2-1. Models: RHMV2421MNACJA, RHMV3021SNACJA, RHMV3621MNACJA, and 2. Indoor unit parts list RHMV4821SNACJA...
- Page 23 70-19929-10 Blower Motor* 51-102601-01 51-102601-01 51-102603-01 51-102603-01 Mounting Bracket Cover 10-101797-03 10-101797-03 10-101797-03 10-101797-03 *: It is recommended that stock be maintained for this part. - (02-5) - 2-1. Models: RHMV2421MNACJA, RHMV3021SNACJA, RHMV3621MNACJA, and 2. Indoor unit parts list RHMV4821SNACJA...
- Page 24 ¢ RCH coil - (02-6) - 2-1. Models: RHMV2421MNACJA, RHMV3021SNACJA, RHMV3621MNACJA, and 2. Indoor unit parts list RHMV4821SNACJA...
- Page 25 Drain Pan - Horizontal AE-101128-31 Insulation - Horizontal Pan 68-100528-01 Rear/Front Shield (2) AE-101136-07 Straps (2) AE-100530-07 *: It is recommended that stock be maintained for this part. - (02-7) - 2-1. Models: RHMV2421MNACJA, RHMV3021SNACJA, RHMV3621MNACJA, and 2. Indoor unit parts list RHMV4821SNACJA...
-
Page 26: Outdoor Unit Parts List
3. Outdoor unit parts list 3-1. Models: RP1724HJVXA and RP1730HJVXA ¢ Exterior parts and chassis - (02-8) - 3-1. Models: RP1724HJVXA and RP1730HJVXA 3. Outdoor unit parts list... - Page 27 Item no. Part no. Part name Service part 9374417070 Top panel sub assy ♦ 9375361013 Net rubber ♦ 9375381011 Protective net ♦ 9374420308 Condenser A sub assy ♦ 9375211011 Thermo sensor holder ♦ 9374166206 Base assy ♦ 9374416271 Right panel sub assy ♦...
- Page 28 ¢ Inverter unit - (02-10) - 3-1. Models: RP1724HJVXA and RP1730HJVXA 3. Outdoor unit parts list...
- Page 29 Item no. Part no. Part name Service part 9378530010 Heat sink ♦ 9900223014 Choke coil ♦ 9707592016 ACTPM ♦ 9708512181 Transistor PCB ♦ 9900514013 Thermistor (Condenser coil) ♦ 9900463007 Thermistor (Outdoor temp.) ♦ 9900827021 Thermistor (Compressor temp.) ♦ 9901041020 Thermistor (Discharge temp.) ♦...
- Page 30 ¢ Compressor - (02-12) - 3-1. Models: RP1724HJVXA and RP1730HJVXA 3. Outdoor unit parts list...
- Page 31 Item no. Part no. Part name Service part 9374426133 Accumulator sub assy ♦ 9378851177 Compressor cover A ♦ 9378851184 Compressor cover D ♦ 9378851283 Compressor cover B ♦ 9378851023 Compressor cover C ♦ 9970095030 Expansion valve coil ♦ 9370947144 Expansion valve assy ♦...
-
Page 32: Models: Rp1736Hjvxa And Rp1748Hjvxa
3-2. Models: RP1736HJVXA and RP1748HJVXA ¢ Exterior parts and chassis - (02-14) - 3-2. Models: RP1736HJVXA and RP1748HJVXA 3. Outdoor unit parts list... - Page 33 Item no. Part no. Part name Service part 9379416108 Top panel sub assy ♦ 9378926059 Protective net (Rear) ♦ 9374420360 Condenser sub assy ♦ 9379425087 Base sub assy ♦ 9332505009 Thermistor holder ♦ 9380570042 Cabinet sub assy (Right) ♦ 9384171009 Pipe cover (Rear) ♦...
- Page 34 ¢ Inverter - (02-16) - 3-2. Models: RP1736HJVXA and RP1748HJVXA 3. Outdoor unit parts list...
- Page 35 Item no. Part no. Part name Service part 9900592011 Choke coil ♦ 9708590004 ACTPM ♦ 9708497242 Inverter PCB ♦ 9900922016 Thermistor assy ♦ 9900565046 Thermistor (Outdoor temp.) ♦ 9900923013 Thermistor (Condenser coil) ♦ 9900428167 Terminal ♦ 9380495000 Control box cover ♦...
- Page 36 ¢ Compressor - (02-18) - 3-2. Models: RP1736HJVXA and RP1748HJVXA 3. Outdoor unit parts list...
- Page 37 Item no. Part no. Part name Service part 9382460006 4-way valve total assy ♦ 9970173004 Expansion valve coil ♦ 9372514191 Suction pipe assy ♦ 9372700075 Accumulator sub assy ♦ 9378750333 Expansion valve total assy ♦ 9315414045 3-way valve assy ♦ 9381055005 3-way valve assy ♦...
-
Page 38: Accessories
4. Accessories 4-1. Indoor unit ¢ Models: RHMV2421MNACJA, RHMV3021SNACJA, RHMV3621MNACJA, and RHMV4821SNACJA Part name Exterior Q’ty Part name Exterior Q’ty Operating manual Cable tie (large) Installation manual Cable tie (medium) (indoor unit) Rail Cable tie (small) Duct flanges Drain hose insulation... -
Page 39: Optional Parts
5. Optional parts 5-1. Indoor unit ¢ Controllers Exterior Part name Model name Summary Easy finger touch operation with LCD Office Fri 10:00AM Mode Set Temp. Wired remote panel. Backlit LCD enables easy Cool 80°F Custom Auto Auto 74°F Heat RXRNRUZ* Cool 84°F... - Page 40 ¢ Others Exterior Part name Model name Summary Thermo-sensor for sensing the RXXSZX Remote sensor temperature of arbitrary place in the unit UXXSZX room. Use to connect with various peripheral External devices and air conditioner PCB. RXXWZXZG connect kit For control output port. Use to connect with external devices External input RXXCSX...
-
Page 41: Refrigerant System Diagrams
6. Refrigerant system diagrams 6-1. Models: RP1724HJVXA and RP1730HJVXA Evaporator coil 3-Way (Indoor) valve Muffler 2-Way valve Pressure switch 4-Way valve Strainer Expansion valve Condenser coil Strainer Pressure (Outdoor) check valve : Cooling : Heating : Thermistor (Compressor temperature) : Thermistor (Discharge temperature) : Thermistor (Outdoor temperature) : Thermistor (Condenser coil Out temperature) : Thermistor (Room temperature) -
Page 42: Models: Rp1736Hjvxa And Rp1748Hjvxa
6-2. Models: RP1736HJVXA and RP1748HJVXA Indoor unit Outdoor unit Condenser coil Evaporator coil Muffler Fusible plug Belt heater : Check valve : Thermistor (Shell) : Strainer : Thermistor (Discharge temperature thermistor) : Compressor (Inverter type) : Thermistor (Outdoor temperature) : Accumulator : Thermistor (Condenser coil Out temperature) : High pressure sensor : Thermistor (Room temperature) -
Page 43: Wiring Diagrams
7. Wiring diagrams 7-1. Indoor unit ¢ Models: RHMV2421MNACJA, RHMV3021SNACJA, RHMV3621MNACJA, and RHMV4821SNACJA - (02-25) - 7-1. Indoor unit 7. Wiring diagrams... -
Page 44: Outdoor Unit
7-2. Outdoor unit ¢ Models: RP1724HJVXA and RP1730HJVXA - (02-26) - 7-2. Outdoor unit 7. Wiring diagrams... -
Page 45: Models: Rp1736Hjvxa And Rp1748Hjvxa
¢ Models: RP1736HJVXA and RP1748HJVXA - (02-27) - 7-2. Outdoor unit 7. Wiring diagrams... - Page 46 8. PC board diagrams 8-1. Models: RHMV2421MNACJA, RHMV3021SNACJA, RHMV3621MNACJA, and RHMV4821SNACJA UL1015 AWG20 BLACK CN70-1 CN70 UL1015 AWG20 WHITE CN70-2 B3 ( 8.0 ) B-PSILE-1 LIGHT BLUE FUSE F200 UL1015 AWG20 CN70-3 3.05A - 250V REMOTE SENSOR ( OPTION )
- Page 47 8-2. Models: RP1724HJVXA and RP1730HJVXA INVERTER ASSEMBLY 24 model: EZ-0193SHUE 30 model: EZ-0193THUE EMI FILTER ZCAT2132-1130 1 TURN UL1015 AWG14 WHITE EMI FILTER UL1015 UL1015 POWER SOURCE ZCAT2132-1130 AWG14 AWG14 AC208/230V 2 TURNS BLACK BLACK UL1015 60Hz UL3271 AWG14 TM101 D100 AWG20 ORANGE...
- Page 48 8-3. Models: RP1736HJVXA and RP1748HJVXA INVERTER ASSEMBLY 36 model: EZ-0193FHUE 48 model: EZ-0193EHUE 4-WAY VALVE COIL BELT HEATER 28W AC230V DC Resistance 2,085 DC FAN MOTOR PRESSURE SENSOR Characteristics of pressure sensor 1,889 SOLENOID VALVE COIL ( HIGH PRESSURE ) DC Resistance 2,085 Wiring and coloring PRES.
- Page 49 R410A REFRIGERANT 3. TROUBLESHOOTING 2021.02.12 SR_CH03_AR024EM_03...
- Page 50 CONTENTS 3. TROUBLESHOOTING 1. ERROR DISPLAY..............03-01 2. TROUBLESHOOTING WITH ERROR CODE......03-05 3. TROUBLESHOOTING WITH NO ERROR CODE...... 03-42 4. PARTS INFORMATION..............03-48...
- Page 51 1. ERROR DISPLAY 1-1 INDOOR UNIT AND WIRED REMOTE CONTROL DISPLAY When you use a wired type remote control, error codes will appear on remote control display. For more information, refer to an installation manual of a remote control. When you use a wireless remote control, lamps on an IR receiver unit will output error codes by way of blinking patterns.
- Page 52 Error display Wired Trouble Description remote control Operation Timer Economy shooting indicator indicator indicator error code lamp (green) lamp (orange) lamp (green) Serial communication error Wired remote control communication error External communication error Combination error Address setting error in wired remote control system Connection unit number error (indoor unit wired remote control error) Indoor unit PCB model information error...
- Page 53 1-2 OUTDOOR UNIT DISPLAY (RP1736,1748HJVXA) Error code If an error occurs, the LED will light up to display the error location and the error code. In the event of an error The error LED ashes quickly. POWER ERROR MONITOR MODE Blink (High-speed)
- Page 54 : Light OFF : Light ON 15 : 1~ 15 Times Blinking Outdoor unit LED display part Trouble Error code Error contents Monitor shooting 11.3 Serial communication error 11.4 Serial communication error during operation 3,4,5,6,7,8,10,11, 5U.1 Indoor unit error 12,13 62.1 Outdoor unit PCB model information error 62.3...
- Page 55 2. TROUBLESHOOTING WITH ERROR CODE Troubleshooting 1 Indicate or Display: Serial communication error (Serial reverse transfer error) Indoor unit Operation lamp: 1 time Flash, Timer lamp : 1 time Flash Detective actuators: Wired remote control Outdoor unit main PCB Error code : [E : 11] Outdoor unit fan motor Outdoor unit (RP1736/1748HJVXA) No indication...
- Page 56 Troubleshooting 1 previous page Check Point 3 : Check voltage of power supply Check the voltage of power supply >> Check if AC187V (AC208V-10%) - 253V (AC230V+10%) appears at outdoor unit terminal L1 - L2. Check Point 4 : Check serial signal (Reverse transfer signal) Check serial signal (Reverse transfer signal) >>...
- Page 57 Indicate or Display: Troubleshooting 2 Serial communication error Indoor unit (Serial forward transfer error) Operation lamp: 1 time Flash, Timer lamp : 1 time Flash Detective details: Wired remote control Error code : [E : 11] When outdoor unit cannot properly receive serial signal from indoor unit for 10 seconds Outdoor unit (RP1736/1748HJVXA) or more.
- Page 58 Indicate or Display: Troubleshooting 3 Indoor unit Wired remote control communication error Operation lamp: 1 times Flash, Timer lamp : 2 times Flash Wired remote Detective details: Error code : [E : 12] Upon receiving signal more than 1 time from wired remote or other Indoor unit, Outdoor unit (RP1736/1748HJVXA) but the same signal has not been...
- Page 59 Indicate or Display: Troubleshooting 4 External communication error Indoor unit Operation lamp: 1 times Flash, Timer lamp : 8 times Flash Detective actuators: Wired remote control Error code : [E : 18] External communication error Outdoor unit (RP1736/1748HJVXA) Mode Error Detective details: After receiving signal from external I/O PCB, : Light OFF...
- Page 60 Indicate or Display: Troubleshooting 5 Combination error Indoor unit Operation lamp: 2 times Flash, Timer lamp : 3 times Flash Detective details: Wired remote control Error code : [E : 23] 1. Outdoor unit receives serial signal of applied refrigerant information from Indoor unit Outdoor unit (RP1736/1748HJVXA) When the refrigerant is R410A.
- Page 61 Indicate or Display: Troubleshooting 6 Address setting error in wired remote control system Indoor unit Operation lamp: 2 times Flash, Timer lamp : 6 times Flash Wired remote control Detective actuators: Error code : [E : 26] Wired remote control (2-Wire) Outdoor unit (RP1736/1748HJVXA) Indoor unit Controller PCB circuit Mode Error...
- Page 62 Indicate or Display: Troubleshooting 7 Indoor unit Connection unit number error Operation lamp: 2 times Flash, (Indoor unit in wired remote control system) Timer lamp : 9 times Flash Wired remote control Error code : [E : 29] Detective actuators: Wired remote control (2-Wire) Outdoor unit (RP1736/1748HJVXA) Indoor unit controller PCB circuit...
- Page 63 Indicate or Display: Troubleshooting 8 Indoor unit Indoor unit PCB model information error Operation lamp: 3 times Flash, Timer lamp : 2 times Flash Wired remote control Detective details: Error code : [E : 32] When power is on and there is some below case. Outdoor unit (RP1736/1748HJVXA) 1.
- Page 64 Indicate or Display: Troubleshooting 9 Manual auto switch error Indoor unit : Operation lamp: 3 times Flash, Timer lamp : 5 times Flash Wired remote control Detective actuators: Error code : [E : 35] Indoor unit controller PCB Indicator PCB Outdoor unit : No indication Manual auto switch Detective details:...
- Page 65 Indicate or Display: Troubleshooting 10 Indoor unit communication circuit (WRC) error Indoor unit Operation lamp: 3 timesFlash, Timer lamp : 10times Flash Wired remote control Error code : [E : 3A] Detective actuators: Wired remote control (2-wire) Outdoor unit (RP1736/1748HJVXA) Indoor unit controller PCB circuit Mode Error : Light OFF...
- Page 66 Indicate or Display: Troubleshooting 11 Room temperature sensor error Indoor unit Operation lamp: 4 times Flash, Timer lamp : 1 time Flash Detective actuators: Wired remote control Indoor unit controller PCB circuit Error code : [E : 41] Indoor temperature thermistor Outdoor unit (RP1736/1748HJVXA) Mode Error Detective details:...
- Page 67 Indicate or Display: Troubleshooting 12 Evaporator coil middle Indoor unit temperature sensor error Operation lamp: 4 times Flash, Timer lamp : 2 times Flash Detective actuators: Wired remote control Indoor unit controller PCB Error code : [E : 42] Evaporator coil (MID) thermistor Outdoor unit (RP1736/1748HJVXA) Detective details: Mode Error...
- Page 68 Troubleshooting 13 Indicate or Display: Indoor unit fan motor error Indoor unit Detective actuators: Operation lamp: 5 times Flash, Indoor unit controller PCB Timer lamp : 1 time Flash Indoor unit fan motor Wired remote Detective details: Error code : [E : 51] When condition that actual frequency of Indoor fan is below 1/3 of target frequency Outdoor unit (RP1736/1748HJVXA)
- Page 69 Indicate or Display: Troubleshooting 14-1 Outdoor unit PCB Indoor unit model information error Operation lamp: 6 times Flash, Timer lamp : 2 times Flash Wired remote Detective actuators: Error code : [E : 62] Outdoor unit main PCB Outdoor unit (RP1736/1748HJVXA) Mode Error Detective details: Access to EEPROM failed due to some cause...
- Page 70 Indicate or Display: Troubleshooting 14-2 EEPROM access error Indoor unit Operation lamp: - times Flash, Timer lamp : - times Flash Wired remote Detective actuators: Error code : [E : --] Outdoor unit main PCB Outdoor unit (RP1736/1748HJVXA) Mode Error Detective details: When the check run if can not write data to : Light OFF...
- Page 71 Indicate or Display: Troubleshooting 14-3 EEPROM Data Corruption Error Indoor unit Operation lamp: 6 times Flash, Timer lamp : 2 times Flash Wired remote Detective actuators: Error code : [E : 62] Outdoor unit main PCB Outdoor unit (RP1736/1748HJVXA) Mode Error Detective details: When the power is turned on and : Light OFF...
- Page 72 Indicate or Display: Troubleshooting 15 Inverter error Indoor unit Operation lamp: 6 times Flash, Timer lamp : 3 times Flash Detective actuators: Wired remote Error code : [E : 63] Inverter PCB Outdoor unit (RP1736/1748HJVXA) Mode Error Detective details: : Light OFF : Light ON n : n times blinking Error information is received...
- Page 73 Indicate or Display: Troubleshooting 16 Active filter voltage error Indoor unit Operation lamp: 6 times Flash, Timer lamp : 4 times Flash Detective actuators: Outdoor unit main PCB Wired remote control Active filter module Error code : [E : 64] Outdoor unit : No indication Detective details: When inverter input DC voltage...
- Page 74 Indicate or Display: Troubleshooting 17 IPM error Indoor unit Operation lamp: 6 times Flash, Timer lamp : 5 times Flash Detective actuators: Wired remote Error code : [E : 65] Outdoor unit main PCB Compressor Outdoor unit (RP1736/1748HJVXA) Transistor PCB Mode Error : Light OFF : Light ON...
- Page 75 Indicate or Display: Troubleshooting 18 Discharge temperature sensor error Indoor unit Operation lamp: 7 times Flash, Timer lamp : 1 time Flash Detective actuators: Discharge temperature thermistor Wired remote control Error code : [E : 71] Detective details: Outdoor unit (RP1736/1748HJVXA) Discharge temperature thermistor short detected Mode Error Discharge thermistor open detected...
- Page 76 Indicate or Display: Troubleshooting 19 Compressor temperature sensor error Indoor unit Operation lamp: 7 times Flash, Timer lamp : 2 times Flash Detective actuators: Compressor temperature thermistor Wired remote control Error code : [E : 72] Detective details: Outdoor unit (RP1736/1748HJVXA) Compressor temperature thermistor short detected Mode Error Compressor thermistor open detected...
- Page 77 Indicate or Display: Troubleshooting 20 Condenser coil liquid Indoor unit temperature sensor error Operation lamp: 7 times Flash, Timer lamp : 3 times Flash Detective actuators: Wired remote control Condenser coil liquid temperature thermistor Error code : [E : 73] Outdoor unit (RP1736/1748HJVXA) Detective details: Mode Error...
- Page 78 Indicate or Display: Troubleshooting 21 Outdoor temperature sensor error Indoor unit Operation lamp: 7 times Flash, Timer lamp : 4 times Flash Detective actuators: Outdoor temperature thermistor Wired remote control Error code : [E : 74] Detective details: Outdoor unit (RP1736/1748HJVXA) Outdoor temperature thermistor Mode Error short or open detected...
- Page 79 Indicate or Display: Troubleshooting 22 Current sensor 1 error Indoor unit (Stoppage permanently) Operation lamp: 8 times Flash, Timer lamp : 4 times Flash Detective actuators: Wired remote control Outdoor unit main PCB Error code : [E : 84] Outdoor unit (RP1736/1748HJVXA) Detective details: Mode Error When input current sensor has detected 0A,...
- Page 80 Indicate or Display: Troubleshooting 23-1 High pressure switch error Indoor unit (RP1724/1730HJVXA) Operation lamp: 8 times Flash, Timer lamp : 6 times Flash Detective actuators: Wired remote control Error code : [E : 86] High pressure switch Outdoor unit : No indication Detective details: When power is turned on, "high pressure switch : open"...
- Page 81 Indicate or Display: Troubleshooting 23-2 Outdoor unit discharge pressure sensor error Indoor unit (RP1736/1748HJVXA) Operation lamp: 8 times Flash, Timer lamp : 6 times Flash Detective actuators: Wired remote control Outdoor unit main PCB Error code : [E : 86] Outdoor unit (RP1736/1748HJVXA) Mode Error Detective details:...
- Page 82 Indicate or Display: Troubleshooting 24 Outdoor unit trip detection Indoor unit Operation lamp: 9 times Flash, Timer lamp : 4 times Flash Wired remote control Detective actuators: Error code : [E : 94] Outdoor unit main PCB Compressor Outdoor unit (RP1736/1748HJVXA) Transistor PCB Mode Error : Light OFF...
- Page 83 Indicate or Display: Troubleshooting 25 Indoor unit Compressor motor control error Operation lamp: 9 times Flash, (Stoppage permanently) Timer lamp : 5 times Flash Wired remote control Error code : [E : 95] Detective actuators: Outdoor unit main PCB Outdoor unit (RP1736/1748HJVXA) Compressor Mode Error Transistor PCB...
- Page 84 Troubleshooting 25(Continued) Check Point 1 : Check noise from compressor Turn on power and check operation noise. If an abnormal noise show, replace compressor. Check Point 2 : Check connection of around the compressor components For compressor terminal, main PCB Check if connector is removed.
- Page 85 Indicate or Display: Troubleshooting 26 Indoor unit Operation lamp: 9 times Flash, Outdoor unit fan motor 1 error Timer lamp : 7 times Flash Wired remote control Error code : [E : 97] Detective actuators: Outdoor unit (RP1736/1748HJVXA) Outdoor unit main PCB Mode Error Outdoor unit fan motor : Light OFF...
- Page 86 Troubleshooting 26(Continued) Check Point 1 : Check rotation of fan Rotate the fan by hand when operation is off. (Check if fan is caught, dropped off or locked motor) >>If Fan or Bearing is abnormal, replace it. Check Point 2 : Check ambient temp. around motor Check excessively high temperature around the motor.
- Page 87 Indicate or Display: Troubleshooting 27 4-way valve error Indoor unit Operation lamp: 9 times Flash, Timer lamp : 9 times Flash Wired remote control Detective actuators: Error code : [E : 99] Indoor unit controller PCB circuit Evaporator coil temperature thermistor Outdoor unit (RP1736/1748HJVXA) Room temperature thermistor Mode Error...
- Page 88 Troubleshooting 27(Continued) Check Point 1 : Check connection of Connector Check if connector is removed. Check erroneous connection. Check if thermistor cable is open. >> Upon correcting the removed connector or mis-wiring, reset the power. Check Point 2 : Check thermistor of indoor unit Isn’t it fallen off the holder? Is there a cable pinched? >>...
- Page 89 Indicate or Display: Troubleshooting 28 Coil (expansion valve) error Indoor unit Operation lamp: 9 times Flash, Timer lamp : 10 times Flash Wired remote Detective actuators: Error code : [E : 9A] EEV coil Main PCB Outdoor unit (RP1736/1748HJVXA) Mode Error Detective details: When the power is turned on and : Light OFF...
- Page 90 Indicate or Display: Troubleshooting 29 Discharge temperature error Indoor unit Operation lamp: 10 times Flash, Timer lamp : 1 time Flash Detective actuators: Wired remote control Discharge temperature thermistor Error code : [E : A1] Detective details: Outdoor unit (RP1736/1748HJVXA) Mode Error "Protection stop by "discharge temperature ≥...
- Page 91 Indicate or Display: Troubleshooting 30 Compressor temperature error Indoor unit Operation lamp: 10 times Flash, Timer lamp : 3 times Flash Detective actuators: Wired remote control Compressor temperature thermistor Error code : [E : A3] Outdoor unit (RP1736/1748HJVXA) Detective details: Mode Error "Protection stop by compressor temperature ≥...
- Page 92 3. TROUBLESHOOTING WITH NO ERROR CODE Indoor unit - No power Troubleshooting 31 Outdoor unit - No Power Troubleshooting 32 No operation (Power is ON) Troubleshooting 33 No cooling / No heating Troubleshooting 34 Abnormal noise Troubleshooting 35 Water leaking Troubleshooting 36 03-42...
- Page 93 Troubleshooting 31 Indoor unit - No power Forecast of cause: 1. Power supply failure 2. External cause 3. Electrical Components defective Check Point 1 : Check Installation Condition Isn’t the breaker down? Check loose or removed connection cable. >>If abnormal condition is found, correct it by referring to Installation Manual or Data &...
- Page 94 Troubleshooting 32 Outdoor unit - No power Forecast of cause: 1. Power supply failure 2. External cause 3. Electrical components defective Check Point 1 : Check Installation Condition Isn’t the breaker down? Check loose or removed connection cable. >>If abnormal condition is found, correct it by referring to Installation Manual or Data &...
- Page 95 Troubleshooting 33 No operation (Power is ON) Forecast of cause: 1. Setting / connection failure 2. External cause 3. Electrical component defective 4. Communication error between controller PCB and wired remote control Check Point 1 : Check indoor and outdoor installation condition Indoor unit - Check incorrect wiring between indoor unit and remote control.
- Page 96 Troubleshooting 34 No Cooling / No Heating (unworking) Forecast of cause: 1. Indoor unit error 2. Outdoor unit error 3. Effect by surrounding environment 4. Connection pipe / connection wire failure 5. Refrigeration cycle failure Check Point 1 : Check indoor unit Does indoor unit FAN run on HIGH FAN? Is air filter dirty? Is evaporator coil clogged?
- Page 97 Troubleshooting 35 Abnormal noise Forecast of cause : 1. Abnormal installation (Indoor / Outdoor) 2. Fan failure (Indoor / Outdoor) 3. Compressor failure (Outdoor) Diagnosis method when abnormal noise is occurred Abnormal noise is coming from Indoor Unit. Abnormal noise is coming from Outdoor Unit. (Check and correct followings) (Check and correct followings) Is Main Unit installed in stable condition?
- Page 98 4. PARTS INFORMATION Compressor Parts information 1 Inverter compressor Parts information 2 Outdoor unit electronic expansion valve Parts information 3 Outdoor unit fan motor Parts information 4 Active filter module Parts information 5 Parts information 6 Thermistor Parts information 7 Discharge pressure sensor Parts information 8 03-48...
- Page 99 Parts information 1 Compressor Diagnosis method of compressor (If outdoor unit LED displays error, refer to Troubleshooting) Does not start up Stops soon after starting up Abnormal noise Check if vibration noise by Is there open or loose connection Is there open or loose connection loose bolt or contact noise cable? cable?
- Page 100 Parts information 2 Inverter compressor RP1724/1730HJVXA RP1736/1748HJVXA Check Point 1 : Check connection Check terminal connection of compressor IPM PCB (loose or incorrect wiring) (U) RED T(W) 1724/1730 models : TM305 S(V) (WHITE) (BLACK) 1736/1748 models : TM403 (V) WHITE (W) BLACK 1724/1730 models : TM304 1724/1730 models : TM303...
- Page 101 Parts information 3 Outdoor unit electronic expansion valve (EEV) Check Point 1 : Check Connections Check connection of connector (Loose connector or open cable) RP1736/1748HJVXA RP1724/1730HJVXA EXPANSION EXPANSION VALVE COIL VALVE COIL BLUE BLUE ORANGE ORANGE CN700 CN111 YELLOW YELLOW WHITE WHITE Check Point 3 : Check noise at start-up...
- Page 102 Parts information 4 Outdoor unit fan motor Check Point 1 : Check rotation of fan Rotate the fan by hand when operation is off. (Check if fan is caught, dropped off or locked motor) >>If Fan or bearing is abnormal, replace it. Check Point 2 : Check resistance of outdoor fan motor Refer to below.
- Page 103 Parts information 5 Active filter module Check Point 1 : Check Open or Short-circuit and Diode (D1) Remove connector, check the open or short-circuit and the diode in the module Check the open or short-circuit Table.1 Each type standard value LOT No.
- Page 104 Parts information 6 (Mounted on Transistor PCB) Check Point 1 Disconnect the connection wires between the Transistor PCB - Capacitor PCB and Transistor PCB - Inverter Compressor. Set the tester to the "Resistance" mode, and measure the resistance between the following terminals. TM301 (P) - TM305(U) / TM304(V) / TM303(W) TM302 (N) - TM305(U) / TM304(V) / TM303(W) Judge the result of...
- Page 105 Parts information 7 Thermistor Check Point : Check thermistor resistance value Remove connector and check Thermistor resistance value. Temperature Resistance Value [ k ] [°F] [°C] Thermistor A Thermistor B Thermistor C - 22 - 30 920.2 88.4 205.7 - 20 503.5 48.1 109.0...
- Page 106 Parts information 8 Discharge pressure sensor (AOUG36/48LMAS1) Check Point : Check Voltage from Main PCB With the connector connected to the PCB, measure the voltage between CN92:2-3 of the Main PCB. CN92 DISCHARGE PRESSURE WHITE SENSOR BLACK Characteristics of pressure sensor Pressure [MPa] 03-56...
- Page 107 R410A REFRIGERANT 4. CONTROL AND FUNCTIONS 2021.02.12 SR_CH04_AR024EM_02...
- Page 108 CONTENTS 4. DESCRIPTION OF EACH CONTROL OPERATION 04-01 1. COMPRESSOR FREQUENCY..........2. COMPRESSOR PREHEATING..........0 4-08 3. AUTO CHANGEOVER OPERATION......... 04-09 4. INDOOR FAN CONTROL............04-11 5. OUTDOOR FAN CONTROL............04-15 6. TIMER OPERATION CONTROL..........04-17 7. MINIMUM HEAT OPERATION........... 04-22 8.
-
Page 109: Compressor Frequency
1. COMPRESSOR CONTROL 1. COMPRESSOR FREQUENCY AT STARTUP RP1724HJVXA RP1730HJVXA Compressor frequency soon after starting is controlled as shown below. When it is first start after switching on a breaker, Pattern II is applied. Pattern I Frequency Condition (Normal) 60 rps In Cooling or dry operation In Heating operation within 47 rps... - Page 110 RP1736HJVXA RP1748HJVXA Operation frequency control at startup. Compressor frequency immediately after startup. H rps G rps E,F rps C,D rps B rps A rps [Frequency] A rps B rps C rps D rps E rps F rps G rps H rps RP1736HJVXA RP1748HJVXA [Time]...
- Page 111 2. BASIC FREQUENCY RANGE OF COMPRESSOR Frequency of compressor is basically defined by operation mode as shown below. Cooling Heating RP1724HJVXA 16 rps 72 rps 18 rps 90 rps 16 rps 29 rps RP1730HJVXA 16 rps 72 rps 18 rps 90 rps 16 rps 39 rps...
- Page 112 3. COMPRESSOR FREQUENCY LIMITED BY OUTDOOR TEMPERATURE Frequency of compressor is limited by outdoor temperature as shown below. Minimum frequency in cooling or dry operation under 14 ˚F over 100 ˚F over 14 ˚F (-10 ˚C) over 32 ˚F (0 ˚C) over 50 ˚F (10 ˚C) (-10 ˚C) (38 ˚C)
- Page 113 Minimum frequency in heating operation under 14 ˚F over 45 ˚F over 14 ˚F (-10 ˚C) over 32 ˚F (0 ˚C) (-10 ˚C) (7 ˚C) under 32 ˚F (0 ˚C) under 45 ˚F (7 ˚C) RP1724HJVXA 40 rps 25 rps 25 rps 16 rps (not working) 16 rps...
- Page 114 5. COOLING OPERATION A sensor (room temperature thermistor) built in an indoor unit body usually perceives difference or variation between set temperatu re and present room temperature, and controls operation frequency of the compressor. * When the room temperature is 7°F(3.5°C) higher than a set temperature, the compressor operation frequency will attain to maximum performance.
- Page 115 7. HEATING OPERATION A sensor (room temperature thermistor) built in the indoor unit body will usually perceive difference or variation between a set temperature and present room temperature, and controls the operation frequency of the compressor. * When room temperature is lower by 9°F (4.5°C) than a set temperature, compressor operation frequency will attain to maximum performance.
-
Page 116: Compressor Preheating
2. COMPRESSOR PREHEATING It works to keep compressor temperature higher than around and prevent oil and refrigerant from mixing in a compressor. RP1724HJVXA RP1730HJVXA RP1736HJVXA RP1748HJVXA It works when outdoor temperature is lower than 68°F (20°C) and a compressor stops for 30 minutes. When, power is applied to a compressor to be heated. -
Page 117: Auto Changeover Operation
3. AUTO CHANGEOVER OPERATION When AUTO mode is set using a remote control, optimum operation mode is selected from Heating, Cooling and Monitoring mode. In operation, optimum mode is automatically switched by temperature changes. Set temperature can be set between 64°F (18°C) and 86°F (30°C) by 1°F (0.5°C). When operation starts, indoor fan and outdoor fan are operated for around 1 minutes. - Page 118 AUTO CHANGEOVER operation flow chart START Setting temperature Monitor mode Room temp. ≥ Ts + 3.6°F (2°C) ? Room temp. Ts - 3.6°F (2°C) ? Middle zone Auto change over is second or more? Operation mode before the monitor mode is cooling mode? Operation mode of HEATING OPERATION...
-
Page 119: Indoor Fan Control
4. INDOOR FAN CONTROL 1. FAN SPEED Indoor fan speed is defined by operation mode and airflow mode. Airflow Volume (CFM) RHMV2421MNACJA RHMV3021SNACJA RHMV3621MNACJA RHMV4821SNACJA High 1200 1640 Medium + Medium 1020 Heating Quiet Cool air prevention S-low High 1200... - Page 120 2. FAN OPERATION In fan operation, airflow can be switched in 5 steps such as Auto, Quiet, Low, Med, High, while an indoor fan only runs. 3. COOLING OPERATION Switch the airflow [Auto], and the indoor fan motor will run according to room temperature, as shown below.
- Page 121 5. HEATING OPERATION Switch airflow [AUTO], and an indoor fan motor will run according to room temperature as below. Airflow changeover ( Heating : Auto ) When room temperature rises When room temperature falls TR-Ts > -2°F (-1°C) TR-Ts > -3°F (-1.5°C) -2°F >...
- Page 122 7. FAN CONTROL FOR ENERGY SAVING When the air flow setting except AUTO mode, the indoor fan motor will run as below. Compressor Indoor fan Setting air flow Quiet or S-low S-low (sec) Function setting 49 Note Setting air flow In the case of 3 wire remote controller is connected, set it to 0 or 1.
-
Page 123: Outdoor Fan Control
5. OUTDOOR FAN CONTROL 1. FAN SPEED Outdoor fan speed is defined by operation mode. and RP1724/1730HJVXA fan speed is defined by outdoor temperature zone. Outside air temperature zone selection Outside air Outside air temperature temperature D zone 53.6°F (12°C) 50°F F zone (10°C) - Page 124 2. AFTER DEFROST After defrost control runs on heating mode, fan speed keeps at higher speed as below without relating to compressor frequency. Fan speed AOU24RGLX 900 rpm AOU30RGLX 900 rpm AOUG36LMAS1 640 rpm AOUG48LMAS1 640 rpm 04-16...
-
Page 125: Timer Operation Control
6. TIMER OPERATION CONTROL 1. WIRED REMOTE CONTROL AR-WEE1U (2-wire remote control) OFF TIMER ON TIMER WEEKLY TIMER *3-wire remote control can be connected When 3-wire remote control is connected, set the DIP-SW on the controller PCB Refer to the installation manual for detailed. If used in combination with wireless and wired RNRUZ4 remote control, the following function is limited. - Page 126 1-2. WEEKLY TIMER 1-2-1. WEEKLY TIMER Use this timer function to set operating time for each day of the week. The weekly timer allows up to two ON and OFF time to set up per day. Set time Set time Set time Set time The operating time can be set in 30 min increments only.
- Page 127 1-3. TEMPERATURE SET BACK TIMER The SET BACK timer only changes the set temperature for 7 days, it cannot be used to start or stop air conditioner operation. The SET BACK timer can be set to operate up to two times per day but only one temperature setting can be used.
- Page 128 2. WIRELESS REMOTE CONTROL (OPTION) AR- REJ1U OFF TIMER ON TIMER PROGRAM TIMER SLEEP TIMER 2-1. ON / OFF TIMER OFF timer : When the clock reaches the set time, the air conditioner will be turned off. Set time ON timer : When the clock reaches the set time, the air conditioner will be turned on.
- Page 129 2-3. SLEEP TIMER When a sleep timer is set, room temperature is monitored and an operation is stopped automatically. If the operation mode or the set temperature is change after the sleep timer is set, the operation is continued according to the changed setting of the sleep timer from that time ON.
-
Page 130: Minimum Heat Operation
7. MINIMUM HEAT OPERATION MINIMUM HEAT operation functions by pressing MIN. HEAT button on a wireless remote control. This function prevents a room from overcooling. (When there is no one) * Timer and MINIMUM HEAT (Wireless RC only) functions of a remote control specified as the secondary cannot be used. -
Page 131: Test Operation Control
9. TEST OPERATION CONTROL With Wired Remote Control Touch the [Test run] in the “Maintenance” screen. The “Test Run” screen is displayed. Touch [OK] to return to the Maintenance screen, and start the test run. The test run will automatically end is approximately 60 min. If you wish to cancel the test run before it is complete, return to the “Monitor Mode screen”, and touch the On/Off button. -
Page 132: Forced Operation
10. FORCED OPERATION FORCED AUTO OPERATION If a wireless remote control or battery power is lost, this function can work without a remote control. This function starts by pushing a body button for 3 seconds like the below table. (It doesn’t work when a body button is pushed for 10 seconds.) Forced auto operation Operation mode Auto changeover... -
Page 133: Defrost Operation Control
11. DEFROST OPERATION CONTROL 1. CONDITION OF STARTING DEFROST OPERATION Defrost operation starts as below. Tn : Outdoor condenser coil temperature. Ta : Outside temperature. RP1724/1730HJVXA Tn10 : Temperature of continuous operation at 10 minutes. (1st defrost after starting operation) Tnb : Back 5 minutes temperature. - Page 134 3. DEFROST FLOWCHART Defrosting shall proceed by integrating operation time, outdoor temperature and outdoor condenser coil temperature as below. RP1724HJVXA RP1730HJVXA Heating operation start : Compressor ON (Not defrosted for 10 minutes) 1st defrost 2nd or later defrost Integrating defrost Integrating defrost (OFF count defrost) Compressor...
- Page 135 RP1736HJVXA RP1748HJVXA Heating operation start : Compressor ON Normal defrost Integrating defrost Integrating defrost (Integrating OFF count defrost) Ta > = 14 F(-10 C) 4 F(-20 C) < = Ta <14 F(-10 C) Ta > = 4 F(-20 C) Tn = 21.2 F(-6 C) < More than 210 minutes (For continuous operation) Compressor OFF...
-
Page 136: Off Defrost Operation Control
12. OFF DEFROST OPERATION CONTROL When operation stops in the [Heating operation] mode, if frost is adhered to the outdoor unit condenser coil, the defrost operation will proceed automatically. In this time, if indoor unit operation lamp flashes slowly (7 sec ON / 2 sec OFF), the outdoor unit will allow the condenser coil to defrost, and then stop. -
Page 137: Prevent To Restart For 3 Minutes (3 Minutes St)
13. PREVENT TO RESTART FOR 3 MINUTES ( 3 MINUTES ST ) The compressor won't enter operation status for 3 minutes after a compressor is stopped, even if any operation is given. 14. 4-WAY VALVE EXTENSION SELECT At the time when air conditioner is switched from Cooling mode to Heating mode, a compressor is stopped, and a 4-way valve is switched in 3 minutes later after a compressor stopped. -
Page 138: Electric Expansion Valve Control
16. ELECTRONIC EXPANSION VALVE CONTROL The most proper opening of an electronic expansion valve is calculated and controlled under the present operating condition based on the following values. The compressor frequency, the temperatures detected by the discharge temperature sensor, the indoor evaporator coil sensor, the outdoor condenser coil sensor, and the outdoor temperature sensor. -
Page 139: Various Protections
17. VARIOUS PROTECTIONS 1. DISCHARGE GAS TEMPERATURE OVERRIDE PREVENTION CONTROL Discharge gas thermosensor (discharge thermistor : Outdoor side) detects discharge gas temperature. RP1724HJVXA RP1730HJVXA When discharge temperature exceeds 219.2˚F (104.0˚C), compressor frequency is decreased 10rps, and it continues to decrease 10 rps every 120 seconds until temperature dips from 219.2˚F (104.0 ˚C) When discharge temperature dips from 213.8˚F (101.0˚C), control of compressor frequency is released. - Page 140 2. CURRENT RELEASE CONTROL RP1724HJVXA RP1730HJVXA The compressor frequency is controlled so that the outdoor unit input current does not exceeds the current limit value that was set up with the outdoor temperature. The compressor frequency returns to the designated frequency of the indoor unit at the time when the frequency becomes lower than the release value.
- Page 141 2. CURRENT RELEASE CONTROL Compressor frequency is controlled so that the outdoor unit input current does not exceeds the current limit value that was set up with the outdoor temperature. The compressor frequency returns to the designated frequency of the indoor unit at the time when the frequency becomes lower than the release value.
- Page 142 3. ANTIFREEZING CONTROL (Cooling and Dry mode) The compressor frequency is decrease on cooling & dry mode when the indoor evaporator coil temperature sensor detects the temperature lower than Temperature . Then, the anti-freezing control is released when it becomes higher than Temperature . RP1724HJVXA RP1730HJVXA Anti-freezing protection operation / Release temperature...
- Page 143 5. HIGH PRESSURE PROTECTION RP1736/1748HJVXA During the compressor operation, when detect the condition of the following table value, the protection function will be worked. The operation condition varies according to the compressor speed. The protection function is, the compressor speed is descreased 7 rps every 60 seconds. When the outdoor unit discharge pressure sensor rises above 580.2 psi (4 MPa), the compressor will stop.
- Page 144 7. HIGH TEMPERATURE RELEASE CONTROL (Heating mode) In heating mode, compressor frequency is controlled as following based on the detection value of the indoor evaporator coil temperature sensor. RP1724HJVXA RP1730HJVXA Indoor evaporator coil temperature compressor stop 145.4°F (63°C) The compressor frequency is decreased 15rps every 120 seconds.
- Page 145 RP1736HJVXA RP1748HJVXA Heating overload protection control Discharge pressure rises The compressor frequency is decreased 15rps every 120 seconds. A psi (A MPa) The compressor frequency is decreased 2rps every 120 seconds. B psi (B MPa) Release Stable range C psi (C MPa) Release Discharge pressure [psi(MPa)] Condenser coil...
-
Page 146: Pump Down
18. PUMP DOWN OPERATION RP1736HJVXA RP1748HJVXA When moving or discarding the air conditioner, in order to consider the environment and avoid the discharge of refrigerant to the atmosphere, please pump down according to the following procedure. In order to interrupt the pump down operation, press the [PUMP DOWN] switch again. (1) Connect the pressure gauge to the charging port. - Page 147 R410A REFRIGERANT 5. FILED WORKING 2021.02.12 SR_CH05_AR024EM_03...
- Page 148 CONTENTS 5. FILED WORKING 1. Function settings (For indoor unit)............05-1 1-1. Function settings on indoor unit..................05-1 1-2. Function settings by using remote controller ..............05-2 2. Function settings (For outdoor unit) ............05-10 2-1. Setting methods......................05-10 2-2. Outdoor unit low noise operation function (option) ............05-13 3.
-
Page 149: Function Settings (For Indoor Unit)
NOTE: Incorrect settings can cause a product malfunction. 1-1. Function settings on indoor unit ¢ Models: RHMV2421MNACJA, RHMV3021SNACJA, RHMV3621MNACJA, and RHMV4821SNACJA By using some components on the PCB, you can change the function settings. Related components on the PCB and the applicable settings... -
Page 150: Function Settings By Using Remote Controller
1-2. Function settings by using remote controller Some function settings can be changed on the remote controller. After confirming the setting proce- dure and the content of each function setting, select appropriate functions for your installation envi- ronment. ¢ Setting procedure by using remote controller Remote controller is not attached for this product. - Page 151 2) Room temperature control for indoor unit sensor Depending on the installed environment, correction of the room temperature sensor may be re- quired. Select the appropriate control setting according to the installed environment. The temperature of the room temperature sensor is corrected as follows: Corrected temp.
- Page 152 3) Room temperature control for wired remote controller sensor Depending on the installed environment, correction of the wire remote temperature sensor may be required. Select the appropriate control setting according to the installed environment. To change this setting, set Function 42 to Both “01”. Ensure that the Thermo Sensor icon is displayed on the remote controller screen.
- Page 153 6) Cold air prevention This setting is to disable the cold air prevention function during heating operation. When disabled, the fan setting will always follow the setting on the remote controller. (Excluding defrost mode) Function number Setting value Setting description Factory setting Enable ♦...
- Page 154 10) Switching functions for external output terminal Functions of the external output terminal can be switched. For details, refer to “External input and output”. Function number Setting value Setting description Factory setting Operation status ♦ 01—04 Cooling thermostat On Heating operation Operation/Stop 07—08 Cooling thermostat On...
- Page 155 12) Operating temperature switching of external heaters Sets the temperature conditions when the external heater is ON. For details, refer to “External heater output” in Chapter 4-4. "Details of function" on page 05-28. Setting description Setting value of function 61: Function Setting Factory...
- Page 156 14) Outdoor temperature zone boundary temperature B Setting required if changing of the outdoor temperature setting for heat pump only zone is required when auxiliary heater control by outdoor temperature 1 is performed on the indoor unit. For details, refer to “External heater output” in Chapter 4-4.
- Page 157 18) Fan delay time Sets the fan delay time when the heater is turned off. Function number Setting value Setting description Factory setting 1 minute ♦ 50 seconds 40 seconds 30 seconds 19) External heater use in defrosting Enables or disables external heater use in defrosting. NOTE: Inappropriate heater selection may cause cold air in defrosting.
-
Page 158: Function Settings (For Outdoor Unit)
2. Function settings (For outdoor unit) Perform appropriate function setting locally according to the installation environment. NOTE: Incorrect settings can cause a product malfunction. CAUTION • Before setting up the switch buttons, discharge the static electricity from your body. • Never touch the terminals or the patterns on the parts that are mounted on the PCB. 2-1. - Page 159 ¢ Setting method 1. Be sure to disconnect the power supply or turn off the breaker. 2. Change the DIP switch setting according to the required setting. • Various settings can be adjusted by changing DIP switches and push switches on the board of the outdoor unit.
- Page 160 ¢ Description of display LED display lamp Function or operation method • Turns on when the power supply is ON (Including when error occurs). (1) POWER/MODE Green • Indicate the MODE by the number of flashes when the installation function is active. (2) ERROR Flashes at high-speed when there is an error.
-
Page 161: Outdoor Unit Low Noise Operation Function (Option)
2-2. Outdoor unit low noise operation function (option) Change the outdoor unit low noise operation by using this setting. Optional Central remote con- troller is necessary to use this function. SET2-1 Setting Factory setting Lower ♦ CAUTION • When the low noise operation function is working, cooling and heating capacity will de- crease. -
Page 162: Test
3. Test 3-1. Test run CAUTION Always connect the power supply 12 hours prior to the start of the operation in order to protect the compressor. 1. Indoor unit a. Is the drain normal? b. Is there any abnormal noise and vibration during operation? 2. - Page 163 4. Confirm operating status. 5. Press "TEST RUN" switch for more than 3 seconds. POWER ERROR MONITOR MODE POWER/MODE LED will turn on, and test run stops. - (05-15) - 3-1. Test run 3. Test...
-
Page 164: Error Code
3-2. Error code If an error occurs, the LED will light up to display the error location and the error code. ¢ In the event of an error The error LED blink quickly. POWER ERROR MONITOR MODE blink (High-speed) ¢ Error location display LEDs A to F of MONITOR light up and display the error location. - Page 165 ¢ Error code display While the error is occurring, briefly press SW1. The error code is displayed. Example: Coil error (Error cord = 9A.1) POWER ERROR MONITOR MODE [A(10)] Blink (High-speed) (9-blink) Display mode LED on: LED off: Blink: (0.5s Light on / 0.5s Light off) Number of blinking: ( )
- Page 166 Error code Error type 11.3 Serial communication error 11.4 Serial communication error during operation 16.5 Communication error between controller and outdoor unit 22.1 Indoor unit capacity error 5U.1 Indoor unit error 62.1 Outdoor unit PCB Model information error 62.3 EEPROM access error 62.8 EEPROM data corruption error 63.1...
-
Page 167: Pump Down
3-3. Pump down WARNING During the pump down operation, make sure that compressor is off before you remove the refriger- ant piping. Do not remove the connection pipe while the compressor is in operation with valve open. This may cause abnormal pressure in the refrigeration cycle that leads to breakage and even injury. - Page 168 7. Disconnect the power supply or turn off the breaker. NOTE: If the pump down is not stopped by pressing the switch as in step 6, it will stop auto- matically after 15 minutes and the LED will light as follows. If the pump down is com- plete, disconnect the power supply or turn off the breaker.
-
Page 169: External Input And Output
4. External input and output Rotary switch CN47 CN65 Fig. External input and output PCB Terminal (External in) External out External in/out PCB (Connect with Wire kit) Remote sensor External Input connect kit External input External output Connector Input select signal (Optional parts) - Page 170 ¢ External input and output PCB The indoor unit Operation/Stop can be set by using the input terminal on the PCB. Input select Use either one of these types of terminals according to the application. (Both types of terminals cannot be used simultaneously.) •...
-
Page 171: External Output
4-2. External output Use an external output cable with appropriate external dimension, depending on the number of ca- bles to be installed. ¢ Indoor unit • A twisted pair cable (22AWG) should be used. Maximum length of cable is 82 ft (25 m). •... - Page 172 ¢ External input and output PCB • A twisted pair cable (22AWG) should be used. • Permissible voltage and current: DC 5 V to 30 V / 3 A, AC 30 V to 250 V / 3 A • For details, refer to Chapter 4-3.
-
Page 173: Combination Of External Input And Output
4-3. Combination of external input and output By combining the function setting of the indoor unit and rotary switch setting of the External input and output PCB, you can select various combinations of functions. Combination examples of external input and output are as follows: External input External input Function... - Page 174 External output External input Function and output Indoor unit Mode External input and output PCB setting PCB (Rotary Output CN47 Output 1 Output 2 Output 3 Indoor unit fan 60-00 Operation/Stop Operation/Stop Error status operation status Indoor unit fan External heater 60-00 Operation/Stop Error status...
- Page 175 ¢ Input signal type • Indoor unit Input signal type is only "Edge". Edge • External input and output PCB The input signal type can be selected. Signal type (edge or pulse) can be switched by the DIP switch 2 (SW2) on the External input and output PCB.
-
Page 176: Details Of Function
4-4. Details of function ¢ Control input function When function setting is "Operation/Stop" mode 1 • In the case of "Edge" input Rotary SW of Function External input and External input Input signal Command setting / output PCB Off → On Operation Input of indoor unit Terminal... - Page 177 When function setting is "Forced stop" mode • In the case of "Edge" input Rotary SW of Function External input and External input Input signal Command setting / output PCB Off → On Forced stop Input of indoor unit Terminal On →...
- Page 178 When function setting is "Operation/Stop" mode 2 • In the case of "Edge" input Rotary SW of Function External input and External input Input signal Command setting / output PCB Off → On Operation Input of indoor unit Terminal Stop (R.C.
- Page 179 ¢ Forced thermostat off function Function Rotary SW of External External input Input signal Command setting / input and output PCB 60-00 / 2 60-02 / 4 60-05 / 7 Off → On Thermostat off 60-06 / 8 External input and output Input 1 60-08 / A 60-09 / B...
- Page 180 ¢ Error status Function Rotary SW of External External output Output signal Command setting / input and output PCB Low → High Error 60-09 / B Output of indoor unit CN47 High → Low Normal 60-00 / 2 Off → On Error 60-01 / 3 60-02 / 4...
- Page 181 ¢ Indoor unit fan operation status Function Rotary SW of External External output Output signal Command setting / input and output PCB Low → High Fan run 60-10 / C Output of indoor unit CN47 High → Low Fan stop 60-00 / 2 Off →...
- Page 182 ¢ External heater output Function setting Indoor unit Wired R. C. Control Primary heater Auxiliary heater Control switching external heaters Sensor activation* No. 61 Auxiliary heater Heat pump 61-00 — External device* control 1 Auxiliary heater Heat pump External device 61-01 —...
- Page 183 Installation configuration of individual connection External heating device is installed individually. (No use of indoor unit fan) On/Off Example of heating device: - Floor heating device WARNING • DIP Switch 101-3 must be in the ON position when ducted electric heat application is be- ing used.
- Page 184 Auxiliary equipment control by room temperature Auxiliary equipment control is switchable by room temperature. Auxiliary equipment switching is per- formed for each room temperature divided to following 3 zones. Zone A Ts +0.9°F (0.5 °C) Ts: Setting temperature Ts -0.9°F (0.5 °C) Tr: Room temperature Zone B Zone C...
- Page 185 Auxiliary heater control 1 Operation Condition Heater on Heater is on as shown in following diagram of heating temperature. • Heater is off as shown in following diagram of heating temperature. • Other than heating mode Heater off • Error occurred •...
- Page 186 Heat pump prohibition control Perform heating by external heater only. Indoor unit is continuous thermostat off. Operation Condition Heater is on as shown in following diagram of heating Heater on temperature. DIP-SW101-3 • Heater is off as shown in following diagram of heating temperature.
- Page 187 Auxiliary heater control by outdoor temperature 1 This control selects heat pump or external heater according to the outdoor temperature. When out- door temperature is high, the heating is performed by using heat pump only. Operation Condition Heater is on as shown in following diagram of heating Heater on temperature.
- Page 188 • Operation status 46.4°F (8°C) 42.8°F (6°C) Outdoor temperature (Factory setting) -0.4°F (-18°C) -4°F (-20°C) Heat pump Heat pump Combination zone prohibition only zone Outdoor temperature zone* zone Comp. On/Off 12 V Heater DIP-SW101-3: On DIP-SW101-3: Off *: The outdoor temperature zone transition from one to another will stay in that zone for minimum of 30 min. NOTE: In following operations, compressor will be on in heat pump prohibition zone.
- Page 189 Auxiliary heater control by outdoor temperature 2 This control selects heat pump or external heater according to the outdoor temperature. Even when outdoor temperature is high, the heating is performed by using both of heat pump and external heater. Operation Condition Heater on...
- Page 190 • Operation status 46.4°F (8°C) 42.8°F (6°C) Outdoor temperature (Factory setting) -0.4°F (-18°C) -4°F (-20°C) Heat pump Combination zone Outdoor temperature zone * prohibition zone Comp. On/Off 12 V Heater DIP-SW101-3 On DIP-SW101-3 Off * The outdoor temperature zone transition from one to another will stay in that zone for minimum of 30 min. NOTE: In following operations, compressor will be on in heat pump prohibition zone.
- Page 191 Auxiliary heater control by outdoor temperature 3 This control selects heat pump or external heater according to the outdoor temperature. Even when outdoor temperature is high, the heating is performed by using both of heat pump and external heater. Operation Condition Heater on...
- Page 192 • Operation status Heat pump only zone 46.4°F (8°C) 42.8°F (6°C) Outdoor temperature (Factory setting) -0.4°F (-18°C) -4°F (-20°C) Combination zone Outdoor temperature zone * Comp. On/Off 12 V Heater DIP-SW101-3 On DIP-SW101-3 Off *: The outdoor temperature zone transition from one to another will stay in that zone for minimum of 30 min. NOTE: In following operations, compressor will be on in heat pump prohibition zone.
- Page 193 Auxiliary heat pump control • External heater output Operation Condition Heater is on as shown in following diagram of heating Heater on temperature. DIP-SW101-3 • Heater is off as shown in following diagram of heating temperature. • Other than heating mode Indoor unit fan •...
- Page 194 Auxiliary heat pump control by outdoor temperature 1 • External heater output Operation Condition Heater on Heater is on as shown in following diagram of heating temperature. DIP-SW101-3 • Heater is off as shown in following diagram of heating temperature.
- Page 195 • Outdoor temperature zone Outdoor temp. Combination zone ( Heat pump + Heater) A + 3.6°F ( 2°C): -0.4°F (-18°C) *A: -4°F (-20°C) Heater only zone *: Adjustable by function setting 67 • Operation status 46.4°F (8°C) 42.8°F (6°C) Outdoor temperature (Factory setting)
- Page 196 Auxiliary heat pump control by outdoor temperature 2 • External heater output Operation Condition Heater is on as shown in following diagram of heating Heater on temperature. DIP-SW101-3 • Heater is off as shown in following diagram of heating temperature.
- Page 197 • Outdoor temperature zone Outdoor temp. Heater only zone B + 3.6°F (2°C): 46.4°F (8°C) *B: 42.8°F (6°C) Combination zone (Heat pump + Heater) *: Adjustable by function setting 67 • Operation status Heat pump prohibition zone 46.4°F (8°C) 42.8°F (6°C) Outdoor temperature (Factory setting) -0.4°F (-18°C)
- Page 198 Auxiliary heat pump control by outdoor temperature 3 • External heater output Operation Condition Heater is on as shown in following diagram of heating Heater on temperature. DIP-SW101-3 • Heater is off as shown in following diagram of heating temperature.
- Page 199 • Outdoor temperature zone Outdoor temp. Heater only zone B + 3.6°F (2°C): 46.4°F (8°C) B: 42.8°F (6°C)* Combination zone (Heat pump + Heater) A + 3.6°F (2°C): -0.4°F (-18°C) A: -4°F (-20°C)* Heater only zone ...
- Page 200 ¢ Heating thermostat on for humidifier Indoor unit Function External output setting Situation Mode Rotary SW Heating Indoor unit fan Heating thermostat on operation thermostat on no. 60 status 60-05 CN47 Example of 60-06 Output3 individual Not used 60-07 Output2 connection 60-08 Output1...