Advertisement
Quick Links
TM
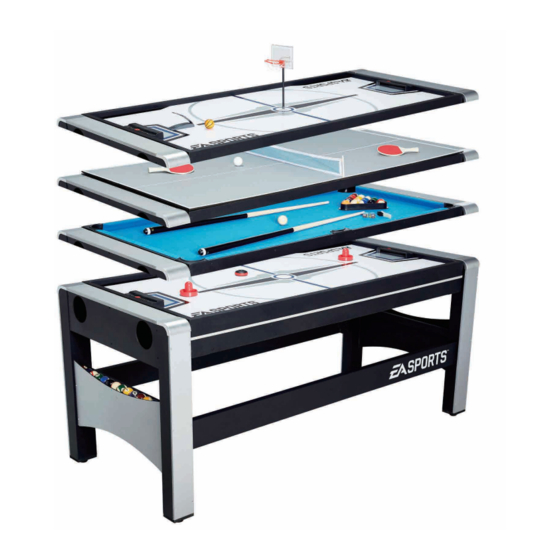
MODEL/MODELO: 1657201
WM.COM
ASSEMBLY INSTRUCTIONS
INSTRUCCIONES DE ARMADO
ATTENTION
ATENCIÓN
DO NOT RETURN
NO DEVOLVERLO
TO THE STORE
A LA TIENDA
Contact
Contacto
MD Sports
MD Sports
Customer Service
Servicio al Cliente
* For additional resources and Frequently
* Por mayor información y Preguntas
Ask Questions, please visit us at
Frecuentes, favor visitarnos en
themdsports.com
themdsports.com
Advertisement

Related Manuals for MD SPORTS 1657201


Summary of Contents for MD SPORTS 1657201
- Page 1 MODEL/MODELO: 1657201 WM.COM ASSEMBLY INSTRUCTIONS INSTRUCCIONES DE ARMADO ATTENTION ATENCIÓN DO NOT RETURN NO DEVOLVERLO TO THE STORE A LA TIENDA Contact Contacto MD Sports MD Sports Customer Service Servicio al Cliente * For additional resources and Frequently * Por mayor información y Preguntas...
- Page 2 Por favor comunique con el minorista por su política de devolución. (Continued on the next page.) (Continúe en la siguiente página.) www.themdsports.com 1657201...
-
Page 3: Tools Required
Mantener alejados a los exterior. Solo para uso en interior. necesarios area de ensamble animales domesticos No utilizar ni guardar el producto en del area de ensamble lugares humedos o mojados (Continued on the next page.) (Continúe en la siguiente página.) www.themdsports.com 1657201... - Page 4 English Español 1657201 PARTS LIST / LISTA DE PARTES Campo de Mainframe Unidad Principal Under Leg Bajo Pierna Panele Hockey Billiards Playfield End Panel - A Juego de Billar de Hockey Pedestal Pedestal de Punta - A Panele Panel de...
- Page 5 English Español 1657201 PARTS LIST / LISTA DE PARTES 42'' Cues Taco 42'' Chalk Tiza Tira Plástica Plastic Strip Brush Cepillo Juego de 4x45mm Tornillo de Cabeza Basketball Set Baloncesto de Wrench Llave Inglesa Allen key Llave Allen Washer Arandela 4x45mm...
-
Page 6: Instrucciones De Ensamblaje
(#28) al Unidad principal (#1) usando 2 to the Mainframe (#1) using 2 Screws (#42) per Pocket. tornillos (#42) por bolsillo. Vea la FIG. 1. See FIG. 1. (Continued on the next page.) (Continúe en la siguiente página.) www.themdsports.com 1657201... - Page 7 (#27 & #28) usando 2 tornillos (#41) por (#27 & #28) using 2 Screws (#41) per Pocket Cap. gorra de bolsillo. Vea la FIG. 3. See FIG. 3. (Continued on the next page.) (Continúe en la siguiente página.) www.themdsports.com 1657201...
- Page 8 Aprons (#3) using 3 Screws (#45) per Under Leg punta (#3) usando 3 tornillos (#45) por inferior pedestal Pedestal. See FIG. 5. de pata. Vea la FIG. 5. (Continued on the next page.) (Continúe en la siguiente página.) www.themdsports.com 1657201...
- Page 9 11. Pegue los paneles de punta (#5) a la unidad de using 5 Screws (#44) per End Apron. See FIG.7. FIG. 6 usando 5 tornillos (#44) por delantal de punta. Vea la FIG. 7. (Continued on the next page.) (Continúe en la siguiente página.) www.themdsports.com 1657201...
- Page 10 2 Screws (#45) per Ball Shelf. See FIG. 9. 14. Pegue los anaqueles de bola (#11) to the FIG. 8 Assembly usando 2 Tornillos (#45) por Anaqueles de bola. Vea la FIG. 9. (Continued on the next page.) (Continúe en la siguiente página.) www.themdsports.com 1657201...
- Page 11 Assembly using 4 Bolts (#51) and 4 Washers FIG. 10 usando 4 pernos (#51) y 4 arandelas (#47) (#47) per Side Leg Panel. See FIG. 11. por panel de pata lateral. Vea la FIG. 11. (Continued on the next page.) (Continúe en la siguiente página.) www.themdsports.com 1657201...
- Page 12 18. Pegue los rinconeros de delantal (#17) a la unidad using 2 Screws (#41) per Apron Corner. See FIG. 13. de FIG. 12 usando 2 tornillos (#41) por rinconero de delantal. Vea la FIG. 13. (Continued on the next page.) (Continúe en la siguiente página.) www.themdsports.com 1657201...
- Page 13 22. Pegue los blancos de Hockey (#19) al Unidad principal (#1) using 2 Screws (#52) per Hockey Goal. See FIG. 14. usando 2 tornillos (#52) por blanco de Hockey. Vea la FIG. 14. (Continued on the next page.) (Continúe en la siguiente página.) www.themdsports.com 1657201...
- Page 14 24. Pele el fieltro de las almohadillas de fieltro (#21) y to the bottom of the Pushers (#22). See FIG. 16. las pegue al fondo de las empujadoras (#22). Vea la FIG. 16. (Continued on the next page.) (Continúe en la siguiente página.) www.themdsports.com 1657201...
- Page 15 See FIG. 18. el interruptor por debajo del duende de suspensión ON. E duende de suspensión funcionará por 20-30 minutos cuando está completamente cargado. Vea la FIG. 18. (Continued on the next page.) (Continúe en la siguiente página.) www.themdsports.com 1657201...
- Page 16 30. In order to use the Table Tennis Surface, the Table 30. Para utilizar la superficie de la mesa de tenis, la must be on the Billiards Side. mesa debe estar en el lado de Billar. (Continued on the next page.) (Continúe en la siguiente página.) www.themdsports.com 1657201...
- Page 17 English Español FIG. 20 FIG.20 FIG.20 31. Monte el Juego de Baloncesto de Lanzamiento. 31. Assemble the Basketball Set. YOU ARE NOW READY TO PLAY! ¡USTED ESTA AHORA LISTO PARA JUGAR! 1657201 (The last page) www.themdsports.com (La ultima página)