Table of Contents
Advertisement
Quick Links
English
Operating Instructions
LED TV
32-inch model
40-inch model
49-inch model
Thank you for purchasing this Panasonic product.
Please read these instructions carefully before operating this product and retain them
for future reference.
Please carefully read the "Safety Precautions" of this manual before use.
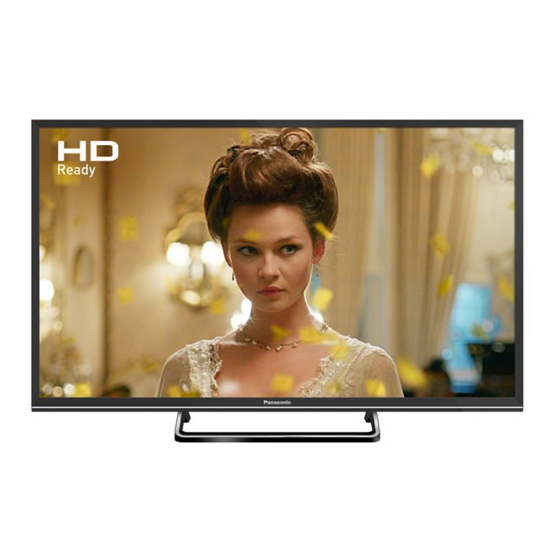
The images shown in this manual are for illustrative purposes only.
M0317-1057
For more detailed instructions, please refer to
[eHELP] (Built-in Operating Instructions).
●
How to use [eHELP]
Model No.
TX-32ES503B
TX-40ES503B
TX-49ES503B
(p. 18)
TQB0E2768U-1
English
Advertisement
Table of Contents

Related Manuals for Panasonic TX-32ES503B


Summary of Contents for Panasonic TX-32ES503B
- Page 1 ● How to use [eHELP] (p. 18) Thank you for purchasing this Panasonic product. Please read these instructions carefully before operating this product and retain them for future reference. Please carefully read the “Safety Precautions” of this manual before use.
-
Page 2: Table Of Contents
● For information about the trademarks, refer to [eHELP] (Search by Purpose > Read first > Before use > Licence). The illustration for TX-40ES503B is used in this manual unless otherwise mentioned. Illustrations shown may be different depending on the model. Contents Be Sure to Read Important Notice···················································... -
Page 3: Important Notice
Panasonic has no authority to and does not grant you that permission and explicitly disclaims any right, ability or intention to obtain such permission on your behalf. -
Page 4: Safety Precautions
Safety Precautions ● Insert the mains plug fully into the mains socket. ● To turn Off the apparatus completely, you must pull the mains plug out of the mains socket. Consequently, the mains plug should be easily To help avoid risk of electrical shock, fire, damage or accessible at all times. - Page 5 ■ ● Do not use an unapproved pedestal / mounting Pedestal equipment. Be sure to ask your local Panasonic Warning dealer to perform the setup or installation of approved wall-hanging brackets. ● Do not disassemble or modify the pedestal.
- Page 6 LED TV Declaration of Conformity (DoC) “Hereby, Panasonic Corporation declares that this TV is (cm) in compliance with the essential requirements and other ● Ventilation should not be relevant provisions of the Directive 2014/53/EU.”...
-
Page 7: Accessories
Accessories Operating Instructions Production Registration Leaflet ● Accessories may not be placed all together. Take care not to throw them away unintentionally. Standard accessories Remote Control (p. 14) ● N2QAYB001109 Pedestal 32-inch model (p. 8) 40-inch model 49-inch model Mains lead 32-inch model (p. - Page 8 ■ Assembling the pedestal Assembling / Removing the pedestal 32-inch model Assembly screw (3) M3 × 14 Assembly screw (4) M4 × 15 Bracket Base ■ Preparations Take out the pedestal and the TV from the packing case and put the TV onto a work table with the screen panel down on the clean and soft cloth (blanket, etc.).
- Page 9 40-inch model 49-inch model Assembly screw (4) M5 × 15 Assembly screw (4) M4 × 12 Bracket (2) 40-inch model 49-inch model Base ■ Assembling the pedestal Removing the pedestal from the TV Be sure to remove the pedestal in the following way when using the wall-hanging bracket or repacking the 32-inch model 1 Put the TV onto a work table with the screen panel...
-
Page 10: Connections
Connections 8 AV (COMPONENT / VIDEO) (p. 12) 9 ETHERNET terminal (p. 11) ● Basic connections External equipment and cables shown are not supplied with this TV. ■ Mains lead ● Please ensure that the unit is disconnected from the mains socket before attaching or disconnecting any cables. - Page 11 Satellite dish Network ■ A broadband network environment is required to be able Freesat, Other Sat. / Satellite to use internet services. ● If you do not have any broadband network services, please consult your retailer for assistance. ● Prepare the internet environment for wired connection or wireless connection.
- Page 12 ■ Amplifier (listening with external speakers) Other connections ● Use HDMI2 to connect the TV to an amplifier which ■ DVD Player has ARC (Audio Return Channel) function. (COMPONENT equipment) If connecting to an amplifier without ARC function, use DIGITAL AUDIO. ●...
- Page 13 CI module ■ USB HDD (for recording) ● Use USB 2 port for connecting the USB HDD. ● For details, refer to [eHELP] (Search by Purpose > Recording). ■ VIERA Link ● Use HDMI1 - 2 for VIERA Link connection. ●...
-
Page 14: Identifying Controls
Identifying Controls 7 OK ● Confirms selections and choices. ● Press after selecting channel positions to quickly change channel. 8 [Option Menu] Remote Control ● Easy optional setting for viewing, sound, etc. 9 Coloured buttons (red-green-yellow-blue) ● Used for the selection, navigation and operation of various functions. - Page 15 ■ Installing / Removing batteries Indicator / Control panel ● When pressing 4, 5, 6 buttons, the control panel guide appears on the right side of the screen for Pull open 3 seconds to highlight which button has been pressed. Hook Close Note the correct...
-
Page 16: First Time Auto Setup
First time Auto Setup Select your region Select the type of [Home Screen] ● The demonstration to explain how to use [my Home Screen] is displayed. Confirm the demonstration by When the TV is turned on for the first time, it will following the on-screen instructions, and then select automatically search for available TV channels and give the desired [Home Screen]. -
Page 17: Operations
Operations Watching TV Select the TV viewer from [Home Screen] Turn power on select (TV) access Select the mode (Remote Control) ● Mains power On / Off switch should be on. TV Selection (p. 15) Freesat The last viewed [Home Screen] is displayed. Analogue Example: [TV Home Screen] Other Sat. -
Page 18: How To Use Ehelp
How to Use eHELP ● To scroll the description (if more than 1 page) While the description is highlighted [eHELP] is the detailed operating instructions built into the TV, and gives a more detailed explanation for a better understanding of the operation of each feature. ●... -
Page 19: Faqs
Alternatively, go to your local electrical retailer, contact your local The TV goes into Standby mode Panasonic dealer or visit freeview.co.uk/retune ● Auto power standby function is activated. Re-tuning only takes a few minutes, just follow the... -
Page 20: Maintenance
Maintenance Specifications First, remove the mains plug from the ■ mains socket. Model No. : TX-32ES503B Display panel, Cabinet, Pedestal 32-inch model : TX-40ES503B 40-inch model Regular care: : TX-49ES503B 49-inch model Gently wipe the surface of the display panel, cabinet, or pedestal by using a soft cloth to remove dirt or Dimensions (W ×... - Page 21 Connection terminals PAL I AV input (COMPONENT / VIDEO) UHF E21 - 68 VIDEO RCA PIN Type × 1 PAL I 1.0 V[p-p] (75 ) VHF A - J AUDIO L - R CATV S1 - S20 RCA PIN Type × 2 UHF E21 - E69 0.5 V[rms] CATV S21 - S41 (Hyperband)
- Page 22 When using the wall-hanging bracket accessories, and be absolutely sure to take steps to prevent the TV from falling off. Please contact your local Panasonic dealer to purchase ● Handle the TV carefully during installation since the recommended wall-hanging bracket.
- Page 24 • Or go on line through our Internet Accessory ordering application at www.pas-europe.com. • Most major credit and debit cards accepted. • All enquiries transactions and distribution facilities are provided directly by Panasonic UK. • It couldn’t be simpler! • Also available through our Internet is direct shopping for a wide range of finished products. Take a browse on our website for further details.