Table of Contents
Advertisement
Quick Links
Advertisement
Table of Contents

Related Manuals for Fortinet FortiFone FON-C70

Summary of Contents for Fortinet FortiFone FON-C70
- Page 1 FortiFone™ User Guide for FON-C70...
- Page 2 Fortinet. For absolute clarity, any such warranty will be limited to performance in the same ideal conditions as in Fortinet's internal lab tests. In no event does Fortinet make any commitment related to future deliverables, features or development, and circumstances may change such that any forward-looking statements herein are not accurate.
-
Page 3: Table Of Contents
Contents Introduction....................... 1 Phone features......................1 FON-C70 base unit ....................1 FF-M70 microphone add-on..................3 Display layout......................4 Installation......................5 Connecting the network and power ................ 5 Power over Ethernet ..................5 To connect the PoE..................5 Power adapter (optional)..................6 To connect the power adapter .............. - Page 4 Call Completion ....................17 Call Log Setting....................17 Settings ........................18 Basic settings....................18 Language ....................18 Time & date ....................18 Display ....................... 19 Sound......................19 Change PIN ....................20 Advanced settings ................... 20 Account ...................... 20 Network...................... 21 Phone Lock ....................
- Page 5 Call waiting ......................32 DND ........................32 Voice mail....................... 32 Troubleshooting ..................... 33 Information......................33 Troubleshooting guide ..................33 Warranty ......................34 Contents Page v FortiFone User Guide...
-
Page 7: Introduction
Introduction This user guide includes information about configuring and using your FON-C70 IP conference phone. Phone features • 4" x 1.5" monochrome display • Full duplex speakerphone • Three microphone array • PoE support eliminates the new for a power adapter •... - Page 8 Item Description Shows information about calls, messages, softkeys, time, date LCD Screen and other relevant data. Softkeys For various context-sensitive features. See table below. Off-hook Key Initiates a call. Ends a call or returns to the idle screen. Onhook Key Scrolls through the displayed information upwards.
-
Page 9: Ff-M70 Microphone Add-On
Softkey Function Contacts Brings up the Phonebook. Call Logs Brings up the Call Logs. Toggles Do Not Disturb on and off. Menu Brings up the Settings menu. FF-M70 microphone add-on Item Description Mute Indicator LED Toggles and indicates mute feature. Microphone Transmits sound to other phones. -
Page 10: Display Layout
Display layout The FON-C70 top line of the screen will display the extension name and number. The following status icons will also appear on the display: Icon Description Network is available Registered successfully Register failed Registering Hands-free speakerphone mode Voice mail Auto Answer Do Not Disturb Call hold... -
Page 11: Installation
Installation Connecting the network and power There are two options for powering the phone: 1. Power over Ethernet (PoE) 2. Power adapter (Optional) Power over Ethernet The FON-C70 can obtain network access as well as be powered through a Power over Ethernet (PoE) switch/ hub. -
Page 12: Power Adapter (Optional)
Power adapter (optional) To connect the power adapter 1. Connect the the power adapter to the DC5V port on the phone and the other end of the power adapter into an electrical power outlet. 2. Connect an Ethernet cable between the Internet port on the phone and the one on the wall or switch/hub device port. -
Page 13: Positioning The Fon-C70 And Ff-M70 Expansion
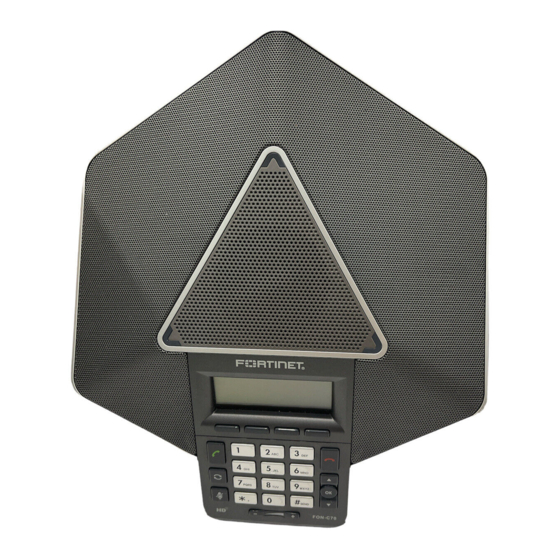
Positioning the FON-C70 and FF-M70 expansion The microphone reception of the FON-C70 conference phone is ideally placed within 3m of any speaking person. Better reception is within 2m. Figure 1: FON-C70 The FON-C70 is a directional microphone. Its coverage range is 60 degree. Ensure the microphone faces the speaker. - Page 14 When the size of the conference room is more than 36 (6x6) square meters, two FF-M70 expansion microphones should be connected to the FON-C70 IP conference phone. Figure 3: FON-C70 + two FF-M70 Follow these guidelines to ensure optimum performance with the FON-C70 IP conference phone and the FF-M70 expansion microphones: •...
-
Page 15: Connecting Optional Pc/Mobile Device
Connecting optional PC/mobile device You can connect a PC or mobile device to listen to the PC or mobile audio using your conference phone. To connect a PC or mobile device Connect one end of the 3.5mm jack cable to the PC/mobile port on the phone, and connect the other end to the headset jack on the mobile device or the AUX/MIC jack on the PC. -
Page 16: Setting Up The Phone
Setting up the phone For use as an internal extension The phone supports plug and play installation and will automatically download its configuration from the FortiVoice system. The phone will display the extension number and name when it has registered. Once configured within the FortiVoice system, reboot the phone to download its configuration and register to the system. -
Page 17: Personalizing Your Phone
Personalizing your Phone How to navigate through menus To access the configuration menu: • Press the Menu softkey. To select an item: • Press to select an item, then press The bottom line of the display shows up to 4 softkey functions at a time. To return to a previous menu, press the Back softkey. -
Page 18: Configuration Overview
Configuration Overview The phone supports the access and configuration of many parameters directly from the Telephone User Interface. To access the Configuration menu, press the Menu softkey while the phone is not in use. The Configuration menu consists of several sub-menus as listed below: •... -
Page 19: Call Waiting
iii. (Optional) Enter the always forward on code or off code respectively in the On Code or Off Code field. b. If you select Busy Forward: i. Press the softkey to select Enable from the Busy Forward field. ii. Enter the destination number you want to forward all incoming calls to when the phone is busy in the Forward to field. -
Page 20: Key As Send
Key as Send You can set the to perform as a send key while dialing. To configure key as send on the phone interface: 1. Press Menu > Features > Key as Send. 2. Press the softkey to select from the Key as Send field, or select Disable to disable this feature. -
Page 21: Auto Redial
4. (Optional) Enter the anonymous call rejection on code in the Reject On Code field. 5. (Optional) Enter the anonymous call rejection off code in the Reject Off Code field. 6. Press the Save softkey to accept the change or the Back softkey to cancel. Anonymous call rejection is configurable via web user interface at the path Account >... -
Page 22: Intercom
4. For multiple numbers, enter a comma between every two numbers. 5. Click Confirm to accept the change. When DND is enabled on the phone, the phone can still receive incoming calls from the numbers specified in the DND Authorized Numbers field. DND authorized number is configurable via web user interface only. -
Page 23: Call Completion
Intercom Feature Description Intercom Tone Enable or disable a tone played when an intercom call is received. Enable or disable the IP phone to automatically answer an incoming Intercom Barge intercom call while there is already an active call on the phone. To configure intercom features via phone user interface: 1. -
Page 24: Settings
Settings Basic settings Language The default language of the phone user interface is English. If the language of your web browser is not supported by the phone, the web user interface will use English by default. You can change the language for the phone user interface and the web user interface respectively. To change the language for the phone user interface: 1. -
Page 25: Display
These are the date formats available:: Date Format Example (2015-03-18) WWW-MMM-DD Wed Mar 18 DD-MMM-YY 18-Mar-15 YYYY-MM-DD 2015-03-18 DD/MM/YYYY 18/03/2015 MM/DD/YY 03/18/15 DD MMM YYYY 18 Mar 2015 WWW DD MMM Wed 18 Mar Display You can configure the backlight to adjust the brightness of the LCD screen. Backlight status on the LCD screen can be configured from the following options: •... -
Page 26: Change Pin
To select a ring tone for the account via phone user interface: 1. Press Menu > Settings > Basic Settings > Sound > Ring Tones. 2. Press to select the desired account, then press the Enter softkey. 3. Press to select the desired ring tone. If Common is selected, this account will use the ring tone selected for the phone. -
Page 27: Network
6. Enter the desired value in the Outbound Proxy1/2 and Proxy Fallback Interval fields respectively. 7. Press the Save softkey to accept the change or the Back softkey to cancel. To disable an account via phone user interface: 1. Press Menu > Settings > Advanced Settings (Default password: 23646) > Account. 2. -
Page 28: Phone Lock
Phone Lock You can lock your phone temporarily when you are not using it. This feature helps to protect your phone from unauthorized use. Phone lock consists of the following: • Menu Key: The Menu softkey is locked. You cannot access the menu of the phone until unlocked. -
Page 29: Reset To Factory Settings
You can long press or wait for a period of time (if configured) to lock the keypad again. You can also unlock the keypad by entering the administrator password. When you enter the administrator password to unlock the keypad, the phone will turn to the Change PIN screen. Program emergency numbers on the phone so that they can be dialed when the phone is locked. -
Page 30: Auto Provision
Auto Provision The FON-C70 can be set to obtain configuration files through auto provisioning via FTP/TFTP/HTTP/HTTPS. To configure auto provisioning via the phone user interface: 1. Press Menu > Settings > Advanced Settings (Default password: 23646) > Auto Provision. 2. Enter the URL of the auto provisioning server. Press to select Enabled from the Lock Enable field. -
Page 31: Text Messages
Text Messages You can send and receive text messages using the FON-C70 IP phone with devices that support the feature. New text messages can be indicated both acoustically and visually. When receiving a new text message, the phone will play a warning tone. The power indicator LED will slowly flash red, and the LCD screen will prompt n New Text Message(s) (n indicates the number of unread text messages, e.g., 1 New Text Message(s)) and display You can store text messages in your phone’s Inbox, Sentbox, Outbox or Draftbox. -
Page 32: Call Log
Call Log The phone stores logs to track inbound and outbound calls. There are separate logs that support 100 entries each: • Missed Calls: stores calls that were unanswered. • Received Calls: stores calls that were answered. • Placed Calls: stores calls placed from this phone. •... -
Page 33: Editing A Contact
Editing a contact To edit a contact: 1. Press to select a contact. 2. Press the Option softkey. 3. Select Details, then press the OK softkey. 4. Edit the information. 5. Press the Save softkey. Deleting a contact To delete a contact: 1. - Page 34 The Start REC softkey is not available when: • there are no connected calls on your phone • you place a new call • the phone prompts you to answer an incoming call. The recording is not paused when the following occurs: •...
-
Page 35: Recorded Calls Playback
Recorded Calls playback If you insert a USB flash drive into the USB port on your phone, you can play back recorded calls on your phone. You can also browse and delete the recorded files on the USB flash drive. To browse the recorded files: 1. -
Page 36: Using Your Phone
Using your Phone Receiving a call When you receive a call, the phone will display the call details and the ring indicator will flash. The phone will also ring unless the ringer is off. To answer the call: • Press or the Answer softkey. -
Page 37: Redial
Redial Redial allows you to redial the last number dialed. • Press . Select a recently dialed number and press again. The phone activates the speakerphone and places the call. Hold To place calls on hold press the Hold softkey. While a call is on hold you can answer or place other calls. -
Page 38: Call Waiting
To end a conference call: 1. Press the Split softkey to separate the parties from the conference. All parties will be placed on hold. 2. Press the EndCall softkey to end the conference call. All parties will be disconnected. Call waiting When Call Waiting is enabled, the phone will present new calls to you while you’re on a call. -
Page 39: Troubleshooting
(IP address, default gateway address, and subnet-mask), registration status of the phone, MAC address and firmware version. This information may be useful if calling Fortinet Support. Troubleshooting guide... -
Page 40: Warranty
Warranty This phone is covered by a one-year hardware warranty against manufacturing defects as set forth in the EULA. www.fortivoice.com/support For warranty service: • In North America, please call 1-866-648-4638 for further information. • Outside North America, contact your sales representative for return instructions. You will be responsible for shipping charges, if any.