Advertisement
Quick Links
Advertisement

Related Manuals for Fisher-Price FWB08


Summary of Contents for Fisher-Price FWB08
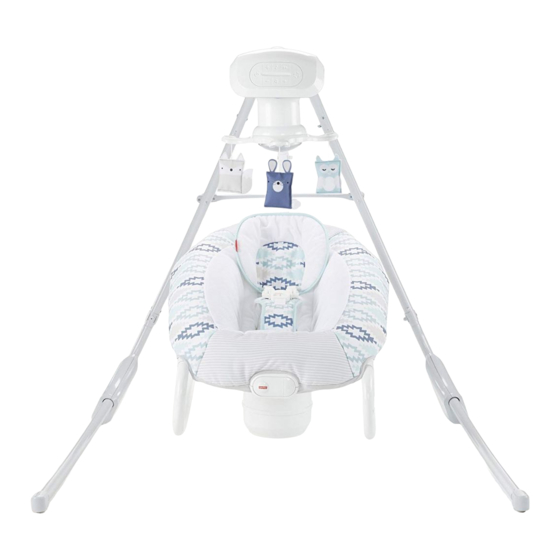
- Page 1 FWB08 OWNER’S MANUAL | MANUAL DEL USUARIO...
- Page 2 WARNING When used as an Infant swing: FALL and STRANGULATION HAZARDS: Infants have suffered head injuries falling from swings and have strangled in straps. • ALWAYS use restraints. Adjust to fit snugly. • STOP using product when infant attempts to climb out (approximately 9 months). •...
- Page 3 ADVERTENCIA Cuando se use como columpio para bebés: PELIGROS DE CAÍDAS y ESTRANGULACIÓN: Se han reportado casos en los que bebés han sufrido lesiones en la cabeza por caídas desde columpios y se han estrangulado con las correas. • SIEMPRE usa el sistema de sujeción. Ajústalo a la medida. •...
- Page 4 BEFORE YOU BEGIN | ANTES DE EMPEZAR IMPORTANT! Keep these instructions for future reference. Before assembly and each use, inspect this product for damaged hardware, loose joints, missing parts or sharp edges. Do not use the product if any parts are missing, damaged or broken.
- Page 5 PARTS | PIEZAS M4,5 x 25 mm Screw Tornillo M4,5 x 25 mm These screws are located in the upper legs and seat tube retainer. You will need to remove them to assemble the upper and lower legs and the seat tube to the motorized frame.
- Page 6 PARTS | PIEZAS You may want to install batteries for the seat soother before assembly. See Battery Installation section. Instala las pilas del proyector relajante antes del montaje. Consulta la sección de Colocación de las pilas. SOOTHER BATTERY INSTALLATION COLOCACIÓN DE LAS PILAS DE LA UNIDAD DE VIBRACIONES Locate the soother battery compartment Localizar el compartimento de pilas de la underneath the seat.
-
Page 7: Montaje
ASSEMBLY MONTAJE Tighten the screw with a Phillips screwdriver. Apretar el tornillo con un desatornillador de cruz. IMPORTANT! The screws needed to fasten the upper legs to the lower legs are located in the upper leg retainers. Loosen and remove the M5 x 40 mm screws using the Allen wrench. - Page 8 The upper legs are designed to fit the lower legs one way. If an upper leg does not seem to fit, remove it and assemble to the other lower leg. Las patas superiores están diseñadas para montarse en las patas inferiores de una sola manera.
- Page 9 You many need the help of another adult to hold the motorized frame while you insert the legs. Make sure each button “snaps” into place. Quizá necesite la ayuda de otra persona para sujetar el armazón motorizado mientras inserta las patas. Asegurarse de que cada botón se ajuste en su lugar.
- Page 10 IMPORTANT! The screw needed to fasten the seat tube to the motorized frame tube is located in the seat tube retainer. Loosen and remove M5 x 40 mm screw using the Allen wrench. Use the screw in the next assembly step. ¡IMPORTANTE! El tornillo para ensamblar el tubo de la silla al tubo del armazón motorizado se encuentra en la...
- Page 11 Tighten the screws with a Phillips screwdriver. Aprieta los tornillos con un destornillador de cruz. Insert the waist belts through the lowest slots in the pad. Make sure the waist belts are not twisted. Insertar los cinturones de la cintura en las ranuras más bajas de la almohadilla.
- Page 12 Smaller Baby Insert the ends of the shoulder belts through the lower slots in the seat pad back. Bebé más pequeño Insertar los extremos de los cinturones de hombro en las ranuras inferiores de la parte trasera de la almohadilla. Larger Baby From the back of the seat, fit the shoulder belt tabs back through the slots in the seat...
- Page 13 Fasten the pad straps. Make sure you hear a "click". Abrocha las cintas de la almohadilla. Asegúrate de oír un clic.
- Page 14 SWING BATTERY INSTALLATION COLOCACIÓN DE LAS PILAS DEL COLUMPIO Install batteries in the swing if you need to use this swing away from an electrical outlet. Instalar las pilas en el columpio para usar este columpio donde no haya tomacorrientes eléctricos. If the swing begins to operate erratically, you may need to reset the electronics.
-
Page 15: Restraint System
RESTRAINT SYSTEM SISTEMA DE SUJECIÓN Place your child in the seat. Position the Sentar al niño en la silla. Colocar la almohadilla restraint pad between your child's legs. de sujeción entre las piernas del niño. Fit the end of each waist belt through the Insertar el extremo de cada cinturón de la end of each shoulder belt. - Page 16 To tighten the waist belts: Feed the anchored end of the belt up through the buckle to form a loop Pull the free end of the belt . Repeat to tighten the other belt. Para apretar los cinturones de la cintura: introducir el extremo fijo del cinturón en la hebilla para formar un espacio .
- Page 17 USE AS A ROCKER SEAT OR AN INFANT SWING! ¡ÚSALA COMO SILLA MECEDORA O COLUMPIO! Lift to remove the seat from the swing hub and place on the floor for rocker seat use. Levantar la silla para desprenderla de la base del columpio y colocarla sobre el piso para usarla como silla mecedora.
- Page 18 ADJUST SEAT RECLINE | AJUSTA EL RESPALDO While lifting the latch on the back of the seat, lift or lower the seat back for upright or recline use. Mientras levantas el seguro en la parte trasera de la silla, sube o baja el respaldo a la posición vertical o reclinada.
- Page 19 SWING AC POWER USO DEL COLUMPIO CON CORRIENTE ALTERNA Plug the AC adapter into the power cord Enchufa el adaptador de corriente alterna extending from the back of a leg. en el cable eléctrico que se extiende del dorso de una de las patas. Plug the AC adapter only into a wall outlet.
- Page 20 THIS SWING REALLY ROCKS! ¡QUÉ MOVIMIENTO MECEDOR TAN RELAJANTE! Touch to turn power ON. Don't forget to Presiona para ACTIVAR la unidad. APAGA turn power OFF when not in use. Touch the la unidad cuando el producto no esté button again to turn it off. en uso.
-
Page 21: Mantenimiento
CARE MANTENIMIENTO Unbuckle the restraint system. Unbuckle the Desabrocha el sistema de sujeción. pad straps on the front of the seat. Remove Desabrocha las cintas de la almohadilla del the pad from the restraint system. frente de la silla. Quita la almohadilla del sistema de sujeción. - Page 22 BATTERY SAFETY INFORMATION INFORMACIÓN DE SEGURIDAD ACERCA DE LAS PILAS CAUTION PRECAUCIÓN To prevent battery leaks, which Para evitar fugas en las pilas (que can burn skin and eyes: podrían provocar quemaduras en • Do not mix old and new batteries la piel y en los ojos): or batteries of different types: •...
- Page 23 NOTE: Changes or modifications not expressly AC ADAPTER approved by the manufacturer responsible for Adults Note: If you use this product with compliance could void the user’s authority to the AC adapter, periodically examine the AC operate the equipment. adapter for damage to the cord, housing or other parts that may result in the risk of fire, This device complies with Part 15 of the FCC electric shock or injury.
- Page 24 UNITED STATES Fisher-Price, Inc., 636 Girard Avenue, East Aurora, NY 14052. Consumer Services: 1-800-432-5437. MÉXICO Importado y distribuido por Mattel de México, S.A. de C.V., Miguel de Cervantes Saavedra No. 193, Pisos 10 y 11, Col. Granada, Alcaldía Miguel Hidalgo, C.P. 11520, México, Ciudad de México.