Advertisement
Quick Links
Please Contact Moen First
For Installation Help, Missing or
Replacement Parts
(USA)
1-800-BUY-MOEN (1-800-289-6636)
Mon - Fri 8:00 AM to 8:00 PM, Eastern
Sat. 9:00 AM to 5:30 PM Eastern
WWW.MOEN.COM
(Canada)
1-800-465-6130
Mon - Fri 7:30 AM to 8:00 PM, Eastern
WWW.MOEN.CA
Por favor, contáctese primero con Moen
Para obtener ayuda de instalación, piezas
faltantes o de recambio
01-800-718-4345
Lunes a viernes de 8:00 a 20:00 hs.
(Costa Este)
Sáb. 8:00 a 18:30 hs. (Costa Este)
WWW.MOEN.MX
Veuillez d'abord contacter Moen
en cas de problèmes avec l'installation, ou pour
obtenir toute pièce manquante ou de rechange
1-800-465-6130
Du lundi au vendredi:
de 7 h 30 à 20 h, HE
WWW.MOEN.CA
Installation Guide
Guía de Instalación
Guide d'installation
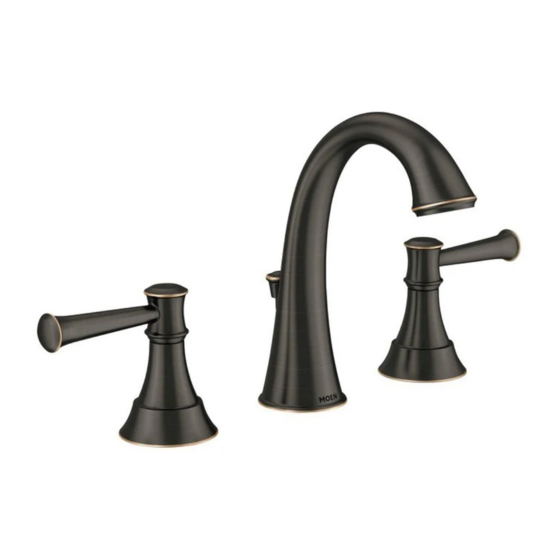
TWO HANDLE LAVATORY FAUCET
MEZCLADORA PARA LAVABO
ROBINET DE LAVABO À DEUX POIGNÉES
Images in this instruction sheet may not reflect your current product, but should follow the same step-by-step instructions.
Las imágenes en esta hoja de instrucciones no siempre son representativas de su producto actual, pero deben seguir los
mismos paso a paso las instrucciones.
Les images de cette feuille d'instructions peuvent ne pas refléter votre produit actuel, mais doivent suivre les mêmes étape
par étape les instructions.
INS10185 - 3/13
INS10185 - 3/13
MODEL 84778
DE DOS MANERALES
MODELO 84778
MODÈL 84778
Advertisement

Related Manuals for Moen 84778


Summary of Contents for Moen 84778
- Page 1 WWW.MOEN.COM (Canada) 1-800-465-6130 Mon - Fri 7:30 AM to 8:00 PM, Eastern WWW.MOEN.CA Por favor, contáctese primero con Moen Para obtener ayuda de instalación, piezas faltantes o de recambio 01-800-718-4345 Lunes a viernes de 8:00 a 20:00 hs. (Costa Este) Sáb.
- Page 2 Open faucet han- HERRAMIENTAS ÚTILES dle to relieve water pressure and ensure that complete water Para que el cambio de la llave sea fácil y seguro, Moen le shut-off has been accomplished. recomienda usar estas útiles herramientas.
- Page 3 INS10185 - 3/13 Parts List A. Handles (2) B. Spout C. Valve Clips (2) D. Upper Mounting Washer (2) E. Lower Mounting Washer (2) F. Mounting Nuts (2) G. Cold Valve Body H. Mounting Bracket I. Bracket J. Spout Mounting Nut K.
- Page 4 Parts List Waste Assembly Q. Plug Ensamblaje del desagüe R. Lift Rod Assemblage de la bonde S. Lift Rod Clip Waste Seat U. Drain Gasket V. Drain Washer W. Drain Nut X. Drain O-Ring Pivot Rod Seat Z. Tail Piece AA.
- Page 5 INS10185 - 3/13 Sealant Sellante Mastic Apply a small amount of silicone lubricant (M) to the black rubber o-ring on Apply a bead of plumbers putty or other sealant to the base of the spout (B) the spout shank (L) as shown. as shown.
- Page 6 Sealant Sellante Mastic Use mounting tool (O) to tighten the mounting nut (J) to the spout base (L). Apply a generous bead of plumbers putty or other sealant to underside of the upper mounting washers (D). A putty groove is provided for this purpose. Utilice la herramienta de montaje (O) para apretar la tuerca de montaje (J) a Turn washers (D) over and position on sink as shown.
- Page 7 INS10185 - 3/13 Slide clip (C) into the groove on each valve body. Check to see that each valve Hold valve body (N) with one wrench and tighten the lower mounting nut body outlet connection below the deck points towards the spout shank (L) as (F) using a 2nd wrench.
- Page 8 Position (A) with handles pointing in the off direction as shown. Holding the Rotate the red stem extension on the hot valve body (N) clockwise and the handle stationary with one hand, thread the base of the handle assembly (A) blue stem extension on the cold valve body (G) counterclockwise until onto the valve bodies (N&G) turning clockwise until (A) tightens to the deck.
- Page 9 INS10185 - 3/13 correct orientation orientación correcta orientation correcte Position the drain o-ring (X) in the groove at the top of the tail piece (Z) and thread onto the waste seat (T). After (Z) is attached to (T), rotate entire assembly so opening on (Z) points towards the wall.
- Page 10 Push pivot rod (AA) down. Insert pivot rod through closest hole on liftrod strap (CC) with pivot rod down. Squeeze lift rod clip (S) and slide other side of clip (S) onto the pivot rod (CC). Verify white plastic pivot rod seat (Y) is in place with beveled side facing out.
- Page 11 INS10185 - 3/13 Attach fl exible lines (not included) to shutoff faucet valve bodies. Attach fl exible lines (not included) to shutoff valves. Fije las líneas fl exibles (no incluidas) a la llave de paso para cortar el agua de Fije las líneas fl exibles (no incluidas) a la llave de paso.
- Page 12 Some states, provinces and nations do not allow the exclusion or limitation of incidental or consequential damages, so the above limitations or exclusions may not apply to you. This warranty gives you specific legal rights and you may also have other rights which vary from state to state, province to province, nation to nation. Moen will advise you of the procedure to follow in mak- ing warranty claims.