Table of Contents
Advertisement
Available languages
Available languages
Quick Links
SEC.
가
WORK
BRAND
LG
20
<FRONT>
가
나
P/NO. 다
182
1
2
3
4
REV. NO.
REVISION DESCRIPTION
REF. NO.
기호
변경 사항
시방 번호
나
다
PRINTING DEGREE
MODEL
P/NO.
T2735NWLV
MFL69482520
<BACK>
182
DATE
PREPARED
APPROVED
년/월/일
시방자
승인자
MATERIAL AND PRINTING DESCRIPTION
LG MODEL 명
1
SNOW WHITE 80g OFFSET 인쇄
F70E1UDNK1
<< 주기 >>
1. 재질, 인쇄방법, 인쇄도수, 외곽치수등은 작업표에 준한다.
2. 인쇄내용, 문자크기 및 형상, 선의 굵기 등은 설계에서 제시된 FILM에 준함.
3. 외곽치수는 절단후 치수임.
4. 양산전에 설계 한도를 득할 것.
5. 본 부품에 금지물질이 포함되지 않도록 하고, 상세내용은 LG(63)-A-5501-34를 만족할 것
<< NOTES >>
1. Material, printing and exterier size are refer to work tables.
2. Printing, text size and line are based on LG design film.
3. Exterier size on the drawing is cutting line.
4. Before product controlled by criteria sample.
5. The part should not contain prohibited substances(Pb,Cd,Hg,Cr+6,PBB,PBDE)
and details
should comply with LG standard of LG(63)-A-5501-34
TRIG.
MODELING
DESIGNED
한 윤 근
16.11.15
LG 전자
LG Electronics Inc.
SUFFIX
LANGUAGE
ENGLISH/
ASSPEVN
VIETNAMESE
SCALE N
UNIT
mm
S
MANUAL,OWNER'S
T
REVIEWED
CHECKED APPROVED
I
T
상 민 규
장 호 성
차 웅 길
L
W-MODULE
E
16.11.15
16.11.15
16.11.15
RELATED DWG.
(주)
MFL69482520
DWG.
No.
RELEASING THIS DRAWING
WITHOUT PERMISSION LG
Electronics SHOULD BE
ACCUSED ACCORDING TO THE
LAWS AND COMPANY RULES.
이 도면은 LG전자의 자산으로 불법
유출시 관계법과 회사규정에 의해 처벌됨.
PAGE
REMARK
W-MODULE
80
DR COMPLETED
PDF
도면 DR 완료
ILLUSTRATOR
완료일 :
1/1
Advertisement
Chapters
Table of Contents
Troubleshooting

Related Manuals for LG T2735NWLV


Summary of Contents for LG T2735NWLV
- Page 1 1. Material, printing and exterier size are refer to work tables. P/NO. 다 2. Printing, text size and line are based on LG design film. 3. Exterier size on the drawing is cutting line. 4. Before product controlled by criteria sample.
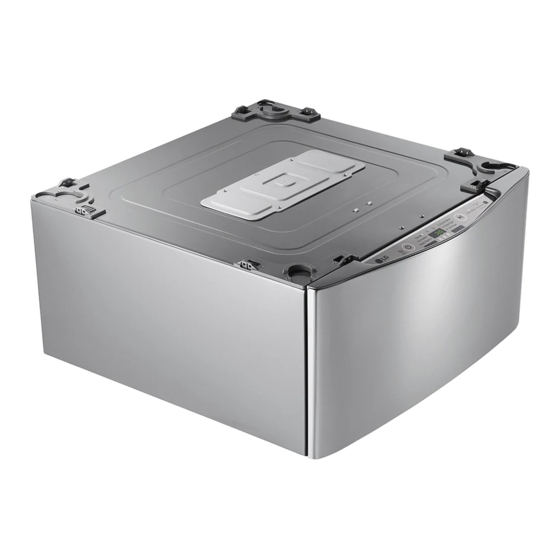
- Page 2 WASHING MACHINE Before beginning installation, read these instructions carefully. This will simplify installation and ensure that the product is installed correctly and safely. Leave these instructions near the product after installation for future reference. ENGLISH VIETNAMESE T2735NWLV www.lg.com MFL69482520 Rev.00_111516...
-
Page 3: Table Of Contents
TABLE OF CONTENTS This manual may contain images or content different from the model you purchased. This manual is subject to revision by the manufacturer. SAFETY INSTRUCTIONS ............3 IMPORTANT SAFETY INSTRUCTIONS ............ 3 Disposal of Your Old Appliance ..............8 INSTALLATION ................9 Parts ...................... -
Page 4: Safety Instructions
SAFETY INSTRUCTIONS The following safety guidelines are intended to prevent unforeseen risks or damage from unsafe or incorrect operation of the appliance. The guidelines are separated into ‘WARNING’ and ‘CAUTION’ as described below. This symbol is displayed to indicate matters and operations that can cause risk. - Page 5 For use in Europe: This appliance can be used by children aged from 8 years and above and persons with reduced physical, sensory or mental capabilities or lack of experience and knowledge if they have been given supervision or instruction concerning use of the appliance in a safe way and understand the hazards involved.
- Page 6 •This pedestal washing machine must be installed underneath a matching LG front-loading washing machine manufactured after 2009. •This appliance must be grounded. In the event of malfunction or breakdown, grounding will reduce the risk of electric shock by providing a path of least resistance for electric current.
- Page 7 Improper use can cause fire or explosion. •In case of flood, disconnect the power plug and contact the LG Electronics customer information centre. •Do not push down the door excessively, when the appliance door is...
- Page 8 •Do not touch the door during a high temperature programme. •Do not use flammable gas and combustible substances (benzene, gasoline, thinner, petroleum, alcohol, etc.) near the appliance. •If the drain hose or inlet hose is frozen during winter, use it only after thawing.
- Page 9 Maintenance •Securely plug the power plug in the socket outlet after completely removing any moisture and dust. •Disconnect the power cord before cleaning the appliance. •Never unplug the appliance by pulling on the power cable. Always grip the power plug firmly and pull straight out from the socket outlet.
-
Page 10: Installation
INSTALLATION Parts Door Drum Lint Filter Control Panel Drawer Water Supply Hose Power Plug Water Drain Hose Leveling Feet Accessories Water supply hose Connecting Water drain hose Water supply hose General-type (for cold water) supply hose connector connector / Screw- type connector Cable tie Water drain hose... -
Page 11: Specifications
Specifications Model T2735NWLV Wash 3.5 kg (Wash) Capacity Power Supply 220 - 240 V~, 50 Hz Size 700 mm (W) x 770 mm (D) x 360 mm (H) Product Weight 48.7 kg Permissible 0.1 - 0.8 MPa (1.0 - 8.0 kgf / cm²) Water Pressure •... -
Page 12: Installation Place Requirements
Installation Place • Do not install the appliance in rooms where freezing temperatures may occur. Frozen Requirements hoses may burst under pressure. The reliability of the electronic control unit may be impaired Location at temperatures below freezing point. • Ensure that when the appliance is installed, it is easily accessible for an engineer in the event of a breakdown. -
Page 13: Unpacking And Removing Packing Materials
Unpacking and Removing Stacking the Pedestal Packing Materials Washing Machine Lift the appliance off the foam base. Make sure the leveling feet on the front- • If you must lay the appliance down to loading washing machine are fully retracted remove the carton base, always protect the before stacking. -
Page 14: Connecting The Supply Hose
Checking the Rubber Seal on the WARNING Supply Hose • This pedestal washing machine must be installed underneath a matching LG front- Two rubber seals are supplied with the water loading washing machine manufactured after supply hoses. They are used for preventing 2009. - Page 15 Connecting Hose to Water Tap Push the adapter onto the end of the tap so that the rubber seal forms a watertight connection. Tighten the four fixing screws. Connecting Screw-Type Hose to Tap with Thread Screw the hose connector onto the water supply tap.
- Page 16 Connecting Hose to Two Washing Remove the guide plate if the tap is too large to fit the adapter. Machines Connect the water supply hose connector to the water supply hose of the front-loading Guide plate washing machine. Open the accessory package for pedestal washing machine installation.
-
Page 17: Installing The Drain Hose
Installing the Drain Hose Using the Drain Hose Connector Connect the drain hose of the front-lading • The drain hose should not be placed higher washing machine and the pedestal washing than 100 cm above the floor. Water in the machine to the drain connector. -
Page 18: Leveling The Appliance
• If the washing machine is installed on a raised not rock. If the appliance rocks, level the platform, it must be securely fastened in order appliance again. to eliminate the risk of falling off. NOTE • You can obtain anti-slip sheets from the LG Service Centre. -
Page 19: Operation
OPERATION Using the Appliance Choose the desired washing cycle. • Press the cycle button repeatedly until the Sort laundry and load items. desired cycle is selected. • Sort laundry by fabric type, soil level, colour and load size as needed. Open the door and load items into the washing machine. -
Page 20: Sorting Laundry
Sorting Laundry Caring before loading. • Do not wash 'memory wire' on female Look for a care label on your clothes. inner wear (such as a brassiere) as it may damage other clothes or the washing • This will tell you about the fabric content of machine and create noise. -
Page 21: Closing The Door And Drawer
• If power failure occurs during product operation, the door cannot be opened. Provide the power again or contact the LG service centre. (in case of boil wash, the door may not open after the power is supplied again due to high temperature inside the washing machine). -
Page 22: Adding Cleaning Products
Adding Cleaning Products Adding Detergent Measure the detergent with the detergent Detergent Dosage dispenser and pour it into the tub. • Detergent should be used according to the instruction of the detergent manufacturer and selected according to type, colour, soiling of the fabric and washing temperature. - Page 23 Adding Softeners Adding Water Softener • A water softener, such as anti-limescale (e.g. Calgon) can be used to cut down on the use Adding Fabric Softener of detergent in extremely hard water areas. CASE 1. When the machine chimes: Dispense according to the amount specified on the packaging.
-
Page 24: Control Panel
Control Panel Boil Wash Normal Intimates Baby Wear Lingerie/Wool Rinse+Spin Power Button Display • Press the Power button to turn the • The display shows the cycle status and washing machine on. estimated time remaining. : Drawer lock indicator • •... -
Page 25: Programme Table
Programme Table Washing Programme Maximum Programme Description Note Load Use this programme to • Pressing the Start/Pause button without wash lightly soiled normal selecting a programme will cause the Normal items, except delicate 3.5 kg Normal programme to begin immediately fabrics such as wool or using the default settings. - Page 26 Maximum Programme Description Note Load • In this programme, laundry is washed thoroughly due to high temperature. Use 1/2 the amount of detergent recommended by the manufacturer for a normal load. • Do not wash white or brightly colored laundry with darkly colored laundry that can discharge colors.
-
Page 27: Option Programme
Option Programme Child Lock Use this option to disable the controls. This Tub Clean feature can prevent children from changing cycles or operating the appliance. Use this option to keep the drum clean by sterilizing germs within the drum. For information Locking the Control Panel on using Tub Clean, see the Cleaning Your Washing Machine section. -
Page 28: Smart Functions
Use this function if you need an accurate for analysis. diagnosis by an LG Electronics service centre when the product malfunctions or fails. Use this function only to contact the service representative, not during normal operation. -
Page 29: Maintenance
MAINTENANCE Cleaning the Interior WARNING • Unplug the washing machine before cleaning • Use a towel or soft cloth to wipe around the to avoid the risk of electric shock. Failure to washing machine door opening and door glass. follow this warning may result in serious injury, •... -
Page 30: Tub Clean
Tub Clean Cleaning the Water Inlet Filter Use this option to keep the drum clean by • Turn off the stopclock if the washing machine sterilizing germs within the drum. is to be left for any length of time (e.g. holiday), especially if there is no floor drain (gully) in the Press the Power button. -
Page 31: Cleaning The Lint Filter
Cleaning the Lint Filter NOTE • When the lint filter is damaged, contact LG The filter is an important part for efficient service centre. washing performance result, so it needs special • Do not operate the washing machine without care from you. It is recommended that the filter the lint filter. - Page 32 How to Handle Freezing Step 3. When the Drain Pump is Frozen • icon may blink on the display when drain pump problems occur, take the following Step 1. When the Door is Frozen measures. • Thaw out the door using a hot water cloth. Pour 15 ℓ...
-
Page 33: Troubleshooting
TROUBLESHOOTING The appliance is equipped with an automatic error-monitoring system to detect and diagnose problems at an early stage. If the appliance does not function properly or does not function at all, check the following before you call for service: Diagnosing Problems Symptoms Reason... - Page 34 Symptoms Reason Solution Supply hose connection is • Check hoses and drain hose connectors loose at the tap, washing for leaks, cracks and splits. machine, or drain hose • Tighten hose connections. connector. • The washing machine pumps out water very rapidly.
- Page 35 Symptoms Reason Solution • Make sure the inlet filters on the fill Filter clogged. valves are not clogged. Refer to the filter cleaning instructions. • Check that supply hoses are not kinked or Supply hoses may be kinked. clogged. • Make sure that both hot and cold water Insufficient water supply.
- Page 36 Symptoms Reason Solution Control panel has powered off • This is normal. Press the Power button to due to inactivity. turn the washing machine on. Washing machine is • Make sure cord is plugged securely into a unplugged. working outlet. Water supply is turned off.
- Page 37 Symptoms Reason Solution Kinked drain hose. • Ensure that the drain hose is not kinked. • Make sure that the drain hose is no Washing machine Drain located higher than 2.4 higher than 2.4 m above the bottom of the will not drain water m above the floor.
-
Page 38: Error Messages
Error Messages Symptoms Reason Solution • Close the drawer and press Start/Pause button to start the cycle. Drawer is not closed properly. • If the drawer is closed and the drawer lock error message is displayed, call for service. • Open the drawer and make sure the latch area is free of clothing or other obstructions. - Page 39 • The pedestal washing machine will not Pedestal washing machine is operate as a standalone unit. It must being operated without a full- be stacked under an LG front-loading size washing machine. washing machine. • The stacking switch will not operate...
- Page 40 Memo...
- Page 41 Memo...
- Page 42 đơn giản hoá quá trình lắp đặt và đảm bảo sản phẩm được lắp đặt đúng cách và an toàn. Để hướng dẫn này ở gần sản phẩm sau khi lắp đặt để sau này tham khảo. www.lg.com...
- Page 43 MỤC LỤC Hướng dẫn này có thể có các hình ảnh hoặc nội dung khác với model mà bạn đã mua. Hướng dẫn sử dụng này có thể được sửa đổi bởi nhà sản xuất. HƯỚNG DẪN AN TOÀN ............3 HƯỚNG DẪN AN TOÀN QUAN TRỌNG ...........
-
Page 44: Hướng Dẫn An Toàn
HƯỚNG DẪN AN TOÀN Các hướng dẫn an toàn sau đây nhằm mục đích ngăn chặn các rủi ro hoặc hư hỏng không thể lường trước từ việc vận hành sản phẩm không an toàn hoặc không đúng cách. Các hướng dẫn được chia thành hai phần ‘CẢNH BÁO’ và ‘THẬN TRỌNG’... -
Page 45: Lắp Đặt
Sử dụng ở Châu Âu: Trẻ em từ 8 tuổi trở lên hoặc người có năng lực thể chất, giác quan hoặc tinh thần bị suy giảm, hoặc thiếu kinh nghiệm và kiến thức có thể sử dụng thiết bị này nếu có sự giám sát hoặc hướng dẫn liên quan đến việc sử... - Page 46 •Chân đế máy giặt này phải được lắp đặt dưới máy giặt lồng ngang LG phù hợp được sản xuất sau năm 2009. •Thiết bị này phải được nối đất. Trong trường hợp xảy ra trục trặc hoặc hỏng máy, việc nối đất sẽ...
- Page 47 ăn v.v.). Sử dụng không đúng cách có thể gây cháy nổ. •Trường hợp xảy ra lụt, ngắt dây điện và liên hệ trung tâm dịch vụ khách hàng LG Electronics. •Không đè cửa xuống quá mạnh khi cửa thiết bị hở.
- Page 48 •Không chạm vào cửa thiết bị khi sử dụng chương trình nhiệt độ cao. •Không được sử dụng khí dễ cháy và các chất dễ cháy (benzen, xăng, dung môi, dầu mỏ hoặc cồn v.v.) gần sản phẩm. •Nếu ống xả hoặc ống cấp bị đóng băng trong mùa đông, chỉ sử dụng thiết bị...
- Page 49 Bảo trì •Cắm chặt phích cắm vào ổ cắm sau khi loại bỏ hết hơi ẩm và bụi bẩn. •Ngắt dây nguồn trước khi vệ sinh thiết bị. •Không bao giờ rút phích cắm thiết bị bằng cách kéo dây điện. Luôn cầm chặt phích cắm và...
-
Page 50: Các Bộ Phận
LẮP ĐẶT Các bộ phận Cửa Lồng giặt Bộ lọc xơ vải Bảng Điều khiển Ngăn kéo Ống cấp nước Phích cắm điện Ống xả nước Chân có thể Điều chỉnh độ cao Các phụ kiện Ống cấp nước Nối Ống xả... -
Page 51: Thông Số Kỹ Thuật
Thông số kỹ thuật Model T2735NWLV Khối lượng 3,5 kg (Giặt) giặt Nguồn Điện 220 - 240 V~, 50 Hz Kích thước 700 mm (R) x 770 mm (S) x 360 mm (C) Trọng lượng Sản phẩm 48.7 kg Áp lực nước 0,1 - 0,8 MPa (1,0 - 8,0 kgf / cm²) -
Page 52: Yêu Cầu Không Gian Lắp Đặt
Yêu cầu Không gian Lắp đặt • Không lắp đặt thiết bị trong các phòng có thể xảy ra nhiệt độ đóng băng. Các ống đóng băng Vị trí có thể bị cháy dưới áp suất. Độ tin cậy của bộ điều khiển điện tử... -
Page 53: Mở Kiện Và Gỡ Bỏ Vật Liệu Đóng Gói
Mở kiện và gỡ bỏ vật liệu Đặt chồng máy giặt lên chân đóng gói đế Nhấc thiết bị khỏi bệ bọt xốp. Đảm bảo chân có thể điều chỉnh độ cao trên • Nếu bạn phải đặt thiết bị nằm xuống để máy giặt lồng ngang thu lại hoàn toàn trước tháo bỏ... -
Page 54: Nối Ống Cấp
• Chân đế máy giặt này phải được lắp đặt dưới máy giặt lồng ngang LG phù hợp được sản Hai gioăng cao su được cung cấp kèm theo các xuất sau năm 2009. (chỉ với máy giặt 16-21 kg) ống cấp nước. - Page 55 Kết nối Ống với Vòi Nước máy Đẩy ống nối lên trên phần đầu của vòi nước máy sao cho gioăng cao su tạo thành kết nối kín nước. Siết chặt bốn vít cố định. Kết Nối Ống Kiểu Vặn vít với Vòi nước máy có...
- Page 56 Nối ống với hai máy giặt Tháo bỏ vành dẫn hướng nếu vòi nước máy quá lớn để lắp với ống nối. Nối đầu nối ống cấp nước với ống cấp nước của máy giặt lồng ngang. Mở gói phụ kiện để lắp đặt chân đế...
-
Page 57: Lắp Đặt Ống Xả Nước
Lắp đặt Ống Xả nước Sử dụng đầu nối ống xả Nối ống xả của máy giặt lồng ngang và chân đế • Ống xả không nên đặt cao hơn 100 cm so với máy giặt với đầu nối ống xả. Lắp dây kẹp ống đi sàn. -
Page 58: Giữ Thăng Bằng Cho Thiết Bị
để đảm bảo rằng thiết bị không bị trừ rủi ro rơi đổ. rung chuyển. Nếu thiết bị rung chuyển, chỉnh lại thiết bị một lần nữa cho thăng bằng. LƯU Ý • Bạn có thể mua miếng lót chống trượt ở Trung tâm Dịch vụ LG. -
Page 59: Vận Hành
VẬN HÀNH Sử dụng thiết bị Chọn chu trình giặt mong muốn. • Nhấn nút chu trình nhiều lần cho đến khi Phân loại quần áo và cho đồ vào máy. chọn được chu trình mong muốn. • Phân loại quần áo theo loại vải, mức độ bẩn, màu sắc và... -
Page 60: Phân Loại Quần Áo
Phân loại Quần áo Thận trọng trước khi bỏ đồ vào máy. • Không giặt 'gọng giữ dáng' trong đồ lót phụ Tìm nhãn sử dụng trên quần áo của bạn. nữ (ví dụ như nịt ngực) vì nó có thể làm hỏng quần áo khác hoặc làm hỏng máy giặt •... -
Page 61: Đóng Cửa Và Ngăn Kéo
• Nếu xảy ra mất điện trong khi vận hành thiết bị, cửa sẽ không thể mở được. Cấp lại nguồn hoặc liên hệ trung tâm dịch vụ LG. (trong trường hợp giặt nước nóng, không thể mở cửa sau khi nguồn được cấp lại do nhiệt độ cao bên trong máy giặt). -
Page 62: Thêm Các Chất Làm Sạch
Thêm Các chất Làm sạch Thêm Chất tẩy Đong xà phòng bằng dụng cụ đong xà phòng và Liều lượng Chất tẩy đổ vào lồng giặt. • Chất tẩy cần được sử dụng theo hướng dẫn của nhà sản xuất chất tẩy đó và được lựa chọn phù... - Page 63 Thêm nước xả vải Thêm Chất làm mềm Nước • Có thể sử dụng chất làm mềm nước, chẳng hạn như chất chống cặn vôi (ví dụ than hoạt Thêm Chất làm mềm Vải tính Calgon), để giảm bớt việc sử dụng chất TÌNH HUỐNG 1.
-
Page 64: Bảng Điều Khiển
Bảng Điều khiển Boil Wash Normal Intimates Baby Wear Lingerie/Wool Rinse+Spin Nút Nguồn Hiển thị • Nhấn nút Nguồn để bật máy giặt. • Màn hình hiển thị trạng thái chu trình và thời gian còn lại ước tính. : Đèn báo chốt ngăn kéo •... -
Page 65: Bảng Chương Trình
Bảng Chương trình Chương trình Giặt Tải Chương Mô tả Lưu ý trọng trình Tối đa Sử dụng chương trình này • Nếu nhấn nút Khởi động/Tạm dừng mà Normal (Giặt để giặt các đồ bình thường không chọn một chương trình, chương 3,5 kg thuong) bị... - Page 66 Tải Chương Mô tả Lưu ý trọng trình Tối đa • Ở chương trình này, đồ giặt được giặt kỹ nhờ nhiệt độ cao. Sử dụng 1/2 lượng xà phòng do nhà sản xuất khuyến nghị cho lượng giặt thông thường. •...
-
Page 67: Chương Trình Tùy Chọn
Chương trình Tùy chọn Khóa Trẻ em Sử dụng tùy chọn này để vô hiệu hóa các phím Tub Clean (Vệ sinh Lồng giặt) điều khiển. Tính năng này có thể ngăn trẻ em không thay đổi các chu trình hoặc vận hành thiết Sử... -
Page 68: Chức Năng Thông Minh
Sử dụng chức năng này nếu bạn cần sự để phân tích. chẩn đoán chính xác từ trung tâm dịch vụ LG Electronics khi sản phẩm bị trục trặc hoặc lỗi. Chỉ sử dụng chức năng này để liên hệ đại diện dịch vụ, không sử... -
Page 69: Bảo Trì
BẢO TRÌ Vệ sinh Phần bên trong CẢNH BÁO • Rút phích cắm máy giặt trước khi vệ sinh để • Sử dụng khăn lau hoặc vải mềm để lau khô tránh rủi ro điện giật. Không tuân theo cảnh xung quanh ô... -
Page 70: Tub Clean (Vệ Sinh Lồng Giặt)
Tub Clean (Vệ sinh Lồng giặt) Vệ sinh Bộ lọc Ngõ vào Nước Sử dụng tùy chọn này để giữ lồng giặt sạch sẽ • Tắt đồng hồ tính giờ nếu không sử dụng máy bằng cách khử sạch vi trùng bên trong lồng giặt. giặt trong một khoảng thời gian bất kỳ... -
Page 71: Vệ Sinh Bộ Lọc Xơ Vải
• Khi bộ lọc xơ vải bị hỏng, liên hệ trung tâm Bộ lọc là một bộ phận quan trọng giúp máy giặt dịch vụ LG. hoạt động hiệu quả, do đó cần đặc biệt chú • Không vận hành máy giặt mà không có bộ lọc ý... - Page 72 Làm cách nào để Xử lý Đóng băng Bước 3. Khi bơm xả bị đóng băng • Biểu tượng có thể nhấp nháy trên màn hình khi xảy ra sự cố với bơm xả, hãy Bước 1. Khi cửa bị đóng băng thực hiện các biện pháp sau.
-
Page 73: Xử Lý Sự Cố
XỬ LÝ SỰ CỐ Thiết bị được trang bị hệ thống giám sát lỗi tự động để phát hiện và chẩn đoán các sự cố ở giai đoạn đầu. Nếu thiết bị không hoạt động đúng chức năng hoặc hoàn toàn không hoạt động, hãy kiểm tra như... - Page 74 Triệu chứng Nguyên nhân Giải pháp Kết nối ống cấp bị lỏng ở vòi • Kiểm tra các ống và đầu nối ống xả xem nước máy, máy giặt hoặc đầu có bị rò rỉ, nứt vỡ không. nối ống xả. •...
- Page 75 Triệu chứng Nguyên nhân Giải pháp • Đảm bảo bộ lọc đầu vào trên van nạp Bộ lọc bị tắc. không bị tắc. Tham khảo hướng dẫn vệ sinh bộ lọc. • Kiểm tra xem ống cấp có bị gập hoặc bị Ống cấp có...
- Page 76 Triệu chứng Nguyên nhân Giải pháp Bảng điều khiển tắt nguồn do • Điều này là bình thường. Nhấn nút Nguồn không hoạt động. để bật máy giặt. Máy giặt bị rút phích cắm • Đảm bảo dây được cắm chặt vào ổ cắm điện.
- Page 77 Triệu chứng Nguyên nhân Giải pháp Ống xả bị gập. • Đảm bảo ống xả không bị gập. Máy giặt không xả • Đảm bảo ống xả không cao hơn 2,4 m so Ống xả được đặt cao hơn sàn nước với đáy máy giặt và...
-
Page 78: Thông Báo Lỗi
Thông báo Lỗi Triệu chứng Nguyên nhân Giải pháp • Đóng ngăn kéo và nhấn nút Khởi động/ Dừng để bắt đầu chu trình. Ngăn kéo không được đóng • Nếu ngăn kéo đóng và thông báo lỗi chốt đúng cách. ngăn kéo hiển thị, hãy gọi cho bộ... - Page 79 Chốt đặt chồng không hoạt cách nếu chân đế nằm dưới một thiết bị động đúng cách. khác không phải LG, hoặc một thiết bị LG được sản xuất trước năm 2009. • Rã đông ống cấp bằng cách sử dụng vải Ống xả, ống cấp hoặc bơm xả...
- Page 80 Ghi nhớ...
- Page 82 This will simplify installation and ensure that the product is installed correctly and safely. Leave these instructions near the product after installation for future reference. F2721HTTV www.lg.com Made in Korea Copyright © 2016 - 2017 LG Electronics Inc. All Rights Reserved MFL69283975...
- Page 83 Control Panel ..................20 Programme Table ................21 Option Cycle ..................25 Dry .......................29 SMART FUNCTIONS ..........30 Using LG SmartThinQ Application ............30 Using Smart Diagnosis™ ..............32 MAINTENANCE ............33 Cleaning your Washing Machine ............33 Cleaning the Water Inlet Filter .............33 Cleaning the Drain Pump Filter ............34 Cleaning the Dispenser ..............35...
-
Page 84: Safety Instructions
SAFETY INSTRUCTIONS The following safety guidelines are intended to prevent unforeseen risks or damage from unsafe or incorrect operation of the product. The guidelines are separated into ‘WARNING’ and ‘CAUTION’ as described below. This symbol is displayed to indicate matters and operations that can cause risk. - Page 85 GROUNDING REQUIREMENTS WARNING For your safety, the information in this manual must be followed to minimize the risk of fire, explosion, or electric shock, or to prevent property damage, injury to persons, or death. • This appliance must be grounded. In the event of malfunction or breakdown, grounding will reduce the risk of electric shock by providing a path of least resistance for electric current.
-
Page 86: Important Safety Instructions
It can cause electric shock or injury. • Only an authorized repair person from LG Electronics service centre should • This appliance is heavy. Two or more disassemble, repair, or modify the people may be needed to install and product. - Page 87 These • In case of flood, stop using the product products contain poisonous materials. and contact the LG Electronics service centre. Contact with water can cause • Do not plug multiple products into electric shock.
- Page 88 Technical Safety for Using the Disposal Tumble Dryer • Before discarding an old appliance, unplug it. Render the plug useless. • Do not dry unwashed items in the Cut off the cable directly behind the appliance. appliance to prevent misuse. •...
-
Page 89: Installation
INSTALLATION Specifications Transit bolts Power plug Detergent dispenser Control panel Drum Door Drain hose Drain plug Drain pump filter Cover cap (Location may vary depending on products) Adjustable feet • Power supply : 220 - 240 V~, 50 Hz • Size : 700 mm (W) x 835 mm (D) x 990 mm (H) •... -
Page 90: Installation Place Requirements
Installation Place Requirements • Do not install your washing machine in rooms where freezing temperatures may occur. Frozen hoses may Location burst under pressure. The reliability of the electronic control unit may be impaired at temperatures below freezing point. 59.4 cm 15 cm •... -
Page 91: Unpacking And Removing Shipping Bolts
Unpacking and Removing Install the hole caps. Shipping Bolts • Locate the hole caps included in the accessory pack and install them in the shipping bolt holes. Lift the washing machine off the foam base. • After removing the carton and shipping material, lift the washing machine off the foam base. -
Page 92: Using Anti-Slip Sheets (Optional)
• It is most effective to install the anti–slip sheets • You can obtain rubber cups (p/no.4620ER4002B) from under the front legs. If it is difficult to place the the LG Service Centre. pads under the front legs, place them under the NOTE back legs. -
Page 93: Leveling The Washing Machine
Leveling the Washing Machine Connecting Inlet Hose If the floor is uneven, turn the adjustable feet as required • Water supply pressure must be between 0.1 MPa and (Do not insert pieces of wood etc. under the feet). Make 1.0 MPa (1.0 ‒ 10.0 kgf/cm sure that all four feet are stable and resting on the floor •... - Page 94 Connecting Hose to Water Tap Push the adapter onto the end of the tap so that the rubber seal forms a watertight connection. Connecting screw-type hose to tap with thread Tighten the four fixing screws. Screw the hose connector onto the water supply tap. Push the inlet hose vertically upwards so that the rubber seal within the hose can adhere completely to the tap and then tighten it by screwing it to the...
- Page 95 Connecting Hose to Washing Machine Push the adapter onto the end of the tap so that the rubber seal forms a watertight connection. Make sure that there are no kinks in the hose and that Tighten the adapter ring plate and the four fixing they are not crushed.
-
Page 96: Installation Of Drain Hose
Installation of Drain Hose • The drain hose should not be placed higher than 100 cm above the floor. Water in the washing machine may not drain or may drain slowly. • Securing the drain hose correctly will protect the floor from damage due to water leakage. -
Page 97: Operation
OPERATION Using the Washing Machine Choose the desired washing cycle. • Press the Cycle button repeatedly or turn the Before the first wash, select a cycle (Normal 60 °C, add cycle selector knob until the desired cycle is a half load of detergent), allow the washing machine selected. -
Page 98: Sorting Iaundry
Sorting Iaundry Caring before loading. • Combine large and small items in a load. Load Look for a care label on your clothes. large items first. • This will tell you about the fabric content of your • Large items should not be more than half the garment and how it should be washed. -
Page 99: Adding Cleaning Products
Adding Cleaning Products NOTE • Do not let the detergent harden. Detergent Dosage Doing so may lead to blockages, poor rinse performance or odour. • Detergent should be used according to the instruction of the detergent manufacturer and selected according •... - Page 100 • Do not leave the fabric softener in the detergent CAUTION dispenser for more than 2 days (Fabric softener may • To avoid injury, do not place fingers under the lid harden). or between the lid and the top plate when pressing •...
-
Page 101: Control Panel
Control Panel Power button Programme button • Press the Power button to turn the washing • Programmes are available according to laundry machine on. type. • Press and hold the Power button for 1 second • Lamp will light up to indicate the selected to turn the washing machine off. -
Page 102: Programme Table
Programme Table Washing Programme Proper Maximum Programme Description Fabric Type Temp. Load Coloured fast garments (shirts, 40 °C Provides better performance by nightdresses, pajamas, etc) Normal (Cold to Rating combining various drum motions. and normally soiled cotton load 60 °C) (underwear). - Page 103 Proper Maximum Programme Description Fabric Type Temp. Load Speed A small amount of laundry which can Less than Speed Wash and Dry 40 °C Wash+Dry be dried in an hour. 1.0 kg Single Shirt Dries a small load in 19 minutes. Small load, shirts 1 item Use for laundry that need rinsing only...
- Page 104 Drying Programme Programme Description Fabric Type Select this cycle to reduce cycle time Turbo Dry during the drying cycle. Cotton or linen fabrics such as cotton towels, t-shirts, and linen laundries. Select this cycle to reduce water and Air Dry energy usage during the drying cycle.
- Page 105 Extra Options Time Turbo Turbo Programme Steam Add Item Air Dry Time Dry Delay Wash™ ● ● ● ●** ● ● ● Normal ● ●* ● ● ● ● ● Allergy Care ● ● ● ● ● ● ● Sanitary ●...
-
Page 106: Option Cycle
Option Cycle Add Item Use this function to add loads or remove the foreign Time Delay material. You can set a time delay so that the washing machine Press the Add Item button. will start automatically and finish after a specified time interval. - Page 107 Steam Light Steam Wash features enhance washing performance This cycle is suitable for lightly soiled clothing. with low energy consumption. NOTE Refresh cycle reduces creases in clothes. • Selectable options will differ depending on Press the Power button. selected course. Select steam course.
- Page 108 Press and hold Remote Start button for 3 seconds • A beeper will sound and the remaining time for the to enable Remote Start function. current programme will reappear on the display. Start a cycle from the LG SmartThinQ application on your smart phone. Refresh Cycle NOTE •...
- Page 109 NOTE • You can download cycles after registering the product and configuring the Wi-Fi connection. • You can download a desired cycle through the 'LG SmartThinQ' app. For more information on each cycle, refer to the 'LG SmartThinQ' app. • Depending on the type of washer purchased, different cycles will be available.
-
Page 110: Dry
Permanent Press and Synthetics • Do not overload your washing machine Use the your Automatic cycles to dry most loads. Electronic sensors measure the temperature of the • Take out permanent press articles as soon as the exhaust to increase or decrease drying temperatures for washing machine stops to reduce wrinkles. -
Page 111: Smart Functions
Check the distance between the appliance and the wireless router manual. wireless router (Wi-Fi network). • LG SmartThinQ is not responsible for any network • If the distance between the appliance and the connection problems or any faults, malfunctions, wireless router is too far, the signal strength or errors caused by network connection. - Page 112 NOTE NOTE • If you change your wireless router, your Internet • If you choose the simple login to access the LG service provider or your password after registering SmartThinQ application, you must go through the appliance, please delete it from the LG the appliance registration process each time SmartThinQ Settings →...
-
Page 113: Using Smart Diagnosis
Use this function if you need an accurate diagnosis by • For best results, do not move the phone while an LG Electronics customer information centre when the the tones are being transmitted. appliance malfunctions or fails. • If the call centre agent is not able to get an Smart Diagnosis™... -
Page 114: Maintenance
MAINTENANCE Care and Cleaning of the Interior WARNING • Unplug the washing machine before cleaning to • Use a towel or soft cloth to wipe around the washing avoid the risk of electric shock. Failure to follow machine door opening and door glass. this warning may result in serious injury, fire, •... -
Page 115: Cleaning The Drain Pump Filter
Cleaning the Drain Pump Filter After cleaning, turn the pump filter and insert the drain plug. • The drain filter collects threads and small objects left in the laundry. Check regularly that the filter is clean to ensure smooth running of your washing machine. •... -
Page 116: Cleaning The Dispenser
Cleaning the Dispenser Tub Clean Leaving detergent in the detergent dispenser for an Tub Clean is a special cycle to clean the inside of the extended period of time or using the washing machine washing machine. for a long period of time may cause the build-up of A higher water level is used in this cycle at higher spin scales in the detergent dispenser. -
Page 117: Caution On Freezing During Winter
Caution on Freezing During • After closing the tap, disconnect the cold inlet hose from the tap, and remove water while keeping the Winter hose facing downwards. • When frozen, the product does not operate normally. Make sure to install the product where it will not freeze during winter. - Page 118 How to Handle Freezing • When water is removed completely from the drum, close the hose plug used for removal of residual • Make sure to empty the drum, pour warm water of water, select Rinse and Spin, and press the Start/ 50–60 °C up to the rubber part inside the drum, close Pause button.
-
Page 119: Troubleshooting
TROUBLESHOOTING • Your washing machine is equipped with an automatic error-monitoring system to detect and diagnose problems at an early stage. If your washing machine does not function properly or does not function at all, check the following before you call for service: Diagnosing Problems Symptoms Reason... - Page 120 Symptoms Reason Solution Electrical power cord may not be plugged in or connection may be • Make sure plug fits tightly in wall outlet. loose. Washing • Reset circuit breaker or replace fuse. Do not House fuse blown, circuit breaker machine does increase fuse capacity.
- Page 121 The password for the Wi-Fi that you smartphone and remove it,then register are trying to connect to is incorrect. your appliance on LG SmartThinQ. • Turn off the Mobile data of your smartphone Mobile data for your smartphone is and register the applianceusing the Wi-Fi turned on.
-
Page 122: Error Messages
Error Messages Symptoms Reason Solution Water supply is not adequate in • Check another tap in the house. area. Water supply taps are not • Fully open tap. completely open. Water inlet hose(s) are kinked. • Straighten hose(s). The filter of the inlet hose(s) are •... - Page 123 Symptoms Reason Solution • Close the door completely. Door is not closed properly. If ‘ ’ is not released, call for service. • Unplug the power plug and call for service. • Close the water tap. Water overfills due to the faulty •...
-
Page 124: Warranty
• Damage or failure caused by incorrect electrical current, voltage, or plumbing codes, commercial or industrial use, or use of accessories, components, or consumable cleaning products that are not approved by LG. • Damage caused by transportation and handling, including scratches, dents, chips, and/or other damage to the finish of your product, unless such damage results from defects in materials or workmanship. - Page 125 Not draining caused by clogging Clean the pump filter. of pump filter. Water is not coming because Clean the inlet valve filter water inlet valve filters are or reinstall the water inlet clogged or water inlet hoses are hoses. kinked. Inlet Filter Dispenser Water is not coming because too...
- Page 126 Level Service trips to deliver, pick The warranty covers up, install the product or for manufacturing defects instruction on product use. The only. Service resulting from removal and reinstallation of the improper Installation is not Product. covered. 1° If all screws are not installed Install 4 screws at each properly, it may cause excessive corner (Total 16EA).
- Page 127 Memo...
- Page 128 Memo...
- Page 129 Memo...
- Page 130 Memo...
- Page 131 Memo...
- Page 132 Điều này sẽ đơn giản hoá quá trình lắp đặt và đảm bảo sản phẩm được lắp đặt đúng cách và an toàn. Để hướng dẫn này ở gần sản phẩm sau khi lắp đặt để sau này tham khảo. F2721HTTV www.lg.com Copyright © 2016-2017 LG Electronics Inc. All Rights Reserved...
- Page 133 Bảng Chương trình ................21 Chu trình Tùy chọn ................25 Dry (Sấy khô)..................29 CHỨC NĂNG THÔNG MINH ........30 Sử dụng Ứng dụng LG SmartThinQ ...........30 Sử dụng Smart Diagnosis™ ..............32 BẢO DƯỠNG ............33 Vệ sinh Máy Giặt của bạn ..............33 Vệ sinh Bộ lọc Ngõ vào Nước .............33 Vệ...
-
Page 134: Hướng Dẫn An Toàn
HƯỚNG DẪN AN TOÀN Các nguyên tắc an toàn sau đây được dùng để phòng ngừa các rủi ro hoặc hư hỏng bất ngờ do vận hành sản phẩm không an toàn hoặc không đúng cách. Các nguyên tắc được phân chia thành “CẢNH BÁO” và “THẬN TRỌNG” như mô... - Page 135 YÊU CẦU NỐI ĐẤT CẢNH BÁO Vì sự an toàn của bạn, các thông tin trong hướng dẫn sử dụng này phải được tuân thủ để giảm thiểu rủi ro cháy, nổ, điện giật hoặc để phòng ngừa thiệt hại về tài sản, thương tích cho người hoặc tử vong. •...
-
Page 136: Hướng Dẫn An Toàn Quan Trọng
• Chỉ có nhân viên sửa chữa được • Thiết bị này khá nặng. Có thể cần hai uỷ quyền từ trung tâm dịch vụ LG người trở lên để lắp đặt và di chuyển Electronics mới được tháo rời, thiết bị. - Page 137 • Trong trường hợp lũ lụt, hãy dừng sử có thể gây hỏa hoạn. dụng sản phẩm và liên hệ trung tâm dịch vụ LG Electronics. Tiếp xúc với • Rút phích cắm điện khi bạn vệ sinh sản nước có thể gây điện giật.
- Page 138 An toàn Kỹ thuật khi Sử dụng Tiêu hủy Máy sấy khô Quần áo • Trước khi vứt bỏ thiết bị cũ, rút phích cắm. Hoàn trả phích cắm không còn sử • Không sấy khô các đồ chưa giặt trong dụng được.
-
Page 139: Lắp Đặt
LẮP ĐẶT Thông số kỹ thuật Bu-lông vận chuyển Phích cắm điện Ngăn đựng xà phòng giặt/nước xả Bảng điều khiển Lồng giặt Cửa Ống xả Ốc xả nước Bộ lọc bơm xả Nắp đậy (Vị trí có thể thay đổi tùy vào các sản phẩm) Chân có... -
Page 140: Yêu Cầu Không Gian Lắp Đặt
Yêu cầu Không gian Lắp đặt • Không lắp đặt máy giặt của bạn trong các phòng có thể xảy ra nhiệt độ đóng băng. Các ống đóng băng có Vị trí thể bị cháy dưới áp suất. Độ tin cậy của bộ điều khiển điện tử... -
Page 141: Tháo Dỡ Bao Bì Đóng Gói Và Tháo Bỏ Bu-Lông Vận Chuyển
Tháo dỡ bao bì đóng gói và Tháo Lắp đặt các nắp che lỗ. bỏ Bu-lông Vận chuyển • Định vị các nắp che lỗ kèm theo trong gói phụ kiện và lắp đặt các nắp trong các lỗ bu-lông vận Nhấc máy giặt khỏi bệ... -
Page 142: Sử Dụng Miếng Lót Chống Trượt (Tuỳ Chọn)
• Lắp các vòng đệm cao su để giảm rung. trong khu vực lắp đặt. • Bạn có thể mua các vòng đệm cao su (số hiệu bộ phận 4620ER4002B) ở Trung tâm Dịch vụ LG. Đặt mặt dính của miếng lót chống trượt lên sàn. LƯU Ý... -
Page 143: Chỉnh Thăng Bằng Máy Giặt
Chỉnh thăng bằng Máy Giặt Kết nối Ống Cấp Nếu sàn không bằng phẳng, hãy vặn các chân có thể • Áp lực cấp nước phải nằm trong khoảng 0,1 MPa và điều chỉnh được nếu cần (Không chèn các miếng gỗ v.v. 1,0 MPa (1,0‒10,0 kgf/cm bên dưới các chân). - Page 144 Kết nối Ống với Vòi Nước máy Đẩy ống nối lên trên phần đầu của vòi nước máy sao cho gioăng cao su tạo thành kết nối kín nước. Kết nối ống kiểu vặn vít với vòi nước máy có ren Siết chặt bốn vít cố...
- Page 145 Kết nối Ống với Máy Giặt Đẩy ống nối lên trên phần đầu của vòi nước máy sao cho gioăng cao su tạo thành kết nối kín nước. Đảm bảo rằng không có chỗ nào trong ống bị thắt nút và Siết chặt vành đai ống nối và...
-
Page 146: Lắp Đặt Ống Xả
Lắp đặt Ống Xả • Ống xả không nên đặt cao hơn 100 cm so với sàn. Nước trong máy giặt không thể xả hoặc có thể xả chậm. • Siết chặt ống xả đúng cách sẽ bảo vệ sàn khỏi hư hỏng do rò... -
Page 147: Vận Hành
VẬN HÀNH Sử dụng Máy Giặt Chọn chu trình giặt mong muốn. • Nhấn nút chu trình nhiều lần hoặc vặn núm chọn Trước khi giặt lần đầu tiên, chọn chu trình (Normal 60 chu trình cho đến khi chọn được chu trình mong °C, thêm một nửa lượng chất tẩy), để... -
Page 148: Phân Loại Quần Áo
Phân loại quần áo Thận trọng trước khi bỏ đồ vào máy. • Kết hợp các đồ kích thước lớn và nhỏ trong Tìm nhãn sử dụng trên quần áo của bạn. một mẻ giặt. Bỏ các đồ kích thước lớn vào máy •... -
Page 149: Thêm Các Chất Làm Sạch
Thêm Các chất Làm sạch LƯU Ý • Không để chất tẩy cô đặc lại. Liều lượng Chất tẩy Làm như vậy có thể dẫn đến vón cục, hiệu năng xả kém hoặc có mùi. • Chất tẩy cần được sử dụng theo hướng dẫn của nhà sản xuất chất tẩy đó... - Page 150 • Không trữ chất làm mềm vải trong ngăn đựng xà THẬN TRỌNG phòng quá 2 ngày (Chất làm mềm vải có thể cô đặc • Để tránh bị thương, không đặt ngón tay dưới nắp lại). hoặc giữa nắp và mặt trên khay đựng xà phòng •...
-
Page 151: Bảng Điều Khiển
Bảng Điều khiển Power (Nguồn) Phím chọn chương trình • Nhấn Power để bật máy giặt. • Các chương trình có thể sử dụng theo loại quần áo. • Nhấn và giữ nút Power trong 1 giây để tắt máy giặt. -
Page 152: Bảng Chương Trình
Bảng Chương trình Chương trình Giặt Nhiệt Chương Tải trọng Mô tả Loại Vải độ Phù trình Tối đa hợp 40 °C Normal Cho hiệu năng tốt hơn bằng cách kết Quần áo không phai màu (áo sơ (Lạnh hợp các chuyển động lồng giặt khác mi, đầm ngủ, đồ... - Page 153 Nhiệt Chương Tải trọng Mô tả Loại Vải độ Phù trình Tối đa hợp Speed Wash+Dry Một khối lượng nhỏ đồ giặt có thể Giặt nhanh và Sấy 40 °C Dưới 1,0 kg được sấy khô trong vòng 1 giờ (Giặt nhanh + Sấy) Single Shirt...
- Page 154 Chu trình Sấy Chương trình Mô tả Loại Vải Turbo Dry Lựa chọn chu trình này để giảm thời gian chu trình trong chu trình sấy. (Sấy nhanh) Vải cotton hoặc vải lanh như khăn mặt, áo phông và đồ vải lanh Air Dry Lựa chọn chu trình này để...
- Page 155 Tùy chọn Thêm Add Item Turbo Dry Time Dry Time Delay Steam Turbo Air Dry Chương trình (Thêm đồ (Sấy (Thời gian (Hẹn giờ) (Hơi nước) Wash™ (Sấy gió) giặt) nhanh) sấy) Normal ● ● ● ●** ● ● ● (Thông thường) Allergy Care...
-
Page 156: Chu Trình Tùy Chọn
Chu trình Tùy chọn Add Item (Thêm đồ giặt) Sử dụng chức năng này để thêm đồ hoặc lấy ra các vật Time Delay (Hẹn giờ) lạ. Bạn có thể đặt hẹn giờ sao cho máy giặt sẽ tự động bắt Nhấn nút Add Item. - Page 157 Steam (Hơi nước) Light (Giặt nhẹ) Tính năng Giặt hơi nước tăng cường hiệu quả giặt với Chu trình này phù hợp cho quần áo bị bẩn nhẹ. mức tiêu thụ năng lượng thấp. LƯU Ý Chu trình Refresh giảm nhăn cho áo quần. •...
- Page 158 • Một tiếng bíp sẽ phát ra và thời gian còn lại đối với chức năng Khởi động từ xa. chương trình hiện hành sẽ xuất hiện lại trên màn hình. Bắt đầu một chu trình từ ứng dụng LG SmartThinQ trên điện thoại thông minh của bạn. Refresh Cycle (Chu trình Refresh) LƯU Ý...
- Page 159 • Bạn có thể tải về một chu trình mong muốn thông qua ứng dụng 'LG SmartThinQ'. Để biết thêm về từng chu trình, xem phần ứng dụng 'LG SmartThinQ'. • Có nhiều chu trình khác nhau tùy thuộc vào loại máy giặt bạn mua.
-
Page 160: Dry (Sấy Khô)
Dry (Sấy khô) Vải dễ nhăn và Sợi tổng hợp • Không làm quá tải máy giặt của bạn Sử dụng các chu trình Tự động để sấy hầu hết các đồ. Các cảm biến điện tử đo nhiệt độ khí xả để tăng hoặc •... -
Page 161: Chức Năng Thông Minh
Kiểm tra khoảng cách giữa thiết bị và bộ định tuyến không dây (mạng Wi-Fi). • LG SmartThinQ không chịu trách nhiệm cho bất kỳ vấn đề kết nối mạng hay bất kỳ lỗi, trục trặc, • Nếu khoảng cách giữa thiết bị và bộ định tuyến hoặc các lỗi gây ra do kết nối mạng. - Page 162 Bật Push Alert để nhận thông báo về tình trạng thiết bị. Apple App Store trong điện thoại thông minh. Thực hiện Các thông báo được kích hoạt ngay cả khi ứng dụng LG theo hướng dẫn để tải về và cài đặt ứng dụng.
-
Page 163: Sử Dụng Smart Diagnosis
được thực hiện bởi một trung tâm thông tin khách • Nếu nhân viên trung tâm tổng đài không thể hàng LG Electronics khi thiết bị gặp trục trặc hoặc sự nhận được bản ghi dữ liệu chính xác, bạn có thể... -
Page 164: Bảo Dưỡng
BẢO DƯỠNG Chăm sóc và Vệ sinh Phần bên trong CẢNH BÁO • Rút phích cắm máy giặt trước khi vệ sinh để tránh • Sử dụng khăn lau hoặc vải mềm để lau khô xung rủi ro điện giật. Không tuân theo cảnh báo này có quanh ô... -
Page 165: Vệ Sinh Bộ Lọc Bơm Xả
Vệ sinh Bộ lọc Bơm Xả Sau khi vệ sinh, xoay bộ lọc bơm và lắp ốc xả nước. • Bộ lọc xả thu gom chỉ và các vật thể nhỏ trong quần áo. Thường xuyên kiểm tra bộ lọc còn sạch để đảm bảo sự... -
Page 166: Làm Sạch Khay Đựng Xà Phòng
Làm sạch Khay đựng xà phòng Tub Clean (Làm sạch lồng giặt) Để chất tẩy rửa trong khoang đựng chất tẩy rửa trong Tub Clean là một chu trình đặc biệt để vệ sinh phần bên khoảng thời gian dài hoặc sử dụng máy giặt trong trong máy giặt. -
Page 167: Thận Trọng Trước Hiện Tượng Đóng Băng Trong Mùa Đông
Thận trọng trước hiện tượng • Sau khi khóa vòi nước máy, ngắt kết nối ống cấp nước lạnh với vòi nước máy và xả bỏ nước trong lúc Đóng băng Trong Mùa đông giữ ống hướng xuống dưới. • Khi bị đóng băng, sản phẩm không hoạt động bình thường. - Page 168 Làm cách nào để Xử lý Đóng băng • Khi nước được xả bỏ hoàn toàn khỏi lồng giặt, đóng nút bịt ống dùng cho xả bỏ nước tồn dư, chọn Rinse • Đảm bảo lồng giặt trống rỗng, dội nước ấm 50–60 °C và...
-
Page 169: Xử Lý Sự Cố
XỬ LÝ SỰ CỐ • Máy giặt của bạn được trang bị hệ thống giám sát lỗi tự động để phát hiện và chẩn đoán các sự cố ở giai đoạn sớm. Nếu máy giặt của bạn không hoạt động đúng chức năng hoặc không hoạt động gì cả, hãy kiểm tra như sau đây trước khi gọi cho bộ... - Page 170 Triệu chứng Nguyên nhân Giải pháp Có thể chưa cắm dây nguồn điện • Đảm bảo phích cắm lắp chặt trong ổ cắm hoặc lỏng kết nối. tường. • Bật lại cầu dao hoặc thay cầu chì. Không Máy giặt không Nổ...
- Page 171 đó đăng kết nối không chính xác. ký thiết bị của bạn trên LG SmartThinQ. • Tắt dữ liệu di động của điện thoại thông Dữ liệu di động cho điện thoại thông minh của bạn và...
-
Page 172: Thông Báo Lỗi
Thông báo Lỗi Triệu chứng Nguyên nhân Giải pháp Nguồn nước trong khu vực bị • Kiểm tra vòi nước máy khác trong nhà. yếu. Các vòi cấp nước máy không mở • Mở hết mức vòi nước máy. hoàn toàn. (Các) ống cấp nước bị... - Page 173 Triệu chứng Nguyên nhân Giải pháp • Đóng cửa hoàn toàn. Cửa không được đóng khít. Nếu chữ “ ” không biến mất, hãy gọi cho bộ phận dịch vụ. • Rút phích cắm điện và gọi cho bộ phận dịch vụ.
-
Page 174: Bảo Hành
• Việc tháo dỡ và lắp đặt lại Sản phẩm nếu thiết bị được lắp đặt ở địa điểm không tiếp cận được hoặc không được lắp đặt tuân theo các hướng dẫn lắp đặt đã phát hành, bao gồm các hướng dẫn người dùng và lắp đặt của LG. - Page 175 Không xả do tắc nghẽn bộ lọc Vệ sinh bộ lọc bơm. bơm. Nước không chảy vào do các Vệ sinh bộ lọc van cấp bộ lọc van cấp nước bị tắc hoặc nước hoặc lắp đặt lại các các ống cấp nước bị gập. ống cấp nước.
- Page 176 Ngang bằng Các chuyến dịch vụ phân phối, Việc bảo hành chỉ bao thu gom, lắp đặt sản phẩm hoặc gồm các lỗi trong quá trình hướng dẫn sử dụng sản phẩm. sản xuất. Không bao gồm Tháo dỡ và lắp đặt lại Sản dịch vụ...
- Page 177 Ghi nhớ...
- Page 178 Ghi nhớ...
- Page 179 Ghi nhớ...
- Page 180 Ghi nhớ...