Table of Contents
Advertisement
Quick Links
Advertisement
Table of Contents

Summary of Contents for Milwaukee MA873
- Page 1 INSTRUCTION MANUAL MA873 Digital Glucose Refractometer SATISFACTION GUARANTEED...
- Page 2 THANK YOU for choosing Milwaukee Instruments! This instruction manual will provide you the necessary information for correct use of the meters. All rights are reserved. Reproduction in whole or in part is prohibited without the written consent of the copyright owner,...
-
Page 3: Table Of Contents
TABLE OF CONTENTS 1. FUNCTIONAL DESCRIPTION .................4 2. GENERAL DESCRIPTION ..................6 3. SPECIFICATIONS ......................7 4. PRINCIPLE OF OPERATION ...................8 5. MEASUREMENT GUIDELINES ................9 6. CALIBRATION PROCEDURE ................10 7. MEASUREMENT PROCEDURE................12 8. MAKING A STANDARD % GLUCOSE SOLUTION ........13 9. CHANGING TEMPERATURE UNIT ..............14 10. -
Page 4: Functional Description
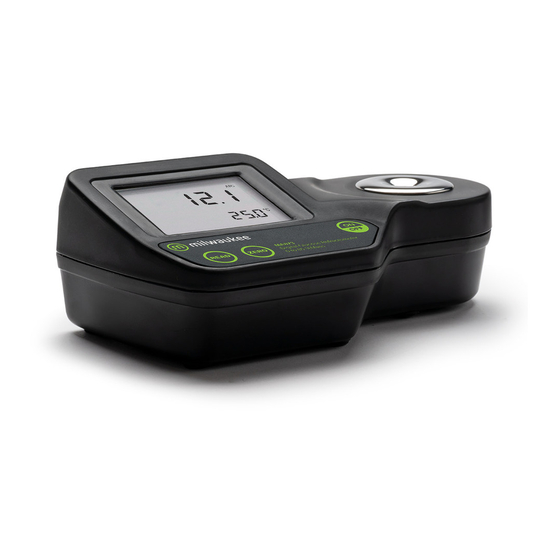
4 MA873 Digital Glucose Refractometer 1. FUNCTIONAL DESCRIPTION Display A. BATTERY STATUS ICON (BLINKS WHEN LOW BATTERY CONDITION DETECTED) B. MEASUREMENT IN PROGRESS TAG C. SETUP: FACTORY CALIBRATION TAG D. CAL: CALIBRATION TAG E. PRIMARY DISPLAY (DISPLAYS MEASUREMENT AND ERROR MESSAGES) F. - Page 5 FUNCTIONAL DESCRIPTION 5 Front Panel MA873 Digital Glucose Refractometer 0 to 85 %Mass A. LIQUID CRYSTAL DISPLAY (LCD) B. READ KEY (USER MEASUREMENT) C. ZERO KEY (USER CALIBRATION) D. ON/OFF E. PRIMARY DISPLAY F. SECONDARY DISPLAY G. STAINLESS STEEL SAMPLE WELL AND PRISM Bottom H.
-
Page 6: General Description
Thank you for choosing Milwaukee. This instruction manual will provide you the necessary information for correct use of the meter. The MA873 is an optical instrument that employs the measurement of refractive index to determine the % Glucose in aqueous solutions. -
Page 7: Specifications
SPECIFICATIONS 7 3. SPECIFICATIONS Range 0 to 85% 0 to 80 °C (32 to 175 °F) Resolution 0.1% 0.1 °C (0.1 °F) Accuracy ± 0.2% ± 0.3 °C (± 0.5 °F) Light Source Yellow LED Measurement Time Approximately 1.5 seconds Minimum Sample Volume 100 µL (cover prism totally) Sample Cell SS ring and flint glass prism... -
Page 8: Principle Of Operation
θ = angle of refraction In the MA873, light from an LED passes through a prism in contact with the sample. An image sensor determines the critical angle at which the light is no longer refracted through the sample. The... -
Page 9: Measurement Guidelines 9
MEASUREMENT GUIDELINES 9 Sample Well Sample Prism Lens Shadow Linear Image Sensor 5. MEASUREMENT GUIDELINES y Handle instrument carefully. Do not drop. y Do not immerse instrument under water. y Do not spray water to any part of instrument except the “sample well”... -
Page 10: Calibration Procedure
10 MA873 Digital Glucose Refractometer 6. CALIBRATION PROCEDURE Calibration should be performed daily, before measurements are made, when the battery has been replaced, or between a long series of measurements. 1. Press the ON/OFF key, then release. Two instrument test screens will be displayed briefly;... - Page 11 CALIBRATION PROCEDURE 11 3. Press the ZERO key. If no error messages appear, your unit is calibrated. (For a description of error messages see "ERROR MESSAGES" section). Note: The 0.0 screen will remain until a sample is measured or the power is turned off. 4.
-
Page 12: Measurement Procedure
12 MA873 Digital Glucose Refractometer 7. MEASUREMENT PROCEDURE Verify the instrument has been calibrated before taking measurements. 1. Wipe off prism surface located at the bottom of the sample well. 2. Using plastic pipettes, drip sample onto the prism surface. -
Page 13: Making A Standard % Glucose Solution 13
MAKING A STANDARD % GLUCOSE SOLUTION 13 5. Using plastic pipettes, rinse prism and sample well with distilled or deionized water. Wipe dry. The instrument is ready for the next sample. 8. MAKING A STANDARD % GLUCOSE SOLUTION To make a Glucose Solution, follow the procedure below: y Place container (such as a glass vial or dropper bottle that has a cover) on an analytical balance. -
Page 14: Changing Temperature Unit
14 MA873 Digital Glucose Refractometer 9. CHANGING TEMPERATURE UNIT To change the temperature measurement unit from Celsius to Fahrenheit (or vice versa), follow this procedure. 1. Press and hold the ON/OFF key continuously for aproximately 8 seconds. The LCD will display the “all segment” screen followed by a screen with the model number on the primary display and the version number on the secondary display. -
Page 15: Error Messages 15
10. ERROR MESSAGES Error Code Description General failure. Cycle power to instrument. If instrument still has error, contact Milwaukee. Sample is reading lower LO Top display than the 0 % standard used for meter calibration. Sample exceeds maximum HI Top display measurement range. - Page 16 16 MA873 Digital Glucose Refractometer Battery segment <5% of battery life is blinking remaining. Temperature Temperature values measurement out are blinking of sampling range 0.0°C or 80.0°C (0.0 to 80.0°C). Outside temperature ATC segment compensation range blinking (10 to 40°C).
-
Page 17: Battery Replacement 17
BATTERY REPLACEMENT 17 11. BATTERY REPLACEMENT To replace the instrument’s battery, follow these steps: y Turn the instrument OFF by pressing the ON/OFF key. y Turn instrument upside down and remove the battery cover by turning it counterclockwise. y Extract the battery from its location. y Replace with fresh 9V battery making certain to observe polarity. -
Page 18: Certification
Damage due to accidents, misuse, tampering or lack of prescribed maintenance is not covered by warranty. If service is required, contact your local Milwaukee Instruments Technical Service. If the repair is not covered by the warranty, you will be notified of the charges incurred. - Page 19 Milwaukee Instruments reserves the right to make improvements in design, construction and appearance of its products without advance notice.
- Page 20 THANK YOU FOR CHOOSING Sales and Technical Service Contacts: Milwaukee Electronics Kft. Alsó-kikötő sor 11C H-6726 Szeged - HUNGARY tel: +36 62 428 050 fax: +36 62 428 051 www.milwaukeeinst.com e-mail: sales@milwaukeeinst.com Milwaukee Instruments, Inc. 2950 Business Park Drive Rocky Mount, NC 27804 USA...