Table of Contents
Advertisement
Available languages
Available languages
Owner's Manual / Manual del Propietario
Automatic Battery Charger
& Engine Starter
Cargador de batería automático
y arrancador
AC Input: 120V AC, 60 Hz
10A Cont., 50A Int.
DC Output: 6V/12V DC
6V/12V: 2A Cont., 6/50A Int.
12V: 250A Intermittent
CAUTION:
Read and follow all safety
rules and operating instructions
before every use of this product.
SAVE THESE INSTRUCTIONS.
Model
71341
de seguridad e instrucciones de uso
antes de cada uso de este producto.
GUARDE ESTAS INSTRUCCIONES.
ATENCIÓN:
Lea y siga todas las reglas
0099002218-01
Advertisement
Table of Contents
Troubleshooting

Related Manuals for DieHard 71341


Summary of Contents for DieHard 71341
- Page 1 AC Input: 120V AC, 60 Hz 10A Cont., 50A Int. DC Output: 6V/12V DC 6V/12V: 2A Cont., 6/50A Int. 12V: 250A Intermittent Model 71341 CAUTION: ATENCIÓN: Read and follow all safety Lea y siga todas las reglas rules and operating instructions de seguridad e instrucciones de uso before every use of this product.
- Page 2 WITH PROOF OF SALE, a defective product will receive free warranty service. The DieHard brand name is used under license. Direct all claims for warranty service to: Schumacher Electric Corporation, 1-800-621-5485, www.batterychargers.com This warranty gives you specific legal rights, and you may also have other rights which vary from state to state.
-
Page 3: Important Safety Instruction
1. IMPORTANT SAFETY INSTRUCTION 1.1 SAVE THESE INSTRUCTIONS – dropped, or otherwise damaged This manual contains important in any way; take it to a qualified safety and operating instructions. serviceman. 1.2 Keep out of reach of children. 1.9 Do not disassemble charger; take it to a qualified serviceman 1.3 Do not expose the charger to rain when service or repair is required. -
Page 4: Preparing To Charge
2.6 Be extra cautious to reduce risk of 2.8 Use the charger for charging dropping a metal tool onto battery. only 6V and 12V LEAD-ACID It might spark or short-circuit (STD, GEL, AGM or deep-cycle) battery or other electrical part that rechargeable batteries. -
Page 5: Follow These Steps When Battery Is Installed In Vehicle
6. FOLLOW THESE STEPS WHEN BATTERY IS INSTALLED IN VEHICLE WARNING: A SPARK NEAR P, +) ungrounded post of battery. THE BATTERY MAY CAUSE Connect NEGATIVE (BLACK) clip A BATTERY EXPLOSION. TO to vehicle chassis or engine block REDUCE THE RISK OF A SPARK away from battery. -
Page 6: Grounding And Ac Power Cord Connections
8. GROUNDING AND AC POWER CORD CONNECTIONS 8.1 This battery charger is for use on a States is not recommended and nominal 120 volt circuit and has a should not be used. grounded plug. The charger must 8.3 USING AN EXTENSION CORD be grounded, to reduce the risk The use of an extension cord is of electric shock. - Page 7 DIGITAL DISPLAY above 100% (14.6 volts) will read HI . The Digital Display gives digital If you get a HI or LO reading, have indication of voltage, % of charge the electrical system checked by a or alternator status. It also gives qualified technician.
- Page 8 BATTERY TYPE BUTTON The AGM batteries are a variant Use this button to select the type of Sealed VRLA (valve regulated of battery. lead-acid) batteries. Popular uses include high-performance engine • STANDARD – Used in cars, trucks starting, power sports, deep-cycle, and motorcycles, these batteries solar and storage batteries.
- Page 9 5. Select the battery type and output is shut off. The digital display charge rate. will show FNN where nn is an error 6. Press the START button to code (see Troubleshooting for a begin charging immediately. description of the error codes). Do If not pressed within 30 not continue attempting to charge seconds, charging will begin...
- Page 10 USING THE ENGINE START NOTE: If the engine does turn FEATURE over but never starts, there is not a Your battery charger can be used problem with the starting system; to jump start your car if the battery there is a problem somewhere else is low.
-
Page 11: Maintenance And Care
button is not pressed within 30 FAN OPERATION seconds, the unit will search for The fan will operate as needed a battery. If the unit detects a and it is normal for the fan to battery that is properly connected, sometimes operate continuously. -
Page 12: Troubleshooting
CODE DESCRIPTION REASON/SOLUTION The charger shut off because Make sure the charger does not have the side its internal temperature exceeds ventilation holes blocked. Move the charger out limit. of the sun and into the shade. The battery voltage dropped too May be caused by a drain on the battery or the low during the maintain mode. - Page 13 Schumacher Electric Corporation, Mount Prospect, IL 60056 DieHard y el logotipo de DieHard son marcas registradas de KCD IP, LLC y / o Transform SR Brands LLC y se utilizan bajo licencia de Schumacher Electric Corporation.
-
Page 14: Instrucciones Importantes De Seguridad
1. INSTRUCCIONES IMPORTANTES DE SEGURIDAD GUARDE ESTAS INSTRUCCIONES – No utilice el cargador si el mismo Este manual contiene instrucciones recibió un golpe fuerte, si se cayó operativas y de seguridad de o si sufrió daños de cualquier otra importancia. forma;... - Page 15 Utilice protección visual y corporal No utilice elementos personales de completa, incluyendo gafas de metal tales como anillos, pulseras, seguridad y prendas de protección. collares y relojes al trabajar con una Evite tocar sus ojos mientras trabaje batería de plomo-ácido. Una batería en forma cercana a la batería.
-
Page 16: Ubicación Del Cargador
4. UBICACIÓN DEL CARGADOR Ubique el cargador a la mayor batería gotee sobre el cargador al leer distancia posible de la batería como lo el peso específico del electrolito o al permitan los cables de CC. cargar la batería. Nunca ubique el cargador No utilice el cargador en un área directamente por encima de la batería cerrada o restrinja la ventilación en... -
Page 17: Conexiones A Tierra Y Energía De Ca
7. SIGA ESTOS PASOS CUANDO LA BATERÍA SE ENCUENTRE FUERA DEL VEHÍCULO ADVERTENCIA: Ubíquese junto con el extremo libre UNA CHISPA PROVOCADA CERCA del cable que previamente sujetó al DE LA BATERÍA PUEDE CAUSAR borne NEGATIVO (NEG, N, -) de la LA EXPLOSIÓN DE LA BATERÍA. -
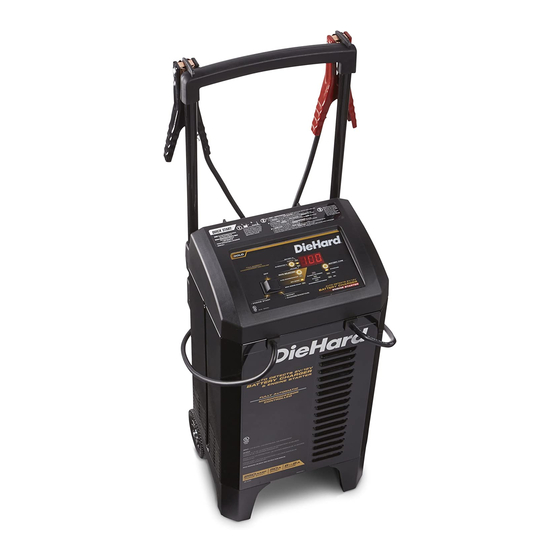
Page 18: Instrucciones De Montaje
9. INSTRUCCIONES DE MONTAJE Desenrede todos los cordones y Extienda el asa desde la posición extienda los cables antes de usar el retraída tirando de él hacia arriba hasta cargador de baterías. que encaje en su lugar. (Pulse los botones pequeños de plata hacia el interior, si es necesario.) 10. - Page 19 • Tensión – La pantalla digital muestra NOTA: Consulte la sección la tensión en los ganchos de batería Instrucciones de Operación para pertenecientes al cargador en volts obtener una descripción completa de C.C. de los modos del cargador. BOTÓN DE TIPO DE BATERÍA BOTÓN DE START/STOP Utilice este botón para seleccionar el Presiónelo para que la batería...
-
Page 20: Instrucciones De Operación
11. INSTRUCCIONES DE OPERACIÓN ADVERTENCIA: UNA CHISPA 3. Conectar la batería según las PROVOCADA CERCA DE LA BATERÍA instrucciones que indicadas en las PUEDE CAUSAR UNA EXPLOSIÓN. secciones 6 y 7. 4. Conecte el cargador a un CARGA DE LA BATERÍA tomacorriente 120 Voltios CA con EN EL VEHÍCULO conexión a tierra. - Page 21 MODO DE CARGA AUTOMÁTICA forma segura y mantener una batería Cuando se selecciona la velocidad en buen estado durante largos períodos 6 <> 2A Charge, el cargador de tiempo. Ahora, los problemas con cambia del modo de mantenimiento la batería, problemas eléctricos del automáticamente después que la vehículo, conexiones equivocadas u batería se cargue.
-
Page 22: Mantenimiento Y Cuidado
5. Si el motor no arranca, cargue la máxima que se requiere para el batería por 5 minutos más antes sistema de arranque hasta 7 segundos. de darle arranque nuevamente. • Enfriar – Después de intentar arrancar 6. Después de que el motor se puso varias veces durante el período de 3 en marcha desenchufe el cable minutos en que la unidad está... - Page 23 13. LOCALIZACIÓN Y RESOLUCIÓN DE PROBLEMAS Y CODIGOS DE ERROR Codigos de Error CÓDIGO DESCRIPCIÓN RAZÓN/SOLUCIÓN El voltaje de la batería todavía La batería podría estar en malas condiciones. está debajo de 10V (para una Verifíquela o reemplácela. batería 12V) o de 5V (para una batería 6V) después de 2 horas de carga.
-
Page 24: Antes De Devolver A Reparaciones
Localización y Solución de Problemas PROBLEMA CAUSA POSIBLE SOLUCIÓN El cargador no se Tomacorriente de CA fuera de Controle la posible presencia de enciende incluso funcionamiento. fusibles abiertos o disyuntores que al estar bien suministren energía al tomacorriente conectado. de CA. Conexión eléctrica deficiente.