
Related Manuals for Dell V313


Summary of Contents for Dell V313
-
Page 1: Method
Dell V310 Series User's Guide April 2009 www.dell.com | support.dell.com Machine type(s): 4443 Model(s): 1d1, 1dw, 5dw... -
Page 2: Additional Assistance, Use The Service Center Link
DELL logo are trademarks of Dell Inc.; Microsoft and Windows are registered trademarks of Microsoft Corporation. Other trademarks and trade names may be used in this document to refer to the entities claiming the marks and names of their products. Dell Inc. disclaims any proprietary interest... -
Page 3: Table Of Contents
Understanding the parts of the printer...11 Ordering and replacing supplies...13 Replacing ink cartridges...13 Ordering ink cartridges...14 Recycling Dell products...15 Using the printer control panel buttons and menus...16 Using the printer control panel...16 Using the printer menus...18 Changing temporary settings into new default settings...19 Changing the Power Saver timeout...20... - Page 4 Printing specialty documents...32 Printing on both sides of the paper (duplexing) manually...33 Working with photos...35 Printing from a Bluetooth-enabled device...40 Managing print jobs...43 Copying...45 Tips for copying...45 Making copies...45 Copying photos...46 Enlarging or reducing images...46 Adjusting copy quality...46 Making a copy lighter or darker...47 Collating copies using the printer control panel...47 Repeating an image on one page...48 Copying multiple pages on one sheet...48...
- Page 5 Cleaning the exterior of the printer...74 Cleaning the scanner glass...75 Troubleshooting...76 Before you troubleshoot...76 Using the Service Center to solve printer problems...76 If Troubleshooting does not solve your problem...76 Setup troubleshooting...76 Jams and misfeeds troubleshooting...81 Print troubleshooting...83 Copy and scan troubleshooting...84 Memory card troubleshooting...86 Wireless troubleshooting...88 Index...103...
-
Page 7: Safety Information
Safety information Connect the power cord to an electrical outlet that is near the product and easily accessible. Do not place or use this product near water or wet locations. Use only the power supply and power cord provided with this product or the manufacturer's authorized replacements. -
Page 8: About Your Printer
About your printer Thank you for choosing this printer! We've worked hard to make sure it will meet your needs. To start using your new printer right away, use the setup materials that came with the printer, and then skim the User’s Guide to learn how to perform basic tasks. -
Page 9: Finding Information About The Printer
“Deep Clean Printhead” features. These features clean the printhead nozzles to improve the quality of your prints. Recycling • Return empty ink cartridges for reuse or recycling through the Dell Cartridge Collection Program. To return an empty ink cartridge, go to www.dell.com/recycling to request a postage-paid bag. •... - Page 10 Note: The Service Tag and Express Service Code appear on labels located on your printer. Installation software CD Note: If you purchased your Dell computer and printer at the same time, then documentation and drivers for your printer are already installed on your computer.
-
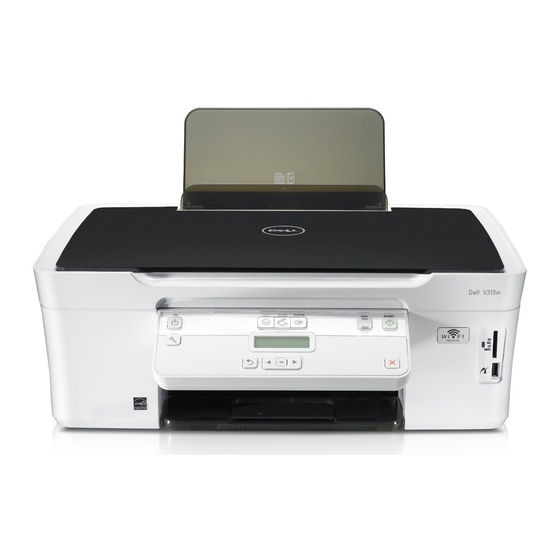
Page 11: Understanding The Parts Of The Printer
Understanding the parts of the printer Use the Paper support Load paper. Wi-Fi indicator Check wireless status. Note: This feature is available in selected models only. Card reader light Check card reader status. The light blinks to indicate that a memory card is being accessed. - Page 12 Use the Scanner glass Scan and copy photos and documents. Security slot Install an anti-theft cable on your printer. Power supply with port Connect the printer to a power source. USB port Connect the printer to a computer using a USB cable. Warning—Potential Damage: Do not touch the USB port except when plugging in or removing a USB cable or installation cable.
-
Page 13: Ordering And Replacing Supplies
Ordering and replacing supplies Replacing ink cartridges Make sure you have a new ink cartridge or cartridges before you begin. You must install new cartridges immediately after removing the old ones, or the ink remaining in the printhead nozzles may dry out. Turn on your printer. -
Page 14: Ordering Ink Cartridges
Color cartridge Color cartridge, high yield Licensed for a single use only. After use, return this cartridge to Dell for remanufacturing, refilling, or recycling. To know more about recycling Dell products, visit www.dell.com/recycling. Available only on the Dell Web site at www.dell.com/supplies. -
Page 15: Recycling Dell Products
Recycling Dell products To return Dell products to Dell for recycling: Click or Start. Click All Programs or Programs, and then select the printer program folder from the list. Select Printer Home. Choose your printer from the printer drop-down list. -
Page 16: Using The Printer Control Panel Buttons And Menus
Using the printer control panel buttons and menus Using the printer control panel The following diagrams explain the sections of the printer control panel: Use the: Power button Copy button Scan button Photo button Color/Black Start button Using the printer control panel buttons and menus •... - Page 17 Use the: Cancel button Display Note: The display is turned off in Power Saver mode. Select button Arrow buttons Back button Setup button Using the printer control panel buttons and menus • Cancel a print, copy, or scan job in progress. •...
-
Page 18: Using The Printer Menus
Using the printer menus Copy menu Scan menu Copies Scan to Quality Lighter/Darker Resize Original Size Photo Reprint Collate Pages per Sheet Copies per Sheet Content Type ID Card Copy This menu appears only when a PictBridge-enabled camera is inserted into the PictBridge port. Photo menu Easy Photo Print Photos... -
Page 19: Changing Temporary Settings Into New Default Settings
Setup menu Paper Setup Device Setup • • Paper Size Language • • Paper Type Country/Region • Maintenance Power Saver • • Ink Levels Auto Screen Dim • • Clean Printhead Eco-Mode • • Deep Clean Clear Settings Timeout Printhead Network Setup •... -
Page 20: Changing The Power Saver Timeout
Photo menu The following Photo options will not time out after two minutes of inactivity or after you turn off the printer, but they will return to the factory default settings when a memory card or flash drive is removed. •... -
Page 21: Resetting To Factory Settings
Resetting to factory settings Resetting to factory default settings will delete all the printer settings you have previously selected. Using the printer control panel menus From the printer control panel, press Press the arrow buttons to scroll to Defaults, and then press Press the arrow buttons to scroll to Set Defaults, and then press Press the arrow buttons to scroll to Use Factory, and then press When prompted to set the initial settings of your printer, make your selections using the printer control panel... - Page 22 Press the arrow buttons to scroll to Eco-Mode. Select the Eco-Mode setting, and then press Press until you exit Setup, or press another mode button. Using the printer control panel buttons and menus...
-
Page 23: Using The Printer Software
If you did not install these additional programs during initial installation, then reinsert the installation software CD, run the installation software, and then select Install Additional Software from the Software Already Installed screen. Printer software Use the Dell Printer Home (referred to as Printer Home) Dell Fast Pics (referred to as Fast Pics) •... - Page 24 Add, edit, or delete contacts in the built-in phone book. • Access the Dell Fax Setup Utility. Use the Fax Setup Utility to set the Speed Dial and Group Dial numbers, set Ringing and Answering, and print fax history and status reports.
-
Page 25: Updating The Printer Software (Windows Only)
In the Start Search or Run box, type D:\setup.exe, where D is the letter of your CD or DVD drive. Follow the instructions on the Welcome screen. Using the World Wide Web Updated printer software may be available at www.support.dell.com. Using the printer software... -
Page 26: Loading Paper And Original Documents
Loading paper and original documents Loading paper Fan the paper. Center the paper on the paper support. Adjust the paper guides so they rest against the edges of the paper. Note: Do not force paper into the printer. The paper should be flat against the paper support, and the edges should be flush against both paper guides. - Page 27 Load up to: 25 sheets of heavyweight matte paper 20 sheets of banner paper 10 envelopes 25 sheets of labels Make sure that: • The print side of the paper is faceup. • The paper guides rest against the edges of the paper. •...
-
Page 28: Saving Paper Default Settings
Load up to: 25 greeting cards, index cards, postcards, or photo cards 25 sheets of photo/glossy paper 10 iron-on transfers 50 transparencies Saving paper default settings You can set the default paper size, paper type, and photo print size for the documents and photos that you print. Note: These default settings apply only to print, copy, and scan jobs that you initiate from the printer. -
Page 29: Loading Original Documents On The Scanner Glass
• If you want to set the default photo print size: Press the arrow buttons to scroll to Defaults, and then press Press to select Photo Print Size. Press the arrow buttons to select the default photo print size for the printer, and then press Press until you exit Setup, or press another mode button. -
Page 30: Printing
Printing Tips for printing • Use the appropriate paper for your print job. • Select a higher print quality for better prints. • Make sure there is enough ink in the ink cartridges. • Remove each sheet as it is printed when printing photos or when working with specialty media. •... -
Page 31: Printing Multiple Pages On One Sheet
Click OK to close any printer software dialogs. Click OK or Print. Printing pages in reverse order By default, the first page is printed first. If you want to reverse the order in which pages print to make documents ready to read with the first page on top, then do the following: With a document open, click File ... -
Page 32: Printing Specialty Documents
Select and print the document: If the printer is using a USB connection Press the arrow buttons to select the file name of the document that you want to print or the folder where the document is saved in the memory device. Press , and then press If the printer is using a Wireless connection (selected models only) -
Page 33: Printing On Both Sides Of The Paper (Duplexing) Manually
Printing labels Load the label sheets in the printer. Send the print job: With a document open, click File Print. Click Properties, Preferences, Options, or Setup. From the Paper Size list of the Print Setup tab, choose a paper size that matches the size of the label sheet. If no paper size matches the label sheet size, then set a custom size. - Page 34 From the 2-Sided Printing section, select Manual. Note: The Print Instruction Page to Assist in Reloading item is selected automatically. Click OK. The printer prints the odd-numbered pages and the instruction sheet. Flip and reload the paper, following the directions on the instruction sheet to complete the print job. Note: To return to single-sided printing, return to the Advanced tab.
-
Page 35: Working With Photos
Working with photos Using a memory card or flash drive with the printer Memory cards and flash drives are storage devices frequently used with cameras and computers. You can remove the memory card from the camera or the flash drive from the computer and insert it directly into the printer. Insert a memory card into the card slot or a flash drive into the USB port. -
Page 36: Printing Photos Using The Printer Control Panel
Supported memory cards and file types Memory Card • Secure Digital (SD) • Micro Secure Digital (with adapter) (Micro SD) • Mini Secure Digital (with adapter) (Mini SD) • MultiMedia Card (MMC) • Reduced Size MultiMedia Card (with adapter) (RS-MMC) •... -
Page 37: Printing Photos From A Memory Device Using The Printer Software
Press the Color/Black button to set a color or black-and-white print. When you select color or black-only printing, the light near your choice comes on. Press Note: For best results, allow the prints to dry at least 24 hours before stacking, displaying, or storing. Printing photos from a memory device using the printer software Load photo paper with the glossy or printable side faceup. -
Page 38: Printing Photos From A Pictbridge-Enabled Digital Camera
Printing photos from a PictBridge-enabled digital camera PictBridge is a technology available in most digital cameras that lets you print directly from your digital camera without using a computer. Insert one end of the USB cable into the camera. Note: Use only the USB cable that came with the camera. Insert the other end of the cable into the PictBridge port on the front of the printer. -
Page 39: Printing Photos From A Memory Device Using The Proof Sheet
Printing photos from a memory device using the proof sheet Load letter- or A4-size plain paper. From the printer control panel, press Insert a memory card or flash drive. Press the arrow buttons to scroll to Proof Sheet, and then press Press the arrow buttons to select an option to print a proof sheet. -
Page 40: Printing Photos From Camera Using Dpof
Printing photos from a digital camera using DPOF If your camera supports Digital Print Order Format (DPOF), then you can specify which photos to print, how many of each, and the print settings while the memory card is still in the camera. The printer recognizes these settings when you insert the memory card into the printer or connect the camera to the printer. - Page 41 • The Bluetooth-enabled device you are using requires users to set up a Bluetooth connection on every print job. For more information, see the documentation for your Bluetooth device. • The name of the Bluetooth device you are using is automatically deleted from the Bluetooth device list. When the Bluetooth security level is set to High, the printer saves a list of up to eight Bluetooth devices that have previously set up a connection with the printer.
-
Page 42: Setting The Bluetooth Security Level
Setting the Bluetooth security level Insert a Bluetooth USB adapter into the USB port. Bluetooth Dongle Connected appears on the display. Note: A Bluetooth adapter is not included with the printer. From the printer control panel, press Press the arrow buttons to scroll to Bluetooth Setup, and then press button Press the arrow buttons to scroll to Security Level, and then press Press the arrow buttons to select the security level, and then press •... -
Page 43: Managing Print Jobs
Bluetooth Dongle Connected appears on the display. Warning—Potential Damage: Do not touch cables, any network adapter, any connector, the USB Bluetooth adapter, or the printer in the areas shown while actively printing, reading, or writing from a Bluetooth-enabled device. A loss of data can occur. Notes: •... -
Page 44: Pausing Print Jobs
Changing the printing mode for a single print job With a document open, click File Print. Click Properties, Preferences, Options, or Setup. Select Automatic, Quick Print, Normal, or Best. Note: Printing in Draft mode uses less ink and is ideal for printing text documents. Pausing print jobs Click , or click Start and then click Run. -
Page 45: Copying
Copying Automatic Document Feeder (ADF) Use the ADF for multiple-page documents. Note: The ADF is available only on selected models. If you purchased a printer without an ADF, then load original documents or photos on the scanner glass. Tips for copying •... -
Page 46: Copying Photos
Copying photos Load photo paper with the glossy or printable side faceup. (If you are not sure which side is the printable side, then see the instructions that came with the paper.) Place a photo facedown on the scanner glass. From the printer control panel, press Press until Photo Reprint appears. -
Page 47: Making A Copy Lighter Or Darker
Press the arrow buttons to set the copy quality to Automatic, Draft, Normal, or Photo, and then press your setting. Press Making a copy lighter or darker Load paper. Load an original document faceup into the ADF or facedown on the scanner glass. From the printer control panel, press Press until Lighter/Darker appears. -
Page 48: Repeating An Image On One Page
Repeating an image on one page You can print the same page image multiple times on one sheet of paper. This option is helpful when creating items such as labels, decals, flyers, and handouts. Load paper. Load an original document faceup into the ADF or facedown on the scanner glass. From the printer control panel, press Press until Copies per Sheet appears. -
Page 49: Canceling Copy Jobs
Press the left or right arrow button to select the number of copies, and then press the Color/Black button to set a color or black-and-white copy. When you select color or black-only printing, the light near your choice comes on. Press Load the next page of the document. -
Page 50: Scanning
Scanning Automatic Document Feeder (ADF) Use the ADF for multiple-page documents. Note: The ADF is available only on selected models. If you purchased a printer without an ADF, then load original documents or photos on the scanner glass. Tips for scanning •... -
Page 51: Scanning To A Flash Drive Or Memory Card
Press the arrow buttons to select an application, and then press Press the arrow buttons to select the resolution quality and the original image size. Press a selection. Press to start scanning. The scan is complete when the application you selected in step 6 opens on the destination computer, and the scan appears within the application as a new file. -
Page 52: Scanning Documents Into An Editing Application
Repeat steps 9 and 10 until all the photos that you want to scan are saved to the printer memory. When asked if you want to scan another page, press the arrow buttons to scroll to No, and then press The scan is complete when the photo editing application you selected in step 6 opens on the destination computer, and the scan appears within the application as a new file. -
Page 53: Scanning Directly To E-Mail
Scanning directly to e-mail Load an original document faceup into the ADF or facedown on the scanner glass. Click or Start. Click All Programs or Programs, and then select the printer program folder from the list. Select Printer Home. Choose your printer from the printer drop-down list. Click Email, and then select Photo, Document or PDF. -
Page 54: Canceling Scan Jobs
Why am I being asked for a PIN? PINs are a security measure used to restrict the scanned information from going into certain locations, or to keep what is being scanned from being seen or used by others. You may be prompted to enter a PIN if the network computer you are scanning to requires one. -
Page 55: Networking
Networking Installing the printer on a wireless network Wireless network compatibility Your printer contains an IEEE 802.11g wireless print server. Your printer is compatible with IEEE 802.11 b/g/n routers that are Wi-Fi certified. If you are having issues with an n router, verify with your router manufacturer that the current mode setting is compatible with g devices, as this setting varies depending on the router brand/model. -
Page 56: Printing A Network Setup Page
Every device on the wireless network must use the same WPA passphrase. WPA security is an option only on infrastructure networks with wireless access points and network cards that support WPA. Most newer wireless network equipment also offers WPA2 security as an option. Note: If your network uses WPA or WPA2 security, then select WPA Personal when you are prompted to select the type of security your network uses. -
Page 57: Installing The Printer On Other Computers
Installing the printer on a wireless network Before you install the printer on a wireless network, make sure that: • Your wireless network is set up and working properly. • The computer you are using is connected to the same wireless network where you want to set up the printer. Close all open software programs. -
Page 58: Special Wireless Installation Instructions
Special wireless installation instructions The following instructions apply to customers outside of North America who are using a wireless broadband box. Some examples of these boxes include LiveBox, AliceBox, N9UF Box, FreeBox, and Club Internet. Before you begin • Make sure your box is wireless-enabled and activated to work on a wireless network. For more information about configuring the box to work wirelessly, see the documentation that came with your box. -
Page 59: Advanced Wireless Setup
Type the IP address you want to assign to the printer in the IP Address field. Click the Submit button. The Submitting Selection message appears. To confirm that the address was successfully assigned, type the static IP address in the Web browser address field and then press Enter. - Page 60 Follow the instructions in the “Set up a wireless ad hoc network” wizard. As part of the setup: Create a network name or SSID for the network between the computer and your printer. Write down the name of your network. Be sure to use the exact spelling and capitalization. Go to the Security Type list, select WEP, and then create a WEP key.
-
Page 61: Adding A Printer To An Existing Ad Hoc Wireless Network
In the Network Name (SSID) box, type the name you want to give your wireless network. Write down the network name you chose so you can refer to it when running the wireless setup. Be sure to use the exact spelling and capitalization. If Network Authentication appears in the list, select Open. -
Page 62: Sharing A Printer In A Windows Environment
Configuring the printer wirelessly using WPS (Wi-Fi Protected Setup) Wi-Fi Protected Setup (WPS) is a method of configuring computers and printers on a secure wireless network. WPS is faster and eliminates typing errors when new devices are added to a wireless network. The SSID and WPA passphrase are automatically detected and configured for you. -
Page 63: Networking Faq
Press Enter, or click OK. The printer folder opens. Right-click the name of your printer. Click Sharing. From the Sharing tab, select Share this printer or Shared as, and then assign a distinctive name. Click OK. Locate the printer from the remote computer: Note: The remote computer is the one that is not attached to the printer. -
Page 64: Where Do I Find My Wep Key Or Wpa Passphrase
Look for any of these identifier marks to check if your device is WPS certified: You can find these WPS logos on the side, back, or top of your access point or router. Where do I find my WEP key or WPA passphrase? To find the WEP key or WPA passphrase for the wireless network, view the security settings on the access point or wireless router. -
Page 65: How Do I Find Out What Type Of Security My Network Is Using
How do I find out what type of security my network is using? You must know the WEP key or WPA passphrase and the type of security (WEP, WPA, or WPA2) used on the wireless network. To obtain this information, see the documentation that came with your wireless access point (wireless router), see the Web page associated with the wireless access point, or consult your system support person. -
Page 66: Why Do I Need An Installation Cable
Scenario 2: Wireless network with Internet access • All computers and printers connect to the network using a wireless access point or wireless router. • The wireless access point connects the network to the Internet through a DSL or cable modem. Scenario 3: Wireless network with no Internet access •... -
Page 67: How Do I Attach The Installation Cable
The installation cable connects to a rectangular USB port on the installing computer and the square USB port on the printer. How do I attach the installation cable? The installation cable attaches to a USB port on the computer and to the square connector on the back of the printer. This connection allows you to configure the printer for a networked or locally attached installation. -
Page 68: Finding The Signal Strength
The following table compares the characteristics and requirements of the two types of wireless networks. Characteristics Communication Security Range Speed Requirements for all devices Unique IP address for each device Mode set to Same SSID Same channel We recommend setting up a network in infrastructure mode using the installation CD that came with the printer. Infrastructure mode is the recommended setup method because it provides: •... -
Page 69: How Can I Improve Wireless Signal Strength
How can I improve wireless signal strength? A common reason wireless printers fail to communicate over a network is poor wireless signal quality. If the signal is too weak, too distorted, or blocked by an object, it cannot carry information between the access point and the printer. -
Page 70: What Is A Mac Address
How can I make sure my computer and printer are connected to the same wireless network? If the printer is not on the same wireless network as the computer, you will not be able to print wirelessly. The SSID of the printer must match the SSID of the computer, if the computer is already connected to the wireless network. Obtain the SSID of the network that the computer is connected to: Type the IP address of your wireless access point (wireless router) into the address field of your Web browser. -
Page 71: How Do I Find The Mac Address
While it is possible to change the MAC address of a network device, it is not common practice to do so. For this reason, MAC addresses are considered permanent. IP addresses are easily changed, so MAC addresses are a more reliable method of identifying a specific device on a network. -
Page 72: How Do I Locate Ip Addresses
What is TCP/IP? Networks are able to function because computers, printers, and other devices are able to send data to each other, either through cables or by using wireless signals. This transfer of data is made possible by sets of data transmission rules called protocols. -
Page 73: Maintaining The Printer
Maintaining the printer Maintaining ink cartridges Checking ink levels Using the printer control panel From the printer control panel, press Press the arrow buttons to scroll to Maintenance, and then press Press again to select Ink Levels. Press the arrow buttons to check the ink level in each cartridge. Using the printer software Click or Start. -
Page 74: Cleaning The Exterior Of The Printer
Select Printer Home. Choose your printer from the printer drop-down list. From the Maintenance tab, click Align cartridges. Follow the instructions on the computer screen. If you aligned the cartridges to improve print quality, then print your document again. If print quality has not improved, then clean the printhead nozzles. -
Page 75: Cleaning The Scanner Glass
Wipe only the outside of the printer, making sure to remove any ink residue that has accumulated on the paper exit tray. Warning—Potential Damage: Using a damp cloth to clean the interior may cause damage to your printer. Make sure the paper support and paper exit tray are dry before beginning a new print job. Cleaning the scanner glass Dampen a clean, lint-free cloth with water. -
Page 76: Troubleshooting
If it appears on an error message dialog, click the For additional assistance, use the Service Center link. If Troubleshooting does not solve your problem Visit our Web site at support.dell.com to find the following: • Live online technical support •... -
Page 77: Incorrect Language Appears On The Display
• “Printer is printing blank pages” on page 80 • “Printer is busy or does not respond” on page 80 • “Cannot delete documents from the print queue” on page 81 • “Cannot print through USB” on page 81 Incorrect language appears on the display If the "Before you troubleshoot"... -
Page 78: Software Did Not Install
Remove the printhead. Wipe the printhead contacts using a clean, lint-free cloth. Reinsert the printhead. Note: If removing and reinserting the printhead does not resolve the error, then contact technical support. Software did not install If you encountered problems while installing, or if your printer does not appear in the list in the Printers folder or as a printer option when sending a print job, then try removing and reinstalling the software. -
Page 79: Does Not Print/Is Missing Pages
HECK THE CONNECTION Check the USB cable for any obvious damage. If the cable is damaged, then use a new one. Firmly plug the square end of the USB cable into the back of the printer. Firmly plug the rectangular end of the USB cable into the USB port of the computer. The USB port is marked with a ECONNECT THE PRINTER POWER SUPPLY Turn off the printer, and then unplug the power cord from the wall outlet. -
Page 80: Printer Is Busy/Does Not Respond
Firmly plug the rectangular end of the USB cable into the USB port of the computer. The USB port is marked with a EMOVE AND REINSTALL THE PRINTER SOFTWARE Printer is printing blank pages Blank pages may be caused by improperly installed ink cartridges. EINSTALL THE INK CARTRIDGES AND DEEP CLEAN AND ALIGN THE PRINTHEAD Reinstall the ink cartridges, see “Replacing ink cartridges”... -
Page 81: Jams And Misfeeds Troubleshooting
Cannot delete documents from the print queue If you have jobs stuck in the print queue and cannot delete them to get other jobs to print, then the computer and printer may not be communicating. ESTART THE COMPUTER AND TRY AGAIN Cannot print through USB If the "Before you troubleshoot"... -
Page 82: Paper Jam In The Paper Support
Press to turn off the printer. Check the paper tray or lift the scanner unit to check for jammed paper. Firmly grasp the paper, and then gently pull it out. Note: Be careful not to tear the paper while removing it. Press to turn the printer back on. -
Page 83: Print Troubleshooting
Print troubleshooting • “Poor quality at the edges of the page” on page 83 • “Streaks or lines on printed image” on page 83 • “Print speed is slow” on page 84 • “Computer slows down when printing” on page 84 Poor quality at the edges of the page If the "Before you troubleshoot"... -
Page 84: Copy And Scan Troubleshooting
Print speed is slow If the "Before you troubleshoot" checklist does not solve the problem, then try one or more of the following: AXIMIZE COMPUTER PROCESSING SPEED • Close all applications not in use. • Minimize the number and size of graphics and images in the document. •... -
Page 85: Scanner Unit Does Not Close
Copier or scanner does not respond If the "Before you troubleshoot" checklist does not solve the problem, then try one or more of the following: ET YOUR PRINTER AS THE DEFAULT PRINTER EMOVE AND REINSTALL THE PRINTER SOFTWARE Scanner unit does not close Lift the scanner unit. -
Page 86: Memory Card Troubleshooting
Scan was not successful If the "Before you troubleshoot" checklist does not solve the problem, then try one or more of the following: HECK THE CONNECTION Check the USB cable for any obvious damage. If the cable is damaged, then use a new one. Firmly plug the square end of the USB cable into the back of the printer. -
Page 87: Nothing Happens When A Memory Card Is Inserted
Nothing happens when a memory card is inserted If the "Memory card troubleshooting checklist" does not solve the problem, then try one or more of the following: EINSERT THE MEMORY CARD The memory card may have been inserted too slowly. Remove and then reinsert the memory card quickly. HECK THE CONNECTION Check the USB cable for any obvious damage. -
Page 88: Wireless Troubleshooting
ELECT THE CORRECT COMPUTER NAME FROM THE SCAN DESTINATION LIST ON THE PRINTER AKE SURE YOUR WIRELESS NETWORK IS CONNECTED AND ACTIVE If your wireless connection is down, then use a USB cable to connect your printer to your computer. Wireless troubleshooting •... -
Page 89: Resetting The Wireless Settings To Factory Defaults
• The correct printer port is selected. • The computer and printer are both connected to the same wireless network. • The printer is located away from obstacles or electronic devices that could interfere with the wireless signal. Make sure the printer and wireless access point are not separated by poles, walls, or support columns containing metal or concrete. - Page 90 Obtain the SSID of the network that the computer is connected to. Type the IP address of your wireless access point (wireless router) into the address field of your Web browser. If you do not know the IP address of the wireless access point: Click , or click Start and then click Run.
-
Page 91: The Continue Button Is Unavailable
HECK YOUR ADVANCED SECURITY SETTINGS • If you are using MAC address filtering to limit access to your wireless network, then you must add the printer MAC address to the list of addresses allowed to connect to the wireless access point. •... -
Page 92: Cannot Print And There Is A Firewall On The Computer
Plug the power cord back into the power outlet. Turn on the printer, and then resume the installation on your computer. RY RUNNING THE INSTALLER AGAIN Close the installer. Remove the CD, and then restart the computer. Insert the CD and then run the installer again. Notes: •... -
Page 93: Wi-Fi Indicator Light Is Not Lit
Wi-Fi indicator light is not lit HECK POWER If the Wi-Fi indictor light is off, make sure the • Make sure the printer is plugged in and turned on. • Make sure the printer is plugged into a working outlet. •... -
Page 94: Wi-Fi Indicator Light Is Still Orange
ELECT THE WIRELESS PORT If you have previously set up your printer as a locally attached printer, then you may need to select the wireless printer to use the printer wirelessly. Click , or click Start and then click Run. In the Start Search or Run box, type control printers. -
Page 95: Wi-Fi Indicator Light Is Blinking Orange During Installation
If you are using WPA security A valid WPA passphrase is: • From 8 to 63 ASCII characters. ASCII characters in a WPA passphrase are case-sensitive. • Exactly 64 hexadecimal characters. Hexadecimal characters are A-F, a-f, and 0-9. If your wireless network is not using security, then you will not have a security key. Using a wireless network with no security is not recommended because it can allow intruders to use your network resources without your consent. - Page 96 HECK YOUR KEY OR A WEP key or WPA passphrase is like a password. All devices on a WEP-secured wireless network must share the same WEP key, and all devices on a WPA-secured wireless network must share the same WPA passphrase. Note: Make sure you copy it exactly, including any capital letters, and store it in a safe place for future reference.
- Page 97 Type ping followed by a space and the IP address of the wireless access point. For example: ping 192.168.1.100 Press Enter. Check to see whether the access point responds: • If the access point responds, you will see several lines appear that start with “Reply from.” It is possible that the printer did not connect to the wireless network.
-
Page 98: Wireless Print Server Not Installed
Notes: • If you change network settings, change them on all the network devices before changing them for the access point. • If you have already changed the wireless network settings on your access point, then you must change the settings on all the other network devices before you can see them on the network. -
Page 99: To Locate Printer Ip Address
Press Enter, or click OK. The Command Prompt window opens. Type ipconfig, and then press Enter. The IP address appears as four sets of numbers separated by periods, such as 192.168.0.100. How to locate a printer IP address • You can locate the printer IP address by viewing the printer network setup page. If the printer and/or the laptop does not have an IP address, or if either has an address of 169.254.x.y (where x and y are any two numbers between 0 and 255): Turn off the device that does not have a valid IP address (the laptop, the printer, or both). -
Page 100: Communication With Printer Lost When Connected To Virtual Private Network (Vpn)
AKE SURE BIDIRECTIONAL COMMUNICATION IS ENABLED Click , or click Start and then click Run. In the Start Search or Run box, type control printers. Press Enter, or click OK. The printer folder opens. Right-click the printer, and then select Properties from the menu. Click the Ports tab. - Page 101 LIMINATE NETWORK CONGESTION If a wireless network is too busy, the computer and printer may have difficulty communicating with each other. Some causes of wireless network congestion can include: • Transferring large files across the network • Networked games • Peer-to-peer file swapping applications •...
- Page 102 To assign a static IP address to the printer, do the following: Complete the wireless setup, allowing the printer to receive a DHCP address from a DHCP server on the network. Print a network setup page to see what IP address is currently assigned to the printer. Open a Web browser and then type the printer IP address in the address field.
-
Page 103: Index
Index ad hoc SSID 59 WEP 59 ad hoc network 67 ad hoc wireless network adding a printer 61 creating using Windows 59 additional computers installing wireless printer 57 AliceBox 58 aligning the printhead 73 appliances wireless network 69 application list downloading 54 updating 54 assigning IP address 72... - Page 104 Eco-Mode using 21 energy conserving 8 enlarging an image 46 envelopes 27 loading 32 printing 32 error using memory card 86 Ethernet 70 exterior of the printer cleaning 74 e-mailing scanned documents 53 factory default settings resetting internal wireless print server 89 resetting to 21 file types...
- Page 105 36 photos using the proof sheet 39 reverse page order 31 tips 30 two-sided 33 printing in draft mode 43 printing mode changing 43 proof sheet using 39 protocol 72 publications finding 9 recycling 8 Dell products 15...
- Page 106 reducing an image 46 repeating an image 48 replacing ink cartridges 13 resetting internal wireless print server to factory default settings 89 resetting to factory defaults 21 resuming print job 44 reverse page order 31 safety information 7 saving paper default settings 28 scan black and white 53 improving quality 53...
- Page 107 Wi-Fi indicator light is not lit 93 Wi-Fi indicator light is still orange 94 special wireless setup instructions 58 uninstalling printer software 25 updating printer software 25 updating the application list 54 USB 62, 70 cable 67 USB connection with network connection 70 USB port 12 Virtual Private Network 100 lose connection to printer 100...