
Summary of Contents for Exmark BR270KC36
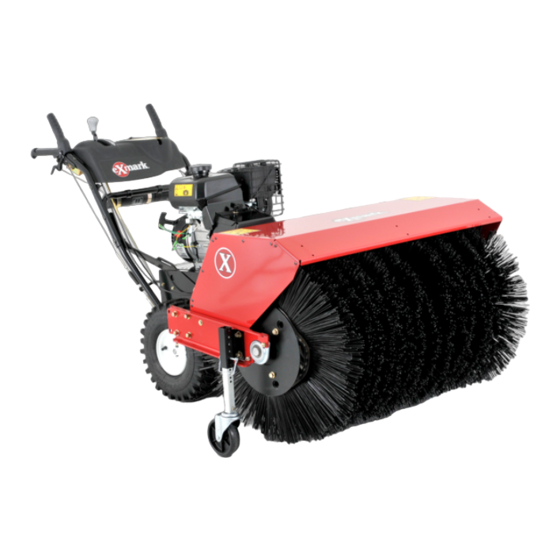
- Page 1 WALK-BEHIND ROTARY BROOM For Serial Nos. 313,000,000 & Higher Part No. 4501-437 Rev. A...
- Page 2 Replacements may be ordered through the engine manufacturer. Exmark reserves the right to make changes or add improvements to its products at any time without incurring any obligation to make such changes to products manufactured previously.
-
Page 3: Introduction
All Exmark parts are thoroughly tested and inspected before leaving the factory, however, attention is required on your part if you are to obtain the fullest measure of satisfaction and performance. -
Page 4: Table Of Contents
Contents Introduction ............3 Safety ..............5 Safety Alert Symbol ......... 5 Safe Operating Practices ........5 Safety and Instructional Decals ......10 Specifications ............13 Model Numbers ..........13 Systems ............13 Dimensions............13 Torque Requirements ........14 Product Overview ..........15 Operation ..............15 Controls ............15 Pre-Start............16 Operating Instructions ........16 Transporting ..........21... -
Page 5: Safety
Only use accessories and This manual uses two other words to highlight attachments approved by Exmark. information. Important calls attention to special • Prior to use, evaluate surfaces to be cleaned to... - Page 6 Safety CAUTION DANGER This machine produces sound levels in excess In certain conditions during fueling, static of 85 dBA at the operator’s ear and can cause electricity can be released causing a spark hearing loss through extended periods of which can ignite gasoline vapors. A fire or exposure.
- Page 7 Safety Operation drop-offs, and the like without proper adjustment of the sweeping discharge angle. WARNING • Stop the machine and broom drive before Operating engine parts, especially the muffler, adjusting the broom angle. become extremely hot. Severe burns can occur •...
- Page 8 • Tire chains are highly recommended when To clear the broom: operating at or below freezing temperatures. Only use chains supplied by Exmark. • Park the machine on level ground. Stop engine, wait for all moving parts to stop, and remove the •...
- Page 9 Failure to use original Exmark parts could cause serious injury or death. Replace all parts including, but not limited to, tires, belts, and broom segments with original...
-
Page 10: Safety And Instructional Decals
Exmark equipment dealer or labels. distributor or from Exmark Mfg. Co. Inc. • Replace all worn, damaged, or missing safety • Safety signs may be affixed by peeling off the signs. - Page 11 Safety 117–2718 116-8505 1. Explosion/Fire hazard–Read the Operator’s Manual. Stop engine before filling fuel tank. Leave 5/8 inch (16mm) at top of tank for fuel expansion-Do Not overfill tank. 116-7668 1. Left turn control-squeeze lever to turn left. 4. Broom drive-squeeze lever to engage; release lever to disengage.
- Page 12 Safety 116-7370 1. Warning-Read the Operator’s Manual. Do Not operate this 4. Warning-Stop engine and remove spark plug before machine unless you are trained. Stay away from moving adjusting, servicing, or cleaning machine and attachments. parts; keep all guards in place. Before leaving the operator’s position, disengage broom, traction drive, and stop engine.
-
Page 13: Specifications
• Engine Specifications: See your Engine Owner’s Transmission Manual • Front disc with free-wheel steering • Engine Oil Type: Exmark 4–Cycle Premium • Speeds: Engine Oil – 0-3.0 mph (4.8 km/hr) forward. • RPM: Full Speed: 3600 ±100 RPM (No Load) –... -
Page 14: Torque Requirements
Specifications Torque Requirements Overall Height: 41.5 inches (105.4 cm) Bolt Location Torque Engine Mounting Nuts 135-165 in-lb (15-19 N-m) Tread Width: (Outside to Outside of Wheel Hub Nuts 100-130 ft-lb Tires, Widthwise) (11-15 N-m) 25.75 inches (65.4 cm) Curb Weight: 323 lb (146.5 kg) -
Page 15: Product Overview
Operation Product Overview Operation Note: Determine the left and right sides of the machine from the normal operating position. Controls Choke Control The choke control is the top lever located on the rear LH side of the engine above the fuel shut-off valve. The choke is used to aid in starting a cold engine. -
Page 16: Pre-Start
Operation Broom Angle Lever Squeezing both wheel clutch levers simultaneously disengages the drive to both wheels (free-wheeling). Located on the RH handle (see Figure 4). This enables you to manually move the machine The broom angle lever allows the broom to rotate and backward without stopping to shift it into a reverse lock 19 degrees to the right or left or straight ahead. - Page 17 This Cable and Traction Cable Adjustment sections disengages the drive to the right wheel while the in Maintenance) or contact your authorized left wheel continues driving, and the machine EXMARK SERVICE DEALER. turns to the right. Driving Forward:...
- Page 18 2. To move rearward, engage the traction drive, drive lever is not functioning properly. slowly squeeze the left hand (traction) lever to Contact your authorized EXMARK SERVICE the handle. Momentarily squeezing and releasing DEALER. the left or right wheel clutch lever allows for steering adjustments to keep the machine going in a straight line.
- Page 19 4. Wait for all moving parts to stop before leaving the operating position. Carefully check the broom height and adjust it properly or contact your authorized EXMARK 5. Turn the engine on/off switch to the “OFF” SERVICE DEALER. position.
- Page 20 Operation the broom can rotate 19 degrees to the right or left or straight ahead. 5. Once the broom is positioned, release the broom angle lever. Release the left wheel clutch lever and make sure the broom is locked into place. Clearing a Clogged Broom WARNING The rotating broom could cause serious injury.
-
Page 21: Transporting
Operation starter handle several times to prevent the recoil starter from freezing up. Transporting Transporting a Unit WARNING Loading the machine onto a trailer without strong enough or properly supported ramps could be dangerous. The ramps could collapse causing the unit to fall, which could cause injury. •... -
Page 22: Maintenance
4. If the oil level is low, wipe off the area around the oil fill cap, remove cap and fill to the “FULL” mark on the dipstick. Exmark 4-Cycle Premium Engine Oil is recommended; refer to the Engine Owner's manual for an acceptable alternative. Do Not overfill. -
Page 23: Check For Loose Hardware
Maintenance Check Tire Pressures Service Interval: Every 50 hours 1. Stop engine, wait for all moving parts to stop, and leave engine switch in the “OFF” position. 2. Check tire pressure in drive tires. 3. Inflate drive tires to 17-20 psi (117-138 kPa). Check Condition Of Belts Figure 12 Service Interval: Every 50 hours... -
Page 24: Check Spark Plug
Maintenance Check Spark Plug 5. Move the speed selector lever to Position 6. 6. Lubricate the other end of the hex shaft. Service Interval: Every 160 hours 7. Move the speed selector lever forward and Remove spark plug, check condition and reset the rearward a few times. - Page 25 4. Support shaft 4. If the shear pin is damaged, remove the pin and 2. End retainer plate 5. Alignment fingers replace only with pin recommended by Exmark. Secure the pin with a nut. 3. Broom segment Check Broom Segments 8.
-
Page 26: Adjustments
Maintenance Adjustments Traction Cable Adjustment If the machine does not drive in the forward or reverse speeds or it drives when you release the traction lever, adjust the traction cable. With the traction lever disengaged, check the pin in the elongated slot in the left side of the machine above the tire. -
Page 27: Troubleshooting
Troubleshooting Troubleshooting Important: It is essential that all operator safety mechanisms be connected and in proper operating condition prior to use. When a problem occurs, do not overlook the simple causes. For example: starting problems could be caused by an empty fuel tank. The following table lists some of the common causes of trouble. - Page 28 Troubleshooting Problem Possible Cause Corrective Action Abnormal vibration. 1. Loose or damaged broom assembly 1. Tighten hardware. Replace broom assembly or contact an Authorized Service Dealer. 2. Engine mounting bolts are loose. 2. Tighten the engine mounting bolts. 3. Loose engine pulley or idler pulley. 3.
- Page 29 No Claim of breach of warranty shall be cause for cancellation provided by Exmark. or rescission of the contract of sale of any Exmark mower. There are no other express warranties except for engine and All implied warranties of merchantability (that the special emission system coverage.
- Page 31 G011841 Figure 20 This page may be copied for personal use. 1. The maximum slope you can safely operate the machine on is 10 degrees. Use the slope indicator to determine the degree of slope of hills before operating. Do Not operate this machine on a slope greater than 10 degrees. Fold along the appropriate line to match the recommended slope.
- Page 32 Pack) or Fill in Below Engine Model No. and Spec. No. Model No. Engine Serial No. (E/No) Serial No. ©2012 Exmark Mfg. Co., Inc. Part No. 4501-437 Rev. A Industrial Park Box 808 (402) 223-6300 Beatrice, NE 68310 Fax (402) 223-5489...