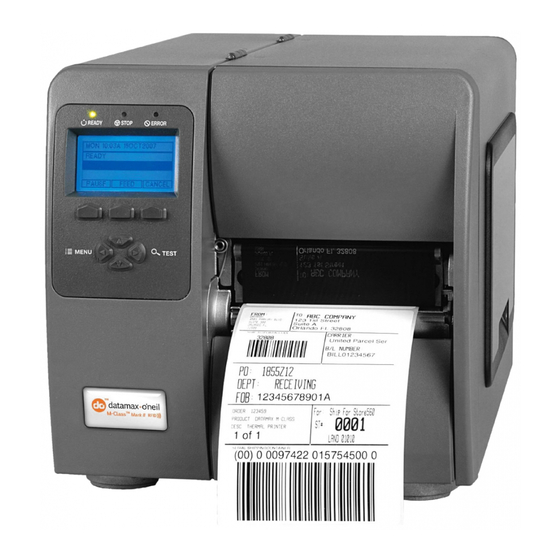
Datamax Mark II M-4206 Operation Instructions Manual
M class mark ii series communication card
Hide thumbs
Also See for Mark II M-4206:
- Operator's manual (168 pages) ,
- Installation instructions manual (22 pages) ,
- Quick start manual (2 pages)
Advertisement
Communication Card
Operation Instructions
Datamax International
Phone +44 1279 772200
rbyrne@datamaxcorp.com
Datamax Corporate Headquarters
4501 Parkway Commerce Boulevard
Orlando, Florida USA 32808
Phone (407) 578-8007
Fax (407) 578-8377
customercare@datamaxcorp.com
Datamax Latin America
Phone (407) 523-5520
tdelgado@datamaxcorp.com
Printed U.S.A. © Copyright 2007
Datamax Asia Pacific
Phone +65-6542-2611
datamax@pacific.net.sg
92-2486-01 Rev. B
Datamax China
Phone
+86 10 64969313
datamax_cn@china.com
Advertisement
Table of Contents

Related Manuals for Datamax Mark II M-4206


Summary of Contents for Datamax Mark II M-4206
-
Page 1: Operation Instructions
Communication Card Operation Instructions Datamax International Datamax Latin America Phone +44 1279 772200 Phone (407) 523-5520 rbyrne@datamaxcorp.com tdelgado@datamaxcorp.com Datamax Corporate Headquarters 4501 Parkway Commerce Boulevard Orlando, Florida USA 32808 Phone (407) 578-8007 Fax (407) 578-8377 customercare@datamaxcorp.com Datamax Asia Pacific Phone +65-6542-2611 datamax@pacific.net.sg... - Page 3 Resetting the printer from the front panel will reset both the printer and the wireless card. Label This Label contains the MAC address of the Wireless Card. The MAC address of the printer’s wired port is listed on the printer’s configuration test label.
-
Page 4: Display Icons
DMXConfig (located on the Accessories CD-ROM) is a windows based configuration utility that allows the user to make changes to the existing printer setup via a direct connection to the host computers serial and parallel connection. This is a vital tool for the use and configuration of wired and wireless printer setup. -
Page 5: Wired Network Setup
Wired Network Setup The Print Server makes IP requests at power-up, so before making a network connection to the printer consider how your IP addressing needs to be assigned. The IP addressing of the Internal Ethernet Print Server can be configured in one of two ways: Using a static IP Address;... - Page 6 DHCP, BootP, and RARP are server services that provide a method for assigning and maintaining IP Addresses. With IP Discovery enabled, the Print Server obtains IP information from this service. Because IP Discovery is, by default, disabled in the printer, it must first be enabled for use. To use IP Discovery follow the steps below: Note: The following example uses the DMXConfig software utility to configure the printer.
-
Page 7: Wireless Network Setup
1. Press the PAUSE, FEED, CANCEL buttons at the same time. The Wireless Card can be configured via a wireless Adhoc connection or using the Datamax Printer Configuration Utility (DMXConfig) via a serial or parallel connection. The procedures for each are listed in the following sections. - Page 8 You may now configure the printer to connect to your network via and access point, see section Browsing to the Printer’s Internal Web Pages. If you will continue to use the printer in its current configuration, (as an Adhoc device) you may install your printer driver and start printing from your Windows Application. See section, Installing the Printer Driver.
- Page 9 If you wish to use DMXConfig to configure your wireless card please download the latest version from the Datamax FTP site at: ftp://ftp.datamaxcorp.com/dmxConfig/ Once you have downloaded and installed the DMXConfig utility: 1.
- Page 10 2. The following page will appear: The printer’s internal web pages are divided into 14 pages that are accessible via the navigation bar on the left-hand side. Most of the items on these pages mimic the printer's internal menu. For more information on the function of these settings see the corresponding function in the Operator’s Manual.
- Page 11 Wifi Configuration Page Wireless Network Settings SSID Service Set Identifier that identifies the Module to connect to an AP. To make this connection, the Module and AP must have the same SSID. The SSID cannot contain spaces. Default setting is the MAC address of the wireless module. Wireless Network Type Specifies the type of network in which the Module will be used: •...
- Page 12 Wifi Configuration Page (continued…) Advanced Settings Maximum Transmission Specifies the Module’s maximum wireless transmission rate. Default is 2 Mbps. Rate Use Fixed Rate for Sets the 802.11 behavior for Ad Hoc mode. Default is 0. Transmission Network IP Settings Enable DHCP When checked, enables the Dynamic Host Configuration Protocol (DHCP).
-
Page 13: Installing The Printer Driver
Installing the Printer Driver The following screen shots are taken from Windows ® 2000, other Windows ® versions will be similar. Start the Windows “Add Printer Wizard”. The following screen should appear, click ‘Next>’. Select on ‘Create a new port:’ and then select ‘Standard... - Page 14 I n s t a l l i n g t h e P r i n t e r D r i v e r Browse to the “\DRIVERS\Seagull” folder on the CD- ROM, make sure the file “Datamax for 95, 98, me, 2000, and xp.inf” is selected and click ‘OK’. Choose your printer from the list and then click ‘Next’.
-
Page 15: Usb Host Ports
2. Enter the printers menu by pressing the MENU BUTTON and navigate to Printer Options>Modules>Format Module. 3. Next select the ‘H’ module from the list and press ENTER. The printer will now format the USB drive and create the ‘H’ folder. - Page 16 Wireless and Wired Ethernet Specifications The following list and table describes the key features and specifications of the wireless card. 802.11b wireless LAN (Wi-Fi) standards-based technology Highly integrated module includes radio, baseband and MAC processor, and application processor Wired 10/100Mbs RJ-45 Ethernet port. Extended temperature and environmental specifications Built-in TCP/IP and UDP features provide flexible LAN connectivity options Built-in Web server enables remote configuration capabilities...
- Page 17 Using the DOWN BUTTON scroll to ‘SET FACTORY DEFAULTS’ and press the ENTER KEY. When prompted press the YES KEY. The printer with then reset and return to Ready Mode. 2. Using DMXConfig program connect to the printer. Download the latest version from the Datamax FTP site at: ftp://ftp.datamaxcorp.com/dmxConfig/ Once you have downloaded and installed the DMXConfig utility: 1.
- Page 18 > Install a printer driver, and start printing from your Windows ® applications. See section, Installing the Printer Driver. -or- > Browse to the printer’s internal web pages to print test labels or configure network settings such as assigning a new IP address or SSID to the printer and enabling/configuring wireless security protocols. See section, Browsing to the Printer’s Internal Web Pages.
- Page 19 Using the DOWN BUTTON scroll to ‘SET FACTORY DEFAULTS’ and press the ENTER KEY. When prompted press the YES KEY. The printer with then reset and return to Ready Mode. 2. Using DMXConfig program connect to the printer. Download the latest version from the Datamax FTP site at: ftp://ftp.datamaxcorp.com/dmxConfig/ Once you have downloaded and installed the DMXConfig utility: 1.