Table of Contents
Advertisement
Advertisement
Table of Contents

Related Manuals for DK Digital AVR-500

Summary of Contents for DK Digital AVR-500
- Page 2 . . . for choosing one of our AV receivers. For your own safety and in order to learn all about the functions available, please read this manual and keep it for future reference. And if you once sell the unit please include the manual. www.dk-digital.com © 2006 Copyright, Manufacturer: DK digital GmbH, Germany...
-
Page 3: Important Notes, Please Observe
• Never attempt to open the housing of your receiver or to service the product beyond that described in this manual. All servicing or repair must be referred to qualified service personnel authorised by us. -
Page 4: Table Of Contents
Content Important notes, please observe! About these instructions Preparation for turning on. Place of erection Before using the remote control . Overview of the control elements Inputs / Outputs on the rear panel The remote control (R/C) . Connecting the antenna . Connecting speakers . -
Page 5: About These Instructions
Don’t expose the unit to direct sunlight or other heat sources. Ø Do not pile up other units on top of your receiver. That would block the vent holes and cause the device to overheat. Before using the remote control 1. -
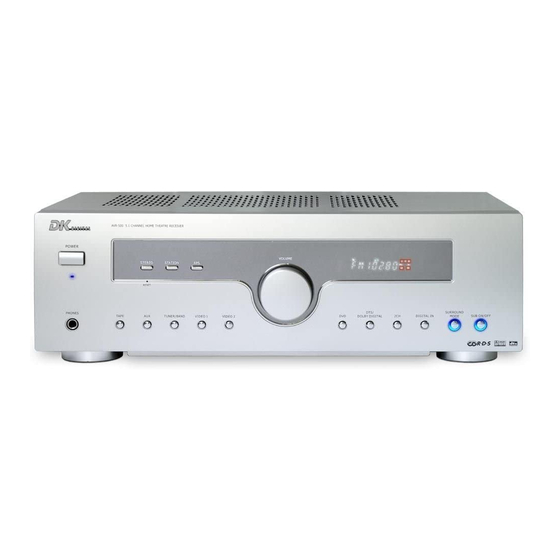
Page 6: Overview Of The Control Elements
Overview of the control elements 1. POWER 2. STEREO 3. STATION 4. APS 5. IR 6. VOLUME 7. Display 8. PHONES 9. Indicator for standby 10. TAPE 11. RESET 12. AUX 13. TUNER/BAND 14. VIDEO 1 15. VIDEO 2 16. DVD 17. -
Page 7: Inputs / Outputs On The Rear Panel
Inputs / Outputs on the rear panel 1. Power cord 2. SPEAKERS 3. SUB LINE OUT 4. S-VIDEO 5. VIDEO 6. Analogue audio inputs 7. OPTICAL DVD 8. COAX VIDEO 1/2 9. ANTENNA - Connection terminals for the speaker boxes - Line output for an active subwoofer - 2 x S-VIDEO inputs / 1 x S-VIDEO output - 3 x VIDEO inputs / 1 x VIDEO output... -
Page 8: The Remote Control (R/C)
The remote control (R/C) - Page 9 1. POWER 2. DISPLAY 3. Input selection keys 4. MEMORY 5. ST/MONO 6. PTY SEARCH 7. TUNING +/- 8. BAND 9. AUTO / MANUAL 10. APS 11/15. PRESET +/- 12/13. VOL +/- 14. MUTE 16. DIMMER 17. CH SELECT 18. SUBWOOFER ON /OFF 19.
-
Page 10: Connecting The Antenna
Connect the two connection wires of the medium wave antenna with the “AM LOOP” terminals on the rear side of the receiver. Determine the optimal recepti- on position of the antenna. -
Page 11: Connecting Speakers
(-) input of the box. Ø We have installed 2 outputs for the subwoofer signal in your receiver: one speaker output for connection a passive subwoofer and one line output for controlling an active subwoofer. An active subwoofer has its own, installed amplifier, a passive one not. If you already have a subwoofer but if you are not quite sure whether it is active or passive, simply check if it has a power cord or a mains connection. -
Page 12: Connecting Audio Und Video Devices
AV-receiver. Otherwise, you have to connect the TV via a video and S-Video cable. You also had to switch the input at the... - Page 13 In brief: Ø Signals reaching the receiver via a video input can only reach the TV via the output “Video-Monitor-Out”. Ø Signals reaching the receiver via a S-Video input can only reach the TV via the output “S-Video-Monitor-Out”. Tip: When purchasing your AV-receiver, you watched out for quality. Do the same when selecting your speaker and audio cables.
-
Page 14: Positioning The Boxes
Positioning the boxes For really enjoying the sound experience “Surround-Sound”, you should position the speakers approximately like this: 1. TV monitor 4. Center speaker 7. Right surround speaker 8. Listener’s position The front speakers reproduce the front stereo effect, the center transmits in most of the cases the performers’... -
Page 15: On The Operation
If you want to switch off the device completely, press the POWER switch at the device. In standby operation, the receiver consumes some energy. Thus, you should switch it off if you don’t use if for some period of time. -
Page 16: Phones Output
If you have activated one of the digital inputs, you can, depending on the incoming sound material, select between 5.1-channel operation and 2-channel operation (=stereo with subwoofer). Press the DTS / DOLBY DIGITAL key for 5.1-operation and the STEREO key for 2-channel operation. -
Page 17: The Speaker Configuration
The speaker configuration In order to receive the best sound result with your AV-receiver, the correct configuration of the speakers is absolutely necessary. The AV-R500 is indeed flexible enough for being able to produce multi-channel surround sounds even without center speaker, for an optimal result at the decoding of Dolby Pro Logic II, DTS and Dolby Digital, you need, however, at least 5 speakers (left, right, center, back left, back right). - Page 18 Test tone Using the test tone, you can determine the volume proportion of the single speakers to each other in Dolby Digital or Dolby Pro Logic II operation. Once the found balance is set, you don’t have to change it again unless you change the position of the speaker boxes. 1.
-
Page 19: Available Surround Modes
DOLBY DIGITAL, Dolby Pro Logic surround functions. We recommend using the center speaker for the DTS, DOLBY DIGITAL, Dolby Pro Logic surround operation. Press the DOLBY DIGITAL key if the programme reaches the receiver via the digital inputs. Only the digital connection transmits the encoded digital data. -
Page 20: Radio Operation
Radio operation Your AV-receiver is equipped with a high-quality FM / medium wave (AM) receiver with RDS-function. RDS (Radio Data System) is a system for the additional information transmittal with the FM-radio programme. RDS radio tuners are able to filter this information out of the transmitted signal and make it useful for different functions, e.g. -
Page 21: Calling Presets
During radio operation, press the STATION key at the device or the PRESET +/- keys in order to call saved stations. RDS function Your AV-receiver is equipped with the following functions: — PS (Programme Service): If you receive a RDS-channel, after some time, the name of the station is shown in the display. -
Page 22: Memory Backup In Case Of A Power Failure
Memory backup in case of a power failure We have designed your AV-receiver in such a way that it keeps the stations in the presets for ca. 7 days if it is separated from the supply voltage. If the separation lasts for more than 1 week, all saved stations and made settings are, however, deleted. -
Page 23: Troubleshooting
Troubleshooting Before requesting service for this AV receiver, check the chart below for a possible cause of the problem you are experiencing. Some simple checks or an adjustment on your part may eliminate the problem and restore proper operation. Problem •... -
Page 24: Technical Specifications
Technical specifications AUDIO SECTION Power Output: Subwoofer Front Center Surround Impedance Subwoofer Front Center Surround Total Harmonic Distortion - LINE INPUT Input Sensitivity/Impedance - Frequency Response Tone Control Range Signal-Noise Ratio WOOFER LINE OUTPUT Rated Output/Impedance Frequency Response FM TUNER SECTION Frequency Range Sensitivity Antenna Terminal... - Page 28 We reserve the right to correct errors and make technical alterations. This manual is copyrighted. All rights reserved. Neither the manual as a whole nor excerpts may be reproduced without our prior written permission. DK digital GmbH 40878 Ratingen Germany...