Table of Contents
Advertisement
Quick Links
United Kingdom
en
These instructions should be read in conjunction with the Boiler Installation and Service Instructions.
Holidays
OK
Instruction manual for Installers and Users
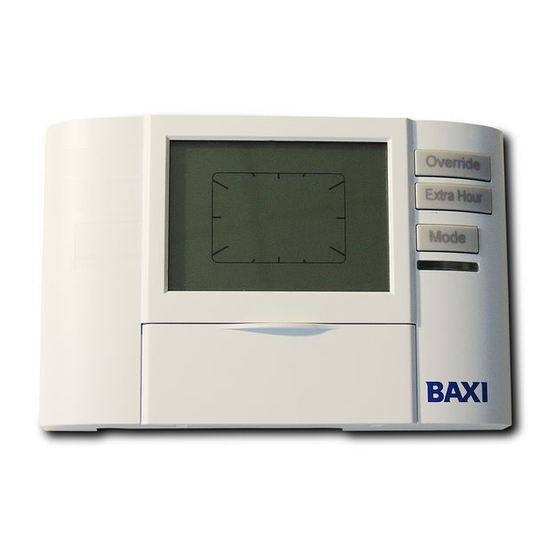
Single Channel Digital Programmer
Please leave with the user when completed.
Thu
Extra Hour
am
OFF
AUTO
ONCE
CONT
EXT HOUR
ON1
+1
+2
+3
DAY/
PROG
RUN
TIME
Select
Override
Mode
Advertisement
Table of Contents

Related Manuals for Baxi Single Channel Digital Programmer

Summary of Contents for Baxi Single Channel Digital Programmer
- Page 1 ONCE CONT EXT HOUR Holidays DAY/ PROG TIME Select Instruction manual for Installers and Users Single Channel Digital Programmer These instructions should be read in conjunction with the Boiler Installation and Service Instructions. Please leave with the user when completed.
- Page 2 EcoBlue Accessories 7212551...
-
Page 3: Table Of Contents
Contents Section Page 1. Introduction 1.1 General energy information 1.2 Description of the device 1.3 Designated use 1.4 Technical data 2. Fitting the Controller 2.1 Installation and mounting 2.2 General siting information 2.3 Wiring and wall mounting 3. Operation & Configuration 3.1 Quick start guide 3.2 Guide to button functions 3.3 Commissioning... -
Page 4: Introduction
1. Introduction Warning Danger! Risk of electric shock! Installation must be carried out by a person competent to do so! Before removal from backplate, the device must be disconnected from the power supply! Interferences and changes to the device will invalidate the warranty and guarantee rights. Maximum diameter of the cable for the terminals is 2 x 2.5 mm Read and observe these instructions fully to ensure the correct operation of the device and a safe operation. -
Page 5: Designated Use
1. Introduction 1.3 Designated use The programmer is used to control central heating zone systems or combi boilers. Suitable for use in dry rooms only! Do not install in the vicinity of devices which generate inductive discharges (motors, transformers, etc.) 1.4 Technical data Dimensions H x W x D (mm) 95 x 148 x 36... -
Page 6: Fitting The Controller
2. Fitting the Controller 2.1 Installation and mounting Warning Danger! Risk of electric shock! Installation must be carried out by a person competent to do so! 1.5 m 2.2 General siting information Identify a suitable site to locate the unit. Fig. 1 gives guidance on optimum positioning and siting restrictions. -
Page 7: Operation & Configuration
3. Operation & Configuration 3.1 Quick start guide 1. Connect mains power. Override 2. Press OK three times. Extra Hour The default Standard programme runs. Mode You can control the unit with the Override, Extra Hour or Mode buttons. Please read the full instructions if you want to know more. -
Page 8: Commissioning
3. Operation & Configuration 3.3 Commissioning Connect the programmer to the power. The product name and version are displayed briefly. DAILY The same ON/OFF time schedule is used every day. WEEKLY A different time schedule can be programmed for each day. One time schedule is used for Mon-Fri and a different one can be used for Sat &... -
Page 9: To Alter The Time And Date
3. Operation & Configuration 3.4 To alter the time and date Press the SELECT buttons until DAY/TIME light is lit. DAY/ PRG RUN TIME Select Select day with + and - Select month with + and - buttons and confirm with OK. buttons and confirm with OK. -
Page 10: To Show A Digital Time Display And Change Am/Pm Time Display To 24 Hour Clock
3. Operation & Configuration 3.5 To show a digital time display and change AM/PM time display to 24 hour clock Press the SELECT buttons until RUN light is lit. Press and hold + & - buttons DAY/ PRG RUN Press OK TIME together for 10 seconds. -
Page 11: Setting The Heating Programmes
4. Setting the Heating Programmes 4.1 Running a default programme Three programme types are possible on the programmer DAILY The same ON/OFF time schedule is used every day. WEEKLY A different time schedule can be programmed for each day. One time schedule is used for Mon-Fri and a different one can be used for Sat & Sun. For each programme type, three default programmes are provided. -
Page 12: Selecting A Programme Type And A Default Programme
4. Setting the Heating Programmes 4.2 Selecting a programme type and a default programme Press the SELECT buttons until RUN light is lit. Press and hold + & - buttons together for DAY/ PRG RUN Press OK. TIME 10 seconds. Select Press + four times until With the + &... -
Page 13: Weekly Programming Days Or Blocks
4. Setting the Heating Programmes 4.3 Weekly programming days or blocks You have the option to edit each day individually or you can create dayblocks, e.g. Tue, Wed, Fri and Sat, where you can set the same ON and OFF sequence. Days you do not select will keep the preset values. -
Page 14: Setting Time Periods
4. Setting the Heating Programmes 4.6 Setting time periods Once the required days have been Thu Fri Sat Sun Thu Fri Sat Sun selected, the first ON time is displayed. Press + & - to OFF1 adjust ON1 time. Press + & - to adjust OFF1 time. -
Page 15: Operating Mode
5. Operating Mode 5.1 Using the mode button Override The operating mode may only be changed when RUN mode is Extra Hour activated (green indicator lamp RUN must be ON). Pressing Mode AUTO the MODE button cycles through the following options: ONCE CONT The system will remain OFF. -
Page 16: Holiday Mode
5.4 Holiday mode The Holiday function allows you to switch OFF your heating system when you are away from home, but resumes normal operation on the day of your return. 1. Make sure the device is working in RUN mode. 2. -
Page 17: Installer Information
6. Installer Information 6.1 Installer menu The programmer has a special installer’s menu where some features can be adjusted to suit your lifestyle or preferences. To access to installers menu (INST MENU) the device must be working RUN mode (green indicator lamp RUN must be ON). - Page 18 6. Installer Information 6.1 Installer menu DIGI CLOCK: Shows the current time (hours/minutes) in a digital and analogue clock format Setting possibilities: NO: Digital clock not shown (Default value). YES: Digital clock shown. If digital clock is set YES, you can choose between 12 HRS (AM-PM) or 24 HRS format.
-
Page 19: Disposal
6. Installer Information 6.2 Disposal Dispose of the packaging materials correctly according to legal requirements and regulations. Please recycle where possible. Do not throw electrical and electronic components in the bin. These should be taken to a recycling centre. EcoBlue Accessories 7212551... - Page 20 All descriptions and illustrations provided in this leaflet have been carefully prepared but we reserve the right to make changes and improvements in our products which may affect the accuracy of the information contained in this leaflet. All goods are sold subject to our standard Conditions of Sale which are available on request.