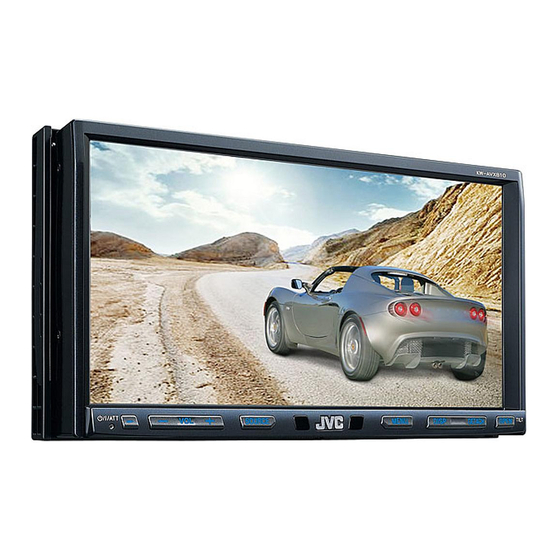
JVC KW-AVX810J Service Manual
Dvd receiver with monitor
Hide thumbs
Also See for KW-AVX810J:
- Installation & connection manual (6 pages) ,
- Schematic diagrams (14 pages)
Advertisement
Quick Links
SERVICE MANUAL
DVD RECEIVER WITH MONITOR
SERVICE MANUAL
MA403<Rev.001>
2008
4
KW-AVX810J, KW-AVX810E, KW-AVX810EU,
KW-AVX810EE, KW-AVX810U, KW-AVX810UN,
KW-AVX810UT, KW-AVX810A, KW-AVX814UI
COPYRIGHT © 2008 Victor Company of Japan, Limited
Lead free solder used in the board (material : Sn-Ag-Cu, melting point : 219 Centigrade)
Lead free solder used in the board (material : Sn-Cu, melting point : 230 Centigrade)
1
PRECAUTION. . . . . . . . . . . . . . . . . . . . . . . . . . . . . . . . . . . . . . . . . . . . . . . . . . . . . . . . . . . . . . . . . . . . . . . . 1-10
2
SPECIFIC SERVICE INSTRUCTIONS . . . . . . . . . . . . . . . . . . . . . . . . . . . . . . . . . . . . . . . . . . . . . . . . . . . . . 1-13
3
DISASSEMBLY . . . . . . . . . . . . . . . . . . . . . . . . . . . . . . . . . . . . . . . . . . . . . . . . . . . . . . . . . . . . . . . . . . . . . . 1-14
4
ADJUSTMENT . . . . . . . . . . . . . . . . . . . . . . . . . . . . . . . . . . . . . . . . . . . . . . . . . . . . . . . . . . . . . . . . . . . . . . . 1-27
5
TROUBLESHOOTING . . . . . . . . . . . . . . . . . . . . . . . . . . . . . . . . . . . . . . . . . . . . . . . . . . . . . . . . . . . . . . . . . 1-39
KW-AVX810J
TABLE OF CONTENTS
COPYRIGHT © 2008 Victor Company of Japan, Limited
KW-AVX810E
KW-AVX810EE
No.MA403<Rev.001>
2008/4
Advertisement

Related Manuals for JVC KW-AVX810J


Summary of Contents for JVC KW-AVX810J
-
Page 1: Table Of Contents
SERVICE MANUAL DVD RECEIVER WITH MONITOR SERVICE MANUAL MA403<Rev.001> 2008 KW-AVX810J, KW-AVX810E, KW-AVX810EU, KW-AVX810EE, KW-AVX810U, KW-AVX810UN, KW-AVX810UT, KW-AVX810A, KW-AVX814UI KW-AVX810E KW-AVX810EE KW-AVX810J COPYRIGHT © 2008 Victor Company of Japan, Limited Lead free solder used in the board (material : Sn-Ag-Cu, melting point : 219 Centigrade) - Page 2 SPECIFICATION KW-AVX810/J AMPLIFIER × Ω Power Output 20 W RMS 4 Channels at 4 and < or = 1% THD+N 80 dBA (reference: 1 W into 4 Ω) Signal-to-Noise Ratio 4 Ω (4 Ω to 8 Ω allowance) Load Impedance Equalizer Control Range Frequencies 60 Hz 150 Hz 400 Hz 1 kHz 2.5 kHz 6.3 kHz 15 kHz...
- Page 3 KW-AVX810/E/EU AMPLIFIER Maximum Power Output Front/Rear 50 W per channel Ω Continuous Power Output (RMS) Front/Rear 20 W per channel into 4 40 Hz to 20 000 Hz at no more than 0.8% total harmonic distortion 4 Ω (4 Ω to 8 Ω allowance) Load Impedance Equalizer Control Range Frequencies...
- Page 4 KW-AVX810EE AMPLIFIER Maximum Power Output Front/Rear 50 W per channel 20 W per channel into 4 Ω 40 Hz to 20 000 Hz at no more than 0.8% total harmonic distortion Continuous Power Output RMS) Front/Rear Ω (4 Ω to 8 Ω allowance) Load Impedance Equalizer Control Range Frequencies...
- Page 5 KW-AVX810U AMPLIFIER Maximum Power Output Front/Rear 50 W per channel Ω Continuous Power Output RMS) Front/Rear 20 W per channel into 4 40 Hz to 20 000 Hz at no more than 0.8% total harmonic distortion 4 Ω (4 Ω to 8 Ω allowance) Load Impedance Equalizer Control Range Frequencies...
- Page 6 KW-AVX810UN AMPLIFIER Maximum Power Output Front/Rear 50 W per channel Ω Continuous Power Output (RMS) Front/Rear 20 W per channel into 4 40 Hz to 20 000 Hz at no more than 0.8% total harmonic distortion 4 Ω (4 Ω to 8 Ω allowance) Load Impedance Equalizer Control Range Frequencies...
- Page 7 KW-AVX810UT AMPLIFIER Maximum Power Output Front/Rear 50 W per channel Ω Continuous Power Output (RMS) Front/Rear 20 W per channel into 4 40 Hz to 20 000 Hz at no more than 0.8% total harmonic distortion 4 Ω (4 Ω to 8 Ω allowance) Load Impedance Equalizer Control Range Frequencies...
- Page 8 KW-AVX810A AMPLIFIER Maximum Power Output Front/Rear 50 W per channel 20 W per channel into 4 Ω 40 Hz to 20 000 Hz at no more than 0.8% total harmonic distortion Continuous Power Output (RMS) Front/Rear Ω (4 Ω to 8 Ω allowance) Load Impedance Equalizer Control Range Frequencies...
- Page 9 KW-AVX814UI AMPLIFIER Maximum Power Output Front/Rear 50 W per channel Ω Continuous Power Output (RMS) Front/Rear 20 W per channel into 4 40 Hz to 20 000 Hz at no more than 0.8% total harmonic distortion 4 Ω (4 Ω to 8 Ω allowance) Load Impedance Equalizer Control Range Frequencies...
-
Page 10: Precaution
SECTION 1 PRECAUTION Safety Precautions Burrs formed during molding may be left over on some parts of the chassis. Therefore, pay attention to such burrs in the case of preforming repair of this system. Please use enough caution not to see the beam directly or touch it in case of an adjustment or operation check. - Page 11 Preventing static electricity Electrostatic discharge (ESD), which occurs when static electricity stored in the body, fabric, etc. is discharged, can destroy the laser diode in the traverse unit (optical pickup). Take care to prevent this when performing repairs. 1.2.1 Grounding to prevent damage by static electricity Static electricity in the work area can destroy the optical pickup (laser diode) in devices such as laser products.
- Page 12 Important for laser products 1.CLASS 1 LASER PRODUCT 5.CAUTION : If safety switches malfunction, the laser is able to function. 2.CAUTION : (For U.S.A.) Visible and/or invisible class II laser radiation 6.CAUTION : Use of controls, adjustments or performance of when open.
-
Page 13: Specific Service Instructions
SECTION 2 SPECIFIC SERVICE INSTRUCTIONS This service manual does not describe SPECIFIC SERVICE INSTRUCTIONS. (No.MA403<Rev.001>)1-13... -
Page 14: Disassembly
SECTION 3 DISASSEMBLY Main body (Used figure are KW-AVX810E) 3.1.1 Removing the Front chassis (See Fig.1 to 5) (1) Press D button, remove the Front panel. (See Fig.1) (2) From the bottom side of main body, insert screwdriver to hole of the third gear from hole a of the bottom chassis, and the turn the gear to clockwise until Front bracket comes up. - Page 15 3.1.2 Removing the Heat sink (See Fig.6) (1) Remove the two screws D and four screws E attaching the Heat sink. Fig.6 3.1.3 Removing the Rear bracket (See Fig.7 to 9) (1) Remove the three screws F attaching the Rear heat sink. CN601 CN604 (See Fig.7)
- Page 16 3.1.4 Removing the Top chassis (See Fig.10 to 13) (1) Remove the two screws J attaching the Front board. (See Fig.10) (2) Disconnect the card wire from Main board connected to connector CN605 of the Sub board. (See Fig.11) (3) Disconnect the connector wire from Main board connected to connector CN607 of the Sub board.
- Page 17 3.1.5 Removing the Main board (See Fig.14) CN961 (1) Disconnect the connector wire from Mecha switch board connected to connector CN961 of the Main board. (2) Remove the four screws L attaching the Main board. Fig.14 3.1.6 Removing the Sub board (See Fig.15, 16) (1) Remove the five screws M attaching the Sub board.
- Page 18 3.1.7 Removing the DVD mechanism (See Fig.17, 18) (1) Remove the two screws N attaching the Front board brack- et. (See Fig.17) (2) Remove the three screws P attaching the DVD mecha- nism. (See Fig.18) Fig.17 Fig.18 1-18 (No.MA403<Rev.001>)
- Page 19 Monitor section (Used figure are KW-AVX810E) 3.2.1 Removing the Rear cover (See Fig.1 to 3) Top side Top side (1) Remove the ten screws A and five screws B attaching the Rear cover. (See Fig.1, 2) (2) Disconnect the card wire from Panel board connected to connector CN881 of the Connection board.
- Page 20 3.2.2 Removing the Connection board (See Fig.4) (1) Remove the five screws C attaching the Connection board. Fig.4 3.2.3 Removing the Panel board (See Fig.5) (1) Disconnect the connector wire from LCD module connect- CN403 ed to connector CN403 of the Panel board. (2) Disconnect the card wire from LCD module connected to connector CN401...
- Page 21 DVD mechanism 3.3.1 Removing the Traverse mechanism assembly (See Fig.1 to 6) (1) Solder the short land section on the flexible wire of pickup. (See Fig.1) Caution: * Solder the short land section on the flexible wire of pickup before disconnecting the flexible wire form the connector CN101 on the Front end board.
- Page 22 3.3.2 Removing the Front end board (See Fig.7) (1) Remove the Motor wires from loading motor soldered to TP79 TP81 of the Front end board. TP81 (2) Remove the two screws B attaching the Front end board. TP79 Fig.7 3.3.3 Removing the Loading arm assembly (See Fig.8) (1) Remove the Loading arm spring L from Loading arm assembly.
- Page 23 3.3.4 Removing the Gear base assembly (See Fig.9, 10) (1) Remove the Loading arm spring L. (See Fig.9) (2) Remove the two screws C attaching the Gear base assembly. (See Fig.10) Loading arm spring L Fig.9 Fig.10 3.3.5 Removing the Loading arm holder. (See Fig.11) (1) Remove the two screws D attaching the Loading arm holder.
- Page 24 3.3.6 Removing the Loading moor assembly (See Fig.12) (1) Remove the three screws E attaching the Loading motor assembly. Fig.12 3.3.7 Removing the Slide cam assembly (See Fig.13) (1) Slide to backward the Slide cam assembly and the remove the Slide cam spring. Slide cam assembly (2) Slide to frontward the slide cam assembly, and then take out it.
- Page 25 3.3.9 Removing the Loading motor (See Fig.15 to 18) (1) Remove the A wheel gear. (See Fig.15) (2) Remove the A worm gear, M connect gear and M wheel A Wheel gear gear by sequentially. (See Fig.16) (3) Remove the two screws G attaching the Loading motor. (Se Fig.17) (4) When attaching the Loading motor, motor wire should arrange to figure.
- Page 26 3.3.10 Removing the Roller assembly (See Fig.19) (1) Remove the Slit washer. (2) Remove the R middle gear. (3) Remove the R connect gear. (4) Snap off the part a of the Roller assembly. R middle gear (5) Lift up the part b of the Roller assembly, and then release Direction part c (When release part c, R collar R is easy to come off, does not lose it).
-
Page 27: Adjustment
SECTION 4 ADJUSTMENT Test instruments required for adjustment Standard measuring conditions (1) Digital oscilloscope (100MHz) Power supply voltage DC14.4V(10.5 to 16V) (2) Electric voltmeter Load impedance 20K.(2 Speakers connection) (3) Digital tester Output Level Line out 2.5V (Vol. MAX) (4) Tracking offset meter Standard volume position (5) Test Disc : VT501 or VT502 Balance and Bass &Treble volume : lndication"0"... - Page 28 Service mode UP Button PLAY / PAUSE REW Button TOUCH PANEL FF Button DOWN Button [ Back ] [ Exit ] [ STAND BY / ON ATTENUATOR ] [ VOL ] [ SOURCE ] [ OPEN ] 4.6.1 Service mode 1 (Indication of a service mode 1 is nothing.) Keep this state more 2 seconds while continuing pressing the [STANDBY/ON ATTENUATOR] button...
- Page 29 4.6.2 Service mode 2 Keep this state more 2 seconds while continuing pressing the [MENU or TP/PTY] button, [SOURCE] button and TOUCH PANEL [DOWN] button sequentially. Screen indication SERVICE MODE 2 INITIALIZE ALL INITIALIZE INITIALIZE DVD INITIALIZE BT TOUCH PANEL CARIBRATION TOUCH PANEL CHECK MODE Exchanging it operate a menu of a service mode with the [UP] button and [DOWN] button.
- Page 30 4.6.3 Service mode 3 Keep this state more 2 seconds while continuing pressing the [MENU or TP/PTY] button, [VOLUME -] button and TOUCH PANEL [ DOWN] button sequentially. Screen indication SERVICE MODE 3 SERVICE MODE INITIALIZE ALL RUNNING MODE Exchanging it operate a menu of a service mode with the [UP] button and [DOWN] button.
- Page 31 DVD picture change DVD NTSC/PAL DVD unit output picture setting (NTSC) NTSC DVD unit output picture setting (PAL) DVD CHECK MODE See "DVD CHECK MODE" for details. ERROR READ DVD ERROR READ CH ERROR READ MECHA ERROR READ READ ALL DVD ERROR READ Reading of a DVD unit error history CH ERROR READ...
- Page 32 4.6.4 Service mode 4 Keep this state more 2 seconds while continuing pressing the [MENU or TP/PTY] button, [VOLUME +] button and TOUCH PANEL [DOWN] button sequentially. Screen indication SERVICE MODE 4 RDS S MODE MONITOR S MODE HD RADIO S MODE Exchanging it operate s menu of a service mode with the [UP] button and [DOWN] button.
- Page 33 DVD check mode DVD CHECK MODE DVD CHECK MODE DVD CHECK MODE NORMAL PLAY EEPROM DATA DISP STOP EF OUT-TRACKING OFF EEPROM DATA CLEAR OPEN EF IN-TRACKING OFF TEMPERATURE CLOSE CD-LASER ON SEARCH & JITTER DVD-LASER ON MONITOR DVDx1 JITTER MODE PLAY Exchanging it operate a menu of a service mode with the [UP] button and [DOWN] button.
- Page 34 Error code tablets Mechanism error code Error contents Details Error code Detailed error code Disc loading error 0013 D1 time out Eject error 0023 B1 time out 0024 C1 time out Loading of a running mode 0031 Error in loading wait Disc was pulled out in a wait.
- Page 35 Error code Detail It is time-out during movement to the closed position. 0B**11 It is time-out during 5 degrees tilt movement.(open direction) 0B**20 It is time-out during 5 degrees tilt movement.(close direction) 0B**21 It is time-out during 10 degrees tilt movement.(open direction) 0B**30 It is time-out during 10 degrees tilt movement.(close direction) 0B**31...
- Page 36 4.10 Monitor adjustment * When adjusting, switch on the main unit and insert a test disc (VT-501). And play the test disc and pause it. (1) Set the service mode 4. (2) Exchanging it operate a menu of a service mode with the [UP] button and [DOWN] button. (3) Change data with the [B.SKIP]/[F.SKIP] buttons.
- Page 37 Reference register value Detail Indication Minimum value Maximum value Initial value 00056 00000 00127 00061 00061 Set the cut-off of the Blue signal (PAL) 00057 00000 00001 00001 00001 ON/OFF change of the gamma revision 00058 00000 00255 00007 00007 Adjust 1 gamma revision point position of a Red signal 00059 00000...
- Page 38 Reference register value Detail Indication Minimum value Maximum value Initial value 00338 Quantity of brightness adjustment setting (NTSC) 00121 00000 01023 00338 00338 Quantity of brightness adjustment setting (PAL) 00122 00000 01023 00338 00168 Brightness gain adjustment (NTSC) 00123 00000 00255 00168 00124...
-
Page 39: Troubleshooting
SECTION 5 TROUBLESHOOTING 16 PIN CORD DIAGRAM (for J, A, U series) GN/BK WH/BK Black Gray VI/BK GY/BK Brown YG YellowGreen Blue White Orange BL/WH Violet Yellow OR/WH Green OR/WH BL/WH GN/BK VI/BK 10 WH/BK GY/BK (No.MA403<Rev.001>)1-39... - Page 40 16 PIN CORD DIAGRAM (for E, EE) Gray Black Brown YG YellowGreen Blue GN/BK WH/BK White Orange VI/BK GY/BK Violet Yellow Green BL/WH OR/WH BL/WH OR/WH BL/WH OR/WH GN/BK VI/BK WH/BK GY/BK VI/BK GY/BK WH/BK GN/BK 1-40 (No.MA403<Rev.001>)
- Page 41 16 PIN CORD DIAGRAM (for EU) Gray Black Brown YG YellowGreen Blue GN/BK WH/BK White Orange VI/BK GY/BK Violet Yellow Green BL/WH OR/WH BL/WH OR/WH OR/WH BL/WH GN/BK VI/BK WH/BK GY/BK VI/BK GY/BK WH/BK GN/BK (No.MA403<Rev.001>)1-41...
- Page 42 Victor Company of Japan, Limited Mobile Entertainment Business Group Mobile Entertainment Category 10-1,1chome,Ohwatari-machi,Maebashi-city,371-8543,Japano (No.MA403<Rev.001>) Printed in Japan...