Table of Contents
Advertisement
Quick Links
Owner's Manual
Practice
°
Songs
˙
Sound a metronome
You can sound a metronome.
˙
Practice along with the built-in songs
This unit contains numerous built-in songs.
For the song titles, refer to "Internal Song List" at the end of this manual.
˙
Recording the Song You're Practicing
You can record your own playing.
° Simply opening or closing the lid turns the power on/off
1.
When you open the lid, the power turns on
automatically.
When you close the lid, the power turns off automatically.
Provision of Bluetooth functionality
Please be aware that depending on the country in which you purchased the unit, Bluetooth functionality might not be included.
If Bluetooth functionality is included
The Bluetooth logo appears
when you turn on the power.
Before using this unit, carefully read "USING THE UNIT SAFELY" and "IMPORTANT NOTES" (leaflet "USING THE UNIT SAFELY" and Owner's Manual (p. 26)). After reading, keep the
document(s) including those sections where it will be available for immediate reference.
Copyright © 2015 ROLAND CORPORATION
Play
°
the Piano
˙
Play various sounds
This unit contains a wide variety of tones (sounds). You can freely select and perform using these tones.
˙
Play two layered tones (Dual Play)
You can layer two tones on a single key.
˙
Play different tones with your left and right hands (Split Play)
You can divide the keyboard into left and right zones, and select a different tone for each zone.
˙
Save your performance settings (Registration)
You can save tone settings and settings for Dual Play or Split, and recall them easily.
Adjust
°
Your Piano
˙
Adjust the keyboard touch
You can adjust the touch sensitivity of the keyboard to match your own playing style.
˙
Match the pitch to other instruments
When playing together with other instruments, you can match the unit's reference pitch to that of the other
instruments (Master Tuning).
˙
Create your own piano (Piano Designer)
You can customize the sound to your own taste by adjusting the sonic elements of the grand piano sound.
8
page
9
page
10
page
2.
Use the [Volume] buttons to adjust the volume.
6
page
7
page
7
page
14
page
6
page
18
page
13
page
4
page
Advertisement
Chapters
Table of Contents

Related Manuals for Roland LX-17

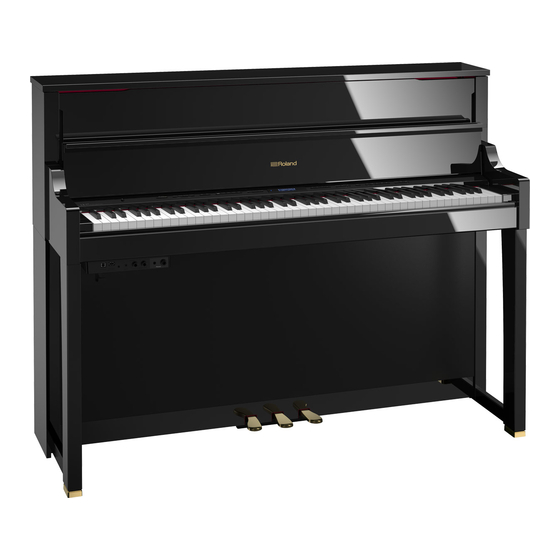
Summary of Contents for Roland LX-17
- Page 1 Before using this unit, carefully read “USING THE UNIT SAFELY” and “IMPORTANT NOTES” (leaflet “USING THE UNIT SAFELY” and Owner’s Manual (p. 26)). After reading, keep the document(s) including those sections where it will be available for immediate reference. Copyright © 2015 ROLAND CORPORATION...
-
Page 2: Easy Quick Guide
For more about the sounds, refer to “Tone List” at the end of this manual. Listening Piano songs recommended for listening Piano Masterpieces Songs corresponding to the included Masterpieces page collection of scores, “Roland Classical Piano Masterpieces. ” Famous popular songs and classical compositions Using the Metronome Easy Piano Songs corresponding to the included collection of scores, “Let’s Enjoy Piano. -
Page 3: Table Of Contents
Piano Sound: SuperNATURAL Piano Modeling USB Flash Memory (*1) Option PHA-50 Keyboard: Wood and Plastic Hybrid Structure, with Escapement and *1: Use USB Flash Memory sold by Roland. We cannot guarantee operation if Keyboard (sold separately) Ebony/Ivory Feel (88 keys) other products are used. -
Page 4: Before You Play
However, it will close quite abruptly if it has been opened only slightly (LX-17 only). 5 When opening or closing the lid, take care not to pinch your Use both hands to lift up the top lid. -
Page 5: Panel Descriptions
° Panel Descriptions [L] Button The power turns on/off when you open/close the lid. If you want to turn the power on/off with the lid left open, press the [L] button. To turn the power off, long-press the [L] button. * Never disconnect the power cord while the screen indicates “Don’t disconnect the power. -
Page 6: Operation Guide
Basic operations ° Operation Guide Select a setting item Use the [K] [J] buttons. Edit a value Use the [–] [+] buttons. Press the [–] [+] buttons Restore the default value simultaneously. Selecting a Tone In addition to piano sounds, the unit lets you enjoy performing with Tone groups many other sounds. -
Page 7: Dividing The Keyboard For Two People (Twin Piano)
Operation Guide Dividing the Keyboard for Two People (Twin Piano) Creating Your Own Piano Tone (Piano Designer) You can divide the keyboard into left and right areas so that two You can create your own piano tone by customizing the elements of people can play the same range of pitches. -
Page 8: Display
Operation Guide Selecting an Item/Editing a Value Display This shows information such as the tone name, song name, tempo, Select a setting item Use the [K] [J] buttons. and time signature. Edit a value Use the [–] [+] buttons. Change a value Hold down the [–] button or [+] button. -
Page 9: Selecting A Song
Internal Memory Songs saved in internal memory Listening Piano songs recommended for listening Piano Masterpieces Songs corresponding to the included Masterpieces collection of scores, “Roland Classical Piano Masterpieces. ” Famous popular songs and classical Time signature Song name Tempo Measure... -
Page 10: Advanced Operation
° Advanced Operation ˙ Recording Your Performance It’s easy to record your own performances. Starting your recording and saving it You can play back a recorded performance to check your playing, or play along with a recorded performance. Type of recording 5 Parts will be separate. -
Page 11: Recording Audio
Advanced Operation Recording Audio Converting an SMF-recorded song to audio Here’s how to record your performance on the unit as audio. The A song recorded as SMF can be re-recorded as audio so that you recorded song can be used on your computer. can play it back on your computer. -
Page 12: Copying A Saved Song (Copy Song)
Advanced Operation Copying a Saved Song (Copy Song) Deleting a Saved Song (Delete Song) Songs that have been saved in internal memory can be copied to Here’s how to delete a song that you saved on an internal memory or USB flash drive. -
Page 13: Personalizing Your Piano Sound (Piano Designer)
Advanced Operation ˙ Personalizing Your Piano Sound (Piano Designer) Parameter Value Explanation Adjusts the sympathetic vibrations of an acoustic piano’s What is Piano Designer? String Duplex Scale. Hammer Noise Duplex Scale Off, 1–10 Resonance This unit allows you to personalize Higher settings will make the sympathetic vibration your piano sound by adjusting louder. -
Page 14: Saving Your Performance Settings (Registration)
Advanced Operation ˙ Saving Your Performance Settings (Registration) Tone settings and settings such as Dual Play or Split Play can be Recalling a Registration saved and recalled easily. Such settings are called a “registration. ” Press the [Registration] button. You can save a total of 25 registrations, five each in buttons [1]–[5]. Press a number button ([1] to [5]) to choose the location These 25 registrations are collectively called a “registration set. -
Page 15: Saving A Registration Set (Registration Export)
Advanced Operation Saving a Registration Set (Registration Export) Loading a Saved Registration Set (Registration Import) You can save all registrations held in registration memory into a registration set on a USB flash drive. Here’s how a registration set that’s saved on a USB flash drive can be Connect your USB flash drive to the USB Memory port loaded into the [Registration] button. -
Page 16: Loading/Saving Piano Setups
Advanced Operation ˙ Loading/Saving Piano Setups This unit lets you load a piano setup that you’ve saved on a USB flash Loading Piano Settings (Piano Setup Import) drive, or save your piano setup to a USB flash drive. MEMO Connect your USB flash drive to the USB Memory port (p. -
Page 17: Convenient Functions
Advanced Operation ˙ Convenient Functions Initializing the Memory (Format Media) Restoring the Factory Settings (Factory Reset) Here’s how to erase all of the files that you saved in internal memory Here’s how to restore all registrations and internally saved settings to or on a USB flash drive (sold separately). -
Page 18: Various Settings (Function Mode)
Advanced Operation ˙ Various Settings (Function Mode) Basic Operations in Function Mode Simultaneously press the [Ambience] button and [Brilliance] button. The unit is in Function mode. Use the [K] [J] buttons to select the item that you want to set. MEMO Depending on the item that you select, another screen may appear, allowing you to select additional items. -
Page 19: Specifying The Song (Smf) Playback Mode (Smf Play Mode)
Advanced Operation Indication Value Explanation Specifying the Song (SMF) Playback Mode (SMF Play Mode) When playing back a song (SMF), select the appropriate setting depending on whether you’re playing an internal song or external data. * The acoustic projection effect (p. 10) is not reproduced if the SMF Playback mode is set to “External. ” Some of the Piano Designer effects are also not applied in this case. -
Page 20: Midi Transmit Channel Settings (Midi Transmit Ch)
Advanced Operation Indication Value Explanation MIDI Transmit Channel Settings (MIDI Transmit Ch) This setting specifies the MIDI channel on which the unit will transmit. MIDI Transmit Ch This unit will receive all sixteen channels (1–16). Off, 1–16 Changing the Language Displayed in the Screen (Language) Language You can change the language that is displayed in the screen. -
Page 21: Using The Bluetooth® Functionality
Bluetooth device screen of your mobile device. Music data played back by the mobile device can be heard through This unit is paired with the mobile device. When pairing succeeds, “LX-17 this unit’s speakers. Audio” or “LX-7 Audio” is added to the list of “Paired Devices” on your mobile device. -
Page 22: Using The Pedal To Turn Pages On A Music Score App
This unit will be paired with the mobile device. When pairing and use the [+] button to select “MIDI.” succeeds, the model name of this unit (“LX-17” or “LX-7”) is added to the “Paired Devices” list of the mobile device. -
Page 23: Connecting Your Equipment
USB memory access indicator is blinking. * You can use the [Ambience] button to adjust the Headphones 3D * Use a USB flash drive sold by Roland. We cannot guarantee Ambience effect. operation if any other USB flash drive is used. -
Page 24: Troubleshooting
5 Keep the volume down. Unable to read Are you using from/write to (optional) Roland USB Use a USB flash drive sold by Roland. – 5 Move away from the objects that are resonating. USB flash drive flash drive? The selected... -
Page 25: Error Messages
A MIDI transmission error has occurred. Check the MIDI cable and connected MIDI device. There may be a problem with the system. Repeat the procedure from the beginning. If it is not solved after you have tried several times, contact the Roland Error 51 service center. -
Page 26: Using The Unit Safely
• For routine care, gently clean the surface using a soft content or making them available on a computer • Roland assumes no liability concerning the restoration cloth or a piano-use feather duster. You must avoid network. - Page 27 ° Tone List Piano Other Tone Name Tone Name Concert Piano UprightPiano Ballad Piano MellowUprght Mellow Piano BrightUprght Bright Piano Rock Piano RagtimePiano MEMO Fortepiano Mellow Forte Piano Designer can be used to customize the sound only for tones of the [Piano] Bright Forte button.
- Page 28 “External, ” the volume of all parts will change. Moments Musicaux op.94-3 Franz Peter Schubert * Songs marked by an asterisk (*) are arranged by Roland Corporation. The copyrights Gavotte François Joseph Gossec to these songs are owned by the Roland Corporation.
- Page 29 For EU countries European Community Declaration of Conformity Hereby, Roland Corporation, declares that this LX-17/LX-7 is in compliance with the essential requirements and other relevant provisions of Directive 1999/5/EC. Hereby, Roland Corporation, declares that this LX-17/LX-7 is in compliance with the essential requirements and other relevant English provisions of Directive 1999/5/EC.