TP-Link RE450 Placement Manual
Easy wi-fi extension flexible placement
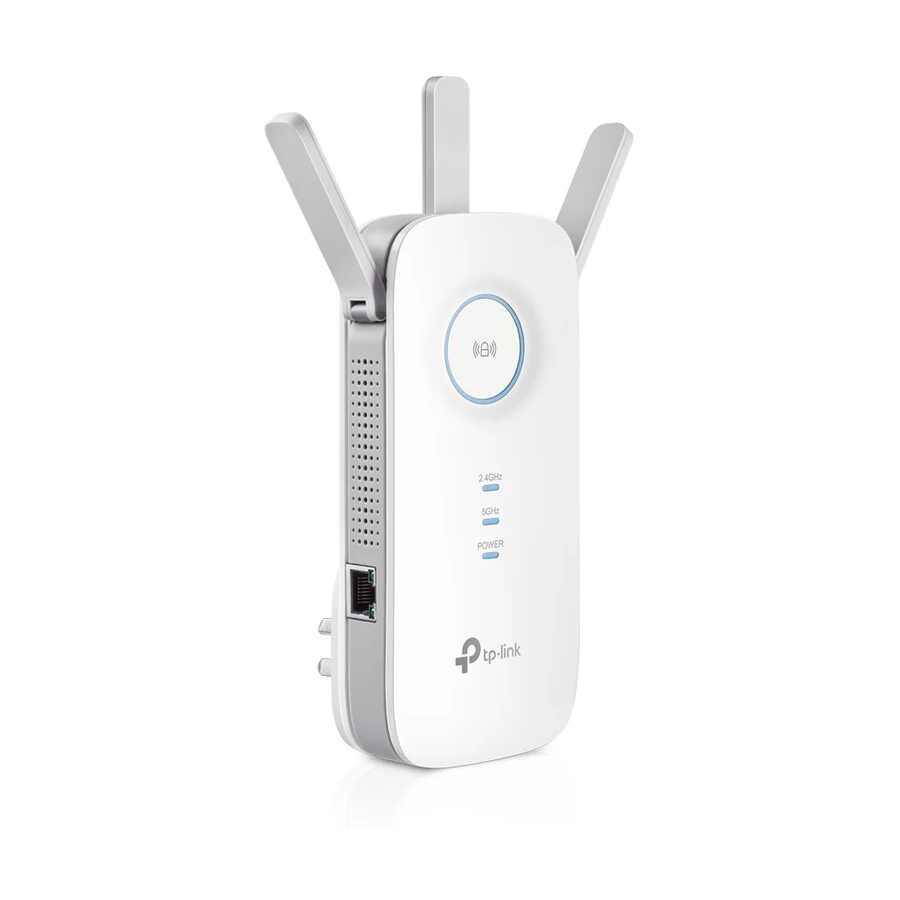
ac1750 wi-fi range extender
Hide thumbs
Also See for RE450:
- Quick start manual ,
- Quick installation manual (61 pages) ,
- User manual (41 pages)
Table of Contents
Advertisement
Quick Links
Advertisement
Table of Contents

Related Manuals for TP-Link RE450


Summary of Contents for TP-Link RE450
- Page 1 1910011296 REV 1.0.1...
- Page 2 Specifications are subject to change without notice. a registered trademark of TP-LINK TECHNOLOGIES CO., LTD. Other brands and product names are trademarks or registered trademarks of their respective holders. No part of the specifications may be reproduced in any form or by any means or used to make any derivative such as translation, transformation, or adaptation without permission from TP-LINK TECHNOLOGIES CO., LTD.
- Page 3 responsible for compliance could void the user’s authority to operate the equipment. Note: The manufacturer is not responsible for any radio or tv interference caused by unauthorized modifications to this equipment. Such modifications could void the user’s authority to operate the equipment. This equipment has been tested and found to comply with the limits for a Class B digital device, pursuant to part 15 of the FCC Rules.
- Page 4 network and service supply (not for Country Restriction Reason/remark spectrum) Bulgaria None General authorization required for Russian Federation No info outdoor use and public service Note: Operations in the 5.15-5.25GHz band are restricted to indoor usage France Outdoor use limited to Military Radiolocation use.
- Page 5 CAN ICES-3 (B)/NMB-3(B) 信, 指依電信規定作業之無線電信。 低功率射頻電機需忍受合法通信或工業、 科學以及醫療用電波輻射性電機設備之干擾。 減少電磁波影響,請妥適使用。 This equipment complies with IC radiation exposure limits set forth for an 安全諮詢及注意事項 uncontrolled environment. This equipment should be installed and operated with minimum distance 20cm between the radiator & your body. 請使用原裝電源供應器或只能按照本產品注明的電源類型使用本產品。...
- Page 6 When product has power button, the power button is one of the way to ● shut off the product; when there is no power button, the only way to completely shut off power is to disconnect the product or the power adapter from the power source.
- Page 7 TP-LINK TECHNOLOGIES CO., LTD The product carries the CE Mark: For the following equipment: Product Description: AC1750 Wi-Fi Range Extender Person responsible for marking this declaration: Model No.: RE450 Trademark: TP-LINK We declare under our own responsibility that the above products satisfy all...
-
Page 8: Table Of Contents
Introduction ................ 1 Change the Extender’s IP Address ........20 Product Overview ..............1 DHCP Server ................20 What can your Extender do ..........1 Settings ................21 Support for the 802.11ac wireless technology ..... 1 View the DHCP Client List ..........22 Main Features ............... -
Page 9: Introduction
Even though you may not be familiar with the extender, you can easily configure it with the help of this guide. Before installing the extender, please look through this guide to get the full information of the RE450 AC1750 WiFi Range Extender. With using IEEE 802.11ac wireless technology, this device can transmit wireless data at the rate of up to 300Mbps (2.4GHz) + 433Mbps (5GHz). - Page 10 Complies with IEEE 802.11ac Provides multiple encryption security Types including: 64/128/152-bit WEP and WPA-PSK/WPA2-PSK Supports Built-in DHCP server Supports Firmware Upgrade Supports Web-based Management Name Status Indication The extender is connected to the router, and is in Solid blue a good location.
- Page 11 Power Button: You can press the Power button to turn on or off the extender. Name Status Indication Ethernet Port: One 10/100Mbps RJ45 Ethernet port used to add wireless Blinking WPS connection is in process. connectivity to an Ethernet-enabled device such as Internet TV, DVR, Gaming console and so on.
-
Page 12: Before You Begin
Typical ranges vary based on the types of materials and background RF (radio frequency) noise in your home or office. In order to optimize the performance of RE450, please follow the instructions below to achieve an... - Page 13 No Interference - Choose a location away from Bluetooth devices and ● other household electronics, such as cordless phone, microwave, and baby monitor, etc., to minimize signal interference. Your router should support WPS. Otherwise, please use Using your web browser. Power On Plug the extender into an electrical outlet near your router, and wait until the Power LED is lit and solid blue.
- Page 14 If the RE LED does not change from flashing to solid, please refer to Using your Web Browser. Some ISP gateways disable the WPS function by default, if the WPS method fails, please refer to Using your Web Browser.
- Page 15 Power On Plug the extender into an electrical outlet near your router, and wait until the Power LED is lit and solid blue. Connecting via Wireless ● Disconnect the Ethernet (wired) connection to your computer. Click the Wi-Fi icon on the taskbar and connect to the extender's network (e.g. TP- LINK_Extender_2.4GHz or _5GHz).
- Page 16 Per FCC regulations, all Wi-Fi products marketed in the Configure U.S. is fixed to the U.S. region. Create a new username and password to log in the web management page, then click Confirm. Select your region,then click Next Connect the Extender to the Internet...
- Page 17 Select your router's 2.4GHz host network and enter the password, Select your router's 5GHz host network and enter the password, then then click Next. click Next. If your router does not support 5GHz wireless network, please click Skip to continue. Connect the Extender to the Internet...
- Page 18 Either keep the same SSIDs as your host network or create new Verify your wireless settings and click Finish. The corresponding names for the extended networks, then click Next. LEDs (2.4GHz and 5GHz) should turn on and stay solid. Connect the Extender to the Internet...
- Page 19 Relocate Plug the extender into an electrical outlet about halfway between your router (Host Network) and the Wi-Fi dead zone. Wait until the LED is lit with a solid blue. If not, relocate the extender closer to the router to achieve a good (or better) signal quality. Enjoy! Both extended networks share the same Wi-Fi password as your main network, but may have different wireless network names if you customize the SSIDs...
-
Page 20: View The Information Of The Extender
Launch a web browser and type in http://tplinkrepeater.net, then go to Settings > Status webpage. You can view the network connection in the Status webpage. The normal status. ● The extender is failed to connect to the wireless network of your router. ●... - Page 21 The extender is connected to the router unnormally. Maybe the gateway ● is set incorrectly in the Static IP. You can select “Obtain an IP address automatically” on the “LAN Settings” page. Launch a web browser and type in http://tplinkrepeater.net, then go to Settings >...
-
Page 22: Extend Another Network
If you want to extend another network, you can refer to the following steps to finish it quickly. Launch a web browser and type in http://tplinkrepeater.net,then go to Settings->Wireless->Connect to Network webpage. Enable Connect to 2.4GHz/5GHz Network. Then click Wireless Scanner to scan the network you want to extend. - Page 23 Select the network you want to extend from the list. Once a network is selected, the SSID and security settings of that network will automatically fill in. If the host network is encrypted, enter the password in the box of the host wireless security. If the network you want to extend is on but not shown in the list, please try by following the steps below.
- Page 24 Relocate. Plug in the extender halfway between your wireless router/AP (Host Network) and the Wi-Fi dead zone. Wait for the extender to reconnect and the LED turns solid blue. If not, relocate it closer to the router to achieve a good (or better) signal quality.
-
Page 25: Manage The Extender's Wi-Fi Security Settings
Click Save to save the settings. Manage the Extender’s Wi-Fi Security Settings Control the Wireless Devices Access to the Extender Change your Admin Account The Access Control function controls the devices connected to the extender by Launch a web browser and type in http://tplinkrepeater.net, then go to the wireless connection. - Page 26 Add the device to the blacklist by following the ways. Add the Online Devices to the blacklist. ● In the Online Devices list, you can view the information about the devices connected to the extender. For one device, you can click the icon to add the device to the blacklist.
- Page 27 settings. MAC Address: Enter the MAC address of the host in XX-XX-XX-XX- XX-XX format (e.g. 00-11-22-33-44-AA). Click OK to save your settings. Modify or Remove a Device in the Blacklist/Whitelist Launch a web browser and type in http://tplinkrepeater.net, then go to Settings->Wireless->...
-
Page 28: Change The Extender's Ip Address
them at the same time. Change the Extender’s IP Address By default, the extender is set to obtain an IP address automatically from the front router. If you want to use a specific IP address appropriate to your network demand, please refer to the steps below. We do NOT recommend you change the IP address unless you IP Address: Enter the IP address in dotted-decimal notation ... -
Page 29: Settings
To use the DHCP server function of the device, you should configure all computers in the LAN as "Obtain an IP Address automatically" mode. Settings Set the DHCP Server status to Auto (by default) ● When the DHCP Server is Auto, the extender automatically detects to find the devices enabling the DHCP Server. -
Page 30: View The Dhcp Client List
Disable DHCP Server Assigned IP Address: The IP address that is allocated to the client ● by the DHCP server. If the DHCP server of the extender is Off, please make sure the DHCP server of your router is on. Otherwise, you have to configure the IP Lease Time: The time duration that the IP address is leased to the ... -
Page 31: More Functions
The extender RE450 can be used as a wireless adapter to connect any Ethernet-enabled device, such as a Blu-ray player, game console, DVR, or smart TV, to your wireless network. After the extender connected to the Internet, you can connect an Ethernet- enabled device to the extender using an Ethernet cable. -
Page 32: Manage The Extender
turn off the LEDs at the specific time LED Control can . The extender can still work normally after the LEDs are off. Launch a web browser and type in http://tplinkrepeater.net, then go to Settings-> System Tools -> Time Settings webpage. Select the Time Zone of your location. - Page 33 LED Off Time: Set the time to turn off the LEDs. ● Please DO NOT power off the extender during the Click Save to save your settings. upgrade process. Launch a web browser and type in http://tplinkrepeater.net,then go to Settings->System Tools->Firmware Upgrade webpage. It is highly recommended to backup your current configurations, in case a recovery is needed to restore the system to a previous state or from the factory You can view the firmware version and the software version.
- Page 34 Please DO NOT power off the extender during the backup process. Configuration Restore ● Click Browse to locate and select your backup file. Click Restore and then Factory Restore will erase all settings that you have configured YES to restore the extender. The restore process may take a few minutes for the extender.
- Page 35 Launch a web browser and type in http://tplinkrepeater.net. Click Reboot on the top right corner to reboot the extender. Launch a web browser and type in http://tplinkrepeater.net. Click Logout on the top right corner to log out the management webpage You can also click the following buttons to apply the settings.
-
Page 36: Glossary
Name Status Common Default Settings Username admin Password admin IP Address 192.168.0.254 Subnet Mask 255.255.255.0 This chapter covers the following topics: Domain http://tplinkrepeater.net Factory Defaults Wireless Troubleshooting Specifications 2.4GHz: TP-LINK_Extender_2.4GHz SSID Glossary 5GHz: TP-LINK_Extender_5GHz Wireless Security Disabled Access Control Disabled... - Page 37 RESET button until all LEDs turn on momentarily, then release the An easy way is to compare the signal strength of your target wireless button. network (symbolized by its SSID), with RE450 in operation vs. out of Option Two: Restore the default settings from “System Tools > Restore ●...
- Page 38 Physical and Environment 0℃~40℃ (32℉~104℉) Working Temperature General 10% ~ 90% RH, Non-condensing IEEE 802.3, IEEE 802.3u, IEEE 802.11a, IEEE Working Humidity Standards and 802.11n, IEEE 802.11b, IEEE 802.11g, IEEE -40℃~70℃(-40℉~158℉) Protocols 802.1x, IEEE 802.11e, IEEE 802.11i, IEEE Storage Temperature 802.11ac, TCP/IP, DHCP 5% ~ 95% RH, Non-condensing Storage Humidity...
- Page 39 products. associated devices communicate with each other wirelessly, which network serving users are limited in a local area. Access Point (Range Extender) A wireless LAN transceiver or "base ● station" that can connect a wired LAN to one or many wireless devices. WPA (Wi-Fi Protected Access) - WPA is a security technology for wireless ●...