Table of Contents
Advertisement
Quick Links
Advertisement
Table of Contents
Troubleshooting

Summary of Contents for Konica Minolta Bizhub 165
- Page 1 User’s Guide...
-
Page 3: Table Of Contents
Paper size ............................1-18 Paper indication ..........................1-18 Part names and their functions Options............................. 2-3 Main unit ............................2-4 2.2.1 Outside of the main unit........................2-4 2.2.2 Inside of the main unit........................2-5 2.2.3 Control Panel ............................. 2-6 bizhub 165 Contents-1... - Page 4 Uninstalling the scanner driver......................6-9 Printer function Print operations..........................7-3 Canceling a print job .......................... 7-3 Sleep mode............................7-3 GDI printer driver settings......................7-4 7.2.1 Common setting ..........................7-4 7.2.2 [Setup] tab............................7-5 7.2.3 [Layout] tab ............................7-6 Contents-2 bizhub 165...
- Page 5 Loading paper into the Bypass Tray ....................10-5 10.2 Toner .............................. 10-6 10.2.1 Checking Toner..........................10-6 Replacement message ........................10-6 Replacing the Toner Bottle ......................10-6 10.3 Cleaning procedure ........................10-9 Original Glass, Control Panel ......................10-9 Housing, Original Pad ........................10-9 bizhub 165 Contents-3...
- Page 6 Clearing paper jams at the Bypass Tray (optional) ................ 11-13 Specifications 12.1 Paper .............................. 12-3 Paper types and paper capacities ....................12-3 12.2 Machine specifications......................... 12-4 bizhub 165 ............................12-4 12.3 Option............................. 12-6 Multi Bypass Tray MB-503 ......................12-6 Appendix 13.1 Glossary ............................13-3 Index 14.1...
-
Page 7: Introduction
Introduction... -
Page 9: Energy Star
"low-power ® mode" after a period of inactivity. An ENERGY STAR product uses energy more efficiently, saves you money on utility bills and helps protect the environment. bizhub 165... -
Page 10: Trademarks And Copyrights
Note User's Guide may not be reproduced in part or in full without permission. KONICA MINOLTA BUSINESS TECHNOLOGIES, INC. will not be held liable for any incidents caused by us- ing this printing system or User's Guide. Information included in User's Guide is subject to change without notice. -
Page 11: Software License Agreement
Trademarks and copyrights SOFTWARE LICENSE AGREEMENT This package contains the following materials provided by KONICA MINOLTA BUSINESS TECHNOLOGIES, INC. (KMBT): software included as part of the printing system ("Printing Software"), the digitally-encoded ma- chine-readable outline data encoded in the special format and in the encrypted form ("Font Programs"), other software which runs on a computer system for use in conjunction with the Printing Software ("Host Soft-... -
Page 12: Safety Information
• Use the power cord supplied in the package only for this machine and NEVER use it for any other product. Failure to observe this precaution could result in a fire or electrical shock. bizhub 165... - Page 13 Dust that accumu- lates between the plug terminals may cause a fire. Grounding WARNING • Connect the power cord to an electrical outlet that is equipped with a grounding terminal. bizhub 165...
- Page 14 Immediately turn OFF the power switch, un- plug the power cord from the power outlet, and then call your au- thorized service representative. If you keep on using it as is, a fire or electrical shock could result. bizhub 165...
- Page 15 When the Fax is not installed: Before successive holidays CAUTION • Unplug the product when you will not use the product for long pe- riods of time. bizhub 165...
-
Page 16: Regulation Notices
This machine is certified as a Class 1 laser product: This means the machine does not produce hazardous laser radiation. Internal laser radiation Maximum Average Radiation Power: 5.3 μW (bizhub 165) at the laser aperture of the print head unit. Wavelength: 770-800 nm This product employs a Class 3B laser diode that emits an invisible laser beam. -
Page 17: For European Users
Dersom apparatet brukes på annen måte enn spesifisert i denne bruksan-visning, kan brukeren ut- settes for unsynlig laserstråling som overskrider grensen for laser klass 1. Dette en halvleder laser. Maksimal effekt till laserdiode er 7 mW og bølge-lengde er 770-800 nm. bizhub 165 1-11... -
Page 18: Laser Safety Label
To avoid incommoding reflections at visual display workplaces this device must not be placed in the direct field of view. Das Gerät ist nicht für die Benutzung im unmittelbaren Gesichtsfeld am Bildschirmarbeitsplatz vorgesehen. Um störende Reflexionen am Bildschirmarbeitsplatz zu vermeiden, darf dieses Produkt nicht im unmittel- baren Gesichtsfeld platziert werden. 1-12 bizhub 165... -
Page 19: Caution Notations And Labels
Do not remove caution labels or notations. If any caution label or caution notation is soiled, please clean to make legible. If you cannot make them legible, or if the caution label or notation is damaged, please contact your service representative. bizhub 165 1-13... -
Page 20: Space Requirements
928 (36-9/16) 783 (30-13/16) 606 (23-7/8) 570 (22-7/16) 927 (36-1/2) bizhub 165 + MB-503 Unit: mm (inch) NOTICE Be sure to allow a clearance of 200 mm (8 inches) or more at the back of this machine. 1-14 bizhub 165... -
Page 21: Operation Precautions
Adhesive that contains solvent (e.g., spray glue) may dissolve the toner on copies. Precaution on transportation Assign two or more persons who should position their hands at the portions shown when moving the ma- chine. bizhub 165 1-15... -
Page 22: Legal Restrictions On Copying
In addition, it is prohibited under any circumstances to copy domestic or foreign currencies, or works of art without permission of the copyright owner. When in doubt about the nature of an original, consult with legal counsel. 1-16 bizhub 165... -
Page 23: Conventions Used In This Manual
This symbol indicates transition of the Control Panel to access a desired menu item. COPY FUNCTION ID COPY COMBINE ORIGINAL SORT The relevant Display is shown. Reference This symbol indicates a reference. View the reference as required. bizhub 165 1-17... -
Page 24: Key Symbols
X side the length. Paper indication w indicates the paper size with the length (X) being longer than the width (Y). v indicates the paper size with the length (X) being shorter than the width (Y). 1-18 bizhub 165... -
Page 25: Part Names And Their Functions
Part names and their functions... -
Page 27: Options
The original is scanned by the scanner section, and the scanned image is printed by the printer section. Referred to as the "machine", the "main unit", or the "bizhub 165" through the manual. Multi Bypass Tray MB-503 (Op- Allows you to load up to 100 sheets. -
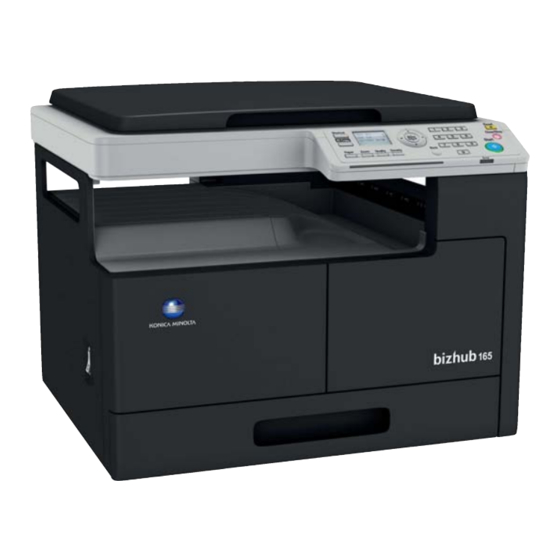
Page 28: Main Unit
The illustration shows the main unit with an optional Multi Bypass Tray MB-503. Name Original Cover Original Pad Control Panel 1st Side Cover 1st Side Cover Release Lever Bypass Tray (Option) Tray 1 Front Cover Output Tray Power Switch Power Cord USB Port (Type A) USB2.0/1.1 bizhub 165... -
Page 29: Inside Of The Main Unit
Main unit 2.2.2 Inside of the main unit The illustration shows the main unit with an optional Multi Bypass Tray MB-503. Name Original Glass Fusing Unit Top Cover Fusing Unit Drum Paper Take-Up Roller Toner Bottle Original Scale bizhub 165... -
Page 30: Control Panel
Main unit 2.2.3 Control Panel Name Shortcut Display + , , , * , ) Menu/Select Keypad Reset Clear/Stop Start Error Back Status LED Density Quality Zoom Paper ID Copy bizhub 165... -
Page 31: Using This Machine
Using this machine... -
Page 33: Turning On Or Off The Machine
Press the Menu/Select key ö [UTILITY] ö [MACHINE SETTING] ö [SLEEP MODE]. To change the length of time until the Auto Panel Reset function is operated: Press the Menu/Select key ö [UTILITY] ö [MACHINE SETTING] ö [AUTO PANEL RESET]. bizhub 165... -
Page 34: Basic Operations
Close Tray 1. Specify the paper size and paper type for Tray 1. % Press the Menu/Select key ö [COPY JOB SETTING] ö [TRAY1 PAPER] or press the Paper key on the control panel. bizhub 165... -
Page 35: Loading Paper Into The Bypass Tray
% To specify from the Menu function, press the Menu/Select key ö [COPY JOB SETTING] ö [BY- PASS PAPER]. Settings [SIZE] Select a paper size. For details on how to configure a custom size, refer to page 3-6. [TYPE] Select a paper type. bizhub 165... -
Page 36: Configuring A Custom Size
Lift open the Original Cover. Place the original face down on the Original Glass. % Load the original by placing it so that its top side faces the back or the left side of the machine. bizhub 165... -
Page 37: Basic Copy Operations
% To interrupt the copy operation being performed, press the Clear/Stop key. % If the following screen appears, place the new original on the Original Glass, then press the Menu/Select key to scan it. To start printing, press the Start key. NEXT PAGE? SCAN=MENU SELECT, (PRINT=START) bizhub 165... - Page 38 Basic operations bizhub 165...
-
Page 39: Control Panel Keys
Control Panel keys... -
Page 41: Control Panel And Functions
Press this key to select a paper tray to be used. For details, Paper refer to page 5-5. Press this key to copy the contents of the front and back sides ID Copy of a card-size original such as a driver's license, on one sheet. bizhub 165... -
Page 42: Display Indications
Indicates that the second side of recycled paper is selected. Indicates that special paper is selected. Zoom ratio Indicates the fixed/manual zoom ratio selected for use. Quality Indicates the selected quality setting. Density Indicates the density level for the selected density setting. bizhub 165... - Page 43 A maintenance is due and the Drum should be replaced. Contact your service repre- sentative. The machine is receiving print data. The print data waits in a queue for printing. Menu or function Displays the menu, function or setting. bizhub 165...
- Page 44 Press the * or ) key to change the settings. Press the + or , key to change the settings, and press the ) key to move to the setting change screen. Press the +, ,, * or ) key to change the settings. bizhub 165...
-
Page 45: Copy Function
Copy function... -
Page 47: Available Copy Features
Copy function Available copy features These are the copy features that can be used in this machine. Settings Full size copy Enlarged/reduced copy [ID COPY] [2in1] (Portrait) [2in1] (Landscape) [4in1] ([PATTERN1]) [4in1] ([PATTERN2]) [SORT] [SORT] + [CRISSCROSS MODE] bizhub 165... - Page 48 Available copy features Settings [LEFT ERASE] [UPPER ERASE] [FRAME ERASE] [BOOK SEPARATION] [BOOK SEPARATION] + [FRAME ERASE] [BOOK SEPARATION] + [CENTER ERASE] [BOOK SEPARATION] + [CENTER + FRAME ERASE] bizhub 165...
-
Page 49: Basic Settings
129% (LTR%11 e 17), 200% Manual zoom The zoom ratio can be set between 50% and 200% by using the keypad or the + and , keys. It can be adjusted in manual zoom after fixed zoom is selected. bizhub 165... - Page 50 The density level is manually adjusted. The reproduced image is lighter when the den- sity is set to side and darker when the density is set to side. Reference To configure custom sizes: Press the Menu/Select key ö [UTILITY] ö [CUSTOM SIZE MEMORY]. bizhub 165...
-
Page 51: Application Settings ([Copy Function])
Place the original so that its top side faces the left side of the machine. Position the original 4 mm (3/16 inches) away from the Original Scale. Press the Menu/Select key ö [COPY FUNCTION] ö [ID COPY] ö [ON], or press the ID Copy key on the control panel. bizhub 165... -
Page 52: Combine Original]
The zoom ratio is automatically set to 70% (Inch: 64%). Load paper of the same size as the original. If the size of the original differs from that of the paper being used, change the zoom ratio manually. Press the Menu/Select key ö [COPY FUNCTION] ö [COMBINE ORIGINAL] ö [2in1]. bizhub 165... -
Page 53: [4In1]
Original size: A3, Paper size: A3, Zoom ratio: 50% Press the Menu/Select key ö [COPY FUNCTION] ö [COMBINE ORIGINAL] ö [4in1]. Reference To change the 4in1 copy order: Press the Menu/Select key ö [UTILITY] ö [COPY SETTING] ö [4in1 COPY ORDER]. bizhub 165... -
Page 54: Sort]
Select the paper tray that is loaded with paper of the same orientation as the original. Press the Menu/Select key ö [COPY FUNCTION] ö [SORT] ö [ON]. Reference To specify the Crisscross Mode: Press the Menu/Select key ö [UTILITY] ö [JOB SETTING] ö [CRISSCROSS MODE] ö [ON]. 5-10 bizhub 165... -
Page 55: Erase]
Erases the left side of the original. [UPPER ERASE] Erases the upper side of the original. [FRAME ERASE] Erases the four sides of the original. Reference To specify the erase width: Press the Menu/Select key ö [UTILITY] ö [COPY SETTING] ö [ERASE SETTING]. bizhub 165 5-11... -
Page 56: Book Separation]
Select this option if the original is bound on the left. The left-hand page of the double-page spread original is copied first. [RIGHT BINDING] Select this option if the original is bound on the right. The right-hand page of the double-page spread original is copied first. 5-12 bizhub 165... -
Page 57: [Erase] + [Book Separation]
Select this option to make Book Separation copies by erasing the center binding of the double-page spread original. [CENTER+FRAME ERASE] Select this option to make Book Separation copies by erasing the en- tire areas around the text and the center binding of the double-page spread original. bizhub 165 5-13... - Page 58 Application settings ([COPY FUNCTION]) Reference To specify the erase width: Press the Menu/Select key ö [UTILITY] ö [COPY SETTING] ö [ERASE SETTING]. To specify the Book Separation: Press the Menu/Select key ö [COPY FUNCTION] ö [BOOK SEPARATION]. 5-14 bizhub 165...
-
Page 59: Using [Mode Memory]
Recall the program registered. Press the Menu/Select key ö [COPY JOB SETTING] ö [MODE MEMORY] ö [RECALL]. MODE MEMORY RECALL PROGRAM1 PROGRAM2 Select the program number to be recalled. The Display shows the copy settings stored in the program number. bizhub 165 5-15... -
Page 60: Function Combination Matrix
Function combination matrix Function combination matrix Function combination matrix for bizhub 165. Paper Quality Den- Nin1 Erase Sort sity Mode B: Set second Mode A: Set first Manual Paper Selection (Tray 1) Manual Paper Selection (Bypass Tray) Paper set Manual Paper... - Page 61 (2): If the [PHOTO] quality setting is selected, the [AUTO] density setting cannot be selected. (3): After selecting [PHOTO] quality, the density will change to Manual density. (4): Function is available only when [BOOK SEPARATION] is ON. (5): When mode B is set up, the zoom ratio changes to 100%. bizhub 165 5-17...
- Page 62 Function combination matrix 5-18 bizhub 165...
-
Page 63: Installing The Driver
Installing the driver... -
Page 65: Precautions For Installation
Traditional Chinese, Simplified Chinese, Thai, Hungarian, Lithuanian, Polish, Romanian, Russian, Slovakian, Turkish 6.1.2 Connecting to the computer Connect this machine to the computer using a USB cable. Use a type A (4 pin, male) to type B (4 pin, male) USB cable. bizhub 165... -
Page 66: Printer Drivers Compatible With Respective Operating Systems
Printer driver Page description Supported Operating Systems language KONICA MINOLTA GDI Windows XP (x86, SP3 or later) Driver (GDI driver) Windows XP (x64, SP2 or later) Windows Server 2003 (x86/x64, SP2 or later) Windows Vista (x86/x64, SP2 or later) -
Page 67: Installing Using Plug And Play
After finishing the installation, make sure that the icon for the installed printer is displayed in the [Print- ers] window. Remove the DVD-ROM from the DVD-ROM drive. This completes the installation of the scanner driver and printer driver. bizhub 165... -
Page 68: Installing The Driver In Windows Xp/Server 2003
After finishing the installation, make sure that the icon for the installed printer is displayed in the [Printers and Faxes] window. Remove the DVD-ROM from the DVD-ROM drive. This completes the installation of the scanner driver and printer driver. bizhub 165... -
Page 69: Installing Using Installer
The installation of the driver begins. % If the [Windows Security] window appears for verifying the publisher, click [Install this driver soft- ware anyway]. When instructed to do so, connect the machine to your computer with a USB cable. Click [Finish]. bizhub 165... -
Page 70: Uninstalling The Driver
% In Windows 7/Vista/Server 2008/Server 2008 R2, the dialog box appears to reconfirm if you are sure. Click [Uninstall]. Close the open windows, then restart the computer. % Be sure to restart the computer. This completes removing the printer driver. bizhub 165... -
Page 71: Uninstalling The Scanner Driver
Uninstalling the driver requires the administrator authority. Click [Start], then select [All Programs] (or [Programs]) - [KONICA MINOLTA :*** Scanner] - [UnInstS- can]. ("***" indicates a model name.) % In Windows 7/Vista/Server 2008/Server 2008 R2, when the [User Account Control] window appears, click [Continue] or [Yes]. - Page 72 Uninstalling the driver 6-10 bizhub 165...
-
Page 73: Printer Function
Printer function... -
Page 75: Print Operations
The confirmation message [JOB CANCEL] appears. Select [YES]. Sleep mode If print data is received while the machine is in the Sleep mode, the mode is canceled. When print data is received, the data is printed after the machine has finished warming up. bizhub 165... -
Page 76: Gdi Printer Driver Settings
Click this button to save current settings so that they can be recalled later. If [Factory Default] is selected, all settings return to their defaults. Up to 32 programs can be registered (including [Factory Default]). Up to 20 characters can be entered for the registered name. bizhub 165... -
Page 77: Setup] Tab
This function can be selected when the optional Bypass Tray is in- stalled on the machine. If [Auto] is selected, the paper tray with paper of the size selected in [Original Size] is used. [Paper type] Select a paper type to be used for printing. bizhub 165... -
Page 78: Layout] Tab
It can be specified when Nin1 is speci- fied for [Combination]. [Border Line] Select this check box to print an outline around each page. It can be specified when Nin1 is speci- fied for [Combination]. bizhub 165... -
Page 79: Per Page Setting] Tab
This function can be selected when the optional Bypass Tray is in- stalled on the machine. [Media Type] Select the type of paper used for the front cover. 7.2.5 [Watermark] tab Print the document with a watermark (character stamp) overlapped. bizhub 165... - Page 80 You can specify the positions using the scroll bars provided on the right of and under the image. [Delete] Click this button to delete the selected watermark. [1st Page Only] Select this check box to print the watermark only on the first page. bizhub 165...
-
Page 81: Quality] Tab
Originals are printed at 300 e 600 dpi. [Adjustment] Click this button to adjust the image quality. [Brightness] Adjust the brightness of the printed im- age. [Contrast] Adjust the density balance of the print- ed image. 7.2.7 [About] tab Displays the printer driver version information. bizhub 165... -
Page 82: Xps Printer Driver Settings
Click this button to save current settings so that they can be recalled later. If [Factory Default] is selected, all settings return to their defaults. Up to 32 programs can be registered (including [Factory Default]). Up to 20 characters can be entered for the registered name. 7-10 bizhub 165... -
Page 83: Setup] Tab
This function can be selected when the optional Bypass Tray is in- stalled on the machine. If [Auto] is selected, the paper tray with paper of the size selected in [Original Size] is used. [Paper type] Select a paper type to be used for printing. bizhub 165 7-11... -
Page 84: Layout] Tab
It can be specified when Nin1 is speci- fied for [Combination]. [Border Line] Select this check box to print an outline around each page. It can be specified when Nin1 is speci- fied for [Combination]. 7-12 bizhub 165... -
Page 85: Quality] Tab
Description [Resolution] Select the print resolution. [600 e 600] Originals are printed at 600 e 600 dpi. [300 e 600] Originals are printed at 300 e 600 dpi. 7.3.5 [About] tab Displays the printer driver version information. bizhub 165 7-13... - Page 86 XPS printer driver settings 7-14 bizhub 165...
-
Page 87: Scan Function
Scan function... -
Page 89: Twain Scanner Driver
Select the device from the dialog box, specify the desired settings, and click [Scan]. Specify the necessary settings. % For details, refer to page 8-4. Click [Scan]. Scanning begins. % To stop scanning, click [Cancel] or press [Esc]. bizhub 165... -
Page 90: Twain Scanner Driver Settings
Adjust the brightness of the image. [Help] Click this button to display the help files. [About] Click this button to display version information. [Scan] Click this button to scan an image. [Close] Click this button to close the properties window. bizhub 165... -
Page 91: Wia Scanner Driver
Adjust the quality of the scanned image. [Preview] A scanned image appears. Drag the rectangle over the image to select an area. [Scan] Click this button to scan an image. [Cancel] Click this button to close the properties window. bizhub 165... -
Page 92: Adjusting The Quality From [Custom Settings]
Click this button to return to the previous settings. [OK] Click this button to enable changed settings. [Cancel] Click this button to close the properties window. Factory default [Resolution] [300] [Brightness] [Picture Type] [Black and white picture or text] bizhub 165... -
Page 93: Menu]
[MENU]... -
Page 95: Copy Function]
Configure functions and settings of the machine. p. 9-6 [TOTAL PAGE] You can check the total number of prints since this p. 9-13 machine was installed. [COPY FUNCTION] Configure the application settings for making copies. For details, refer to page 5-7. bizhub 165... -
Page 96: Copy Job Setting]
[MODE MEMORY] Combine frequently used copy settings into programs and register them with this machine. These programs can easily be recalled as programs. Up to two programs can be registered. [RECALL] Recall a program. [REGISTER] Register a program. bizhub 165... - Page 97 [BYPASS PAPER] <Metric area> [SIZE]: [A4 v] <Inch area> [SIZE]: [Letter v] [TYPE]: [PLAIN] [QUALITY] [TEXT/PHOTO] [DENSITY] [AUTO] If the optional Multi Bypass Tray MB-503 is not installed, the following setting items cannot be selected. [TRAY SELECT] [BYPASS PAPER] bizhub 165...
-
Page 98: Utility]
Sleep mode. [DISABLE] Enters the Sleep mode when the time specified in the [SLEEP MODE] setting has elapsed. [ENABLE] Enters the Sleep mode immediately af- ter the print job is executed. bizhub 165... - Page 99 Specify whether or not display (light up) Status LED. Factory default [AUTO PANEL RESET] [1 min] [SLEEP MODE] [15 min] [SLEEP SHIFT] [ENABLE] [DENSITY (BOOK)] [MODE1] [PRINT DENSITY] [LCD CONTRAST] [KEY SPEED SETTING] [TIME TO START]: [1s] [INTERVAL]: [0.1s] [LANGUAGE] [ENGLISH] [STATUS LED] [ON] bizhub 165...
-
Page 100: Shortcut Setting]
[RIGHT BINDING] separate pages, the image of the origi- nal being divided about the mark on the Original Scale. For details, refer to page 5-12. Factory default [SHORTCUT SETTING] [2in1] bizhub 165... -
Page 101: Custom Size Memory]
Use this function to dry the Drum and eliminate the condensation. The machine completes the Drum Dehumidify within about one minute. Press the Menu/Select key ö [UTILITY] ö [USER MANAGEMENT]. USER MANAGEMENT DRUM DEHUMIDIFY RETURN Settings [DRUM DEHUMIDIFY] Start the Drum Dehumidify. bizhub 165... -
Page 102: Job Setting]
[TRAY PRIORITY] [TRAY1] [TRAY1 PAPER] <Metric area> [SIZE]: [A4 v] <Inch area> [SIZE]: [Letter v] [TYPE]: [PLAIN] [BYPASS PAPER] <Metric area> [SIZE]: [A4 v] <Inch area> [SIZE]: [Letter v] [TYPE]: [PLAIN] [PRINT PRIORITY] [COPY] [CRISSCROSS MODE] [OFF] 9-10 bizhub 165... -
Page 103: Copy Setting]
Erases the upper side of the original. [FRAME] Erases the frame around the original. [SORT PRIORITY] Specify whether to sort copies as they are fed into the output tray. [4IN1 COPY ORDER] Specify the combine order of the original for 4in1. [PATTERN1] [PATTERN2] bizhub 165 9-11... - Page 104 [UTILITY] Factory default [QUALITY PRIORITY] [TEXT/PHOTO] [DENSITY PRIORITY] [AUTO] [DENSITY LEVEL] [AUTO]: [MANUAL]: [ERASE SETTING] Erase setting: [LEFT] Erasing width: [LEFT]: 10 mm [UPPER]: 10 mm [FRAME]: 10 mm [SORT PRIORITY] [OFF] [4IN1 COPY ORDER] [PATTERN1] 9-12 bizhub 165...
-
Page 105: Total Page]
The paper size that is counted should be configured by your service representative. [TOTAL SCAN] Displays the total number of scans made since this machine was in- stalled. (Scans made for copying are not included.) bizhub 165 9-13... - Page 106 [TOTAL PAGE] 9-14 bizhub 165...
-
Page 107: Maintenance
Maintenance... -
Page 109: Paper
Paper storage Store paper in a cool, dark location with little humidity. If the paper becomes damp, a paper jam may occur. Store the paper flat, not on its edge. Curled paper may cause a paper jam. bizhub 165 10-3... -
Page 110: Loading Paper
Slide the Lateral Guides to fit the size of paper being loaded. % Be sure that the Lateral Guides are slid up against the edges of the loaded paper. Close Tray 1. Press the Start key to restart printing. 10-4 bizhub 165... -
Page 111: Loading Paper Into The Bypass Tray
% Allows you to load up to 100 sheets of plain paper, or 20 sheets of card in the paper tray. Slide the Lateral Guides to fit the size of paper being loaded. % Push the Lateral Guides firmly up against the edges of the pa- per. Press the Start key to restart printing. bizhub 165 10-5... -
Page 112: Toner
If toner gets in your eyes, immediately flush them with water, and then seek professional medical atten- tion. 7 CAUTION Handling toner and toner bottles Do not burn toner or the toner bottle. Toner expelled from the fire may cause burns. 10-6 bizhub 165... - Page 113 Remove the new Toner Bottle from its packaging, and shake it side to side 5 to 10 times. Insert the Toner Bottle into the machine a little. While holding the seal of the Toner Bottle up, slowly peel off the seal. bizhub 165 10-7...
- Page 114 % As shown at the right, make sure that the tip of the nob is aligned with the , mark on the machine. Rotate the Toner Bottle clockwise to lock it. Close the Front Cover of the machine. % When the Front Cover is closed, toner replenishing automatically begins. 10-8 bizhub 165...
-
Page 115: Cleaning Procedure
Wipe the surface using a soft, dry cloth. Housing, Original Pad NOTICE Never use solvents, such as benzene or thinner, to clean the Original Pad. Wipe the surface using a soft cloth moistened with a mild household detergent. bizhub 165 10-9... - Page 116 Cleaning procedure 10.3 10-10 bizhub 165...
-
Page 117: Troubleshooting
Troubleshooting... -
Page 119: When A Problem Is Detected (Call A Service Representative)
CAUTION MACHINE TROUBLE SERVICE CALL Write down the malfunction code in the service call screen. Turn off the Power Switch. Unplug the machine. Contact your service representative and inform them of the written down malfunction code. bizhub 165 11-3... -
Page 120: Troubleshooting Table
If a thin 2-sided original is being ied? copied, the print on the back side may be reproduced on the front side of the copy. Press the * key (lighter) in the density setting to adjust the density level. (p. 5-5) 11-4 bizhub 165... - Page 121 You are trying to configure the Check carefully the functions you "unable to configure" or "func- functions that cannot be com- have specified, then specify the tion will be canceled" appears. bined. functions that can be combined. bizhub 165 11-5...
- Page 122 A message saying "Machine er- There may be problem with the Check the USB cable connected ror" appears on the computer transmission of commands be- to the machine. screen. tween the TWAIN driver and the machine. 11-6 bizhub 165...
-
Page 123: Main Messages And Their Remedies
Copying/printing cannot be per- new one. (p. 10-6) formed. [MAINTENANCE CALL (M1) A maintenance is due. Contact your service representa- CALL SERVICE] tive. [MAINTENANCE CALL (M2) The Drum should be replaced. Contact your service representa- CALL SERVICE] tive. bizhub 165 11-7... - Page 124 Turn off the machine, then check chine was reading data during that the USB cable is correctly scanning. connected. After checking the USB cable, turn on the machine again. If the error is still not corrected, contact your service representa- tive. 11-8 bizhub 165...
-
Page 125: Clearing Paper Jams
If toner gets in your eyes, immediately flush them with water, and then seek professional medical atten- tion. NOTICE Decreased copy quality may result if the surface of the Drum is touched. Be careful not to touch the surface of the Drum. % 1. Drum bizhub 165 11-9... -
Page 126: Clearing Paper Jams At The Vertical Transport Section
Open the Fusing Unit Top Cover. % Push up the Fusing Unit Top Cover until it locks into place. Slowly pull out the paper. Close the Fusing Unit Top Cover. Close the 1st Side Cover of the machine. 11-10 bizhub 165... -
Page 127: Clearing Paper Jams At The Paper Take-Up Section
Open the 1st Side Cover of the machine. Slowly pull out the paper. Close the 1st Side Cover of the machine. Pull out the Tray 1. Remove all paper from the Tray 1, and then load the tray with pa- per again. bizhub 165 11-11... -
Page 128: Clearing Paper Jams At The Exit Section
Slide the Lateral Guides to fit the size of paper being loaded. NOTICE Be sure that the Lateral Guides are slid up against the edges of the loaded paper. Close the Tray 1. Clearing paper jams at the exit section Slowly pull out the paper. 11-12 bizhub 165... -
Page 129: Clearing Paper Jams At The Bypass Tray (Optional)
Clearing paper jams at the Bypass Tray (optional) Remove all paper from the Bypass Tray. Open the 1st Side Cover of the machine. Slowly pull out the paper. Close the 1st Side Cover of the machine. Reload paper into the Bypass Tray. bizhub 165 11-13... - Page 130 Clearing paper jams 11.3 11-14 bizhub 165...
-
Page 131: Specifications
Specifications... -
Page 133: Paper
If plain paper, recycled paper, card 1, or card 2, with images printed on its one side, is to be loaded, select [***-R] for each paper type in paper setting. ("***" indicates a paper type.) bizhub 165 12-3... -
Page 134: Machine Specifications
Machine specifications 12.2 12.2 Machine specifications bizhub 165 Specifications Type Scanner, printer, desktop Document holder Stationary Photo conductor Light source Copy system Laser electrostatic copying Developing system Dry 2-component HMT developing system Fusing system Roller fusing Resolution 600 dpi e 600 dpi... - Page 135 Height 449 mm (17-11/16) Machine occupation dimen- Width 928 mm (36-9/16) sions Depth 531 mm (20-7/8) Height 449 mm (17-11/16) (When the Bypass Tray is used) Memory size 32 MB Weight Approx. 23.5 kg (Approx. 51-13/16 lb) bizhub 165 12-5...
-
Page 136: Multi Bypass Tray Mb-503
(A4 v (8-1/2 e 11 v)) Card 1/2: 20 sheets Power supply Supply from machine Max. power consumption 8 W or less Size Width 446 mm (17-9/16) Depth 469 mm (18-7/16) Height 82 mm (3-1/4) Weight Approx. 1.6 kg (Approx. 3-1/2 lb) 12-6 bizhub 165... -
Page 137: Appendix
Appendix... -
Page 139: Glossary
Resolution The resolution value indicates how much detail of an object can be re- produced precisely on an image or a print matter. Scanner driver Software that works as a bridge between a computer and a scanner. bizhub 165 13-3... - Page 140 To use a WIA compatible device, a relevant WIA driver is re- quired. The abbreviation for XML Paper Specification. This is one of the elec- tronic document formats developed by Microsoft Corporation. It is first supported in Windows Vista. 13-4 bizhub 165...
-
Page 141: Index
Index... - Page 143 Crisscross mode LCD contrast Cursor Custom size memory 10-4 Loading paper 10-4 Loading paper in tray 1 10-5 Density Loading paper into the bypass tray Display Display indications Machine setting Drum 12-4 Machine specifications Drum dehumidify Maintenance 10-3 bizhub 165 14-3...
- Page 144 Recalling copy program WIA scanner driver settings Registering copy settings 5-15 1-10 Regulation notices Replacement message 10-6 XPS driver 10-6 Replacing the toner bottle 7-10 XPS printer driver settings Replenishment message 10-3 Reset 7-11 Zoom 7-13 Resolution Zoom ratio 14-4 bizhub 165...
- Page 145 5-11 5-13 TOTAL COUNT 9-13 9-13 TOTAL PAGE TOTAL SCAN 9-13 ID Copy 9-10 TRAY PRIORITY TRAY SELECT 9-10 TRAY1 PAPER JOB SETTING 9-10 5-11 UPPER ERASE KEY SPEED SETTING USER MANAGEMENT Keypad UTILITY Zoom ZOOM RATIO bizhub 165 14-5...
- Page 146 Index by button 14.2 14-6 bizhub 165...