Table of Contents
Advertisement
Quick Links
Advertisement
Table of Contents

Related Manuals for Gigaset C590 ip


Summary of Contents for Gigaset C590 ip
-
Page 2: Safety Precautions
If you use a medical device (e.g. a pacemaker), please contact the device manufacturer. They will be able to advise you regarding the susceptibility of the device to external sources of high frequency energy. Please refer to the "Appendix" chapter in the long user guide (see enclosed CD) for the specifications of this Gigaset product. -
Page 3: Package Contents
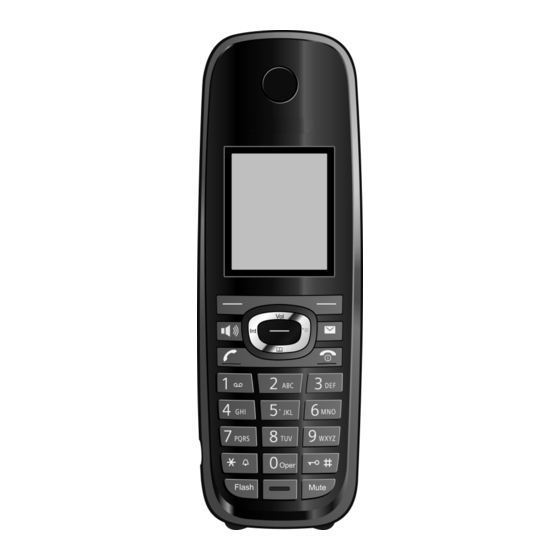
Package contents Gigaset C590 IP or C595 IP base Power adapter for connecting the base to the A/C power outlet Phone cord (flattened) for connecting the base to the analog telephone (fixed-line) network Ethernet (LAN) cable for connecting the base to the router (LAN/Internet) - Page 4 Keys and functions on the handset Display keys: Start function displayed to the left or right of the bottom display line Speaker key: Switch between earpiece and speaker mode (key lights up) Talk key: Answer a call; after entering number: start dialling Control key: Open menu (press right);...
-
Page 5: Connection Overview
Connecting the base to the router in order to connect the base to the Internet (connection via router and modem or via router with integrated modem) Connecting the PC to the LAN (optional) – for advanced configuration of the Gigaset C590/ C595 IP base... -
Page 6: Preparing The Handset
Preparing the handset Inserting the supplied batteries and closing the battery cover > Check the polarity when inserting the batteries (see symbols in or on the battery compartment). > Use only the rechargeable batteries recom- mended. Once the batteries have been inserted, the handset switches on automatically. -
Page 7: Connecting The Base
Connecting the base Connecting the phone cord and power lead to the base Insert the (flattened) phone cord into the lower connection socket at the rear of the base. Insert the power lead of the power adapter into the upper connection socket at the rear of the base. -
Page 8: Connecting The Base To The Router (Internet)
(paging key). Data protection notice: Further information about saving Gigaset.net service data can be found at www.gigaset.net/privacy-policy. Connecting the PC to the router (optional) You can change the settings on the phone's base using a PC connected to your phone via the router. -
Page 9: Configuring The Voip Connection
Launch the web browser on your PC. > Enter the URL www.gigaset-config.com in the address field of the web browser and press the return key. You are connected to your base's Web configurator. To log in to the Web configurator you will need the system PIN for the telephone (default setting: 0000). -
Page 10: Starting The Configuration Process
Configuring the VoIP connection Starting the configuration process When your handset is sufficiently charged (approx. 20 minutes after you have placed it in the charger), the message key on the handset flashes. > Press the message key on the handset. If "New firmware available"... - Page 11 Configuring the VoIP connection Select IP Account A list of all possible IP connections is shown in the display ´ (IP 1 to IP 6). VoIP connections that are already configured IP 1 are marked with ³. ´ IP 2 ´...
-
Page 12: Entering An Auto-Configuration Code
Configuring the VoIP connection Entering an auto-configuration code > Enter your auto-configuration code using the keypad IP Wizard (max. 32 characters). Press the right-hand display key §OK§. > Activation code for autoconfiguration: All data required for VoIP telephony is loaded directly from the Internet to your phone. -
Page 13: Entering Personal Voip Account Data
Configuring the VoIP connection If your provider is not in the list, you must cancel the VoIP wizard: > Press and hold the end call key to return your handset to idle status. > Carry out the configuration and the assignment of the send and receive connection using the Web configurator. -
Page 14: Assigning The Send/Receive Connection
Fixed Line: 4560123 §Change§ > Press the display key if you wish to IP1: 12345602 change the receive connection setting. Gigaset.net: 12345#9 §OK§ > Press the display key if you do not wish to Change change the setting. The following steps are... - Page 15 > Press right on the control key to set to No. IP1: < Yes > Receive calls for Gigaset.net: Back Save INT 1 > Press down on the control key to switch to the next connection. Select either Yes or No as IP1: described above.
- Page 16 Assigning the send/receive connection Send Connections The send connection currently set for the handset Ð is displayed: Fixed Line. INT1 sends calls with §OK§ > Fixed Line: Press the display key if you do not wish to change the setting. Skip the following step. 4560123 >...
-
Page 17: Completing The Installation
Assigning the send/receive connection On the Gigaset C595 IP: You can now start the connection wizard for the three Gigaset answering machines. For each answering machine, the following will be shown in the display: Assign connections to answering machine ? >... -
Page 18: Gigaset.net Directory Entry
Nicknames are stored on a central Gigaset server and displayed in the Gigaset.net directory. You can receive calls from other users of the Gigaset.net service under this nickname. By entering your data, you agree to having your data saved. If you do not wish this to happen, you can cancel the operation by pressing the right §Save§... -
Page 19: Making Calls / Operating The Answering Machine
Select a send connection and press the talk key c; the number will be dialled via the selected > send connection. Operating the Gigaset C595 IP answering machine Switching the answering machine on/off Press right on the control key p to open the menu. -
Page 20: Fcc / Acta Information
Cet appareil numérique de la classe B est conforme à la norme NMB-003 du Canada. FCC / ACTA Information Warning: Changes or modifications to this unit not expressly approved by Gigaset Communications USA LLC could void the FCC authority to operate the equipment. This includes the addition of any external antenna device. - Page 21 FCC / ACTA Information order for you to make necessary modifications to maintain uninterrupted service. If you experience trouble with this telephone system, disconnect it from the network until the problem has been corrected or until you are sure that the equipment is not malfunctioning. If trouble is experienced with this equipment, for repair or warranty information, please contact Support at 1- 866 247-8758.
- Page 22 Safety precautions Before using your telephone equipment, basic safety instructions should always be followed to reduce the risk of fire, electric shock and injury to persons. 1. Read and understand all instructions. 2. Follow all warnings and instructions marked on the product. 3.
-
Page 23: Service (Customer Care)
(collectively, "Product") provided by Gigaset Communications USA LLC or Gigaset Communications Canada Inc. (collectively "Gigaset NAM"). Gigaset NAM warrants to you that at the date of pur- chase, the Product is free of defects in workmanship and materials and the software included in the Product will perform in substantial compliance to its program specifications. -
Page 24: Warranty Claim Procedure
God, riots, acts of terrorism, spills of food or liquids, viruses or other soft- ware flaws introduced into the Product or other acts which are not the fault of Gigaset NAM and which the Product is not specified to tolerate, including damage caused by mishandling or blown fuses. -
Page 25: Limitation Of Warranty
OF THE FAULT, TORT (INCLUDING NEGLIGENCE), STRICT LIABILITY, BREACH OF CONTRACT OR BREACH OF WAR- RANTY OF GIGASET NAM OR SELLER OR ANY SUPPLIER, AND EVEN IF GIGASET NAM OR SELLER OR ANY SUP- PLIER HAS BEEN ADVISED OF THE POSSIBILITY OF SUCH DAMAGES. REPAIR OR REPLACEMENT, AS PROVIDED... -
Page 26: Limitation Of Liability And Remedies
Canada applicable therein, and exclude the United Nations Convention on Contracts for the International Sale of Goods. If you want to learn more about Gigaset Service or for Support on your Gigaset phone, visit our web site at http://www.gigaset.com or please call 1-866 247-8758.