
Related Manuals for Nesco PC8-25


Summary of Contents for Nesco PC8-25
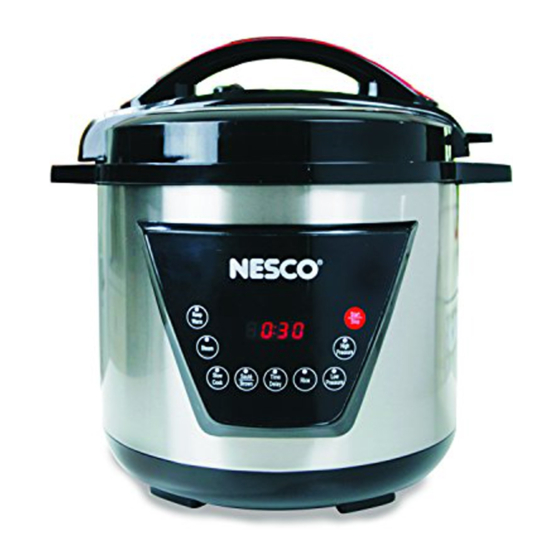
- Page 1 8 QT Digital Pressure Cooker (Model PC8-25) Care/Use Guide 7,6 L Autocuiseur Numérique (Modèle PC8-25) Guide d’entretien et d’utilisation...
-
Page 2: Table Of Contents
Consiels et Astuces, Dépannage ................30 - 31 Garantie Limitée d’un an ......................32 TECHNICAL SPECIFICATIONS Specification / Caractéristiques: 1300 W., 120 VAC, 60Hz NESCO is a registered trademark of The Metal Ware Corp ® ® NESCO est une marque de commerce enregistrée de la société The Metal Ware Corp... - Page 3 CAUTION MARKS AND SYMBOLS This is the safety alert symbol. This symbol is placed in the manual to alert you to the potential for bodily injury or death. UNDERSTANDING SIGNAL WORDS: Signal words are used to identify safety information within the text of this manual.
-
Page 4: Important Safeguards
Do not operate any appliance with a damaged cord or plug or after the appliance malfunctions or has been damaged in any manner. To avoid hazards, return appliance to NESCO Factory Service Department for examination, repair or adjustment. ®... - Page 5 Grounded 3 prong plug: This appliance has a 3-prong (grounding) plug for use in a 3-prong (grounding) outlet to minimize the possibility of electric shock. This applance should only be used with a 120V, 60 Hz grounded outlet. Failure to follow these instructions could result in fire, electrical shock, serious injury or death.
-
Page 6: Parts
PARTS Base Removable Sealing Gasket Pressure Regulator Knob Regulator Filter Cooking Pot, removable Control Panel Power Cord Floating Valve Cooking Rack Twist and Lock Lid Serving Spoon and Measuring Condensation Cup... -
Page 7: Functions
FUNCTIONS Base - Do not immerse in water! Contains the electronic controls and heater. Pressure Regulator Knob - Controls the cooking function. Align the dots for desired setting. PRESSURE for cooking under high or low pressure and rice setting. STEAM for keep warm, steam and to release pressure from unit. Cooking Pot - 8 L. -
Page 8: Regulator Knob Instructions
PRESSURE REGULATOR INSTRUCTIONS The Pressure Regulator Knob controls the cooking function. Align the ARROW on the regulator knob To the direction of the Steam/Pressure mark on the lid. Use the STEAM setting for keep warm, slow cook, steam and to release pressure at the end of the pressure cooking cycle. -
Page 9: Operation
OPERATION Place the appliance on a flat, heat resistant and stable surface. 2. Before using your appliance, always check the lid to be sure the sealing gasket and regulator filter are clean and positioned correctly. (see Care and Cleaning section). Ensure gasket is not damaged or broken. - Page 10 Natural Method: CAUTION KEEP HANDS AND FACE AWAY FROM ESCAPING STEAM AS IT IS HOT AND CAN CAUSE INJURY. After cooking, press the ‘STOP’ button and unplug cord. Let appliance stand and allow pressure to drop naturally which takes from 10 to 20 minutes. After 20 minutes, using oven mitts or tongs, set the pressure regulator knob to ‘STEAM’...
- Page 11 STEAM SETTING: This program quickly brings liquid to a boil for steaming food or cooking rice. Position the cook pot into the pressure cooker base. 2. Place the rack in the bottom of the removable cooking pot. 3. Add at least 16 oz. of water so that the bottom of the rack is above the liquid. 4.
-
Page 12: Care And Cleaning
INSERT WARNING: Do not use gasket if damaged. Contact our customer support representative. www.NESCO.com or toll free 1-800-288-4545 4. Cooking Pot - Wash the cooking pot with warm soapy water and dry. Do not put into dishwasher as detergents may ruin the nonstick surface. -
Page 13: Tips And Hints, Troubleshooting
Cleaning the Pressure Regulator Knob and Floating Valve: Check that the regulator knob and floating valve are in good working order before each use. Regulator knob will turn freely and the floating valve will slide easy with a push of your finger. Be sure the small seal is in place around the floating valve. Wash floating valve by following these directions. -
Page 14: Cooking Charts
COOKING CHART VEGETABLES • When pressure cooking vegetables use HIGH pressure setting and QUICK RELEASE for pressure release. • Before pressure cooking fresh vegetables, add 1 cup water and place a steam rack into removable cooking pot. Place a layer of vegetables on rack. Cover and lock lid in place. - Page 15 COOKING CHART MEATS AND PULTRY • When pressure cooking Meat or Poultry use HIGH pressure setting and QUICK RELEASE for pressure release. • Always cook meat or poultry with at least 1-3 cups of liquid. Preserved or salted meats should be immersed in water. •...
-
Page 16: Recipes
RECIPES BBQ RIBS 1 Rack of Ribs, cut into pieces 1 (28 oz.) bottle of Barbeque sauce 2 C. Ginger ale Pour ginger ale in cooking pot. Add: Cut rack of rib and your favorite rub or just salt and pepper. Set regulator knob to PRESSURE. Place lid on cooker and lock it. Set regulator knob to PRESSURE. - Page 17 RECIPES CHICKEN STOCK 1-1/2 Tbsp. vegetable oil 3 lbs. chicken thighs 1/2 celery stalk, chunked (set aside leaves) 1 lb. carrots, cut 1”to 3” lengths 1 lbs. onions, quartered 1/2 bundle Parsley, 1 tsp. black peppercorn 1/2 Bay leaf 2 Tbsp. chicken flavored soup base 13 C.
- Page 18 RECIPES COUNTRY BOIL 2 lbs. Kielbasa, cut into pieces 2 lbs. extra large shrimp, peel/devein 1-1/2 lbs. baby red potatoes 3 corn on the cob, cut in half 4 C. water 2/3 C. Old Bay seasoning 1 Bay leaves Place all ingredients into cooking pot and place lid on cooker and lock it. Set regulator knob to PRESSURE.
- Page 19 RECIPES PORCINI RISOTTO 1-1/2 Tbsp. olive oil 1 medium yellow onion, peeled and chopped 2 cups Arborio rice 2/3 C. white wine 5 C. chicken stock 1-1/2 oz. dried porcini mushrooms, crushed 1 C. frozen peas 2/3 C. grated Parmesan cheese Add oil and BROWN/SAUTÉ...
-
Page 20: One Year Limited Warranty
We ask that you kindly fill in the details on your warranty card and return it within one week from date of purchase. Send warranty card to: PC8-25 • NESCO 8QT Digital Pressure Cooker C/O MW PO Box 237 Two Rivers, WI 54241-0237... - Page 21 PICTOGRAMMES ET SYMBOLES DE DANGER Ceci est un symbole de danger. Il est placé dans le manuel pour vous alerter des dangers de dommages corporels ou de mort potentiels. COMPRENDRE LES MOTS-INDICATEURS: Les mots indicateurs identifient les informations relatives à la sécurité dans ce manuel.
-
Page 22: Mesures De Précaution Importantes
7. N’utilisez jamais un appareil dont le cordon ou la prise de courant sont endommagés, ou si l’appareil a mal fonctionné ou qu’il a été endommagé de quelque façon que ce soit. Pour éviter tout danger, retournez l’appareil à NESCO au département de service d’entretient ®... - Page 23 Grounded fiche à 3 broches: Cet appareil a une broche 3 (terre) pour une utilisation dans une prise à 3 broches (mise à la terre) pour minimiser le risque de choc électrique. Cette applance ne doit être utilisé avec un 120V, 60 Hz prise de terre.
-
Page 24: Pièces
PIÈCES Base Joint d’étanchéité Bouton régulateur de pression Filtre régulateur Cuve de cuisson Panneau de commande Cordon d’alimentation Soupape fl ottante Grille de cuisson Couvercle avec verrouillage de sécurité Cuiller de service/Tasse à Réservoir de condensation mesurer... -
Page 25: Fonctions
FONCTIONS 1. Base - Ne la plongez pas dans l’eau! Contient les commandes électroniques et l’élément chauffant. 2. Bouton régulateur de pression - Alignez les marques du bouton avec le point du couvercle. Mettez en position « PRESSURE » pour cuire sous pression et en position «... -
Page 26: Instrucciones Reguladoras De Presión
DES INSTRUCTIONS DE RÉGULATION DE PRESSION Le bouton du régulateur de pression contrôle la fonction de cuisson. Aligner la FLÈCHE sur le bouton du régulateur dans le sens de la marque vapeur / pression sur le couvercle. Utilisez le réglage VAPEUR pour garder au chaud, faire cuire lentement, à la vapeur et pour relâcher la pression à... -
Page 27: Fonctionnement
PARAMÈTRES DE TEMPS DE FONCTION RÉGLAGES DES FONCTIONS TEMPS PAR DÉFAUT TEMPS TOTAL HIGH AND LOW PRESSURE 1 MINUTE 1 MIN. TO 2 HRS RICE 10 MINS. 5 TO 30 MINS. TIME DELAY 30 MINS. 8 HRS. BROWN 30 MINS. 1 TO 30 MINS. - Page 28 FONCTION DE CUISSON SOUS PRESSION: Avant chaque utilisation de l’autocuiseur, assurez-vous que le joint d’étanchéité et la soupape de régulation de pression sont propres et qu’ils sont positionnés correctement. Branchez le cordon d’alimentation dans une prise murale. 2. Placez la cuve de cuisson dans l’appareil. 3.
- Page 29 AVERTISSEMENT: • Pour prévenir les blessures causées par la vapeur, ne touchez pas au bouton régulateur de pression pendant que l’appareil est en cours d’utilisation. • Tenez toujours vos mains et votre visage éloignés de l’appareil. Utilisez des gants pour ôter la cuve intérieure ou pour changer le réglage du bouton régulateur.
- Page 30 FONCTION VAPEUR: Ce programme porte rapidement les liquides à ébullition pour la cuisson à la vapeur ou la cuisson du riz. Placez la cuve de cuisson dans l’autocuiseur. 2. Placez la grille au fond de la cuve de cuisson. 3. Ajoutez au moins 500 mL/16 oz d’eau en veillant à ce que le fond de la grille soit au-dessus du liquide.
-
Page 31: Entretien Et De Nettoyage
POUR ENLEVER ATTENTION: Ne pas utiliser de joint d ‘étanchéité s’il est endommagé. Contactez notre service clientèle. www.NESCO.com or toll free 1-800-288-4545. 4. Si le réservoir contient de l’humidité de condensation visible, enlevez-le en tirant vers le bas. Laver à l’eau tiède savonneuse. Rincer et sécher. Fixer à la base en appuyant sur le haut pour verrouiller en place. -
Page 32: Consiels Et Astuces, Dépannage
n’est pas positionné correctement l’appareil ne fonctionne pas normalement. 6. Afin de maintenir une bonne performance de votre appareil, le fond de la casserole de cuisson amovible doit être nettoyé après chaque utilisation. Essuyer avec un chiffon doux et humide et sec avant de l’utiliser. 7. - Page 33 DÉPANNAGE Si vous remarquez que la soupape flottante n’est pas montée mais que le minuteur a commencé son décompte, procédez comme suit : 1. Arrêtez l’autocuiseur en appuyant sur le bouton STOP. 2. Mettez le bouton régulateur de pression sur STEAM à l’aide d’un gant anti- chaleur ou de pinces et relâchez la vapeur en procédant par courts jets jusqu’à...
-
Page 34: Garantie Limitée D'un An
Nous vous demandons de bien vouloir remplir votre bon de garantie et de l’envoyer dans un délai d’une semaine à compter de la date d’achat. Envoyez votre bon de garantie à: PC8-25 • 7,6 L Autocuiseur Numérique C/O MW PO Box 237... - Page 36 1-800-288-4545 Part No. 67939 ©2018 (12/17) The Metal Ware Corp All Rights reserved, including the right of reproduction in whole or part. Tous droits réservés, y compris le droit de reproduction en totalité ou en partie.