Advertisement
Available languages
Available languages
Table of Contents
- 1 Table of Contents
- 2 Preface
- 3 Safety Warning
- 4 Packing List
- 5 Description of the Bicycle (Epac)
- 6 Startup
- 7 Quick Start
- 8 LCD Display
- 9 Display Setting Instructions
- 10 Maintenance Instructions
- 11 Connections Diagram
- 12 Troubleshooting
- 13 Battery (Warnings)
- 14 Technical Specifications
- 15 Warranty Terms
- Download this manual
Advertisement
Table of Contents

Related Manuals for Ducati MG-20


Summary of Contents for Ducati MG-20
- Page 1 foldable e-bike User manual | Manuale d'uso...
- Page 2 Index English Italiano...
- Page 3 English foldable e-bike User and maintenance manual Before using the bicycle, it must be properly and correctly assembled and checked in all its parts.Any assembly damage or incorrect maintenance are not covered by the warranty. For more information, technical support and assistance, contact your dealer or visit the website www.ducatiurbanemobility.it...
-
Page 4: Table Of Contents
Contents Preface Safety warning Packing list Description of the bicycle (epac) Lifting and carrying Startup Quick start LCD Display Display setting instructions Maintenance instructions Connections diagram Troubleshooting Battery (Warnings) Technical specifications Warranty terms... -
Page 5: Preface
Support Service If you experience any problems or have any requests for clarification, please do not hesitate to contact the Support Service of your authorised Ducati Urban e-Mobility dealer, which can provide skilled and specialised personnel, specific equipment and original spare parts. -
Page 6: Safety Warning
2. Safety warning General safety rules ATTENTION Use of the pedal-assisted bicycle Each user must read this user and maintenance manual before first using the bicycle; in particular the chapter on safety instructions. ATTENTION Risks associated with the use of the pedal-assisted bicycle Despite the use of safety devices, to ensure the safe use of the pedal-assisted bicycle, you must take note of all the accident prevention instructions in this manual. - Page 7 ATTENTION Original spare parts Use only original Ducati Urban e-Mobility spare parts. The manufacturer shall not be held liable for damage or loss of functionality caused by the use of non-original accessories and parts.
- Page 8 Other provisions The first thing to do when starting to use the bicycle is to check the presence and integrity of the guards and the operation of the safety devices. If you find any defect, do not use the pedal-assisted bicycle! DANGER Guards Therefore, it is strictly forbidden to modify or remove the battery and chain guards, etc.,...
-
Page 9: Packing List
3. Packing list - Bike frame body - Seat + seat post - Charger - Rear reflector light - Allen wrench (4mm) - Front fender - Rear fender - 2 battery lock keys... -
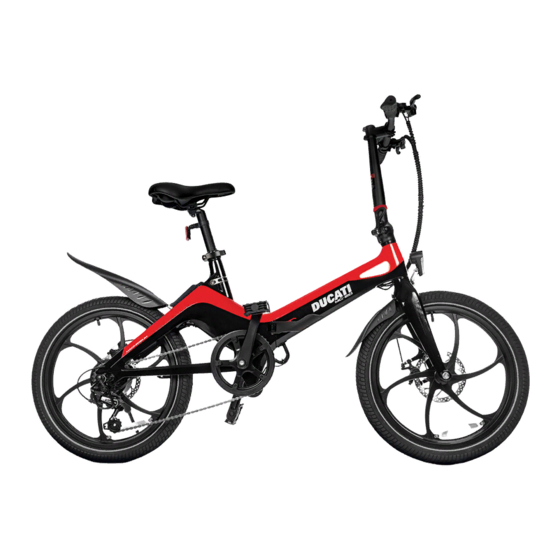
Page 10: Description Of The Bicycle (Epac)
4. Description of the bicycle (epac) display 11 22 1. Saddle 2. Bike frame folder 3. Stem folder 4. Safe lock 5. Handlebar 6. Brake lever 7. Front light 8. Front fork 9. Disc brake 10. Front fender (to be assembled, provided in the box) 11. - Page 11 Terms of use The pedal-assisted bicycle has been designed and built to be ridden outdoors, on public roads and cycle paths, but always on asphalted surfaces. Any modification of the state of construction can compromise the safety and stability of the pedal-assisted bicycle and can lead to an accident.
- Page 12 Improper uses and contraindications The actions described below, which obviously cannot cover the entire range of potential possibilities of "misuse" of the pedal-assisted bicycle, are to be considered absolutely prohibited. ATTENTION Prohibited operations Performing prohibited operations invalidates the warranty. The manufacturer declines all responsibility for any damage to persons and things deriving from the execution of prohibited operations.
- Page 13 5. Strolling and carrying DANGER Crushing and impact During lifting, it is necessary to operate with extreme caution in order to avoid damage to people and things. The manufacturer is not liable for breakages due to the lifting and/or transport of the pedal-assisted bicycle after delivery.
-
Page 14: Startup
6. Startup Charging the battery Before using the bicycle for the first time, it is necessary to charge the battery for at least 4-6 hours, until charging is complete, using the supplied battery charger. The bicycle is powered by a 36V lithium-ion battery. The average charging time is around 4-6 hours. - Page 15 Uninstall & Install battery 1. Power off the vehicle, unlock 2. When installing battery, lock the battery, then pull out the the battery with key and take battery box with the lifting the key away, press battery handle as shown in picture handle to be flat,and unfold shows.
- Page 16 Put on the road Before using the pedal assisted bicycle, to ensure the efficient “putting on the road” of the product, it is advisable to carefully check each part and provide for adequate adjustment intervention of the relative mechanical components, directly or with the support of specialized operators, e.g.
-
Page 17: Quick Start
7. Quick start Unfold the bike 1. Hold the vehicle body, unfold 2. As shown in picture, lock the the frame. folder clamp tightly, please finish step 3) and 4) before locking the clamp. 3. If the fastener shows as picture, 4.If the fastener shows as picture, need press it down to release the then can operate step 2) to lock... - Page 18 Unfold the stem 1. Hold the bike body and turn the 2. Fasten the folding wrench stem upright to ensure that the directly in the direction of the stem is seamlessly connected to stem. the underside. Security button 3. Slightly shake the stem and 4.
- Page 19 Mount handlebar 1. Use the M4 Allen Key to loosen the screw of the ahead stem, and take off the clamp. 2. Carefully place the clamp on the 3. Check handlebars for strength middle of handlebar, then tighten and correct position before ride. the screws by M4 Allen Key.
- Page 20 Seat post assembling 1. Loosen the seat post clamp , 2. Adjust the screw ,tighten the keep the bike steady, insert the clamp, then press the saddle at seat post in the frame. full tilt to ensure the seat post locked tight enough and doesn't rotate or move up and down.
- Page 21 Unfold and Fold the pedals 1. Hold the vehicle body and 2. Press the pedal towards the unfold the pedals. crank, and fold it up. Power on operation 1. Charge the battery before your first ride. Note: When charging is completed, please cover the plug to avoid the water intake of the charging port.
-
Page 22: Lcd Display
8. LCD Display battery charge percentage battery level front light ON + button speed M button - button icons pedal-assist mode / level Button functions: Button M : multifunctional button, long press for 3 seconds to switch ON/OFF the bike; short press to switch the display of single trip mileage, total mileage and running time. - Page 23 Icons' meaning: Indicates that the front light is on Indicates that the brake is working Indicates that the throttle is not working or not working properly Indicates that the motor is not working or not working properly Indicates that the controller is not working or not working properly Switch among single trip mileage, total mileage and running time...
-
Page 24: Display Setting Instructions
9. Display setting instruction 1. Press + and - at same time for 3s into Setting interface P0. 2. Restore factory setting: Press + for about 30s in P0 and it will automatically exit Setting Mode. 3. Km/Mile switch: A. Press M button and switch P0 to P1 B. - Page 25 4. Adjust speed slightly: A. Press M button and switch P0 to P2 P2 can only adjust the speed shown in display slightly, it could not change the real speed. B. Press +/- to change the data. The proper setting is 15.6 for 16inch wheels, 18.5 for 20inch wheels.
-
Page 26: Maintenance Instructions
This manual does not go into detail about disassembly and non-routine maintenance, as these operations must always be carried out exclusively by the Support Service staff of your authorised Ducati Urban e-Mobility dealer. The Support Service is able to provide all the information you will need and answer all your requests regarding the perfectcare and maintenance of your pedal-assisted bicycle. - Page 27 Checking the parts The supporting frame of the pedal-assisted bicycle and the welds must be free of visible defects such as: cracks, deformations, incisions, corrosion, etc. Make sure that all the bolts and pedals of the pedal-assisted bicycle are properly tightened.
-
Page 28: Connections Diagram
11. Connections diagram... -
Page 29: Troubleshooting
12. Troubleshooting Display Indicator Reasons Solutions Indicates that the brake is engaged Brake Press brake lever some times to let it Brake lever does not return to normal position return. Replace with new brake lever Without accelerator Accelerator cable, accelerator or connector Replace with new cable, accelerator is broken/damaged Accelerator fault... -
Page 30: Battery (Warnings)
13. Battery (Warnings) Battery indicator The battery indicator is full when the battery of your pedal-assisted bicycle is fully charged. The battery indicator drops in level as the pedal-assisted bicycle is used. The battery indicator may fluctuate in the charge level depending on the use of the pedal- assisted bicycle, for example, if you are on a gradient, the battery indicator level may drop rapidly as you consume much more of the battery power of your pedal-assisted bicycle. - Page 31 Battery precautions: The battery is made up of lithium-ion cells and chemical elements that are hazardous to health and the environment. Do not use the pedal-assisted bicycle if it emits odours, substances or excessive heat. Do not dispose of the pedal-assisted bicycle or battery with household waste.The end user is responsible for disposing of electrical and electronic equipment and batteries in compliance with all applicable regulations.
-
Page 32: Technical Specifications
14. Technical specifications General information Tires 20 "X 2.125" with reflective band Rims magnesium, 6-spoke Brakes mechanical disc Shifter SHIMANO 6 gear Fork magnesium Chainset chainring 44T - 6 pinions (14-16-18-21-24-28T) Pedals plastic, resealable Frame magnesium, foldable Max speed 25 km/h Seat comfort model Seat tube... - Page 33 ATTENTION Permitted speed The maximum speed allowed by law is 25 km/h. Any interventions not authorised by the manufacturer on the control unit shall mean that the manufacturer cannot be held liable for any damage caused to persons and/or things; moreover, the warranty on the purchased product shall be invalidated.
- Page 34 CAUTION Disposing of electrical or electronic devices at the end of their life (applicable in all countries of the European Union and in other European systems with separate collection systems) This symbol on the product or on the packaging indicates that the product should not be considered as normal household waste, but should instead be taken to an appropriate collection point for the recycling of electrical and electronic equipment (WEEE).
- Page 35 CAUTION Disposal of dead batteries (applicable in all countries of the European Union and in other European systems with separate collection system) This symbol on the product or packaging indicates that the battery pack should not be considered normal household waste. On some types of batteries, this symbol may be used in combination with a chemical symbol.
-
Page 36: Warranty Terms
15. Warranty terms All products are covered by the "Legal Guarantee of conformity" in compliance with the Directive 2011/83/EU. The Legal Guarantee is reserved for consumers. It therefore applies only to users who have made a purchase for purposes unrelated to any entrepreneurial, commercial, craft or professional activity carried out. - Page 37 - incorrect installation and/or incorrect assembly of parts and/or components, except when installation and/or assembly has been carried out by the seller or under his responsibility and/or they have been carried out by the consumer but the error in the installation and/or assembly is attributable to a lack of installation instructions;...
- Page 38 Address: Via Bargellino 10, 40112 Calderara di Reno (BO), Italy This declaration of conformity is issued under the sole responsibility of the Manufacturer Product Brand Ducati Product Model MG-20 Description of product Electric Bike Rating Product: DC 36V, 250W Is in conformity with the requirements of the council Directives on the approximation of...
- Page 39 Italiano foldable e-bike Manuale d'uso e manutenzione Prima di utilizzare la bicicletta, questa deve essere montata in modo corretto e controllata in tutte le sue parti. Eventuali danni dovuti ad un montaggio o una manutenzione errata non sono coperti dalla garanzia. Per ulteriori informazioni o per richiedere un supporto tecnico e assistenza, con- tattare il rivenditore, oppure visitare il sito web www.ducatiurbanemobility.it Per i ricambi vai al sito www.urbanemobility.com...
- Page 40 Indice Introduzione Avvertenze sulla sicurezza Contenuto della confezione Descrizione della bicicletta (epac) Sollevamento e trasporto Messa in strada Assemblaggio Display LCD Configurazione del display Istruzioni per la manutenzione Diagramma delle connessioni Risoluzione dei problemi Batteria (Avvertenze) Specifiche tecniche Termini di garanzia...
- Page 41 Servizio assistenza Per qualsiasi problema o chiarimento, non esitare a contattare il Servizio Assistenza del distributore autorizzato Ducati Urban e-Mobility, che metterà a disposizione personale competente e specializzato, attrezzature specifiche e ricambi originali. Forma grafica delle avvertenze di sicurezza I seguenti simboli grafici saranno utilizzati per identificare i messaggi di sicurezza nel presente manuale.
- Page 42 2. Avvertenze sulla sicurezza Regole generali per la sicurezza ATTENZIONE Uso della bicicletta a pedalata assistita Ogni utente deve leggere il presente manuale d'uso e manutenzione prima di usare la bicicletta per la prima volta, in particolare il capitolo sulle istruzioni di sicurezza. ATTENZIONE Nonostante l'uso di dispositivi di sicurezza, per garantire un uso sicuro della bicicletta a pedalata assistita è...
- Page 43 ATTENZIONE Ricambi originali Utilizzare solo ricambi originali o compatibili approvati Ducati Urban e-Mobility. Il produttore non è responsabile di danni o perdite di funzionalità causati dall'uso di accessori e parti non originali.
- Page 44 Altre disposizioni La prima cosa da fare quando si inizia a usare la bicicletta è controllare la presenza e l'integrità delle protezioni e il funzionamento dei dispositivi di sicurezza. Se si riscontrano dei difetti, non utilizzare la bicicletta a pedalata assistita! PERICOLO Guards È...
- Page 45 3. Contenuto della confezione - Corpo del telaio della bicicletta - Sella + canotto sella - Caricabatterie - Luce catarifrangente posteriore - Chiave a brugola (4 mm) - Parafango anteriore - Parafango posteriore - n°2 chiavi serratura batteria...
- Page 46 4. Descrizione della bicicletta (epac) display 11 22 1. Sella 2. Leva per ripiegare il telaio della bicicletta 3. Leva per piegare l'asta del manubrio 4. Blocco di sicurezza 5. Manubrio 6. Leva del freno 7. Luce anteriore 8. Forcella anteriore 9.
- Page 47 Condizioni di utilizzo La bicicletta a pedalata assistita è stata progettata e costruita per essere utilizzata all'aperto, su strade pubbliche e piste ciclabili, ma sempre su superfici asfaltate. Qualsiasi modifica dello stato di costruzione può compromettere la sicurezza e la stabilità della bicicletta a pedalata assistita e può...
- Page 48 Usi impropri e controindicazioni Le azioni descritte di seguito, che ovviamente non coprono l'intera gamma di possibili "usi impropri" della bicicletta a pedalata assistita, sono da considerarsi assolutamente vietate. ATTENZIONE Operazioni vietate L'esecuzione di operazioni vietate invalida la garanzia. Il produttore declina ogni responsabilità per eventuali danni a persone e cose derivanti dall'esecuzione di operazioni vietate.
- Page 49 5. Sollevamento e trasporto PERICOLO Schiacciamento e impatto Durante il sollevamento, è necessario prestare la massima attenzione per evitare di causare eventuali danni a persone e cose. Il produttore non è responsabile di eventuali rotture dovute al sollevamento e/o al trasporto della bicicletta a pedalata assistita dopo la consegna.
- Page 50 6. Messa in strada Ricarica della batteria Prima di utilizzare la bicicletta per la prima volta, è necessario caricare completamente la batteria per almeno 4-6 ore, utilizzando il caricabatterie in dotazione. La bicicletta è alimentata da una batteria agli ioni di litio da 36V. Il tempo medio di ricarica è...
- Page 51 Disinstallare e installare la batteria 2. Per installare la batteria, 1. Spegnere il veicolo, sbloccare la batteria, quindi estrarre bloccare la batteria con la la scatola della batteria chiave e togliere la chiave, afferrando la maniglia di abbassare completamente la sollevamento, come raffigurato maniglia della batteria e aprire nell'immagine.
- Page 52 Messa in strada Prima di utilizzare la bicicletta a pedalata assistita, per garantire una efficiente messa su strada del prodotto, si consiglia di controllare attentamente ogni parte e provvedere ad adeguato intervento di regolazione delle relative componenti meccaniche, direttamente od avvalendosi del supporto di operatori specializzati, si vedano: regolazione e serraggio manubrio ed attacco manubrio, regolazione e serraggio sella e reggisella, regolazione freni, regolazione cambio, verifica pressione pneumatici, lubrificazione catena ed ingranaggi, verifica corretto serraggio viti di fissaggio e controllo generale che tutte le...
- Page 53 7. Assemblaggio Apertura della bicicletta 1. Afferrare il corpo del veicolo e 2. Come illustrato nell'immagine, aprire il telaio. bloccare saldamente il morsetto di fissaggio di apertura; eseguire completamente i passaggi 3) e 4) prima di bloccare il morsetto. 3. Se l'elemento di fissaggio si 4.
- Page 54 Apertura dell'asta del manubrio 1. Afferrare il corpo della bicicletta 2. Stringere la leva di chiusura, e ruotare l'asta del manubrio per spingendola verso l'asta del portarla in posizione verticale, manubrio. assicurandosi che l'asta del manubrio sia collegata saldamente alla parte inferiore. Pulsante di sicurezza 3.
- Page 55 Montaggio del manubrio 1. Utilizzare la chiave a brugola in dotazione per allentare le viti dell’attacco manubrio anteriore e rimuovere il morsetto. 2. Posizionare con cura il morsetto 3. Controllare il manubrio se sul centro del manubrio e utilizzare posizionato e serrato in modo la chiave in dotazione per stringere corretto prima di mettersi in le viti...
- Page 56 Installazione della sella 1. Allentare il morsetto del 2. Regolare la vite, stringere reggisella, tenere ferma la il morsetto, quindi provare a bicicletta, inserire il reggisella nel spingere la sella inclinandola, per telaio. assicurarsi che il reggisella sia abbastanza stretto e non ruoti o si muova su e giù.
- Page 57 Apertura e chiusura dei pedali 1. Afferrare il corpo del pedale e 2. Premere il pedale verso la ruotarlo verso l’esterno. pedivella e ruotarlo verso l’interno. Accensione 1. Caricare la batteria prima di utilizzare la bicicletta per la prima volta. NB: Una volta completata la carica, si raccomanda di coprire la spina per evitare che l'acqua penetri...
- Page 58 8. Display LCD percentuale di carica livello della della batteria batteria luce anteriore accesa tasto + tachimetro tasto M tasto - modalità/livelli di icone assistenza Funzioni dei pulsanti: Tasto M : tasto multifunzione, premere per 3 secondi per accendere/spegnere la bicicletta;...
- Page 59 Significato delle icone: Indica che la luce anteriore è accesa Indica che il freno è in funzione Indica che l'acceleratore non funziona correttamente Indica che il motore non funziona correttamente Indica che il controller non funziona correttamente Passa dai chilometri del singolo viaggio ai chilometri totali o al tempo di funzionamento...
- Page 60 9. Configurazione del display 1. Premere + e - contemporaneamente per 3 secondi per accedere al menù impostazioni P0. 2. Per ripristinare le impostazioni di fabbrica premere + per circa 30secondi in P0. Se eseguito correttamente uscirà automaticamente dalla modalità di impostazione. 3.
- Page 61 4. Regolare il tachimetro: A. Premere il pulsante M e passare P0 a P2. P2 può solo regolare leggermente la velocità mostrata nel display, non può cambiare la velocità reale. B. Premere +/- per cambiare i dati. L'impostazione corretta è 15,6 per ruote da 16 pollici, 18,5 per ruote da 20 pollici.
- Page 62 Il presente manuale non approfondisce lo smontaggio e la manutenzione straordinaria, in quanto queste operazioni devono sempre essere eseguite esclusivamente dal personale del Servizio Assistenza del rivenditore autorizzato Ducati Urban e-Mobility. Il Servizio Assistenza è in grado di fornire tutte le informazioni necessarie e di rispondere a tutte le domande riguardanti la cura e la manutenzione della bicicletta a pedalata assistita.
- Page 63 Controllo delle parti della bicicletta Il telaio portante della bicicletta a pedalata assistita e le saldature devono essere prive di difetti visibili, come ad esempio crepe, deformazioni, incisioni, corrosione, ecc. Assicurarsi che tutti i bulloni e i pedali della bicicletta a pedalata assistita siano ben stretti.
- Page 64 11. Diagramma connessioni...
- Page 65 12. Risoluzione dei problemi Indicazioni del Display Causa Soluzione Indica quando il freno è in uso Premere la leva per alcune volte per farla Spia del freno La leva del freno non ritorna in posizione tornare in posizione. Sostituire la leva del freno. Non accelera Il cavo dell’acceleratore, l’acceleratore o le Sostituire il cablaggio...
- Page 66 13. Batteria (Avvertenze) Indicatore della batteria L'indicatore della batteria è al massimo quando la batteria della bicicletta a pedalata assistita è completamente carica. L'indicatore della batteria scende di livello man mano che la bicicletta a pedalata assistita viene utilizzata. L'indicatore della batteria può...
- Page 67 Precauzioni per la batteria: La batteria è composta da celle agli ioni di litio ed elementi chimici pericolosi per la salute e l’ambiente. Non utilizzare la bicicletta a pedalata assistita se emette odori, sostanze o calore eccessivo. Non smaltire la bicicletta a pedalata assistita o la batteria insieme ai rifiuti domestici.
- Page 68 14. Specifiche tecniche Informazioni generali Ruote 20 "X 2.125" con banda riflettente Cerchioni in magnesio a 6 razze Freni a disco meccanici Cambio SHIMANO 6 rapporti Forcella anteriore magnesio Guarnitura corona 44T - 6 pignoni (14-16-18-21-24-28T) Pedali in plastica, richiudibili Telaio in magnesio, pieghevole Velocità...
- Page 69 ATTENZIONE Velocità consentita La velocità massima consentita dalla legge è di 25 km/h. Qualsiasi intervento non autorizzato dal produttore sulla centralina comporta l'esclusione della responsabilità dello stesso produttore per eventuali danni causati a persone e/o cose; inoltre decade la garanzia sul prodotto acquistato. La centralina è...
- Page 70 ATTENZIONE Trattamento del dispositivo elettrico o elettronico a fine vita (applicabile in tutti i paesi dell’unione europea ed in altri sistemi europei con sistema di raccolta differenziata) Questo simbolo sul prodotto o sulla confezione indica che il prodotto non deve essere considerato come un normale rifiuto domestico, ma deve invece essere consegnato ad un punto di raccolta appropriato per il riciclo di apparecchi elettrici ed elettronici (RAEE).
- Page 71 ATTENZIONE Trattamento delle pile esauste (applicabile in tutti i paesi dell’unione europea ed in altri sistemi europei con sistema di raccolta differenziata) Questo simbolo sul prodotto o sulla confezione indica che la pila- batteria non deve essere considerato un normale rifiuto domestico. Su alcuni tipi di pile questo simbolo potrebbe essere utilizzato in combinazione con un simbolo chimico.
- Page 72 15. Termini di garanzia Tutti i prodotti sono coperti da garanzia legale di conformità prevista dalla Direttiva 2011/83/UE. La Garanzia Legale è riservata ai consumatori. Essa, pertanto, trova applicazione esclusivamente agli utenti che hanno effettuato l'acquisto dei Prodotti per scopi estranei all'attività...
- Page 73 - l'errata installazione e/o l'errato assemblaggio di parti e/o componenti, fatto salvo il caso in cui l'installazione e/o l'assemblaggio siano stati effettuati dal venditore o sotto la sua responsabilità e/o esse siano state effettuate dal consumatore ma l'errore nella installazione e/o assemblaggio sia imputabile a carenza delle istruzioni di installazione; - la naturale usura dei materiali logorabili: freno a disco meccanico (es: pastiglie, pinze, disco, cavi), pneumatici, pedane, guarnizioni, cuscinetti, luci led e lampadine, cavalletto, manopole, parafanghi, parti in gomma (pedana), cablaggi dei connettori dei cavi,...
- Page 74 La presente dichiarazione di conformità è rilasciata sotto la responsabilità esclusiva del Fabbricante Marca del prodotto Ducati Modello MG-20 Tipo di prodotto Bici elettrica Rating Prodotto: DC 36V, 250W È conforme ai requisiti delle Direttive del Consiglio per il ravvicinamento delle legislazioni...
- Page 75 Produced and imported by M.T. Distribution Srl Calderara di Reno, Bologna www.mtdistribution.it Errors and omissions excepted...