Table of Contents
Advertisement
Available languages
Available languages
Quick Links
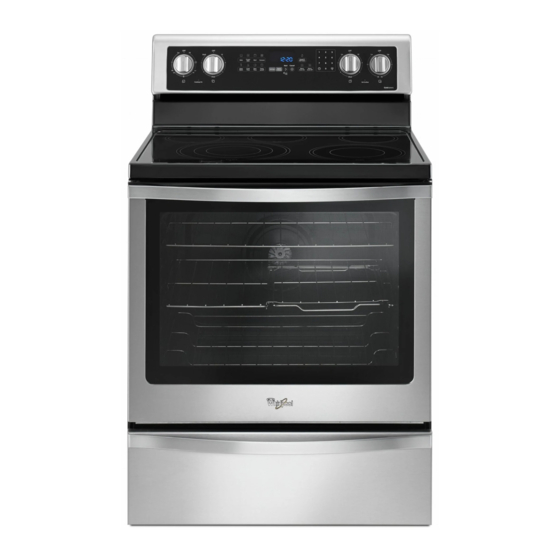
Freestanding Electric Range Control Guide
WARNING: To reduce the risk of fire, electric shock, or injury to persons, read the IMPORTANT SAFETY INSTRUCTIONS, located in
your appliance's Owner's Manual, before operating this appliance.
This manual covers several models. Your model may have some or all of the items listed. Refer to this manual or Frequently Asked
Questions (FAQs) section of our website at www.whirlpool.com for more detailed instructions. In Canada, reference the Customer
Service section at www.whirlpool.ca.
KEYPAD
CLOCK
Oven LIGHT
TIMER SET/OFF
START
CANCEL
BAKE
FEATURE GUIDE
Do not let food sit for more than one hour before or
after cooking.
Doing so can result in food poisoning or sickness.
FEATURE
INSTRUCTIONS
Clock
This clock can use a 12- or 24-hour cycle. See "Electronic Oven Controls" section.
1. Press SETTINGS once, then wait 5 seconds.
2. Press START to change the time..
3. Press "3" for AM or "6" for PM.
4. Press the number keypads to set the time of day.
5. Press START.
Oven cavity
While the oven door is closed, press the OVEN LIGHT keypad to turn the light on and off.
light
The oven light will come on when the oven door is opened.
Oven timer
The Timer can be set in hours or minutes up to 9 hours and 59 minutes.
1. Press TIMER.
2. Press the number keypads to set the length of time in hr-hr-min-min. Leading zeroes
do not have to be entered. For example, for 2 minutes, enter "2."
3. Press TIMER or START to begin the countdown. If enabled, end-of-cycle tones will
sound at end of countdown.
4. Press TIMER twice to cancel the Timer and return to the Time of Day. Do not press the
Cancel keypad because the oven will turn off.
5. If the Kitchen Timer is running, but not in the display, press TIMER to display the
countdown for 5 seconds.
Cooking start
The Start keypad begins any oven function. If Start is not pressed within 2 minutes after
pressing a keypad, the function is canceled and the time of day is displayed.
Range
The Cancel keypad stops any oven function except the Clock, Timer, Control Lock, and
function
Warming Drawer.
Baking and
1. Press BAKE.
roasting
2. Press the number keypads to set a temperature other than 350°F (175°C) in 5°
increments between 170°F and 500°F (75°C and 260°C).
3. Press START.
4. To change the temperature, repeat steps 1 and 2. Press START for the change to take
effect.
5. Press CANCEL when finished.
WARNING
Food Poisoning Hazard
1
Advertisement
Table of Contents

Related Manuals for Whirlpool AQUALIFT


Summary of Contents for Whirlpool AQUALIFT
- Page 1 This manual covers several models. Your model may have some or all of the items listed. Refer to this manual or Frequently Asked Questions (FAQs) section of our website at www.whirlpool.com for more detailed instructions. In Canada, reference the Customer Service section at www.whirlpool.ca.
- Page 2 KEYPAD FEATURE INSTRUCTIONS FROZEN BAKE Prepackaged 1. Position the food on a flat rack in the oven on rack position 4. See the “Positioning food Racks and Bakeware” section. NOTE: Cook only 1 package of frozen food at a time when using FrozenBake™ Technology.
-
Page 3: Cooktop Use
Hi, to keep the cooktop from instructions. For additional information, frequently asked extreme temperatures. ® questions and videos on using AquaLift Self-Cleaning Technology, visit our website at It is normal for the surface of light colored ceramic glass to appear http://whirlpoolcorp.com/aqualift. - Page 4 Triple Zone Cooking Element � To avoid scratches, do not slide cookware or bakeware across the cooktop. Aluminum or copper bottoms and rough finishes The Triple Zone cooking element offers flexibility depending on on cookware or bakeware could leave scratches or marks on the size of the cookware.
- Page 5 Melt Element Cookware with nonstick surfaces should not be used under the broiler. The Melt Cooking element offers flexibility due to a wide range of settings between Hi and Melt. The Hi heat option can be used to Check for flatness by placing the straight edge of a ruler across boil small amounts of liquid quickly.
-
Page 6: Home Canning
Settings Use flat-bottomed cookware for best cooking results and energy efficiency. The cookware should be about the same size as the Many features of the oven control can be adjusted to meet your cooking area outlined on the cooktop. Cookware should not personal needs. -
Page 7: Sabbath Mode
Sabbath Mode End of Cycle Tone Activates or turns off the tones that sound at the end of a cycle. The Sabbath mode sets the oven to remain on in a bake setting 1. Press SETTINGS until “CYCLE TONE END” is displayed. until turned off. -
Page 8: Split Oven Rack (On Some Models)
If your model has a Max Capacity Oven Rack, the recessed ends To Use Racks: must be placed in the rack position above the desired position of 1. Place a full rack in the lower section of the oven and position the food. -
Page 9: Convection Cooking
Broiling Convect Options Convect Bake - Multiple-rack baking or cookies, biscuits, breads, Leave the door open 4" (10.2 cm) at the broil stop position to casseroles, tarts, tortes, cakes. ensure proper broiling temperature. Preheat the oven for 5 minutes before putting food in unless recommended otherwise in Convect Roast - Whole chicken or turkey, vegetables, pork roasts, the recipe. - Page 10 Ce manuel concerne plusieurs modèles. Le modèle que vous avez peut comporter toutes les caractéristiques énumérées ou seulement certaines d’entre elles. Reportez-vous à ce manuel ou à la section Foire Aux Questions (FAQ) de notre site Web sur www.whirlpool.com pour des instructions plus détaillées. AVERTISSEMENT...
- Page 11 TOUCHE FONCTION INSTRUCTIONS BAKE (cuisson au four) Cuisson au 1. Appuyer sur BAKE (cuisson). four et 2. Appuyer sur les touches numériques pour régler une température autre que 350°F rôtissage (175°C) par tranches de 5°, entre 170°F et 500°F (75°C et 260°C). 3.
- Page 12 Évent du four L’évent du four permet l’évacuation de l’air chaud et de l’humidité du four. Il ne doit pas être obstrué ou couvert. Ne pas placer près La technologie d’autonettoyage AquaLift ® est une solution de de l’évent du four des objets en plastique, en papier ou nettoyage inédite permettant de réduire la durée, la température...
-
Page 13: Utilisation De La Table De Cuisson
UTILISATION DE LA TABLE DE � Ne pas faire cuire de maïs soufflé dans son emballage en aluminium d’origine sur la table de cuisson. Il pourrait rester CUISSON des traces d’aluminium qui ne peuvent être complètement enlevées. AVERTISSEMENT � Afin d’éviter d’endommager la table de cuisson, ne pas laisser d’objets qui pourraient fondre, comme du plastique ou du papier d’aluminium, toucher une partie quelconque de la table de cuisson. - Page 14 Élément de cuisson à triple zone Élément de fonte L'élément de cuisson à triple zone offre une grande souplesse L’élément Melt (faire fondre) offre plus de souplesse de chauffe d'utilisation en fonction de la taille des ustensiles de cuisson. La grâce à...
-
Page 15: Ustensiles De Cuisson
Ustensiles de cuisson Ustensile Caractéristiques IMPORTANT : Ne pas laisser d'ustensile de cuisson vide sur une Cuivre � Chauffe très rapidement et surface de cuisson, un élément ou un brûleur de surface chauds. uniformément. Les ustensiles de cuisson idéals doivent avoir un fond plat, des �... -
Page 16: Utilisation Du Four
UTILISATION DU FOUR 6. Appuyer sur CANCEL (annulation) pour sortir. Des odeurs et de la fumée sont normales lorsque le four est utilisé Commande de décalage de température du four la première fois, ou lorsqu'il est très sale. IMPORTANT: Ne pas utiliser de thermomètre pour mesurer la IMPORTANT: Certains oiseaux sont très sensibles aux température du four. -
Page 17: Mode Sabbat
Désactivation des signaux sonores de rappel 3. Appuyer sur la touche “3” pour modifier le réglage. Désactive les courts signaux sonores qui retentissent toutes les 4. Appuyer sur START (mise en marche) pour enregistrer le minutes après les signaux sonores de fin de programme. réglage. -
Page 18: Positionnement Des Grilles Et Des Ustensiles De Cuisson Au Four
Positionnement des grilles et des Grille de four en deux pièces (sur ustensiles de cuisson au four certains modèles) Grille en deux pièces à section amovible Pour déplacer une grille, la tirer jusqu’à la butée d’arrêt, soulever La grille en deux pièces à section amovible maximise l'espace. le rebord avant puis la retirer. -
Page 19: Cuisson Au Four Et Rôtissage
Cuisson au four et rôtissage Le changement de température lors de la cuisson au gril permet un contrôle plus précis de la cuisson. Plus le réglage du gril est Système de gestion de la température bas, plus la cuisson est lente. Les morceaux épais et de forme ACCUBAKE ®... -
Page 20: Durée De Cuisson
étapes 1 à 7. Lorsque la durée de cuisson réglée s'achève, le four s’éteint automatiquement. 8. Appuyer sur CANCEL (annulation) pour effacer l’affichage. ® ©2020 Whirlpool. All rights reserved. Used under license in Canada. ™ W11435597A Tous droits réservés. Utilisé sous licence au Canada.