Table of Contents
Advertisement
Quick Links
Advertisement
Table of Contents

Related Manuals for Seagate Lyve Mobile Rackmount


Summary of Contents for Seagate Lyve Mobile Rackmount
- Page 1 Seagate Lyve Mobile Rackmount Receiver User Manual Click here to access an up-to-date online version of this document. You will also find the most recent content as well as expandable illustrations, easier navigation, and search capability.
-
Page 2: Table Of Contents
Cont ent s Cont ent s 1 Welcome ................... . - Page 3 ......................... . Connect Seagate Lyve Mobile Array .
-
Page 4: Welcome
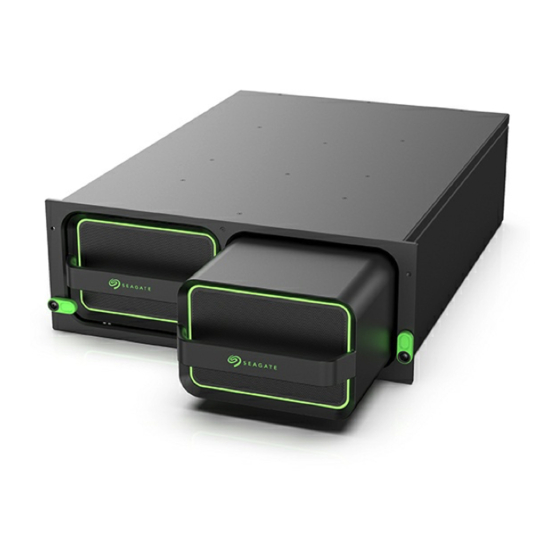
Seagate Lyve Mobile Rackmount Receiver facilitates quick ingestion of shuttle content directly into a network center. Box content Lyve Mobile Rackmount Receiver 1.8 m power cord (x4: US, UK, EU, AU/NZ) Rail kit accessory box Front latch kit accessory box... -
Page 5: Front View
Views Front view Description Slot A Slot for compatible device. Slot B Slot for compatible device. Back view... - Page 6 Turn power on/off. Power input - A Redundant power supply units. Each unit on its own is Power input - B capable of delivering power to Lyve Mobile Rackmount Receiver and installed devices. See Power Connections. Slot A / Left Data connection for device in slot A.
- Page 7 Ethernet management port Ethernet connection for device in slot B. Not to be used for data transfers. CLI management port - B Command-line interface port for device in slot B. For service only. Not to be used for data transfers.
-
Page 8: Setup Requirements
Management Portal. An email was sent to you from the Lyve team that included a link for resetting your password. If you can't remember your credentials or you lost your email invitation, visit lyve.seagate.com. Click Sign in and then click the Don’t remember your password? link. If your email isn’t recognized, contact your account manager. - Page 9 The host computer remains authorized for up to 30 days, during which you can unlock and access connected devices even without an internet connection. After 30 days, you’ll need to open Lyve Client on the computer and re-enter your credentials. Lyve devices lock when powered off, ejected or unplugged from the host computer, or if the ...
-
Page 10: Rackmount Kit
Rackmount Kit Parts list Package Image Name Quantity Notes Back rails Front rail left Front rail right M4 pin for M4 x L10 (6.8,2.5) 7.1mm hole" Phillips screw hole M4 pin for .375" M4 x L10 (9.1,2.5) hole Phillips screw M4 nut 10-32 cage nut... - Page 11 10-32 flat head 10-32 x L12.7 Phillips screw screw Stepped washer M4 pan head M4 x L8 Phillips screw screw 10-32 pan head 10-32 x L25.4 Phillips screw screw Flat washer Latch 10-32 nut and 2 (each) washer Zip ties Parts diagram...
-
Page 12: Lyve Mobile Rackmount Receiver
Removing Lyve Mobile Rackmount Receiver from its packaging and carrying the unit must be performed by at least two people. Receiver weight (empty): 47.52 lb/21.6 kg Do not attempt to lift or assemble Lyve Mobile Rackmount Receiver with compatible devices inserted. -
Page 14: Rack Assembly
Rack Assembly Step 1 - A ach M4 rack screws to the front rails Your rack may have standard 7.1mm or .375" openings. M4 screws are provided for both hole dimensions. Insert an M4 screw for 7.1mm or .375" in the indicated hole on the left front rail and fasten it with an M4 nut. Repeat the process for the right front rail. -
Page 15: Step 3 - Attach Cage Nuts To Rack
Step 3 - A ach cage nuts to rack Attach two 10-32 cage nuts to each front rack post. Leave 101.6mm space between the two nuts on each post. - Page 16 Step 4 - A ach the front rails to the front of the rack Position the left front rail on the cage nut on the left front rack post. Insert two 10-32 flat head screws into two stepped washers. Use the screw/washer assemblies to fasten the left front rail to the left front rack post.
-
Page 17: Step 6 - Attach The Front Rails To The Back Rails
stepped washers. Use the screw/washer assemblies to fasten the back rails to the rear rack posts. Step 6 - A ach the front rails to the back rails Use M4 flat pan head screws to attach the front rails to the back rails. -
Page 18: Step 7 - Install Lyve Mobile Rackmount Receiver
Removing Lyve Mobile Rackmount Receiver from its packaging and carrying the unit must be performed by at least two people. Receiver weight (empty): 47.52 lb/21.6 kg Do not attempt to lift or assemble Lyve Mobile Rackmount Receiver with compatible devices inserted. -
Page 19: Recommended Clearance
Position the front face of Lyve Mobile Rackmount Receiver over the cage nuts attached to the left and right front posts. Insert two 10-32 pan head screws into two flat washers. Use the screw/washer assemblies to attach Lyve Mobile Rackmount Receiver to the top cage nuts attached to the left and right front posts. -
Page 21: Non-Rack Setup
Non-Rack Setup Latch a achment If Lyve Mobile Rackmount Receiver is not assembled on a rack, use the additional lock washer and 10-32 hexagonal nut to attach each latch to the enclosure. -
Page 22: Data Connections
Seagate Lyve Mobile Rackmount Receiver is pre-configured to support one or more host interfaces. Connect to host interfaces Connect the appropriate fiber optic, Ethernet, or SAS cables to available ports on Lyve Mobile Rackmount Receiver’s back panel. Fiber op c cable... -
Page 23: Sas Cable
SAS cable SAS 12Gb, 2-Port SFF-8644... -
Page 24: Power Connections
Power Connec ons Secure power cord Insert the zip tie into the slot below the socket. - Page 25 Insert the power cord into the socket and secure with the zip tie.
-
Page 26: Device Connections
Lyve Client. If no device is inserted in a slot, there's no need to connect its corresponding Ethernet management port to the network. Connect Seagate Lyve Mobile Array Insert Lyve Mobile Array into slot A or B on Lyve Mobile Rackmount Receiver. - Page 27 Slide device in until it snaps in place and is firmly connected to Lyve Mobile Rackmount Receiver's data and power. Close latches.
-
Page 28: Turn On Power
Turn on power Set the power switch on Lyve Mobile Rackmount Receiver to ON. -
Page 29: Unlock The Device
Unlock the device The LED on the device inserted in Lyve Rackmount Receiver blinks during the boot process and turns solid orange. The solid orange LED color indicates the device is ready to be unlocked. -
Page 30: Safely Removing A Device
To access Lyve Mobile Array and compatible devices, a Lyve Management Portal username and password must be entered in the Lyve Client app installed on the connected host computer. See Setup Requirements. Once Lyve Client has validated permissions for the device connected to the computer, the LED on the device turns solid green. -
Page 31: Regulatory Compliance
Regulatory Compliance Product Name Seagate Lyve Mobile Rackmount Receiver Regulatory Model Number SMAP001 FCC DECLARATION OF CONFORMANCE This device complies with Part 15 of the FCC Rules. Operation is subject to the following two conditions: (1) this device may not cause harmful interference, and (2) this device must accept any interference received, including interference that may cause undesired operation. -
Page 32: Taiwan Rohs
CNS 15663, Guidance to reduction of the restricted chemical substances in electrical and electronic equipment. Beginning on January 1, 2018, Seagate products must comply with the “Marking of presence” requirements in Section 5 of CNS 15663. This product is Taiwan RoHS compliant. The following table meets the Section 5 “Marking of presence”...