Table of Contents
Advertisement
Available languages
Available languages
Quick Links
Advertisement
Chapters
Table of Contents

Related Manuals for EINHELL RG-EM 1536 HW


Summary of Contents for EINHELL RG-EM 1536 HW
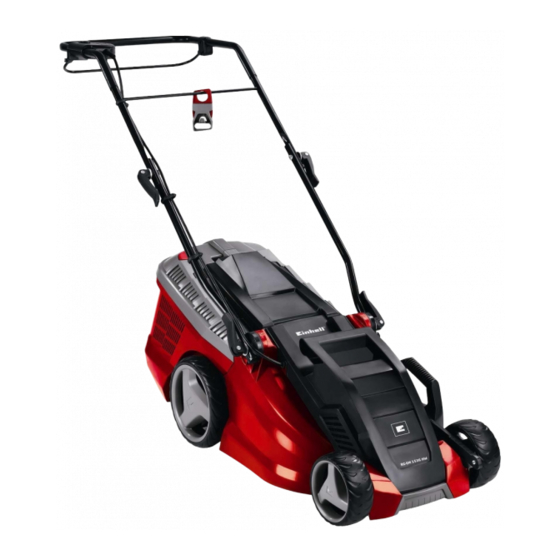
- Page 1 RG-EM 1536 HW Manual de instrucciones original Cortacésped eléctrico Original operating instructions Electric Lawn Mower South America Anl_SA_RG_EM_1536_HW_SPK8.indb 1 Anl_SA_RG_EM_1536_HW_SPK8.indb 1 06.04.2017 13:56:38 06.04.2017 13:56:38...
- Page 2 22 23 - 2 - Anl_SA_RG_EM_1536_HW_SPK8.indb 2 Anl_SA_RG_EM_1536_HW_SPK8.indb 2 06.04.2017 13:56:38 06.04.2017 13:56:38...
- Page 3 - 3 - Anl_SA_RG_EM_1536_HW_SPK8.indb 3 Anl_SA_RG_EM_1536_HW_SPK8.indb 3 06.04.2017 13:56:39 06.04.2017 13:56:39...
- Page 4 - 4 - Anl_SA_RG_EM_1536_HW_SPK8.indb 4 Anl_SA_RG_EM_1536_HW_SPK8.indb 4 06.04.2017 13:56:43 06.04.2017 13:56:43...
- Page 5 - 5 - Anl_SA_RG_EM_1536_HW_SPK8.indb 5 Anl_SA_RG_EM_1536_HW_SPK8.indb 5 06.04.2017 13:56:46 06.04.2017 13:56:46...
-
Page 6: Table Of Contents
Índice de contenidos 1. Instrucciones de seguridad 2. Descripción del aparato y volumen de entrega 3. Uso adecuado 4. Características técnicas 5. Antes de la puesta en marcha 6. Manejo 7. Cambio del cable de conexión a la red eléctrica 8. - Page 7 Aviso - Leer el manual de instrucciones para reducir cualquier riesgo de sufrir daños Usar protección para los oídos. La exposición al ruido puede ser perjudicial para el oído. Cuidado! Es preciso ponerse una mascarilla de protección. Puede generarse polvo dañino para la salud cuando se realicen trabajos en madera o en otros materiales.
-
Page 8: Instrucciones De Seguridad
¡Atención! una descarga eléctrica. Al usar aparatos es preciso tener en cuenta una b) Evitar el contacto corporal con superfi - serie de medidas de seguridad para evitar le- cies con toma de tierra como tubos, ca- siones o daños. Por este motivo, es preciso leer lefacciones, fogones y frigorífi... - Page 9 lada pulsando el interruptor o si se enchufa a se bloqueen, controlar también si existen la toma de corriente cuando está encendida. piezas rotas o están tan dañadas que d) Retirar las herramientas de ajuste o las ponen en peligro el funcionamiento de la llaves antes de conectar la herramienta herramienta eléctrica.
- Page 10 ADVERTENCIAS: siempre calzado resistente y pantalones • No utilizar el cortacésped cuando el cable de largos. No operar la máquina descalzo o con conexión esté dañado o desgastado. sandalias. Evitar llevar ropa holgada o con • No enchufar ningún cable dañado ni tocar cordones o cinturones colgando.
-
Page 11: Descripción Del Aparato Y Volumen De Entrega
ción de césped. correctamente. k) Utilizar con cuidado el interruptor ON/OFF e) Por motivos de seguridad, llevar el aparato siguiendo las instrucciones del fabricante. a un taller de servicio para que se sustituyan Asegurarse de mantener la distancia de se- las piezas gastadas o dañadas. -
Page 12: Uso Adecuado
2.2 Volumen de entrega como azada para allanar irregularidades en el Sirviéndose de la descripción del volumen de suelo como, por ejemplo, los montículos de tierra entrega, compruebe que el artículo esté com- hechos por los topos. pleto. Si faltase alguna pieza, dirigirse a nuestro Service Center o a la tienda especializada más Por motivos de seguridad, no emplear el corta- cercana en un plazo máximo fi... -
Page 13: Antes De La Puesta En Marcha
El valor de emisión de vibraciones indicado tam- y el alojamiento del mango (fi g. 2/pos.12) y bién puede utilizarse para una valoración prelimi- acoplarlos al eje previsto para ello (fi g. 5). A con- nar de los riesgos. tinuación, colocar el soporte del arco de empuje (fi... -
Page 14: Manejo
• indicador de llenado funcione correctamente, Doblamientos por fijación inadecuada o por será preciso mantener siempre limpios y permea- la guía del cable. bles los orifi cios bajo la compuerta. Ajuste de la altura de corte Los cables deben ser como mínimo del tipo ¡Atención! H05RN-F y de 3 hilos. - Page 15 el césped, especialmente al cambiar el sentido Seleccionar la altura de corte correspondiente a de la marcha en zanjas y pendientes. Es preciso la longitud real del césped. Pase el cortacésped asegurarse de que se mantiene una posición varias veces de tal manera que cada vez que lo segura, de que se lleva calzado de suela antides- pase corte un máximo de 4 cm de césped.
-
Page 16: Cambio Del Cable De Conexión A La Red Eléctrica
Cuelgue la cesta de recolectora únicamente cu- 8.3 Mantenimiento ando haya desconectado el motor y la herramien- No hay que realizar el mantenimiento a más ta de corte se haya detenido por completo. piezas en el interior del aparato. Levantar con un mano la compuerta de expulsi- 8.4 Pedido de piezas de repuestos: ón, mientras sostiene con la otra mano el asa de Al solicitar repuestos se indicarán los datos sigu-... - Page 17 Table of contents 1. Safety regulations 2. Layout and items supplied 3. Proper use 4. Technical data 5. Before starting the equipment 6. Operation 7. Replacing the power cable 8. Cleaning, maintenance and ordering of spare parts 9. Disposal and recycling 10.
- Page 18 Caution - Read the operating instructions to reduce the risk of inquiry Wear ear-muff s. The impact of noise can cause damage to hearing. Wear a breathing mask. Dust which is injurious to health can be generated when working on wood and other materials.
-
Page 19: Safety Regulations
Danger! b) Avoid bodily contact with earthed sur- When using the equipment, a few safety pre- faces such as pipes, heating, ovens and cautions must be observed to avoid injuries and fridges. The risk of electric shock is increa- damage. Please read the complete operating sed if your body is earthed. - Page 20 circumstances. 5. Service Wear suitable work clothes. Do not wear a) Have your electric tool repaired only by loose clothing or jewellery. Keep hair, clo- trained personnel and/or the authorized thes and gloves away from moving parts. service agent, using only genuine spare Loose clothing, jewellery or long hair can get parts.
- Page 21 - if a foreign body has been struck; Danger! - whenever the machine starts to vibrate Handling oddly. a) Only mow in broad daylight or in well-lit condi- • Carefully read the instructions for how to ope- tions. rate the machine safely. b) Do not use the machine on wet grass.
-
Page 22: Layout And Items Supplied
- Repair the damaged parts as required. 19. Grass basket, top part of the housing - Make sure that all nuts, bolts and screws are 20. Grass basket, right part of the housing fastened securely. 21. Grass basket, left part of the housing q) Switch off... -
Page 23: Technical Data
• tation, planted roofs, or balcony-grown grass, to Service and clean the appliance regularly. • clean (suck up) dirt and debris off walkways, or Adapt your working style to suit the appliance. • to chop up tree or hedge clippings. Moreover, the Do not overload the appliance. - Page 24 shed onto the push bar holders (Figure 2/Item 3) The cutting height is adjusted as follows (see and secured as shown above in Figure 9. Then Fig. 14): attach the power cable to the push bar (Fig. 10/ 1. Push the lever (A) outwards. Item A) using the cable clips (Fig.
-
Page 25: Operation
6. Operation Try to mow in straight lines for a nice, clean look. The swaths should overlap each other by a few centimeters in order to avoid stripes. Connect the plug (Fig. 1/Item 8) to an extension cable. It is imperative to secure the extension How frequently you should mow your lawn is cable with the cable grip as shown in Figure 15. -
Page 26: Replacing The Power Cable
off the engine and wait until the blade has come basket. Switch off the engine before emptying the to a stop. grass basket. To take off the grass basket, use one hand to lift Always ensure that a safe distance (provided up the chute fl... -
Page 27: Cleaning, Maintenance And Ordering Of Spare Parts
Select the cutting height according to the length Using one hand, lift up the chute fl ap, while grab- of the grass. If the lawn has grown quite a bit, bing onto the basket handle with the other. Hang mow over it several times so that no more than 4 in the basket from the top. -
Page 28: Disposal And Recycling
9. Disposal and recycling The equipment is supplied in packaging to pre- vent it from being damaged in transit. The raw materials in this packaging can be reused or recycled. The equipment and its accessories are made of various types of material, such as metal and plastic. - Page 29 12 meses para los productos en un service autorizado Einhell. Para averiguar el de la línea Home (Blue, Classic)** y 24 meses service autorizado más próximo, comuníquese al para la línea Expert (Red, Expert, Expert Plus)
- Page 30 4º) Verifi car que la tensión de la línea eléctrica corresponda a 230 V 50 Hz, corriente alterna. EINHELL Argentina S.A. no se responsabiliza por daños y/o deterioros que eventualmente se pue- den ocasionar a terceros. En ningún caso EIN- HELL Argentina S.A.
- Page 31 Características técnicas Tensión de red: ......230 V ~ 50 Hz Consumo de energía: ......1500 W Revoluciones del motor: ......3650 r.p.m Anchura de corte: ........36 cm Ajuste de altura de corte: ..25-75 mm; 6 niveles Volumen de la bolsa recolectora: .... 40 litros Nivel de presión acústica L ....
- Page 32 Para ello, envíe el aparato a nuestra dirección de servicio técnico. Einhell Chile S.A. La Farfana 400; Galpón G10; Pudahuel Sur; Santiago - Chile Phone: +56 2 25448500 centro.tecnico@einhell.com...
- Page 33 Características técnicas Tensión de red: ......230 V ~ 50 Hz Consumo de energía: ......1500 W Revoluciones del motor: ......3650 r.p.m Anchura de corte: ........36 cm Ajuste de altura de corte: ..25-75 mm; 6 niveles Volumen de la bolsa de recogida de grano: ..............
- Page 34 - 34 - Anl_SA_RG_EM_1536_HW_SPK8.indb 34 Anl_SA_RG_EM_1536_HW_SPK8.indb 34 06.04.2017 13:56:50 06.04.2017 13:56:50...
- Page 35 - 35 - Anl_SA_RG_EM_1536_HW_SPK8.indb 35 Anl_SA_RG_EM_1536_HW_SPK8.indb 35 06.04.2017 13:56:50 06.04.2017 13:56:50...
- Page 36 EH 04/2017 (01) Anl_SA_RG_EM_1536_HW_SPK8.indb 36 Anl_SA_RG_EM_1536_HW_SPK8.indb 36 06.04.2017 13:56:50 06.04.2017 13:56:50...