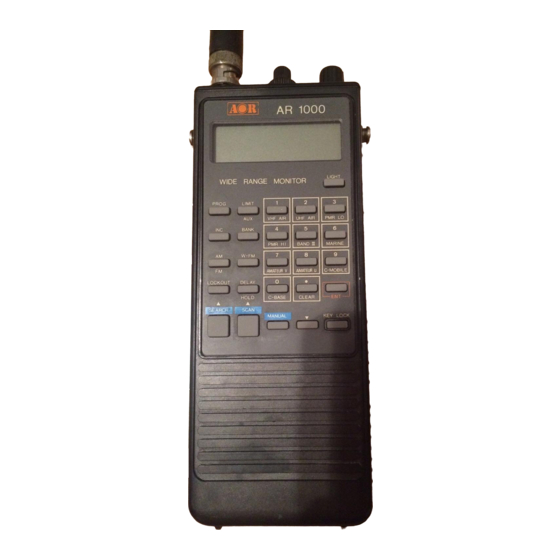
AOR AR1000 Manual
Hide thumbs
Also See for AR1000:
- Instruction manual (16 pages) ,
- Instruction manual (7 pages) ,
- Instruction manual (4 pages)
Table of Contents
Advertisement
Advertisement
Table of Contents

Related Manuals for AOR AR1000


Summary of Contents for AOR AR1000
- Page 1 Guide to the AR1000 Operations AR 1000 SCAN Applications DELAY BANK 311.000 Accessories LIGHT WIDE RANGE MONITOR PROG LIMIT Reference BANK • LOCKOUT DELAY CLEAR HOLD SEARCH SCAN KEYLOCK MANUAL Howard Bornstein...
- Page 2 Guide to the AR1000 A comprehensive guide to the AR1000 family of Wide Range Monitors. Covers all models of the AR1000, plus the AR2000, the Fairmate HP100, HP200, HP2000, the Camnis HSC-010, and the Trident TR1000 and TR1200XLT. Includes detailed sections on operations, applications, accessories and reference.
- Page 3 ©1994, 1999 Howard Bornstein. All Rights Reserved. This PDF version of the Guide to the AR1000 is made available for free down- load from www.designeq.com. Design EQ retains all distribution rights for this document and it may not be distributed in any collection of software, in printed form, or from any other source than the Design EQ website.
-
Page 4: Acknowledgements
Laakso, Paul Miyashiro, Jason Reimer, Michael Schuster, and Bill Steinberg. They reviewed the manuscript and offered endless suggestions and corrections, as well as techniques and insights about the AR1000. While their help was invalu- able, I must take responsibility for any errors in this guide. -
Page 5: Table Of Contents
Quickly setting the starting scan or search bank 36 Finding a hidden frequency in a range 37 Setting up car radio-like buttons on the AR1000 38 Setting up radio buttons in Search mode 38 Setting up radio buttons in Scan mode 38... - Page 6 Using two adjacent channels 40 Copying a group of frequencies 41 Stepping through the scan banks 42 How to make the AR1000 come up in the mode you want 43 Listening to the AR1000 in your car 44 Optimizing scan and search banks 45...
- Page 7 The Keyboard 69 LIGHT 69 PROG 70 INC 70 AM/FM 71 W-FM 71 LOCKOUT 71 LIMIT/AUX 72 LIMIT 72 AUX (Priority) 72 BANK 74 DELAY/HOLD 74 SEARCH 75 SCAN 75 MANUAL 76 Down Arrow 76 Using the Down arrow while searching 76 Using the Down arrow while scanning 77 Using the Down arrow in Manual mode 77 KEYLOCK 78...
-
Page 8: Introduction
One of the things you may have noticed is the lack of complete documentation for your AR1000. This is unfortunate, since the unit is robust in its capabilities and can be complex in its operations. Many users have figured out the operations of this scanner through much trial and error. - Page 9 AOR released a scanner following the AR1000 called the AR1500. It has the features of the AR1000 with the addition of a beat frequency oscillator (BFO) for decoding sideband transmissions, and a search-and-store feature. However, many of the tricks and tips in this book are based on certain “anomolies” in the AR1000’s operations.
-
Page 10: How This Guide Is Organized
The Guide to the AR1000 is written for both the beginner and the expert user alike. If you’re new to the AR1000, this guide will get you started and take you quite a ways along the path. If you’re an experienced scanner user, even with the AR1000, you will probably find some new tricks and information within. - Page 11 We suggest that, rather than just reading about techniques, you actually go through the steps and try each technique on your scanner. While a technique may look confusing on paper, once you perform the operation, it will make much more sense and you will find that it will soon become second nature.
-
Page 12: Operations
Operations Scanning AR 1000 Searching SCAN DELAY BANK 311.000 Manual Mode LIGHT WIDE RANGE MONITOR PROG LIMIT BANK • LOCKOUT DELAY CLEAR HOLD SEARCH SCAN KEYLOCK MANUAL... -
Page 13: Introduction
Introduction This section will give you simple step-by-step procedures for performing the basic operations with the AR1000. In particular, it will show you how to use the scan and search features of the AR1000. One thing to mention first, however, is a feature of the AR1000 that operates whenever you try to program a search or scan function. -
Page 14: Scanning
What you cannot pickup The things you won’t be able to pick up with the AR1000 are few. You will not be able to easily decode Single Side Band (SSB) transmissions, because there is no beat frequency oscillator (BFO) included with the AR1000. -
Page 15: Selecting A Scan Channel
We’ll address this issue again in the Applications section. The AR1000 uses a somewhat confusing idea of banks and channels. It has ten banks with 100 channels per bank. You select an individual channel by pressing a bank number (0-9) and then a two-digit channel number (00-99). -
Page 16: Programming A Scan Channel
Scanning Use MANUAL to step through a scan bank to view the frequencies that have been entered into that bank. This is also a good way to determine which channels you have locked (see page 18 for details on locking out scan channels). Note: You cannot step backward through the scan channels with the MANUAL but- ton, but there is a way to do something similar with the Tuning knob. -
Page 17: Entering Sequential Frequencies
In addition, using our method, you’ll find that it will add consistency to many AR1000 operations. You will almost always first specify the channel you are interested in and second , act on it (i.e. change the frequency). By first going to the channel, you can see what is in it before you overwrite it. -
Page 18: Locking A Scan Channel
L.OUT disappears from the display. Caution using Lockout With the AR1000, the LOCKOUT key is always active. If you are scanning and press LOCKOUT by accident, the channel that you happen to be scanning when you press the key will be locked, even if the scanner has not stopped on that... -
Page 19: Clearing A Scan Channel
When you press the MANUAL key to sequentially move through the channels, the AR1000 will skip over a cleared channel. In other words, if channels 127 through 134 are cleared and you start on channel 125, when you press MANUAL the first time, you will move to channel 126. -
Page 20: Copying A Frequency From One Channel To Another
Scanning were interested in monitoring the Drug Enforcement Agency (DEA). You might plug in 20 frequencies in your scanner to monitor them. At some point you decide you are no longer interested in them. If you leave the frequencies in the scanner, even if locked out, when you go searching around for “available”... -
Page 21: Unlocking A Scan Bank
BANK, LOCKOUT. Shortcut: If you are scanning several banks at a time, you can quickly force the AR1000 to start scanning at the beginning of any bank by pressing the bank number on the keyboard. For example, if you have enabled banks 3, 5, 7, and 8 for scanning,... -
Page 22: The Difference Between Locking A Channel And Locking A Bank
Limiting scan banks There is a method of limiting the banks that are scanned with the AR1000, but under normal circumstances, we do not recommended using it. The limited banks must be sequential, and, more seriously, once you limit a set of banks, you will not be able to access channels outside these banks in any mode, even in Manual mode. -
Page 23: Removing Scan Bank Limits
Bank limiting will add a layer of protection. Unless someone is very familiar with the operations of the AR1000, they won’t be able to display or change any of the frequencies outside the limited banks. -
Page 24: Using Delay/Hold
There is currently no way around this problem and the AR1000 may not be able to meet your needs for monitoring trunked systems. -
Page 25: Searching
Setting up search banks There are ten individual search banks in the AR1000. Each bank holds a set of limits, a step increment, and a transmission mode. These banks come in very handy if there are several parts of the radio spectrum that you regularly search through. -
Page 26: Examining Search Bank Parameters
Searching • Press the mode keys until the mode you want is selected. If the mode you want is already selected, just go on to the next step. • Press ENT. BANK will flash in the display. • Enter the bank number you want to set (0-9). •... -
Page 27: Locking Out Frequencies Within A Search Bank
Locking out frequencies within a search bank One of the unique features of the AR1000 is the ability to lock individual fre- quencies in a search range. Sometimes the scanner will stop on a frequency or a group of sequential frequencies during a search, but these frequencies have no useful activity. -
Page 28: Locking Out Search Banks
Searching When you enter that search bank (you’ll see the bank number below the BANK indicator), the first frequency you’ll see will be the first locked frequency. If you want to unlock it, press LOCKOUT. If you want to leave it locked, press ENT. In either case, you’ll be shown the next locked frequency. -
Page 29: Unlocking A Search Bank
The bank you were in when you pressed LOCKOUT will be locked and the AR1000 will begin using the search parameters of the next higher bank, if one is available. The banks will “wrap around” if necessary. For example, if you have banks 3 and 9 enabled and are searching bank 9, when you lock it out, the AR1000 will wrap around to bank 3 and start using it for searching. -
Page 30: Unlocking A Search Bank Where Previous Bank Has Locked Frequencies
While this looks involved on paper, it is really very easy to do on the keyboard. Unlocking a search bank where the previous bank has locked frequencies Unfortunately in the AR1000, there is no separation between the search banks you lock and individual frequencies within a search bank that you lock. If you want to unlock a search bank that is locked, you first need to go through all the locked frequencies in the previous search bank. -
Page 31: Limiting Search Banks
AR1000 Operations all of the locked frequencies in bank 3, you will see bank 4 appear in the display (both BANK and L.OUT will be flashing). When you press LOCKOUT, bank 4 will become enabled. If you only have a couple of locked search frequencies (or better yet, none), it is very easy to get to the bank you want to unlock. -
Page 32: Removing Search Bank Limits
Searching Example: To limit bank searching to banks 3, 4, and 5, press SEARCH, BANK, PROG, 3, LIMIT, 5, ENT. To limit bank searching to just bank 3 press SEARCH, BANK, PROG, 3, LIMIT, 3, ENT. Removing search bank limits To remove all •... -
Page 33: Using Delay/Hold
HOLD is selected. After stopping on an active frequency, the scanner will resume searching after the usual two to three second delay. This is a bug in the AR1000 operation. Manual mode Manual mode is the mode you will use to program frequencies for individual... -
Page 34: Applications
DELAY BANK 311.000 Car Radio-Like Buttons LIGHT WIDE RANGE MONITOR Toggling Frequencies PROG LIMIT BANK Copying Frequencies • LOCKOUT DELAY Stepping Through Banks CLEAR HOLD SEARCH SCAN KEYLOCK MANUAL Setting the Startup Mode The AR1000 in your Car Optimizing Memory... -
Page 35: Introduction
AR1000. After you become familiar with its operation, you can begin to develop your own techniques and applications. -
Page 36: Quickly Setting The Starting Scan Or Search Bank
For example, if you have set up all of your scan banks and you press SCAN, the AR1000 will start scanning at the beginning of bank 0 and move sequentially through all the banks. If you want it to start scanning at bank 4, just press 4 on the keyboard. -
Page 37: Finding A Hidden Frequency In A Range
Here’s how to use the AR1000’s search bank frequency lockout feature to help you. Start searching as described above. When you identify an active frequency, log it and then press LOCKOUT. -
Page 38: Setting Up Car Radio-Like Buttons On The Ar1000
There is an interesting way you can set up a series of car radio-like buttons on the AR1000. Then with one button press you can get to a specific channel. This method is particularly useful for stations that have continu- ous transmissions, like AM and FM broadcast stations and shortwave stations. - Page 39 AR1000 Applications To select these frequencies, you need to first lock all the scan banks. This is easily accomplished with the key sequence BANK, LOCKOUT. Keep repeating this until the scanner stops scanning. When all the banks are locked, you simply press a number from the keyboard and the scanner will jump to the first channel in that bank.
-
Page 40: Switching Between Two Frequencies
Toggling Frequencies Switching between two frequencies There may be times when you want to switch between two frequencies. Of course, you can set up the two frequencies as scan channels and then lock the other 98 channels in the bank, but this would be a lot of work. You can also use the radio button techniques described above. -
Page 41: Copying A Group Of Frequencies
AR1000 Applications Copying a group of frequencies Because the AR1000 memory space is so large, you may periodically want to rearrange where you keep sets of frequencies. Instead of referring to your bank/ channel records and manually entering in the group of frequencies you want to move, use this method to copy a group of frequencies from within the scanner. -
Page 42: Stepping Through The Scan Banks
Stepping Through Banks Stepping through the scan banks While you can’t step backwards through the scan banks with the MANUAL button, there is a way to do this using the Down arrow button, or the Tuning knob. This trick comes in handy in many situations, and if you arrange your scan channels as described in the later section on optimizing scan channels, this technique will help you access related groups of frequencies. -
Page 43: How To Make The Ar1000 Come Up In The Mode You Want
Run the AR1000 from the AC adapter, with Nicad batteries in the unit. Set the AR1000 in the mode you want the scanner to come up in. For example, if you want the scanner to be searching when you turn it on, press the Search key as the first step in this method. -
Page 44: Listening To The Ar1000 In Your Car
While the AR1000 has very good volume capability, you may still have some difficulty hearing it over the car and road noise. A very effective way to amplify the output of the AR1000 is to run it through your car stereo. You will need a car tape player to use this technique. -
Page 45: Optimizing Scan And Search Banks
You may want to have a set of discrete frequencies in your scanner that you can easily get to that you won’t scan on a regular basis. For example, the AR1000 picks up both regular AM and FM radio broadcasts. It also (with the right antenna) picks up many strong shortwave stations. - Page 46 Use the provided bank templates to keep track of your channel frequencies The Guide to the AR1000 comes with a set of templates that you can use to keep track of the contents of all 1,000 scan channels. Photocopy these templates and record your frequencies and descriptions on the forms.
-
Page 47: Example Bank Allocations
AR1000 Applications Example of bank allocations BANK 4 Military BANK 0 CB/Weather/Radio 400 Radio button 0 Radio button 401-450 Military comms 1-40 Citizens Band 451-499 Free 41-49 Free 50-56 National weather BANK 5 Railroads 57-59 Free 500 Radio button 60-70 Favorite AM/FM stations... -
Page 48: Accessories
Accessories The Power Supply AR 1000 The Strap/Belt Clip SCAN DELAY BANK 311.000 Antennas LIGHT WIDE RANGE MONITOR Customizing the AR1000 PROG LIMIT BANK • LOCKOUT DELAY CLEAR HOLD SEARCH SCAN MANUAL KEYLOCK... -
Page 49: Introduction
The AR1000 comes with some standard accessories and you can purchase others to enhance the unit. The accessories described here are those that generally come with the AR1000 in the United States. These include a set of supplied nicad batteries, an AC transformer power supply, a DC cigarette lighter power supply for your car, a shoulder carrying strap, a metal belt clip, a vinyl carrying case, and a standard rubber ducky antenna. -
Page 50: The Power Supply
The Power Supply The power supply The AR1000 comes with a supplied charger and a set of four AA nicad recharge- able batteries. The scanner requires a 6 volt DC power source but will run with anything up to 13.8 VDC. -
Page 51: Using Other Chargers
AR1000 Accessories adapter all the time as long as the AR1000 is not powered on. If the AR1000 is turned on when you start the car, the unit may be susceptible to a power surge that could damage the scanner. One way to guard against this is to solder a small fast-blow 1 amp or less fuse into the charger. -
Page 52: The Strap/Belt Clip
The AR1000 also has two lugs at the top of the unit that are used for hooking on the shoulder strap. If you decide that you don’t want to use the shoulder strap, you may want to reverse these “Frankenstein”... -
Page 53: Antennas
Antennas The antenna is probably the most important element for getting good reception on the AR1000. The AR1000s in the USA come with one general purpose rubber antenna, while the units available in England and Europe come with several antennas. While the general rubber ducky is fine for average listening, you will get the best reception by using an antenna cut for a specific frequency range. - Page 54 If you have a local scanner retailer near you, consult with him about your an- tenna needs. A good antenna will give you the best possibility of taking advantage of the wide range of the AR1000.
-
Page 55: Other Ways To Customize The Ar1000
AR1000 Accessories Other ways to customize the AR1000 There are a few other simple customizations of the AR1000 that will make your life much easier and will enhance the enjoyment of your scanner. At the end of this section is a detailed description of extending the frequency range of earlier- model AR1000s that only cover 8-600 MHz and 805-1300 MHz. -
Page 56: Extending The Frequency Coverage
Extending the frequency coverage The AR1000 is microprocessor based and the parameters that determine its coverage are set under software control. If you have an older model AR1000 that doesn’t have continuous coverage from .5 MHz to 1300 MHz, you may want to perform this mod. - Page 57 AR1000 Accessories 11) Remove the connectors on the lower board. Note which connector goes where, particularly the orientation of the connectors. The lower board will look like this figure. LCD DLC5066P IC400 µpD 75P308GF D75308GF651 C411 10 µ D404 R406 47K...
-
Page 58: Adjusting A Unit That Is Off Frequency
Adjusting Off Frequencies Turn on the unit. The display will be blank. This means that the unit is ready to be re-programmed. Carefully enter in the following keystrokes from left to right, top to bottom. Keys are shown within brackets (e.g. [Bank]). The symbol [V] means press the Down arrow button. - Page 59 5 KHz to either side. Disclaimer: While these modifications have been performed successfully by a number of AR1000 owners, please understand that the author does not warranty these mods and if you perform them, you do so at your own risk.
-
Page 60: Reference
Reference The Display AR 1000 SCAN The Keyboard DELAY BANK 311.000 The Top Controls LIGHT WIDE RANGE MONITOR PROG LIMIT BANK • LOCKOUT DELAY CLEAR HOLD SEARCH SCAN KEYLOCK MANUAL... -
Page 61: Introduction
AR1000 Reference Introduction The AR1000, operationally, consists of the LCD display, the keyboard, the top panel controls, the power jack, and the battery compartment. The section AR1000 Operations provides step-by-step instructions for performing the basic scanning and searching operations. This section is a concise reference for all the keys, display items, and controls on the unit. -
Page 62: The Display
The Display The Display The LCD display shows you which channel you are looking at, its frequency and transmission mode, and a number of status indicators. The illustration shows the LCD display with all the annunciators turned on. AR 1000 MANUAL SCAN SEARCH PROG... -
Page 63: Frequency
Fr. Err (frequency error) in the display. Press CLEAR to start over. Mode (AM/FM/WFM) There are three transmission modes you can set the AR1000 to receive. These are AM, FM, and Wide FM. You set each scan channel and each search bank to listen in a specific mode. -
Page 64: Bank/Ch
While other scanners default to a transmission mode for a specific range, with the AR1000, you can always set the mode explicitly, so you’ll never miss out on unusual transmissions. -
Page 65: Delay/Hold
DELAY/HOLD When the AR1000 stops on an active frequency, it pauses for two or three seconds after a transmission ends before it continues scanning or searching. This is to provide time to hear a response before it resumes scanning or searching. -
Page 66: With Search Banks
The Display the BANK indicator. You may also have an individual channel locked in a locked bank, but you will not be able to tell that the channel is itself locked by looking at the indicator. Once you unlock the bank, however, any channels that are locked will continue to show the flashing L.OUT indicator. -
Page 67: Prog
AR1000 Reference PROG PROG appears in the display after you have pressed the PROG button while in Search mode or Manual mode or after pressing the BANK button while in Scan mode. In Search mode, if you press PROG, you are telling the scanner you want to set up new search bank limits. -
Page 68: Khz
You may occasionally see the message FR. ERR in the display. This message stands for “Frequency Error.” You may encounter this message if you enter an invalid frequency—something out of the AR1000’s range. It also may occur if you perform an operation with an incorrect sequence of steps. -
Page 69: The Keyboard
AR1000 Reference The Keyboard The keyboard, along with the top control panel, contains the controls for run- ning and programming the scanner. The buttons on the keyboard are described in detail below. LIGHT WIDE RANGE MONITOR PROG LIMIT BANK •... -
Page 70: Prog
The Keyboard PROG The PROG button is used to program in scan bank limits and search bank limits. It is also used to lock and unlock individual frequencies within a search bank and to lock and unlock entire search banks. You can also use it to program a specific scan channel with a frequency, but we don’t recommend you use this method. -
Page 71: Am/Fm
AR1000 Reference 5 KHz is the smallest increment value you can use with the AR1000. 995 KHz is the largest value you can use. The value you choose must be divisible by 5 or 12.5. AM/FM This button toggles between the two transmission modes. The AR1000 can pick up both AM and FM transmissions and this button switches between them. -
Page 72: Limit/Aux
You always press this button for its LIMIT function within a key sequence. AUX (Priority) The AR1000 has one Priority channel that will take precedence over any other broadcast. If you want to be sure you will hear the transmissions on a certain channel, even if you are listening to another active channel, make it the Priority channel. - Page 73 AR1000 Reference To program a • Press AUX. • Press PROG. new Priority • Enter the channel number you want as the new Priority channel. channel • Press ENT. To check the • Open up the squelch so you hear the background hiss current Priority •...
-
Page 74: Bank
If you press the BANK button while in Scan mode, scanning will stop and PROG will flash in the display. The AR1000 thinks you want to set up scan bank limiting, a feature we recommend you don’t use for normal activity. Press the SCAN button to take you out of this mode. -
Page 75: Search
There is currently no way around this problem and the AR1000 may not be suitable for monitoring trunked systems. -
Page 76: Manual
The Keyboard MANUAL The MANUAL button puts the scanner in Manual mode. From Manual mode, you can examine or program individual scan channels. By repeatedly pressing the MANUAL button, you will step through all the scan channels that contain frequencies. Even locked frequencies will appear when you press the MANUAL key, but if a channel has been cleared, MANUAL will skip over it. -
Page 77: Using The Down Arrow While Scanning
AR1000 Reference SEARCH button, you will still search in the normal upwards manner. If you want to continue to search downwards, keep pressing the Down arrow button. Using the Down arrow while scanning The Down arrow works in a similar manner while scanning as it does while searching. -
Page 78: Keylock
The Keyboard This operation in Manual mode can be useful for fine-tuning a frequency, particularly frequencies in the shortwave bands, which tend to drift in and out of frequency. These changes are not permanent. When you press the Manual key again, the original frequency will return. -
Page 79: Ent
123.000 MHz, you only need to enter 123 and press the ENT button. ENT automatically enters the decimal point and the remaining zeros. ENT is used to terminate certain key sequences in the AR1000, particularly limit sequences. Number key pad The number key pad allows you to enter the numeric digits 0 through 9. -
Page 80: Key Mode Chart
The Keyboard The following chart shows what each key does, depending on the mode you are in. Key/Control Manual Mode PROG Copy a frequency from one channel to another. Set up tuning increment. AM/FM Change modes. Make frequency permanent. LOCKOUT Lock channel. -
Page 81: The Top Controls
AR1000 Reference The Top Controls The top panel contains controls for volume, squelch, tuning, and attenuation. In addition, it contains jacks for earphones and the antenna. These controls are described below. Power Switch/Volume control The switch in the center of the top panel is a double rotary switch. The inner knob is the power and volume control while the outer knob is the squelch control. -
Page 82: Attenuation Button
The AR1000 is famous for its touchy squelch controls. The scanner may need a different squelch setting for different frequency ranges. If you mix frequencies in a scan bank, you may be compelled to set the squelch at the highest common denominator, which may cause you to miss other active frequencies. -
Page 83: Using The Tuning Knob While Scanning
AR1000 Reference Using the Tuning knob while scanning The Tuning knob works in a similar manner while scanning as it does while searching. If you are scanning, turning the Tuning knob stops the scanner at the current channel, but keeps it in scan mode. Successive clicks of the Tuning knob will step you backwards or forwards through the scan channels. -
Page 84: Earphone Jack
You may want to use more comfortable, light-weight stereo headphones with the AR1000. If you use a stereo mini-jack, you will get sound, but only out of one ear piece. To comfortably use stereo headphones with the AR1000, you need to get a stereo-to-mono mini-jack adaptor. -
Page 85: Appendix
Appendix Frequency Lists AR 1000 SCAN Magazines/Newsletters DELAY BANK 311.000 Equipment Sources LIGHT WIDE RANGE MONITOR PROG LIMIT Frequency Guides and Books BANK On-Line Services • LOCKOUT DELAY CLEAR HOLD SEARCH SCAN KEYLOCK MANUAL... - Page 86 Useful and Interesting Frequencies and Search Ranges U.S. Television Broadcast Sound Channels (WFM mode) NOAA Weather Stations 59.75 MHz 571.75 MHz 58 739.75 MHz 162.400 Weather 65.75 MHz 577.75 MHz 59 745.75 MHz 162.425 Weather 71.75 MHz 583.75 MHz 60 751.75 MHz 162.450 Weather 81.75 MHz...
- Page 87 U.S. VHF Marine Channels Cordless phones/baby monitors (FM) Ch Transmit Receive User Ch. 1 base 46.61 MHz 156.050 156.050 Vessel Traffic System Ch. 2 base 46.63 156.100 156.100 Port Operations Ch. 3 base 46.67 156.150 156.150 Port Operations Ch. 4 base 46.71 156.200 156.200 Port Operations Ch.
-
Page 88: Magazines/Newsletters
While there are many sources of information for scanner enthusiasts, we have found the following to be particularly useful. Magazines/Newsletters In the United States/Canada Popular Communications Tom Kneitel, Editor 76 North Broadway Hicksville, NY 11801-2953 $21.50 per year/USA 12 issues Beginner-level coverage of scanning, shortwave, CB, cellular telephone, satellite, RTTY. -
Page 89: Equipment Sources
In England Short Wave Magazine Dick Ganderton, Editor PW Publishing Ltd. Arrowsmith Court, Station Approach Broadstone, Dorset BH18 8PW England $45.00 per year for the USA. 12 issues Good general coverage of scanning, shortwave, satellite, RTTY. Equipment Sources Tandy/Radio Shack Corporation Stores everywhere. - Page 90 CRB Research Books, Inc. P.O. Box 56 Commack, NY 11725 Books on scanners and communications monitoring, CB radio, COMINT, clandestine operations, cryptography, electronic surveillance, countermea- sures, espionage. Write for catalog. Passport to World Band Radio Lawrence Magne, Editor-in-Chief International Broadcasting Services, Ltd. P.
-
Page 91: On-Line Services
Type GO HAMNET at the ! prompt. You may contact the author at scanners@designeq.com on the Internet, however, the author cannot offer any additional online help for the AR1000 other than that which is found in this guide. Look for our web page at...