
Related Manuals for Buffalo AirStation WI-U2-433DM


Summary of Contents for Buffalo AirStation WI-U2-433DM
- Page 1 AirStation WI-U2-433DM WI-U2-300D User Manual Americas: www.buffaloamericas.com Europe: www.buffalo-technology.com 35020067-04 2015.08...
-
Page 2: Table Of Contents
Contents Chapter 1 Product Overview .........3 System Requirements ..............3 Package Contents ................3 Hardware Overview .................4 Chapter 2 Installation .............5 Installing Wireless Drivers ...............5 Chapter 3 Connect to a Wireless Network ....8 Chapter 4 Troubleshooting ......... 11 My Computer Does Not Recognize the Wireless Adapter ..11 Cannot Connect to the Network Wirelessly ........ - Page 3 Windows Vista ..................17 Windows XP ....................18...
-
Page 4: Chapter 1 Product Overview
Chapter 1 Product Overview System Requirements Your computer should have a USB 2.0 port and a CD-ROM. Compatible operating systems: Windows 10 (64-bit or 32-bit), Windows 8.1 (64-bit or 32-bit), Windows 8 (64-bit or 32-bit), Windows 7 (64-bit or 32- bit), Windows Vista (64-bit or 32-bit), Windows XP (32-bit) Notes: • Service Pack 3 or later is required for Windows XP. -
Page 5: Hardware Overview
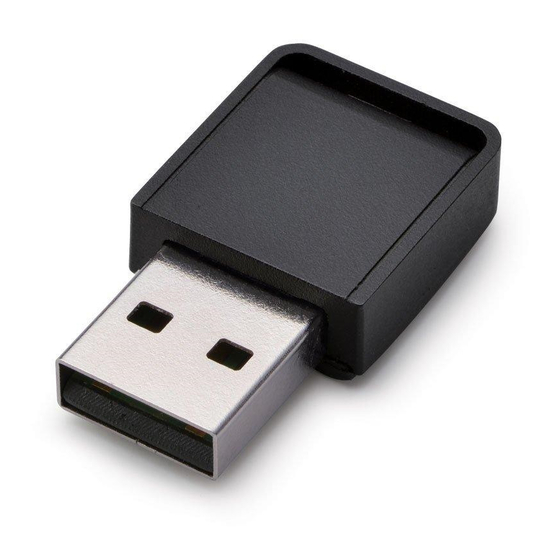
Hardware Overview WI-U2-433DM Activity LED (blue) Blinks when sending or receiving data. WI-U2-300D Activity LED (blue) Blinks when sending or receiving data. -
Page 6: Chapter 2 Installation
Chapter 2 Installation Installing Wireless Drivers Follow the instruction below to install drivers. Do not connect the AirStation to your computer yet. Boot your computer and insert the AirStation Driver CD. The setup menu will launch automatically. If not, open the CD and click "Launcher.exe". - Page 7 Read the license agreement, select Agree, and click Next. Check "Always trust software from "BUFFALO INC."." and click Install. When the screen below is displayed, connect the AirStation to your computer. Drivers will be installed automatically.
- Page 8 After the drivers are installed, the screen below will be displayed. Click Finish. Drivers are now installed.
-
Page 9: Chapter 3 Connect To A Wireless Network
Chapter 3 Connect to a Wireless Network Follow the steps below to connect to the AirStation. The procedure varies depending on the version of Windows used. Click the network icon in the system tray. Notes: • If you’re using Windows 8.1 or Windows 8, switch Windows to desktop mode in advance. • If you’re using Windows Vista, click Connect to a network. - Page 10 Note: If the screen below is displayed, click I want to enter the network key or passphrase instead. Enter the encryption key and click Next, OK or Connect.
- Page 11 Note: If any message such as the following is displayed, click No, don't turn on sharing or connect to devices. If the "Set Network Location" screen is displayed, select "Home", "Work", or "Public location" depending where you're using the AirStation.
-
Page 12: Chapter 4 Troubleshooting
Chapter 4 Troubleshooting My Computer Does Not Recognize the Wireless Adapter • Make sure that the wireless adapter is connected to an USB port on your computer. • If your computer has multiple USB ports, connect to a different USB port. • Refer to chapter 2 to reinstall drivers for this unit. -
Page 13: Chapter 5 Appendix
Chapter 5 Appendix Specifications WI-U2-433DM Wireless LAN Interface Standard Compliance IEEE802.11ac/n/a/g/b Transmission Method Direct Sequence Spread Spectrum (DSSS), OFDM Available frequencies depend on the country of purchase. See Frequency Range the next page for details. 802.11ac 20 MHz BW (Long GI): 78, 65, 58.5, 52, 39, 26, 19.5, 13, 6.5 Mbps (1 stream) 802.11ac 20 MHz BW (Short GI): 86.7, 72.2, 65, 57.8, 43.3, 28.9, 21.7, 14.4, 7.2 Mbps (1 stream) -
Page 14: Wi-U2-300D
Operating Environment 0 - 40° C (32 - 104° F) , 10-85% (non-condensing) 802.11a Frequency Range 5180-5240 MHz (Channels 36, 40, 44, 48) 5260-5320 MHz (Channels 52, 56, 60, 64) Canada 5500-5580 MHz (Channels 100, 104, 108, 112, 116) Mexico 5680-5700 MHz (Channels 136, 140) 5745-5825 MHz (Channels 149, 153, 157, 161, 165) 802.11g Frequency Range... -
Page 15: Uninstalling The Drivers
5180-5240 MHz (Channels 36, 40, 44, 48) 5260-5320 MHz (Channels 52, 56, 60, 64) 5500-5700 MHz (Channels 100, 104, 108, 112, 116, 120, 124, 128, 132, 136, 140) 802.11g Frequency Range Canada 2412-2462 MHz (Channels 1, 2, 3, 4, 5, 6, 7, 8, 9, 10, 11) Mexico 2412-2462 MHz (Channels 1, 2, 3, 4, 5, 6, 7, 8, 9, 10, 11) Uninstalling the Drivers... -
Page 16: Tcp/Ip Settings
TCP/IP Settings Windows 10, Windows 8.1, Windows 8 To configure TCP/IP in Windows 10, Windows 8.1 or Windows 8, follow the procedure below. Open Control Panel. Click Network and Internet. Click Network and Sharing Center. Click Change adapter settings on the left side menu. Right-click on the network adapter, then click Properties. -
Page 17: Windows 7
Windows 7 To configure TCP/IP in Windows 7, follow the procedure below. Open Control Panel. Click Network and Sharing Center. Click Change Adapter Settings on the left side menu. Right-click on the network adapter, then click Properties. If the "User Account Control" screen opens, click Yes or Continue. Select "Internet Protocol Version 4 (TCP/IPv4)"... - Page 18 Windows Vista To configure TCP/IP in Windows Vista, follow the procedure below. Open Control Panel. Click Network and Sharing Center. Click Manage network connections on the left side menu. Right-click on the network adapter, then click Properties. If the "User Account Control" screen opens, click Yes or Continue. Select "Internet Protocol Version 4 (TCP/IPv4)"...
- Page 19 Windows XP To configure TCP/IP in Windows XP, follow the procedure below. Open Control Panel. Double-click Network. Right-click on the network adapter, then click Properties. Select "Internet Protocol (TCP/IP)" then click Properties. To have DHCP set your IP address settings automatically, check "Obtain an IP address automatically" and "Obtain DNS server address automatically".