Table of Contents
Advertisement
Quick Links
Advertisement
Table of Contents

Related Manuals for Hotpoint CH60EKKS


Summary of Contents for Hotpoint CH60EKKS
- Page 1 CH60EKKS CH60EKWS...
-
Page 2: Table Of Contents
Instructions for Installation and Use Contents WARNING, 3 Safety Information, 4 Introduction, 5 Installation, 6 Features, 7 The Controls, 8-9 Oven Timer Operation, 9 now our Timer, 10 Y Y Y K K K letronic Clock and Automatic Oven Timer Operation, 11-13 Temperature Conversion Chart, 14 Use and Care of the Ceramic Hob, 15-16 High Speed Grill, 18... -
Page 3: Warning
WARNING WARNING: The appliance and its accessible parts become hot during use. Care should be taken to avoid touching heating elements. Children less than 8 years ! ATTENTION ! ATTENTION ! ATTENTION of age shall be kept away unless ! VERY HOT SURFACES ! VERY HOT SURFACES ! VERY HOT SURFACES DURING INSTALLATION... -
Page 4: Safety Information
Safety Information When used properly your appliance is completely safe · Never stare at Halogen heating units. but as with any electrical product there are certain · Never leave children unsupervised where a precautions that must be observed. PLEASE READ cooking appliance is installed as all surfaces will be THE PRECAUTIONS BELOW BEFORE USING hot during and after its use. -
Page 5: Introduction
Introduction To the Installer: * The guarantee is subject to the provisions that Before installation, fill in the product details on the the appliance: back cover of this book. (a) Has been used solely in accordance with The information can be found on the rating plate. the Users Instruction Book. -
Page 6: Installation
This operation must be perfomed Installation by a qualified technician WARNING - THIS APPLIANCE MUST Siting the Cooker BE EARTHED. The cooker is designed to fit between kitchen cabinets spaced 600mm apart. The space either Mains Connection side need only be sufficient to allow withdrawal of Your cooker should have been checked to ensure the cooker for servicing and cleaning. -
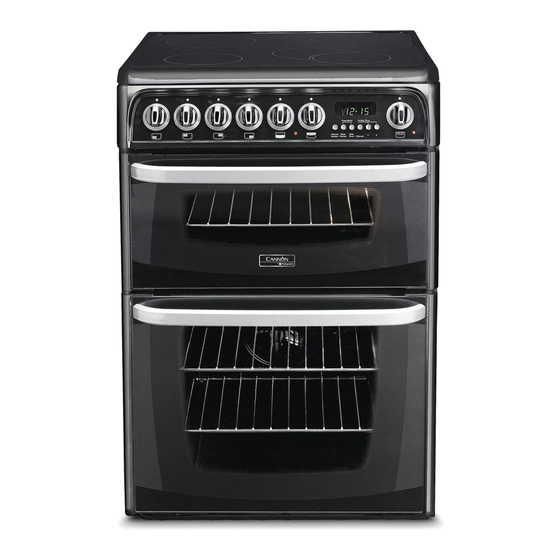
Page 7: Features
Features Features WARNINGS: DO NOT TOUCH THE OVEN DOORS WHEN THE OVEN IS IN USE AS THESE AREAS CAN BECOME HOT. 1800W Ceramic 1200W Ceramic 1200W Ceramic 1500W Dual Oval Ceramic Timer Hob Hot Indicators Control Panel Model number and Serial number Label High Speed Grill Oven Light... -
Page 8: The Controls
The controls Switch on the electricity supply to the cooker at the Cooker Control Unit. Top Oven Neon Main Oven Neon Grill Control Main Hotplate Controls Timer Oven Oven Control Control Dual Circuit Oval Hotplate - Right Front control Hotplate Controls As each control knob is turned clockwise, numbers from 1 - 6 on the control knob increase. -
Page 9: Oven Timer Operation
Main Oven Control This control switches on the main oven. To select Fan Cooking - Turn the control clockwise and select any temperature between 80°C and 220°C. As the control is turned the fan will start, the oven interior light and the main oven thermostat light will come on and the heating element around the fan will start heating. -
Page 10: Now Our Timer
KNOW YOUR TIMER CLOCKFACE The timer incorporates a 24 hour clock. 0 0 0 Ensure the correct time of day is always set, before using your cooker. SYMBOLS A 'bell' symbol will light up when you select a Minute Minder Period and will remain lit for the 0 0 0 period set. -
Page 11: Letronic Clock And Automatic Oven Timer Operation
ELECTRONIC CLOCK & AUTOMATIC OVEN TIMER OPERATION SETTING THE TIME OF DAY Step 1 Make sure all oven controls are turned Off. 0 0 0 Step 2 Check the electricity supply to the cooker is turned on. Step 3 When switched on the display will show 0.00 and the Auto symbol, flashing intermittently. - Page 12 ELECTRONIC CLOCK & AUTOMATIC OVEN TIMER OPERATION Release the buttons and the timer display will revert to the time of day with the 'Auto' symbol and 'cookpot' symbol lit. Step 5 Press and hold in the End Time button. The display will read the earliest possible end time for the Cook Period that you have set above.
- Page 13 ELECTRONIC CLOCK & AUTOMATIC OVEN TIMER OPERATION The timer display will revert to the time of day with the 'Auto' symbol lit & 'cookpot' symbol remaining lit. At the end of the Cook Period the 'Auto' symbol will flash and an intermittent audible tone NOTE: The Cookpot symbol disappears will be heard.
-
Page 14: Temperature Conversion Chart
Temperature Conversion Chart Main Main °F Conventional Conventional Oven Oven Oven 25 0 1 20 1 10 27 5 1 40 1 30 1 50 1 40 1 60 1 50 1 80 17 0 1 90 18 0 1 90 21 0 2 00 2 10... -
Page 15: Use And Care Of The Ceramic Hob
Using the Ceramic Hob Ratings of Cooking Zones Front Left Front Right Back Left Back Right Solarglo Solarglo (Dual Oval) Solarglo Solarglo 1200 W 1500 W 1800 W 1200 W 145mm diameter 145mm x 250mm diameter 180mm diameter 145mm diameter Choice of saucepan's WARNING: IF THE SURFACE IS CRACKED, It is essential that the saucepan's you use on the... - Page 16 Care of the Ceramic Hob Do Not cause damage to the surface of the glass. A l w a y s A l w a y s A l w a y s A l w a y s A l w a y s clean spills immediately (see Care and In order to keep your ceramic hob in good Cleaning).
- Page 17 HIGH SPEED GRILL CAUTION: Accessible parts may become hot when the grill is in use - children should be kept away. Your cooker is not fitted with a conventional type of grill. The high speed grill is designed to reduce your grilling times. It is quicker because it takes less time to warm up from cold.
-
Page 18: High Speed Grill
HIGH SPEED GRILL Guide to grilling successfully Food Pre-heat Shelf Position Setting Approx. Cooking Time from base of oven Toasting of Bread 1 min. 3 or 2 Maximum 3-5 minutes. Products Grill pan and grid. Small cuts of meat − None 3 or 2 Maximum for 4... -
Page 19: Top Oven - Conventional Cooking
TOP OVEN - CONVENTIONAL COOKING The heat for conventional cooking in the top oven is provided by the grill element and the element under the floor of the oven. It is ideal for the slow cooking of cheaper cuts of meat in casseroles etc. but can also be used for small joints of meat up to 1.5kg (3lb). -
Page 20: Main Oven - Fan Cooking
MAIN OVEN - FAN COOKING The heat for fan cooking in the main oven is provided by an element situated at the back of the oven, around the fan Fan cooking is ideal for large poultry or joints of meat, reducing cooking times and often eliminating the need for pre-heating the oven. It is also ideal for batch cooking where food is cooked on more than one level, because the forced circulation of hot air gives an even temperature from the top to the bottom of the oven. -
Page 21: Using The Slow Cook Setting
USING THE SLOW COOK SETTING 'S' 'S' SLOW setting This is used for slow cooking, keeping food warm and warming plates for short periods. Extra care should be taken when warming bone china, as it may be damaged in a hot oven. DO NOT place food or plates directly on the oven floor as this could damage both the oven lining and the plates which are being warmed. -
Page 22: Oven Temperature Charts
OVEN TEMPERATURE CHARTS - BAKING Top Oven Cooking Baking Pre-heat Temperature °C Time in mins. Position in Oven Scones 210/220 10-15 Runner 2 from bottom of oven Small Cakes 180/190 20-25 Runner 2 from bottom of oven Victoria Sandwich 170/180 20-30 Runner 2 from bottom of oven Sponge Sandwich... - Page 23 OVEN TEMPERATURE CHARTS - MEAT Top Oven Cooking Meat Pre-heat Temperature °C Time (approx.) Position in Oven Beef/ Lamb 170/180 35 mins per 450g (1lb) + 35 mins over. (slow roasting) Beef/ Lamb 190/200 35-40 mins per 450g (1lb) (foil covered) Pork 170/180 40 mins per 450g (1lb) + 40 mins over...
-
Page 24: Care And Cleaning
Care and Cleaning • always condition hob after cleaning by using 'Easy TURN OFF THE MAIN SWITCH AND ENSURE Do Conditioner' or 'Hob Brite'. Apply a small amount THE COOKER IS COLD BEFORE CLEANING. of conditioner with a clean damp cloth or paper BEFORE SWITCHING ON AGAIN, ENSURE THAT towel. - Page 25 Care and Cleaning - side and rear panels. slight soiling the inner glass panel may be cleaned, Main Oven Liners - sides while still warm. For removing stubborn stains see Top Oven Liners It should not normally be necessary to clean the next page.
- Page 26 Care and Cleaning Cleaning the glass doors Ensure anti-rattle bungs are fitted before fitting inner door glass. DROP DOWN DOORS Open the door fully and BE CAREFUL NOT TO DAMAGE THE GLASS PANELS carefully slide the first BY PUSHING THEM TOO HARD. inner glass towards you, taking care not to allow the glass to fall.
-
Page 27: Something Wrong With Your Cooker
Something Wrong with your Cooker? Problem Check Steam / Steam is a by - product of cooking any food with a high water contact. To help minimise Condensation in always: the oven after use. a) Preheat the oven (depending on the model) b) Reduce the amount of moisture at the food preparation stage for example by using a covered container, wherever possible c) Open the door immediately after the baking process. -
Page 28: Disposal Of The Product
Via Carlo Pisacane n.1 05/2020 - W11465104 20016 Pero (MI), Italy XEROX FABRIANO VAT number: IT00693740425 www.hotpoint.co.uk Respecting and conserving the Disposal of your product environment To minimise the risk of injury to children please dispose of your product carefully and safely.