Table of Contents
Advertisement
Available languages
Available languages
Advertisement
Table of Contents

Related Manuals for Gibson Maestro


Summary of Contents for Gibson Maestro
- Page 1 22/09/2017 13:21:01...
-
Page 2: Table Of Contents
TUNING YOUR GUITAR 3 Connecting your guitar to amplifier 6 Control Adjustments 6 More About Tuning 3 HOLDING YOUR GUITAR 7 CHANGING STRINGS 4 Inserting strings at the bridge (acoustic guitar) 4 CARE AND MAINTENANCE 8 Inserting strings at the bridge (electric guitar) 4 String maintenance 8... - Page 3 Congratulations on choosing a Maestro by Gibson guitar to give you years of musical enjoyment! Please read this manual to get the most out of your new musical instrument. EN 1 um_maestro_us_2L_170922.indd 22/09/2017 13:21:01...
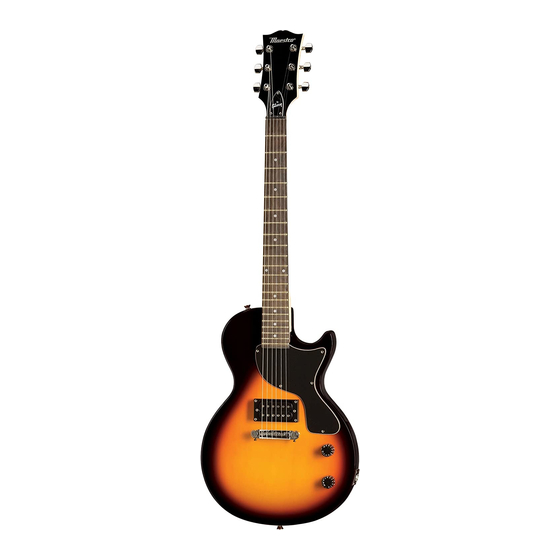
- Page 4 tuning head headstock fret fingerboard strap pin neck neck string sound hole pickup pickguard saddle volume output jack bridge tone strap pin EN 2 um_maestro_us_2L_170922.indd 22/09/2017 13:21:01...
-
Page 5: Tuning Your Guitar
TUNING YOUR GUITAR More About Tuning There is a standard tuning for the strings on a guitar. Generally, these are referred to simply as E, A, D, G, B, high E. The following tips will help you obtain more accurate tuning. •... -
Page 6: Changing Strings
To help maintain consistent neck tension, replace strings one at a time and tune (electric guitar) each string before proceeding to the next string. Maestro recommends tuning the two outside strings first, then tune toward the center to equalize pressure on the bridge. Note A string’s end is sharp and can puncture your skin. -
Page 7: Changing Strings (Continued)
CHANGING STRINGS (CONTINUED) Fig. 1 Fig. 3 4. Now feed the string through the hole in 6. Start tuning the string up to pitch the tuning head (Fig. 1). (Fig. 3). 7. Proceed to the section on Tuning and tune the string to pitch. When it’s on pitch, follow the same procedure for the remaining strings. -
Page 8: Connect And Control (Electric Guitar Only)
CONNECT AND CONTROL (ELECTRIC GUITAR ONLY) Connecting your guitar to amplifier Control Adjustments Your Maestro electric guitar has two controls. Volume Tone A 3 meter cable is included to connect the guitar to the amp. Plug the ‘L’ shaped end into the guitar and the straight end into the amp. -
Page 9: Holding Your Guitar
HOLDING YOUR GUITAR You can play guitar sitting down or standing up. When standing up, use the included strap (strap not included with mini acoustic guitar). Each strap end has slots; slide the large end of the guitar’s strap pins through the strap slots to hold the strap in place. -
Page 10: Care And Maintenance
Humidity affects wood. Dry air causes moisture to migrate out from wood, which can create cracks. With high humidity, wood absorbs moisture and can warp. Maestro prepares wood carefully to resist humidity changes, but it’s best to maintain humidity between 40% and 60%. - Page 11 Merci d’avoir choisi une guitare Maestro de Gibson pour bénéficier d’un plaisir musical de longues années durant ! Ce manuel est conçu pour vous aider à tirer le meilleur parti de votre nouvel instrument de musique. FR 9 um_maestro_us_2L_170922.indd 22/09/2017...
- Page 12 mécanique tête sillet frette touche fixation pour sangle manche manche corde ouïe micro plaque de sillet de protection volume chevalet sortie jack chevalet fixation pour tonalité sangle FR 10 um_maestro_us_2L_170922.indd 22/09/2017 13:21:03...
-
Page 13: Accorder Votre Guitare
ACCORDER VOTRE GUITARE Il existe un accordage standard pour les cordes d’une guitare. Ces dernières sont en général baptisées Mi grave, Si, Sol, Ré, La, Mi aigu (ou E, A, D, G, B, high E en anglais). Informations supplémentaires sur l’accordage Les conseils suivants vous permettront d’obtenir un accordage plus précis. -
Page 14: Remplacer Les Cordes
Insérer les cordes sur le chevalet Pour conserver une tension uniforme au niveau du manche, remplacez et accordez (guitare électrique) les cordes une par une. Maestro vous recommande d’accorder les deux cordes extérieures en premier, puis de poursuivre l’accordage en direction du centre pour uniformiser la pression sur le chevalet. -
Page 15: Remplacer Les Cordes (Suite)
REMPLACER LES CORDES (SUITE) Fig. 1 Fig. 3 4. Maintenant, passez la corde dans 6. Accordez la corde jusqu’à la bonne l’orifice de la mécanique (Fig. 1). hauteur (Fig. 3). 7. Consultez la section consacrée à l’accordage. Quand la corde est à la bonne hauteur, répétez la procédure pour les cordes restantes. -
Page 16: Brancher Votre Guitare À Un Amplificateur
BRANCHEMENT ET BOUTONS DE CONTRÔLE (GUITARE ÉLECTRIQUE UNIQUEMENT) Brancher votre guitare à un Régler les boutons de contrôle amplificateur Votre guitare électrique Maestro est équipée de deux boutons de contrôle. Volume Tonalité Un câble de 3 mètres est fourni pour brancher la guitare à... -
Page 17: Tenir Votre Guitare
TENIR VOTRE GUITARE Vous pouvez jouer de la guitare assis ou debout. Pour jouer debout, utilisez la sangle fournie (sangle non fournie avec mini guitare acoustique). Ses deux extrémités sont percées : faites glisser la partie la plus large des fixations pour sangle de la guitare dans les orifices de la sangle pour la maintenir en place. -
Page 18: Entretien
En cas de forte humidité, le bois absorbe l’humidité et peut se déformer. Maestro prépare le bois avec soin pour qu’il résiste aux changements d’humidité, mais il est préférable de maintenir le taux d’humidité... - Page 19 um_maestro_us_2L_170922.indd 22/09/2017 13:21:04...
- Page 20 Maestro – Part of the Gibson Family of Brands 309 Plus Park Blvd, Nashville, TN37127, USA www.gibson.com/maestro service@gibson.com GUM-02NAM70921-13 UM_MG_US_2L_V2.0 WK17385 um_maestro_us_2L_170922.indd 22/09/2017 13:21:05...