Table of Contents
Advertisement
Quick Links
Advertisement
Table of Contents

Related Manuals for Yamaha SWX2320-16MT


Summary of Contents for Yamaha SWX2320-16MT
- Page 1 L2 SWITCH SWX2320-16MT User Guide...
-
Page 2: Table Of Contents
Table of content 1. Introduction ............... . . ... -
Page 3: Introduction
1. Introduction 1.1. Product Features The “SWX2320-16MT” intelligent L2 switch continues on with the features of the SWR2310 Series, while featuring high-speed LAN ports with speeds of more than 1 Gbps. This product can be used as a floor switch for medium-sized networks that can support access switches with high-speed LAN ports. -
Page 4: Optional Accessories
• Direct attach cable:DAC-SWRT-3M/DAC-SWRT-1M This cable can be used to directly connect SFP+ ports between Yamaha products. This allows you to build an inexpensive 10-gigabit Ethernet system, although with limited distance. For switches that support stack functionality, this cable can also be used as a stack cable. -
Page 5: Conventions Used In This Guide
• The explanations in this guide are based on current product specifications as of the date of publication. The latest version of this document can be downloaded from the Yamaha website. • All illustrations and screens included in this guide are for the purpose of explanation. -
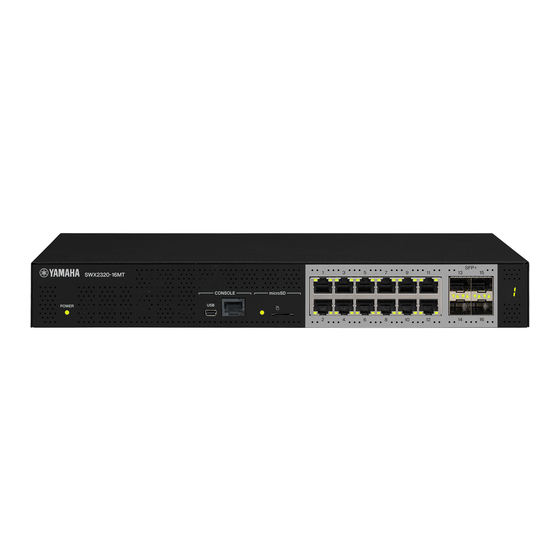
Page 6: Controls And Connectors
Use a USB cable equipped with a USB Type A connector and a USB mini-B (5- pin) connector. Memo • Use a cable that supports data transfer. Charge-only cables cannot be used. 4 | L2 SWITCH SWX2320-16MT User Guide... - Page 7 ⑧ Stack ID display indicator This indicates the stack ID when stack connection is used. When not using a stack connection, “1” is shown. If the stack architecture has failed, “E” is shown. L2 SWITCH SWX2320-16MT User Guide | 5...
-
Page 8: Bottom Panel
⑩ Wall mount hardware attachment holes Use these holes to attach the hardware included with the dedicated wall mount kit. For details on installation, refer to “Installing onto a wall or ceiling” in “Installation.” 6 | L2 SWITCH SWX2320-16MT User Guide... -
Page 9: Rear Panel
These holes are used when drawing in outside air with the fan to cool the product. Warning • Do not block the cooling vents or place objects near them. Doing so could cause fire or malfunctions. L2 SWITCH SWX2320-16MT User Guide | 7... -
Page 10: Top Panel
These holes are used when drawing in outside air with the fan to cool the product. Warning • Do not block the cooling vents or place objects near them. Doing so could cause fire or malfunctions. 8 | L2 SWITCH SWX2320-16MT User Guide... -
Page 11: Port Indicators
Flashing (green) Data is flowing. Right indicator Connection speed Unlit Not connected Lit (orange) Connected by 1000BASE-SX/LX. Lit (green) Connected by 10GBASE-SR/LR. When using a direct attach cable, the product is connected at 10Gbps. L2 SWITCH SWX2320-16MT User Guide | 9... - Page 12 • When all errors have been resolved, the product automatically switches to the default LED mode. 2.6.3. OFF mode The indicators on the LAN and SFP+ ports, as well as the stack ID display indicator turns off. 10 | L2 SWITCH SWX2320-16MT User Guide...
-
Page 13: Switching Through Port Indicator Display Modes
• The factory default default LED mode is set to LINK/ACT mode. • Use the “show led-mode” command to check the default LED mode and the display mode that is currently displayed. L2 SWITCH SWX2320-16MT User Guide | 11... - Page 14 SWX2320#configure terminal Enter configuration commands, one per line. End with CNTL/Z. SWX2320(config)# 3. Type “led-mode default off”, and press the [Enter] key. The product switches to OFF mode. SWX2320(config)#led-mode default off SWX2320(config)#exit SWX2320# 12 | L2 SWITCH SWX2320-16MT User Guide...
-
Page 15: Installation
This could also cause electric shock or malfunctions. • Do not block the cooling vents on the top or the sides of this product, or the fan outlet on the back. Doing so could cause fire or malfunctions. L2 SWITCH SWX2320-16MT User Guide | 13... - Page 16 If the 19-inch rack has a door, install this product in a recessed position so that LAN cables inserted into the front panel of the product do not touch the door of the rack. 14 | L2 SWITCH SWX2320-16MT User Guide...
-
Page 17: Installing Onto A Wall Or Ceiling
If the product falls, you may be injured or the product may become damaged. • Make sure to follow the steps for installation in this manual. Failure to do so could cause electrical shock or malfunctions. L2 SWITCH SWX2320-16MT User Guide | 15... - Page 18 or damage. • You must use screws that are appropriate for the material and thickness of the wall. If the product falls, you may be injured or the product may become damaged. 16 | L2 SWITCH SWX2320-16MT User Guide...
- Page 19 If the product falls, you may be injured or the product may become damaged. This could also cause electric shock or malfunctions. Caution • Take care when letting your hand or finger contact the corners of the mounting accessory. Inattention might cause injury. L2 SWITCH SWX2320-16MT User Guide | 17...
- Page 20 Caution • You must use screws that are appropriate for the material of the wall or ceiling. If the product falls, you may be injured or the product may become damaged. 18 | L2 SWITCH SWX2320-16MT User Guide...
-
Page 21: Connections
• Corruption of config save area The config information cannot be read correctly at startup. Contact the dealer where you purchased this product to have the product inspected and/or repaired. L2 SWITCH SWX2320-16MT User Guide | 19... -
Page 22: Connecting To A Network Device Or Computer
Consult your router manufacturer for information on optimum security practices. • The LAN ports and the RJ-45 CONSOLE port all use the same 8-pin connector. Improper connections may cause hardware damage or malfunction. Use care when making connections. 20 | L2 SWITCH SWX2320-16MT User Guide... -
Page 23: Installing An Sfp Module
• Since this product supports hot-swapping, an SFP module can be installed without turning the power off. 2. Remove the protective cap from the SFP module. SFP+ ports SFP+ ports SFP module SFP module Protective cap Protective cap L2 SWITCH SWX2320-16MT User Guide | 21... -
Page 24: Removing An Sfp Module
• Do not look into the optical emitter when installing an SFP module. The SFP modules separately sold by Yamaha are class 1 laser devices. These devices may emit laser beams invisible to the eye. If a laser beam enters your eye, your eyesight might be damaged. -
Page 25: Installing A Direct Attach Cable
• Do not look into the optical emitter when installing an SFP module. The SFP modules separately sold by Yamaha are class 1 laser devices. These devices may emit laser beams invisible to the eye. If a laser beam enters your eye, your eyesight might be damaged. - Page 26 • Since this product supports hot-swapping, a direct attach cable can be attached without turning the power off. • Refer to the manual included with each direct attach cable for instructions and precautions regarding installation and removal. 24 | L2 SWITCH SWX2320-16MT User Guide...
-
Page 27: Removing A Direct Attach Cable
• Since this product supports hot-swapping, a direct attach cable can be removed without turning the power off. • Refer to the manual included to each direct attach cable for installation or removal methods and precautions. L2 SWITCH SWX2320-16MT User Guide | 25... -
Page 28: Making Stack Connections
• Also refer to the owner’s manuals included with the direct attach cable or SFP module for details on attachment and removal, as well as for points of caution. For details on stack connections, refer to “Technical data.” 26 | L2 SWITCH SWX2320-16MT User Guide... -
Page 29: Settings
5.1.2. Installing the USB serial driver • To use the mini-USB CONSOLE port, the USB serial driver must first be installed. • For details on installing the USB serial driver, refer to the “Yamaha Network Device USB Serial Driver Installation Guide.”... - Page 30 Use care when making connections. • If you use the mini-USB CONSOLE port, do not use a USB hub. If multiple Yamaha router or switches are connected to one computer, the COM port numbers assigned to the connection might be swapped inadvertently. Use care to ensure that you do not change the settings of an unintended device.
-
Page 31: Making Settings From The Command Line Using Telnet
If this product is not powered on, turn on the power as described in “Connecting the power cord”. Once the power is on, go to step 3. 3. Launch the Windows command prompt. L2 SWITCH SWX2320-16MT User Guide | 29... - Page 32 7. Press the [Enter] key. If password authentication is successful, the command prompt appears and you can enter commands. SWX2320> Memo • For details on the commands, refer to the “Command reference” (on the Yamaha website). 30 | L2 SWITCH SWX2320-16MT User Guide...
-
Page 33: Making Settings From The Command Line Using Ssh
• The “ssh-server host key generate” command generates a pair of keys, a DSA/RSA public key and a private key. Note that it may take a minute to process the command, depending on the model. L2 SWITCH SWX2320-16MT User Guide | 31... - Page 34 • For details on the commands, refer to the “Command reference” (on the Yamaha website). • Refer to the owner’s manual of the SSH client you are using for the SSH client settings and operations. 32 | L2 SWITCH SWX2320-16MT User Guide...
-
Page 35: Making Settings Using The Web Gui
This explains how to log in to this product using the Web GUI. For details on compatible Web browsers, refer to the website listed below. Web browser compatibility with Web GUI on Yamaha network products: http://www.yamahaproaudio.com/ 5.4.1. Logging in to this product using a Web browser 1. -
Page 36: Restoring This Product's Settings To Their Factory-Set Defaults
If necessary, use external memory to save the settings before you proceed with initialization. For details on how to export settings to external memory, refer to the “Technical data for Yamaha network devices,” available on the Yamaha website. - Page 37 [Caps Lock] key or hold down the [Shift] key so that you will be ready to enter an uppercase "I" immediately. 4. When you see a screen asking whether to execute initialization, press the [y] key to execute. Initialize or not ?(y/n) Initialization is executed. Ready to Initialize ....L2 SWITCH SWX2320-16MT User Guide | 35...
- Page 38 "Network cable is not connected"). Communication will be restored when the reboot is completed. The IP address of this product will be restored to the factory default setting (192.168.100.240) after rebooting. Once Web GUI is redisplayed, access “192.168.100.240”. 36 | L2 SWITCH SWX2320-16MT User Guide...
-
Page 39: Appendix
6. Appendix 6. Appendix 6.1. RJ-45/DB-9 console cable pin configuration Console (RS-232C) Signal RJ-45 D-SUB 9 DSR* CTS* * These signals are not used by this product. L2 SWITCH SWX2320-16MT User Guide | 37... - Page 40 Manual Development Group © 2021 Yamaha Corporation Published July 2021 YJ-A0...