Table of Contents
Advertisement
Quick Links
Advertisement
Table of Contents

Related Manuals for CSSN ScanShell 1000


Summary of Contents for CSSN ScanShell 1000
- Page 1 User Manual Version 8.15.5...
-
Page 2: Disclaimer
Disclaimer Disclaimer Warranty Card Scanning Solutions provides this publication “as is” without warranty of any kind, either express or implied, including, but not limited to, the implied warranties of merchantability or suitability for any particular purpose. Card Scanning Solutions reserves the right to revise this publication, and to make changes in the content hereof from time to time without notification. -
Page 3: Table Of Contents
...2 ISCLAIMER Warranty ...2 Notice to User ...2 Publication...2 ABLE OF ONTENT ...4 ABLE OF IGURES GETTING STARTED ...5 EFORE USING THE SCANNER INIMUM SYSTEM REQUIREMENTS ONNECTING THE SCANNER ...7 NSTALLATION ...7 NINSTALL INTRODUCTION...8 ROGRAM NTERFACE HE MAIN SCREEN CONTROLS CONFIGURING THE PROGRAM...12... -
Page 4: Table Of Figures
Figure 9: Live Update tab ...26 Figure 10: Live Update user details ...27 Figure 11: ID Data (detailed mode) ...30 Figure 12: ScanShell 1000, ID placing ...33 Figure 13: The placing of a passport...34 Figure 14: Main screen in minimized mode ...41 MedicScan User Manual version 8.15.5... -
Page 5: Getting Started
• 15 MB free storage space Connecting the scanner The scanner is connected to the computer via the USB port. To connect the reader, do the following: • Place the scanner on a flat, firm, solid surface with easy access. - Page 6 Getting Started - <CD ROM drive>:\Scanner Driver\MagShell900 (for magnetic reader model MagShel900) After you specify the driver, click Next until the installation is complete. © MedicScan User Manual version 8.15.5 Card Scanning Solutions, all rights reserved...
-
Page 7: Installation
Installation Installation To install the software on the computer, do the following: 1. Close all programs. 2. Insert the CD into the CD ROM drive. 3. Wait until the install program begins and follow the instructions on the screen. 4. If the install program does not automatically start, click the My Computer icon on the desktop and then select the CD ROM drive. -
Page 8: Introduction
ScanShell 800 scanner. In the ScanShell 1000, the scan job is initiated by pressing any of the scanner buttons. The image is scanned and saved to the hard disk in a predefined color scheme, resolution, and scanning area, in a user-defined format (BMP, JPG, PCX, PNG, TIFF, TGA, PSD). -
Page 9: The Program Interface
Program Interface The Program Interface The following figure shows the application main screen: Note: Some features are only available in MedicScanOCR – see details below, and the first paragraph in chapter 2 - The main screen controls • Top: Toggles the application window between normal mode Always on and always-on-top mode. - Page 10 Otherwise, activates the FILE OPEN dialog. Note: ‘Toggle to file’ is possible only if a scanner is physically connected to the PC, or if the license key used is a temporary key. •...
- Page 11 Program Interface • Open OCR View view. • Open Configuration which all the application behavior can be set. • Scan: Used to close the application or to save the current Exit / End of image (used in automatic save mode only). •...
-
Page 12: Configuring The Program
(see figure 1 page 9). The following configuration panel will be displayed: Figure 2: Scanner configuration panel The configuration panel first tab is the Automation tab. Here you can set various parameters of scanning and saving data and images. The Automation tab consists of three main sections: •... -
Page 13: Data Source
Paper auto detection - Checking this option will cause the scanner (ScanShell 800) to auto-detect document insertion and start the scanning and saving process automatically. When using the ScanShell 1000 scanner, any of the scanner buttons can be pressed to start the scan. -
Page 14: Saving Options
Image auto save Image auto save is particularly useful for large batch scanning jobs. This option enables chain-feeding the scanner while image saving is done automatically without user interference. Scan scheme: This function is set to single-sided document in MedicScan. -
Page 15: File Naming
Program Configuration – File Naming File Naming Clicking on the ‘File naming’ button will take you to the following configuration screen: This dialog sets the naming properties of the automatically saved image files. The file destination folder can be typed into the ‘File Path’, or selected by clicking the File Path button. - Page 16 Program Configuration – File Naming Save immediately after scan - Checking the checkbox titled ‘Save immediately after scan’ (See Figure 2 page 12), will save the image and data immediately after the scan is done. If the ‘Save immediately after scan’ checkbox is unchecked, the saving will occur on the next scan job (in the automatic saving option) or when the user clicks on the Save button (in the manual saving option).
-
Page 17: Data Extraction Tab (*Medicscanocr Only)
Program Configuration – Data Extraction Tab Data extraction tab (*MedicScanOCR Only) Figure 4: Scanner configuration panel - License data processing tab • Extract full image: extracts the complete ID card image and saves it as a separate file. • Extract face image: Isolates the face image rectangle from the ID card image and saves it as a separate file. -
Page 18: Extract Face Image To File
Program Configuration – Data Extraction Tab Extract face image to file The face image rectangle is extracted from the ID image and saved to a file. The face image is saved under the ID image name with the .Face extension (e.g. if the card image name is c:/images/ID-1.bmp, the face image is saved as c:/images/ID-1- Face.bmp). -
Page 19: Append Records
Program Configuration – Data Extraction Tab Notes: 1. If a specific field is not supported in the current state, its corresponding value is empty. 2. ID number and License number have the same value in the US. 3. ID image file name holds the full path and name of the ID card image file. 4. -
Page 20: Medic Text Export Tab (*Medicscanocr Only)
Program Configuration – Medic Text Export Tab Medic text export tab (*MedicScanOCR Only) Figure 5: Scanner configuration panel – Image tab By checking the first checkbox, text extracted from the scanned card will be saved to a text file, which will have the same name as the image file (ending with the .txt extension), and which will be placed in the directory where the image files are saved. -
Page 21: Image Tab
(100) yields a large image file (with the highest image quality). To set these values, select the Image tab in the configuration panel. Figure 6: Scanner configuration panel – Image tab MedicScan User Manual version 8.15.5 ©... -
Page 22: Figure 7: Document Measurements
Program Configuration – Image Tab Document size: The document size determines the size of the scanned area. This area is defined by the width and height values, as shown in Figure 11 below using the ScanShell800 scanner: Width Figure 7: Document Measurements The document Passport size drop-down list offers the following options: •... -
Page 23: Scanner Calibration
Calibrate button (located in the configuration panel’s Image tab) and use the calibration paper card that was part of the scanner package, to calibrate the ScanShell 800 scanner. The ScanShell 1000 does not require a calibration paper. -
Page 24: Printing - Print Tab
The Print tab has the following options: IDAN: Please get updated screen shot Figure 8: Scanner configuration panel – Print tab Image size as percent of actual size: Reduces / enlarges the image size from 50% to 200% of the actual document size. Selecting the default (100%) prints the image the same size as the document. - Page 25 Program Configuration – Print Tab Print data from driver’s license card: Places the data from the card under the card image. The printed image and data fields can be selected using the appropriate check boxes. © MedicScan User Manual version 8.15.5 Card Scanning Solutions, all rights reserved...
-
Page 26: Live Update
Program Configuration - Live Update Tab Live Update Live Update checks for updates whenever you are connected to the Internet, and updates your program automatically with the most recent version of your program available. Note: If you don’t configure your software for automatic Live Update, you can still update it manually using the Live Update button in the main screen. -
Page 27: Figure 10: Live Update User Details
Program Configuration - Live Update Tab b. At preset times; Use the combo boxes to specify the updating frequency. 3. Click on the ‘Set User Data’ button. Figure 10: Live Update user details 4. Fill in your details. Note: ‘Email’ is obligatory and must be filled in. 5. -
Page 28: Program Operation
Scan button, or auto-scan, i.e. the scan starts automatically when the user inserts the card into the scanner. When using the ScanShell 1000 scanner, the scan starts as soon as one of the silver buttons on the scanner is pressed. -
Page 29: Scanning A New Document
Program Operation – Scanning a New Document Scanning a new document To scan a new document, just feed the driver’s license into the scanner. If the scanner is set to automatic scan mode, the scanner will start scanning the card automatically. -
Page 30: Id Data (*Medicscanocr Only)
Program Operation – ID Data ID Data (*MedicScanOCR Only) After scanning and processing the ID card, you can review the acquired text information by opening the ID Data window. To open the ID Data window, press the button titled ‘OCR’ on the main screen. The ID Data window shows the data retrieved either from the scanned image by OCR (Optical Character Recognition), or from the scanned image Barcode, depending on the option selected. -
Page 31: Id Card Authentication (*Medicscanocr Only)
6. Place the ID card in scanner. a. If you are not using the Auto detect card insertion option: Click on the Scan button to scan the data source (This scan will be saved to the database if you will save the record). -
Page 32: Understanding The Authentication Status Light
7. MedicScan will scan the card, and than prompt you to scan the card a second time. Insert the card again in the scanner/reader and repeat the steps above. 8. If the data from the two sources on the card matched, the icon on the authentication button will be green. -
Page 33: Reading Passports (*Medicscanocr Only)
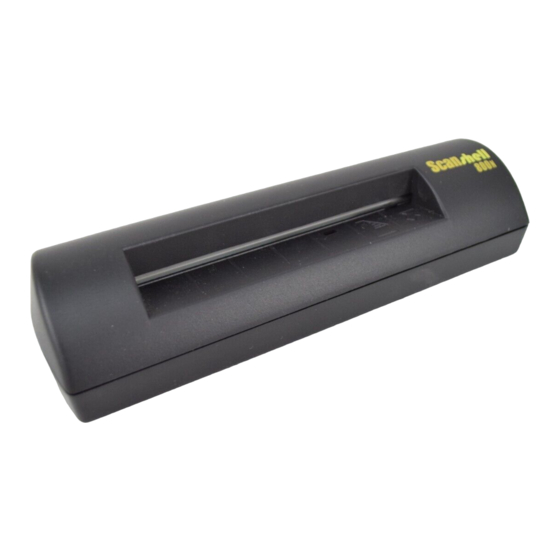
The proper way to scan a passport is to put the information page (the page that includes the person picture) facing down on the glass, and the data lines (the lines at the bottom of the page) against the plastic frame closer to the ScanShell 1000 logo as shown below. -
Page 34: Figure 13: The Placing Of A Passport
Program Operation – Reading Passports Figure 13: The placing of a passport © MedicScan User Manual version 8.15.5 Card Scanning Solutions, all rights reserved... -
Page 35: Appendix A - Supported States For Detection
Appendix A – Supported States and Countries 5. Appendix A – Supported States for Detection The following table shows the countries and states supported by MedicScan. This list will be updated in each new version release of MedicScan. Country: USA State Name Alabama Alaska... - Page 36 Appendix A – Supported States and Countries New Hampshire New Jersey New Mexico New York North Carolina North Dakota Ohio Oklahoma Oregon Pennsylvania Rhode Island South Carolina South Dakota Tennessee Texas Utah Vermont Virginia Washington West Virginia Wisconsin Wyoming Hawaii Country Name: Australia State Name State id Signature Extraction Support...
- Page 37 Appendix A – Supported States and Countries Country Name: Malaysia State Name State id Signature Extraction Support Malaysia Country Name: Canada State Name State id Signature Extraction Support Ontario √ Alberta √ Country Name: Chile State Name State id Signature Extraction Support Chile √...
-
Page 38: Appendix B - Supported Scanners
• ScanShell 900: Driver for the scanner can be found at http://www.id-scan.com/FTP/Scanner_Drivers/MagShell900 • ScanShell 1000: Driver for the scanner can be found at http://www.id-scan.com/FTP/Scanner_Drivers/ScanShell1000 • Scanshell 600, USB 201: Driver for the scanner can be found at http://www.ID-scan.com/FTP/Scanner Drivers/USB 201... -
Page 39: Appendix C - Maintaining The Scanner
To calibrate the ScanShell 800scanner, insert the calibration paper card that was part of the scanner package into the scanner, and click on the Calibrate button (located in the configuration panel’s Image tab). The ScanShell 1000 does not require a calibration paper, just click on the Calibrate button. -
Page 40: Appendix D - Minimized Interface Mode & Command-Line Switches
Appendix D – Minimized Interface & Program Line Switches 8. Appendix D - Minimized Interface Mode & Command- Line Switches The MedicScan application behavior can be modified to best suit your needs. This is done by running the program while using command lines switches. MedicScan offers the following switches: MI –... -
Page 41: Figure 14: Main Screen In Minimized Mode
Note: All the settings described in previous sections of this documents apply when running in Minimized Interface mode. MedicScan User Manual version 8.15.5 Clean Scanner Select Country status: Indicates if the scanner is connected to the PC. © Card Scanning Solutions, all rights reserved Select State Scanner connection status...