
Related Manuals for Fatar STUDIO 900


Summary of Contents for Fatar STUDIO 900
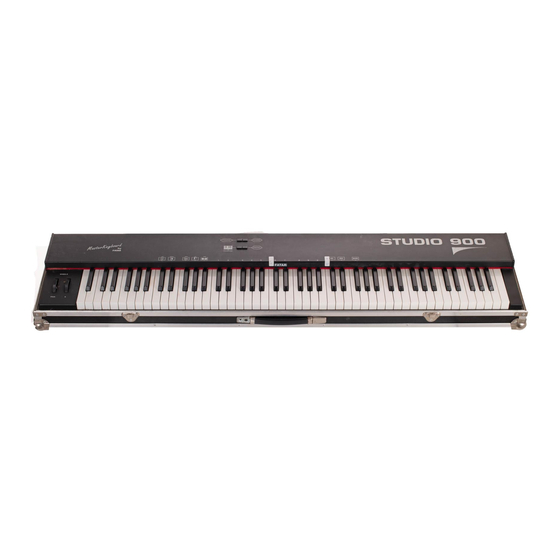
- Page 1 STUDIO 900 - STUDIO 90 PLUS STUDIO 900 - STUDIO 90 PLUS MIDI PEDALBOARD MP-1 MIDI PEDALBOARD MP-1...
- Page 2 " 3.0 WEITERSCHALTEN DER CAMBIO PRESET " OCTAVE ASSIGNMENT " " KLANGFARBEN CHANNEL ASSIGNMENT " PROGRAM ASSIGNMENT " ITALIANO ENGLISH DEUTSCH STUDIO 900 CARATTERISTICHE Pag. TECHNICAL DATA Page TECHNISCHE DATEN Pag. CONNESSIONI " CONNECTIONS " HINWEISE " STANDARD SETUP "...
-
Page 3: Caratteristiche Tecniche
Collegare il cavo di uscita dell'adattatore all'ingresso di alimentazione della MASTERKEYBOARD (STUDIO 900 accetta come alimentazione 9V DC con polarità positiva [+] al centro envenuti nel mondo delle MASTERKEYBOARD FATAR. e necessita di una corrente minima di 200 mA). -
Page 4: Funzioni Di Controllo
Midi tramite i tasti da 0 a 9 il controllo verrà assegnato alla oppure premendo i tasti contrassegnati con *INC* o *DEC* per incrementare o ruota destra quando lo switch *CONTROL* sarà rilasciato. decrementare il valore corrente del parametro sul quale si vuole intervenire. STUDIO 900 STUDIO 900... - Page 5 STUDIO 90 PLUS RESET GENERALE Spegnere la tastiera. Tenere premuti i tasti "ENTER" e "1" della tastiera numerica. Sempre tenendo premuti i suddetti tasti, riaccendere la tastiera. Importante: una volta resettata la tastiera, tutti i programmi vengono cancellati Param. Value Prog. Enter ed entra in funzione un programma di default.
- Page 6 POSSIBILITA' DI PROGRAMMAZIONE DELLA STUDIO 90 Plus PARAMETRI E VALORI DELLA STUDIO 90 Plus DISPLAY TASTI NUMERICI PARAMETRO FUNZIONE VALORE PARAMETRO FUNZIONE VALORE Split Sinistro 00-88 Split Destro 00-88 Param. Value Prog. Enter Transposer 1 00-11 Transposer 2 00-11 TASTO ENTER Transposer 3 00-11 TASTO PROGRAMMA...
- Page 7 Esempio: Nel programma N. 12 il punto di divisione sinistro si trova sul tasto 17 e il punto di divisione destro nel tasto 42. Operazione Tasto Display Cosa succede PROG. tasto programma attivato SPLIT 1 SPLIT 2 lampegg. chiamare numero programma PAR.
- Page 8 PRESET 1, 2, 3 (Parametri 11, 12, 13) OCTAVE 1, 2, 3 (Parametri 05, 06, 07) La scelta dei suoni dei vari expanders e strumenti collegati alla STUDIO 90 Plus, Con questo parametro si possono effettuare trasposizioni per ottave. E' possibile avviene attraverso questi parametri, che offrono una possibilità...
-
Page 9: Dati Tecnici
MIDI PEDALBOARD MP-1 POSSIBILITA' DI PROGRAMMAZIONE DELLA MIDI PEDALBOARD POSIZIONE DELLE OTTAVE Dopo l'attivazione del tasto "OTTAVA" premendo semplicemente uno dei tasti CHANNEL MIDI della pedaliera, si decide l'ottava da assegnare: OCTAVE PRESET - DO = Ottava più bassa - DO = Ottava sopra MP 1 - RE = Ottava sopra... -
Page 10: Technical Characteristics
Make sure that the AC adapter corresponds to the correct voltage output. The Studio 900 will accept an adapter that has a rating of 9V DC with a positive polarity elcome to the world of the Fatar Studio Series Keyboard Controllers. -
Page 11: Operation
See Figure #2. You will notice on the left a dedicated pitch and a programmable second wheel, rnarked [WHEEL A]. With [WHEEL A] you may assign aftertouch, pitch, modulation, volume and pan as well as any controller (O - 127). STUDIO 900 STUDIO 900... -
Page 12: Controller Number
Operation of Class A equipment in a residential area is likely to cause harmful interference Refer to a MIDI technical handbook for further information on these controller in which case the user will be required to correct the interference at his or her own functions. expense. STUDIO 900 STUDIO 900... -
Page 13: Feature List
MIDI OUT FOOT-SWITCH POWER 9V DC 200mA Thank you for purchasing the FATAR Studio-90 Plus, the finest feeling master controller on the market today. The action is a result of many years of engineering that went into the keyboard MIDI PROGRAM mechanism. -
Page 14: Section I: Getting Started
Look at figure #2 and #3. The functions are the same, but the location of the midi SECTION I: GETTING STARTED outs and foot switch controls are separated from the power section. You will find In this section we will explore the possibilities of the Studio-90 Plus in its entirety. this configuration on the ST-90 Plus in the cabinet. - Page 15 can get the feel of moving through programs. (You will find that the ENTER button At this time the keyboard is asking you at what key location on the keyboard must be pressed every time you want a function to work properly regardless what would you like your first split.
- Page 16 TRANSPOSER: CHANNEL MIDI: Locate parameter 02 through 04 on the parameter chart at top of the keyboard that Parameters 08, 09, and 10 are midi channel functions. You will locate them on the are clearly marked as TRANSPOSER 1, 2, and 3. Use these functions for parameter chart as CHANNEL MIDI 1, 2 and 3.
-
Page 17: Foot Switch Control
In order to get a result like that you must program the program change map so that envelope. The result is a fast or slow release of the sound. VALUE 99 has a quick the transmitting number 99 equals sound 127. There can be any type of number response and 00 has a slow response. - Page 18 Three Sounds Split One Sound Left of Two Sounds at B3 and B6 C5, Two Sounds Right Across Keyboard 00 = 27 10 = 03 00 = 40 10 = 04 00 = 88 10 = 03 01 = 63 11 = 08 01 = 88 11 = 32...
-
Page 19: Parameter Chart
PARAMETER CHART PARAMETER CHART MIDI IMPLEMENTATION CHART ST-90 Plus Program Name FUNCTION TRANSMITTED RECOGNIZED REMARKS Channel 10 - 16 Memorized Program Number Mode Default Messages Note Number 0 - 127 21 - 108 in C key 00 = Velo. Note On 01 = Note off 02 =... - Page 20 RESULT 8+4+2+1 (none) The FATAR MIDI PEDALBOARD MODEL MP-1 is the perfect way to expand your MIDI system. Studio and stage musicians a like will appreciate the added flexibility OCTAVE ASSIGNMENT: of accessing MIDI Note and Program events by foot, both for playing traditional Depress and release the octave footswitch;...
-
Page 21: Channel Assignment
Channel 11 Channel 12 C (hi) no change STUDIO 900 Upon new channel selection, the display immediately returns to the current OCTAVE setting. You will not see the new channel assignment displayed until the CH. MIDI STUDIO 90 Plus footswhitch is depressed once more. Note also that, in this case, the sum of the... - Page 22 - Stellen Sie sicher, daß die Spannungsversorgung korrekt ist. - 01 Modulationsrad. Dieses Rad kann mit diversen, anderen MIDI-Controllern - Wenn Sie das "STUDIO 900" längere Zeit nicht benutzen, entfernen Sie bitte das belegt werden. Z.B: Modulation (CC 1), Volume (CC 7), Panorama (CC 10), Netzteil aus der Steckdose.
-
Page 23: Bedienung
* Schauen wir uns zunächst die ersten fünf schwarzen Tasten und deren Als erstes das Master-Gerät (In diesem Fall das "STUDIO 900"). Als zweites das Beschriftung an. (von links nach rechts gesehen) erste Slave Gerät. Dies ist jenes Gerät, dessen MIDI-In direkt mit dem MIDI-Out des "STUDIO 900"... - Page 24 Um Ihren Tonerzeuger spielen zu können, müssen Ihr Tonerzeuger und das dann per Bankwechselbefehl (Bankselect). Ein typisches Beispiel hierfür ist z.B. "STUDIO 900" auf dem gleichen MIDI-Kanal eingestellt sein. Immer wenn Sie das die wohl bekannteste Soundkarte im Musikbereich: "Roland SCC 01" die immerhin "STUDIO 900"...
- Page 25 Programmwechselnummer (in Einzelschritten) verwenden. - Sollten Sie einen Programmwechselwert hîher als 128 eingegeben haben, beginnen Sie den Vorgang am besten von vorn, da das "STUDIO 900" jede Um einen Controllerwert zu senden, gehen Sie bitte wie folgt vor: eingegebene Zahl auswertet und somit u.U. ein von Ihnen nicht gewünschter Programmwechsel erfolgte.
- Page 26 Ihnen vielleicht bisher ab und an schwer gefallen sind. verzichten können. - Sie können die Transponierung wieder rückgängig machen indem Sie einfach bei gehaltenem "TRANSP"-Funktionstaster das mittlere "C" betätigen. Woraufhin Sie Und nun viel Spaß beim komponieren/musizieren. natürlich wieder alle Tasten loslassen. STUDIO 900 STUDIO 900...
- Page 27 STUDIO 90 Plus GENERALPROGRAMMIERUNG (STUDIO 90 Plus) Das Manual ausschalten. Die Tasten "ENTER" und "1" von der Nummerntastatur gedrückt halten. Die o.g. Tasten immer gedrückt halten und gleichzeitig das Manual einschalten. Wichtig: Die Generalprogrammierung löscht alle Programme die Sie gespeichert haben.
-
Page 28: Die Programmierung
DIE PROGRAMMIERUNG PARAMETERN UND WERTE (STUDIO 90 Plus) DISPLAY NUMERIC KEYS PARAMETER PARAMETER FUNKTION FUNKTION VALUE VALUE (WERT) Splitpunkt left 00-88 Splitpunkt right 00-88 Param. Value Prog. Enter Transposer 1 00-11 Transposer 2 00-11 ENTER KEY PROGRAM KEY Transposer 3 00-11 VALUE KEY PARAMETER KEY... - Page 29 Beispiel: Im Programm Nr. 12 soll der linke Spitpunkt bei Taste Nr. 17 und der rechte Splitpunkte bei Taste Nr. 42 liegen. Schritt Taster Display Aktion PROG. Programm-Taster aktivieren 12 blinkt Eingabe der Programm-Nummer SPLIT 1 SPLIT 2 ENTER Programm-Nr. 12 ist aktiv PAR.
- Page 30 OCTAVE 1, 2, 3 (Parameter 05, 06, 07) PRESET 1, 2, 3 (Parameter 11, 12, 13) Diese Parameter erlauben für jeden Manualbereich eine oktavweise Transponierung bis zu maximal Die Wahl der Klangfarben des angeschlossenen Instrumentes für jeden der 7 Oktaven nach oben oder unten. Manualbereich nehmen Sie über die Parameter "11, 12 und 13"...
- Page 31 MIDI-PEDAL MP-1 PROGRAMMIERMÖGLICHKEITEN 1.0 OKTAVLAGE Nach dem Betätigen des Tasters "OKTAVE" läßt sich die Oktavlage des Basspedals CHANNEL MIDI über die Pedaltasten einstellen: OCTAVE PRESET - C = tiefste Oktave - Cis = eine Oktave höher u.s.w. MP 1 Nach jedem Betätigen des Tasters "OKTAVE" kann man immer nur einen Oktave- Wert einstellen.