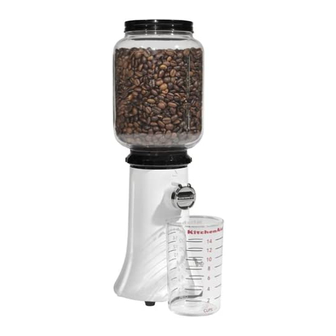
KitchenAid A-9 Removal And Replacement
Burr adjustment, removal, replacement and cleaning
Hide thumbs
Also See for A-9:
- Instructions manual (32 pages) ,
- Instructions manual (12 pages) ,
- Instructions manual (16 pages)
Advertisement
Quick Links
A-9 Coffee Mill Burr Adjustment, Removal, Replacement and Cleaning
How to clean KitchenAid A-9 Coffee Mill
The A-9 Coffee Mill is a replica unit of the original A-9 Coffee Mill designed by famed industrial designer Egmont Arens
in 1938.
• The flowing curves of metal and glass embodied a new age of performance and delighted homemakers everywhere
with style and convenience.
• The original unit was Discontinued in 1947.
• In 2003, KitchenAid again began to produce the A-9 Coffee Mill in Greenville, Ohio. While the unit looks very similar
to the original unit, not all parts are interchangeable.
Some models have removable burrs, while others do not.
How do you know if your model has removable burrs?
To help determine if yours does, look at the back of the base.
•
If you see a screw in the middle of the back base, yours has removable burrs, which allows you to take it apart and
clean it.
•
If you look on the bottom of the burr grinder, there will also be a "1" after the model number of KCG200.
Cleaning the Coffee Mill
The Burrs in the -1 model Coffee Mill can be removed periodically for cleaning. Keeping the burrs free of residue build-
https://producthelp.kitchenaid.com/Countertop_Appliances/Coffee_Products/Product_Info/Coffee_Product_Assembly_and_O...
Updated: Thu, 12 Aug 2021 20:09:57 GMT
Powered by
1
Advertisement

Summary of Contents for KitchenAid A-9
- Page 1 A-9 Coffee Mill Burr Adjustment, Removal, Replacement and Cleaning How to clean KitchenAid A-9 Coffee Mill The A-9 Coffee Mill is a replica unit of the original A-9 Coffee Mill designed by famed industrial designer Egmont Arens in 1938. • The flowing curves of metal and glass embodied a new age of performance and delighted homemakers everywhere with style and convenience.
- Page 2 1. Unplug the coffee mill. 2. Grasp the jar assembly securely and unscrew it from the motor housing by turning the jar assembly counterclockwise. Set the jar assembly aside. https://producthelp.kitchenaid.com/Countertop_Appliances/Coffee_Products/Product_Info/Coffee_Product_Assembly_and_O… Updated: Thu, 12 Aug 2021 20:09:57 GMT Powered by...
- Page 3 6. Lift the rotating burr out of the motor housing. https://producthelp.kitchenaid.com/Countertop_Appliances/Coffee_Products/Product_Info/Coffee_Product_Assembly_and_O… Updated: Thu, 12 Aug 2021 20:09:57 GMT Powered by...
- Page 4 9. Rotate the rotating burr slowly to be sure that the drive slot on the burr is in place on the drive pin on the motor shaft. When correctly positioned, the motor shaft will turn when the rotating burr is turned. https://producthelp.kitchenaid.com/Countertop_Appliances/Coffee_Products/Product_Info/Coffee_Product_Assembly_and_O… Updated: Thu, 12 Aug 2021 20:09:57 GMT...
- Page 5 11. To set the grind properly, rotate the grind adjustment ringback counterclockwise until the selection arrow on the baselines up with the "M" in the Medium grind selection. 12. Replace the set screw and tighten with a Phillips head screwdriver. https://producthelp.kitchenaid.com/Countertop_Appliances/Coffee_Products/Product_Info/Coffee_Product_Assembly_and_O… Updated: Thu, 12 Aug 2021 20:09:57 GMT Powered by...
- Page 6 15. Replace the bean hopper. The Coffee Mill is now ready for use. If you would like to download or view product literature for your appliance, please visit our Manuals and Literature page. https://producthelp.kitchenaid.com/Countertop_Appliances/Coffee_Products/Product_Info/Coffee_Product_Assembly_and_O… Updated: Thu, 12 Aug 2021 20:09:57 GMT Powered by...


