Table of Contents
Advertisement
Quick Links
Advertisement
Table of Contents

Related Manuals for Planar PT1545R


Summary of Contents for Planar PT1545R
- Page 1 PT1545R / PT1545P Touch Screen Monitor USER’S GUIDE www.planar.com...
- Page 2 Windows is a registered trademark of Microsoft, Inc. Other brand or product names are trademarks of their respective holders. For more information on how to recycle your product, please visit WWW.PLANAR.COM/GREEN.
- Page 3 FCC RADIO FREQUENCY INTERFERENCE STATEMENT WARNING: (FOR FCC CERTIFIED MODELS) This LED LCD Monitor has been tested and found compliant with the limits for a Class B digital device, pursuant to part 15 of the FCC Rules. These limits are designed to provide proper protection against harmful interference to a residential installation.
- Page 4 COMMUNIQUE D’AVERTISSEMENT DE LA FCC CONCERNANT LES INTERFERENCE DE FREQUENCE RADIO: (SEULEMENT POUR MODELES CERTIFIE PAR LA FCC) Ce moniteur a été testé et à été trouvé conforme aux limites pour un appareil numérique de Classe B, suivant la partie 15 des règlements de la FCC. Ces limites ont été développées pour offrir une protection satisfaisante contre les interférences nuisibles dans une installation résidentielle.
-
Page 5: Table Of Contents
Table of Contents Usage Notice Precautions ..........................1 Introduction About PT1545R/PT1545P ..................... 3 Touch Screen for PT1545R ....................4 Touch Screen for PT1545P ....................4 Package Overview ......................... 5 Installation Product Overview ........................6 Front View .......................... 6 Bottom View (Without Stand) .................... -
Page 6: Usage Notice
Usage Notice Warning - To prevent the risk of fire or shock hazards, and do not expose the product to moisture. Warning - Please do not open or disassemble the product as this may cause electric shock. Warning - Power cord shall be connected to a socket-outlet with earthing connection. - Page 7 Mise en garde- Pour prévenir les risques d’incendie ou d’électrocution, ne pas exposer le produit à l’humidité. Mise en garde- Prière de ne pas ouvrir ou démonter le produit, car cela pourrait entraîner l’électrocution. Mise en garde- Le cordon d’alimentation doit être branché à une prise pourvue d’une mise à...
-
Page 8: About Pt1545R/Pt1545P
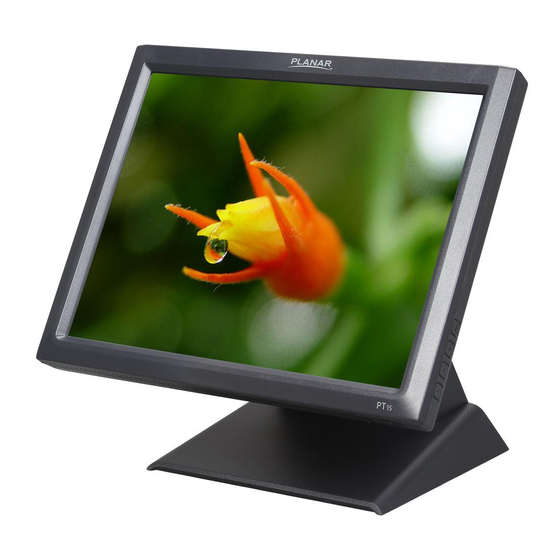
Introduction About PT1545R/PT1545P The PT1545R/PT1545P is a 15" flat panel screen with an active matrix, thin-film transistor (TFT) liquid crystal display (LCD). This unit is to be used as commercial and light industrial equipment only. Features include: • Analog signal input •... -
Page 9: Touch Screen For Pt1545R
Touch Screen for PT1545R • Number of Touch Points: 1 • 5-wire resistive touch screen for finger and stylus input • Surface: Anti-glare treatment • Interface: USB controller • Transmittance: 82%±5% • HID: Windows® 7/8 • Driver: VISTA, XP, 2000, CE, XP Embedded, Linux kernel 2.x.x / 3.x.x / 4.x.x / 5.x.x (32 bit &... -
Page 10: Package Overview
Package Overview LCD Display Power Cord VGA Signal Cable USB Cable ( A to B) HDMI Cable Audio-in Cable Landing Strip User’s Guide Cable Cover Screw... -
Page 11: Installation
Installation Product Overview • Front View • Bottom View (Without Stand) AUDIO HDMI AC IN POWER SWITCH... -
Page 12: Vesa Mount Your Monitor
VESA Mount Your Monitor This monitor conforms to the VESA Flat Panel Mounting Physical Mounting Interface standard which defines a physical mounting interface for flat panel monitors, and corresponding with the standards of flat panel monitor mounting devices, such as wall and table arms. The VESA mounting interface is located on the back of your monitor. -
Page 13: Start Your Installation
Start Your Installation Please follow these instructions so that you can hookup the cables to associated connector. 1. Lay the display flat on an even surface. 2. Move the stand into position as seen in the step 2 diagram. 3. Remove the cable cover as seen in the step 3 diagram. 4. -
Page 14: Connecting The Display(Figure 10.1)
Connecting the Display (Figure 10.1) To setup this display, please refer to the following figure and procedures. 1. Be sure all equipment is turned off. 2. Connect the AC power cord to the power connector on the monitor and the other end into an electrical outlet (10.1). -
Page 15: (Figure 10.1)
(Figure 10.1) -
Page 16: Kensington Security Slot
Kensington Security Slot The monitor can be secured to your desk or any other fixed object with Kensington lock security products. The Kensington lock is not included. -
Page 17: User Controls
User Controls Side Panel Controls Icon Key Name Menu Down Enter Power Menu off status Menu on status Menu appear Exit. Returns to previous menu or exits OSD. Brightness Main item select up/ Adjust up Mute Main item select down/ Adjust down Select or Enter. -
Page 18: How To Use The Osd Menus
How to Use the OSD Menus Icon Key Name Menu Down Enter Power How to Operate OSD 1. Press the “MENU” button to pop up the “on-screen menu” 2. Press “Up” or “Down” button to navigate in the main menu and sub menu. 3. - Page 19 Powering off the monitor Powering off the monitor requires 3 presses to the power key. This is designed to prevent accidental power off. 1. Press the power key once, an OSD window will pop up “Do you want to turn off”. Press the power key again.
-
Page 20: On-Screen Display Menus
On-Screen Display Menus Main OSD Menu: ITEM CONTENT Contrast The monitor luminance level control. Brightness The monitor backlight level control. H-Positon Moving screen image horizontal position to left or right. V-Positon Moving screen image vertical position to up or down. Phase The screen image horizontal dot clock adjustment. -
Page 21: Appendix
Appendix Troubleshooting If you are experiencing trouble with the display, refer to the following. If the problem persists, please contact your local dealer or our service center. Problem: No image appears on screen. ► Check that all the I/O and power connectors are correctly and well connected described in the "Installation"... -
Page 22: Warning Signal
Below are the three kinds of Warning Signal. Please check the cable connections or contact your local dealer or Planar for more information. No Signal This message means that the display has been powered on but it cannot receive any signal from the computer graphics card. -
Page 23: Product Dimensions
Product Dimensions PT1545R 350.8 mm ► Front View ► Side View 67.0 mm 222.5 mm ► Top View... -
Page 24: Pt1545P
PT1545P 350.8 mm ► Front View ► Side View 62.5 mm 222.5 mm ► Top View... -
Page 25: Compatibility Modes
Compatibility Modes Mode Resolution H-Frequency (KHz) V-Frequency (Hz) IBM VGA 720 x 400 31.47 IBM VGA 640 x 480 31.47 VESA VGA 640 x 480 37.86 VESA VGA 640 x 480 37.50 VESA SVGA 800 x 600 35.16 VESA SVGA 800 x 600 37.88 VESA SVGA... -
Page 26: Touch Screen Driver Installation
Touch Screen Driver Installation Windows 7/8/10 Multi touch without driver(support by HID) The PT1545R/PT1545P is available with USB connection. The touch driver is available at www.planar.com/support for these operating systems: Windows® 7/8/10, VISTA, XP, 2000, CE, XP Embedded, Linux kernel 2.x.x / 3.x.x / 4.x.x / 5.x.x (32 bit & 64 bit), Apple® Mac OS, Android 2.3.X Upwards. -
Page 27: Pt1545P Optional Calibration Tool Install
PT1545P Optional Calibration Tool Install: Calibrating the touch screen in Windows 7/8: 1. Tap the Start button, Control Panel and then Hardware and Sound. 2. Under Tablet PC Settings, tap Calibrate the screen for pen or touch input. 3. On the Display tab, under Display options, tap Calibrate and then Yes to allow the program to make changes. -
Page 29: Pt1545R Install Instructions
3. Be sure that your EWF is disabled. If your EWF is enabled, please disable the EWF by using the EWF Manager command. 4. Once the EWF is disabled click on the XP driver at www.planar.com/support. and follow the step-by-step instructions as shown on the pop-up windows. - Page 30 When changing the Touch Interface, please follow instructions below. 1. Uninstall the touch driver. 2. Re-start the computer. 3. Remove the original Touch Interface. 4. Connect the computer to the Touch Interface that you would like to use. 5. Install the Touch driver, then follow the step-by-step instructions as show on monitor.
-
Page 31: Pt1545P Install Instructions
3. Be sure that your EWF is disabled. If your EWF is enabled, please disable the EWF by using the EWF Manager command. 4. Once the EWF is disabled click on the XP driver at www.planar.com/support. and follow the step-by-step instructions as shown on the pop-up windows. -
Page 32: Technical Support
Technical Support Cables and Accessories To find cables and accessories for your Planar monitor, touch screen or other Planar products visit our online store at www.PlanarOnline.com. Technical Support Visit Planar at http://www.planar.com/support for operations manuals, touch screen drivers, warranty information and access to Planar’s Technical Library for online troubleshooting. - Page 33 Hours: 24 hours a day, 7 days a week © 06/2021 Planar Systems, Inc. Planar is a registered trademark of Planar Systems, Inc. Other brands and names are the property of their respective owners. Technical information in this document is subject to change without notice.