Table of Contents
Advertisement
Advertisement
Table of Contents

Related Manuals for Baofeng BF-H6 Series


Summary of Contents for Baofeng BF-H6 Series
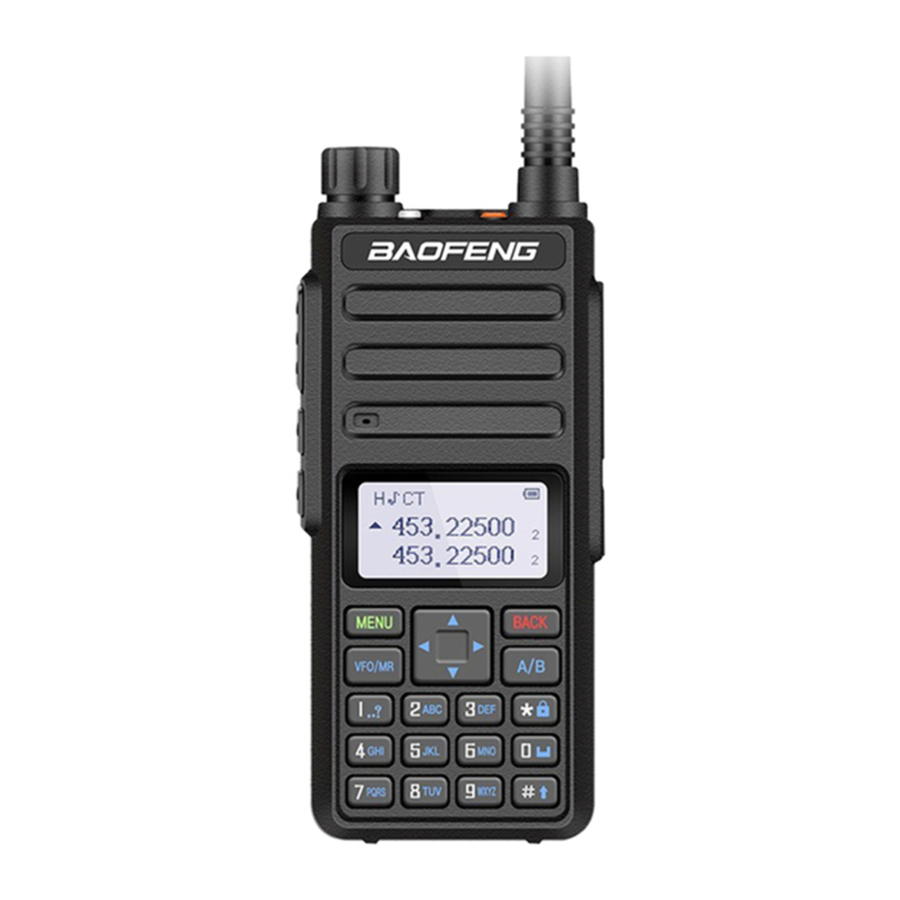
- Page 1 USER‘S MANUAL...
- Page 2 PREFACE Thank you for purchasing H6 Series Amateur Radio, which is a dual band/dual display/dual watch. This easy-to-use radio will deliver you secure, instant and reliable communications at peak efficiency. Please read this manual carefully before use. The information presented herein will help you to derive maximum performance from your radio.
-
Page 3: Table Of Contents
Table of Contents 5.3 Making a call Chapter1. Getting Started 1.1 Regula�ons and Safety Warnings 5.4 Channel selec�on 1.2 Main features 5.5 Frequency (VFO) mode 1.3 Content of the packaging 5.6 Channel (MR) mode Chapter2. Charging the Battery Chapter6. Advanced Features 2.1 Charging the Ba�ery Pack 6.1 Frequency scanning 2.2 Charger Supplied... -
Page 4: Chapter1. Getting Started
Chapter1. Getting Started 1.1 Regulations and Safety Warnings FCC Licensing Information This device complies with Part 90 and 15 of the federal Communications Commission (FCC) Rules. Operation is subject to the condition that that this device does not cause harmful interference. The radio operates on radio frequencies that are regulated by the Federal Communications Commission (FCC). - Page 5 - Increase the separation between the equipment and receiver. - Connect the equipment into an outlet on a circuit different from that to which the receiver is connected. - Consult the dealer or an experienced radio/TV technician for help. Changes or modifications not expressly approved by the party responsible for compliance could void the user's authority to operate the equipment.
- Page 6 RSS102 Issue 5 March 2015 • Institute of Electrical and Electronic Engineers (IEEE) C95.1:2005 Edition RF Exposure Compliance and Control Guidelines and Operating Instructions To control your exposure and ensure compliance with the occupational/ controlled environmental exposure limits, always adhere to the following procedures. Guidelines: •...
- Page 7 ■Precautions for Portable Terminals Operating Prohibitions To protect you against any property loss, bodily injury or even death, be sure to observe the following safety instructions: 1. Do not operate the product in a location containing fuels, chemicals, explosive atmospheres and other flammable or explosive materials.
- Page 8 flammable or explosive materials. 2. Do not charge your battery that is wet. Please dry it with a soft and clean cloth prior to charge. 3. Do not charge your battery suffering deformation, leakage and overheat. 4. Do not charge your battery with an unauthorized charger. 5.
-
Page 9: Main Features
1.2 Main features • Dual displayed, Dual watch, Dual band • Operating modes: UHF/VHF, UHF/UHF, VHF/VHF • CTCSS and DCS codes research • Squelch adjustable in 9 levels • 50 CTCSS tones and 210 DCS codes • 1750Hz tone for repeaters •... -
Page 10: Charging The Ba�Ery Pack
Chapter2. Battery Information 2.1 Charging the Battery Pack The Li-ion battery pack is not charged at the factory; please charge it before use. Charging the battery pack for the first time after purchase or extended storage (more than 2 months) may not bring the battery pack to its normal maximum operating capacity. -
Page 11: How To Charge
WARNING! When keys, ornamental chain or other electric metals contact the battery terminal, the battery may become damage or injure a human. If the battery terminals are short circuited it will generate a lot of heat. Take care when carrying and using the battery. - Page 12 » Do not short circuit the battery terminals. » Never attempt to remove the casing from the battery pack. » Never store the battery in unsafe surroundings, as a short may cause an explosion. » Do not put the battery in a hot environment or throw it into a fire, as it may cause an explosion.
-
Page 13: Chapter3. Installation Of Accessorie
Chapter3. Installation of Accessories Before the radio is ready for use we need to attach the battery pack, as well as charge the battery. 3.1 Installing/ Removing the Antenna a. Installing the Antenna: Screw the antenna into the connector on the top of the transceiver by holding the antenna at its base and turning it clockwise until secure. -
Page 14: Chapter4. Radio Overview
Chapter4. Radio Overview 4.1 Buttons and controls of the radio... -
Page 15: Main Controls And Parts Of The Radio
4.2 Main controls and parts of the radio LCD Display 1. Received signal strength. 2. High/Low power selection. 3. Appears when DTMFST (DT-ST / DT + ANI / ANI-ST) is activated. 4. These symbols show that you set a DCS or CTCSS code in tx or rx. In tx mode it appears while you are transmitting, while in rx mode it is shown also in stand-by condition. -
Page 16: Status Indica�Ons
13/17. Depending on the setting, it will show the frequency in use, the channel name, the menu setting, etc 14/15. Indicates the VFO in use and the current menu or function setting. This icon is displayed close to the band in use or to the menu settings. - Page 17 • [A/B] (appears on the display): push to select the desired frequency (VHF or UHF) in the main or secondary display. • Numeric keypad With these keys you can input the information or your selections on the radio. In tx mode, push the number keys to send a corresponding DTMF code.
-
Page 18: Chapter5. Basic Operations
Chapter5. Basic Operations 5.1 Power on the radio • Turning the unit on To turn the unit on, simply rotate the Volume/Power knob clockwise until you hear a "click". If your radio powers on correctly there should be an audible double beep after about one second and the display will show a message or flash the LCD depending on settings for about one second. -
Page 19: Channel Selec�On
transmission from 2.5 cm to 5 cm. 5.4 Channel selection There are two modes of operation: Frequency (VFO) mode, and Channel or Memory (MR) mode. For everyday use, Channel (MR) mode is going to be a whole lot more practical than Frequency (VFO) mode. However, Frequency (VFO) mode is very handy for experimentation out in the field. -
Page 20: Chapter6. Advanced Features
Chapter6. Advanced Features 6.1 Frequency scanning This function can scan the frequency. a. In frequency mode, press [#] key for more than 2 seconds. The radio will start scanning the frequency according to the set frequency step. b. You can change the scanning direction with the ▲/▼ keys. c. -
Page 21: Cursor▼▲Conversion (A/B)
a. In standby mode, press [MENU] [3][0]; the display will show “Scan DCS”. b. Press [MENU] and the scan of DCS codes will start. NOTES: The function cannot be activated when the radio is set in Channel mode. The Scan will start only when the receiving band will detect a signal. -
Page 22: 000Hz, 1450Hz, 1750Hz Tone-Burst
signal will automatically switch to the frequency or channel mode for normal transmitting and receiving. When the signal disappears the radio will automatically switch again to FM radio mode. 6.9 TX 1000Hz, 1450Hz, 1750Hz, 2100Hz repeaters tone Press [PTT] + [SK2] to send 1750Hz repeaters tone. This function is useful for communications through repeaters. If you have the keypad lock enabled on your radio, you can still send a 1750Hz tone the regular way without having to unlock your radio. -
Page 23: Repeaters Programming
d. [MENU] [1][3] [MENU] 123.0 [MENU] [BACK] Selects desired TX encode tone e. Enter RX frequency (Ex. 43255000) f. [MENU] [2][6] [MENU] [1][0] [MENU] Enter the desired channel (Ex 10) -->>[BACK] RX has been added g. Enter TX frequency (Ex. 43755000) h. - Page 24 c. Press the [MENU] key to enter the menu. d. Enter [2][5] on the numeric keypad to get to frequency offset. e. Press [MENU] key to select. f. Use the numerical keypad to enter the specified frequency offset. See the section called “25 OFFSET - Frequency shift amount”...
-
Page 25: Chapter7. Working The Menu System
Chapter7. Working the MENU System For a complete reference on available menu items and parameters, see Appendix C, Shortcut Menu operations. Note: in channel mode, the setting of these features is not possible: CTCSS/ DCS tones, wide/narrow bandwidth, PTT-ID, Busy channel lock out, channel name edit. 7.1 Basic use Using the menu with arrow keys a. -
Page 26: Func�Ons And Opera�Ons
e. And just as in the previous section; a). To confirm your selection, press [MENU] and it will save your setting and bring you back to the main menu. b). To cancel your changes, press [BACK] and it will reset that menu item and bring you out of the menu entirely. f. - Page 27 You have 4 selections available: OFF/ Mode 1/ Mode 2/ Mode 3. For example: Mode 1= 1s’ working and 1s’ battery saving. Mode 2= 1s’ working and 2s’ battery is saving. NOTE: The higher the number the longer the battery lasts. The higher number increases the RX sleep cycle, but you may miss the first few syllables before the RX opens (5) VOX Function (Vox Level ) - MENU No.4 This function allows hands-free conversations: just speak in the direction of the microphone and the communication will...
- Page 28 (9) Keypad beep (Beep Prompt) - MENU No. 8 When this function is enabled, every time a button is pressed, you will hear a beep tone. (10) Time-Out-Timer (Tx over time) - MENU No.9 The TOT function is used to prevent a too long transmission and limits the tx time: TOT temporarily stops the transmission if the radio has been used beyond the max pre-set time (for example 15s, 30s, 45s, etc).
- Page 29 Note: there are 50 groups of CTCSS tones. In channel mode the CTCSS tones cannot be changed. (15) Frequency hopping system (FHSS) - MENU No. 14 With this function, you can activate the frequency hopping system, improve the anti-interference ability of the radio, and reduce the risk of being monitored.
- Page 30 (20) PTT-ID (PTT-ID) - MENU No.19 With this function you can decide when sending the ANI-ID code in tx mode. You can choose amongst 4 possibilities. • OFF: press PTT to turn it off • BOT: the code is sent when you press the PTT •...
- Page 31 (24) Auto Keypad Lock (Key Auto Lock) - MENU No.23 When this feature is activated, the keypad will be automatically locked after 15s; this prevents accidental pressure of any keys. The keypad lock can be manually activated/deactivated through the keypad: keep pressed [* ] . (25) Frequency offset direction (Direction) - MENU No.24 Using this function, you can set the direction of the frequency offset in rx and tx.
- Page 32 Keep pressed the [SK1] key for 3 seconds to start the alarm tone. The following three options can be selected: • On site: the speaker emits an alarm tone but the radio doesn’t transmit; •Send sound: the speaker emits an alarm tone and the radio transmits it; •...
- Page 33 With this function you have the confirmation that the repeater has transferred the signal. You can choose amongst: OFF 1,2,3,4,5,….10 to set the delay time. (35) Roger beep (ROGER) - Menu No. 34 When the PTT is released, the radio will beep to confirm to other users that you have finished your transmission and that they can start talking.
-
Page 34: Appendix A. - Technical Specifica�Ons
Appendix A. - Technical Specifications Frequency Range 144.0-148.0 & 420.0-450.0MHz (Tx, FCC Rule parts 97) 136.0-174.0 & 400.0-480.0MHz (Scanning Receiver,FCC Rule parts 15B) 144.0-146.0& 430.0-440.0MHz (Tx/Rx. Limited to EU users) Memory Channel 128 Groups Operation Voltage DC 7.4 V ±10% Battery Capacity 2200mAh (Li-Ion) Output Power... -
Page 35: Appendix B. - Trouble Shoo�Ng Guide
Appendix B. – Trouble shooting guide Phenomena Analysis Solution The battery may be installed improperly. Remove and reattach the battery. The battery power may run out. Recharge or replace the battery. You cannot turn on the radio. The battery may suffer from poor contact caused by Clean the battery contacts or replace the dirty or damaged battery contacts. -
Page 36: Appendix C. - Shortcut Menu Opera�Ons
Appendix C. - Shortcut Menu operations MENU Name Enter item LCD display Selectable (Full Name) 0-9 Levels Squelch - Squelch MENU+0 0:Lowest Level 9:Highest Step –Step 2.5K/5.0K/6.25K/10.0K MENU+1 12.5K/20.0K/25.0K/50.0K Frequency HIGH:8W(VHF) 4W(UHF)/Low:2W *Selects between HIGH, MID, and LOW transmitter Tx Power – power when in VFO/Frequency mode. - Page 37 Backlight –Auto bright/1,2,3…8,9,10Sec MENU+6 *Time-out for the LCD backlight. (seconds) Backlight Dual Standby – *Monitor [A] and [B] at the same time. The display Dual Watch MENU+7 with the most recent activity ([A] or [B]) becomes the selected display. Operation Beep Prompt - MENU+8 Keypad Beep...
- Page 38 67.0HZ…254.1HZ *Mutes the speaker of the transceiver in the Rx CTCSS - absence of a specific and continuous sub-audible MENU+11 Receiver CTCSS signal. If the station you are Listening to does not transmit this specific and continuous signal, you will not hear anything. D023N…D754N D023I …D754I Tx DCS...
- Page 39 OFF: No DTMF Side Tones are heard DT-ST : Side Tones are heard only from manually keyed DTMF codes DTMFST - DTMFST MENU+16 ANI-ST: Side Tones are heard only from automatically keyed DTMF codes DT+ANI : All DTMF Side Tones are heard S-CODE - Signal 1,…,15 MENU+17...
- Page 40 Busy Lockout – *Disables the [PTT] button on a channel that is Busy Channel MENU+22 already in use. The transceiver will sound a beep tone and will not transmit if the [PTT] button is Lock-out pressed when a channel is already in use. Key Auto Lock *When ON, the keypad will be locked if not used in –Automatic...
- Page 41 On site: Sounds alarm through your radio speaker Alarm Mode - only MENU+28 Send sound: Sending alarm tone Alarm Mode Send code: Sending alarm code Scan CTCSS -Scan 67.0HZ,…,254.1HZ of frequencies MENU+29 *Automatic stop after receiving the CTCSS signal with CTCSS Scan DCS -Scan of D023N,…,D754I frequencies with...
- Page 42 1000Hz/1450Hz/1750Hz/2100Hz R-TONE–Repeater *To send out a repeater tone; You hold down the MENU+35 Tone [PTT] + [SOS] key. Preset Logo: Performs an LCD screen test at Power On Msg power-on -Power On MENU+36 Preset Msg : Displays a 2-line power on message Voltage: Message Language-...
-
Page 43: Appendix D. - Ctcss Table
Appendix D. - CTCSS Table CTCSS CHART (Hz) Number Frequency Number Frequency Number Frequency Number Frequency Number Frequency 67.0 69.3 71.9 74.4 77.0 79.7 82.5 85.4 88.5 91.5 94.8 97.4 103.5 107.2 110.9 114.8 118.8 123.0 127.3 131.8 136.5 141.3 146.2 151.4 156.7... -
Page 44: Appendix E. - Dcs Table
Appendix E. - DCS Table DCS CODE LIST Number Code Number Code Number Code Number Code Number Code D023N D025N D026N D031N D032N D036N D043N D047N D051N D053N D054N D065N D071N D072N D073N D074N D114N D115N D116N D122N D125N D131N D132N D134N D143N... - Page 45 D731N D732N D734N D743N D754N D023I D025I D026I D031I D032I D036I D043I D047I D051I D053I D054I D065I D071I D072I D073I D074I D114I D115I D116I D122I D125I D131I D132I D134I D143I D145I D152I D155I D156I D162I D165I D172I D174I D205I D212I D223I D225I D226I...
- Page 46 Note to EU users European Users should note that operation of this unit in Transmit mode requires the operator to have a valid Amateur Radio License from their respective Countries Amateur Radio Licensing Authority for the Frequencies and Transmitter Power levels that this Radio transmits on. Failure to comply may be unlawful and liable for prosecution. At this subject, refer to the “EU”...
- Page 47 Disclaimer The Company endeavors to achieve the accuracy and completeness of this manual, but no warranty of accuracy or reliability is given. All the specifications and designs are subject to change without notice due to continuous technological development. No part of this manual may be copied, modified, translated, or distributed in any manner without the prior written consent of the Company.