
Related Manuals for La Crosse Technology 515-1912


Summary of Contents for La Crosse Technology 515-1912
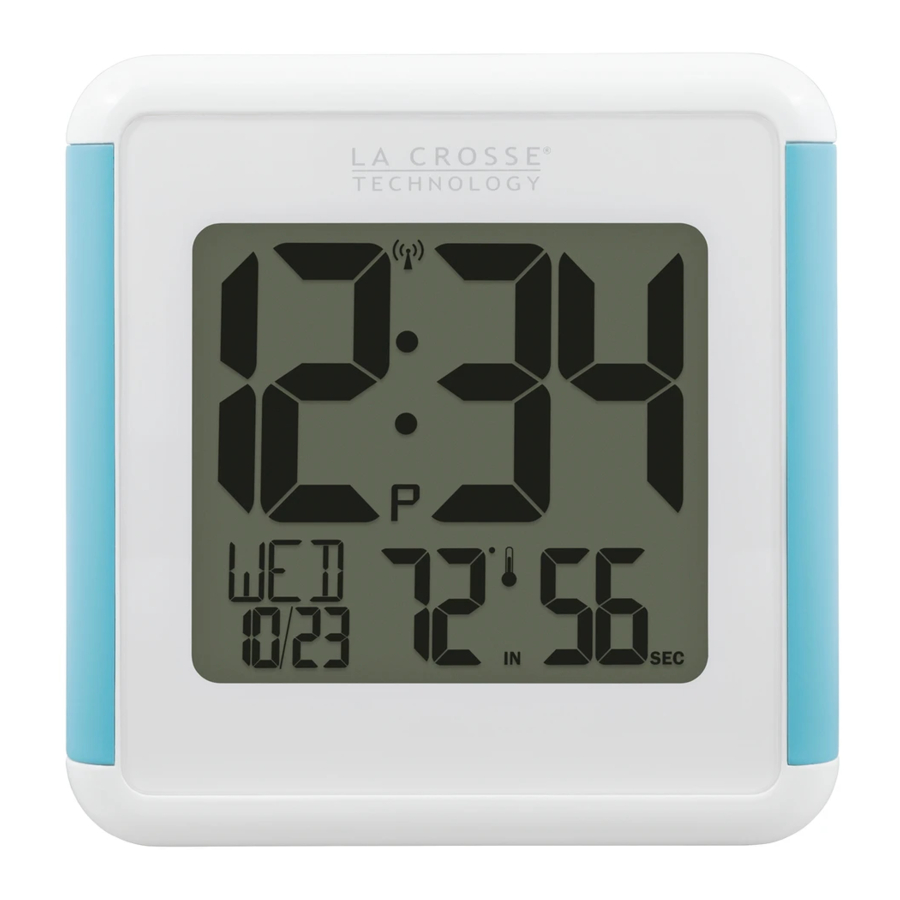
- Page 1 SPL ASH P R OO F ATOM I C C LO C K W IT H O UT DOOR TEM P E RAT UR E/ H UM ID IT Y MODEL: 515-1912 DC: 092419...
-
Page 2: Table Of Contents
TABLE OF CONTENTS 3. Power up 3. Buttons 3. Atomic Time 4. Settings Menu 5. Custom Display Views 6. Timer 7. Search for Outdoor Sensor 7. Low Battery 7. Specifications 8. We’re Here to Help 8. Join the Conversation 8. Warranty Info 8. -
Page 3: Power Up
3. Configure basic Settings. 4. Once the sensor is reading to your clock, place sensor outside in a shaded location. Watch sensor mounting video: bit.ly/TH_SensorMounting TX191TH Outdoor Sensor 515-1912 Atomic Clock B U TTO N S TIMER PLUS (+) MINUS (-) -
Page 4: Settings Menu
SE T T I N G S ME N U Daylight Saving Time Options: DST ON- Clock gains 1 hour in spring and loses 1 hour in the fall DST OFF- Clock remains in Standard Time all year long DST ALWAYS ON- Clock remains in Daylight Saving Time all year long Settings order: •... -
Page 5: Custom Display Views
BEEP ON/OFF ATOMIC ON/OFF DST ON/OFF/ALWAYS ON TIME ZONE HOUR MINUTES YEAR MONTH DATE FAHRENHEIT/CELSIUS C U STO M D IS P L AY VI E W S Press the MINUS (-) button to select between: • Outdoor Temperature & Humidity •... -
Page 6: Timer
T I ME R Set Timer: 1. Hold the TIMER button until you see the Minutes begin to flash. Press the + or – button to adjust the minutes (1-99). 2. Press the TIMER button to confirm and exit. Timer Icon will show when Timer is active. -
Page 7: Search For Outdoor Sensor
S EA R CH F OR O UT D O O R S E N SOR • If the Outdoor Sensor loses connection to the clock for any reason, the clock will show NO after 30 minutes. • The clock will search for 3 minutes every hour to reconnect with sensor. •... -
Page 8: We're Here To Help
Ask questions, watch detailed setup videos, and provide feedback on our social media outlets! WA RR A N T Y I N F O La Crosse Technology, Ltd. provides a 1-year limited time warranty (from date of purchase) on this product relating to manufacturing defects in materials & workmanship.