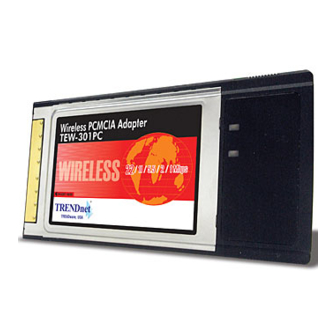
TRENDnet TEW-301PC Quick Installation Manual
2.4ghz 22mbps wireless network pc card
Hide thumbs
Also See for TEW-301PC:
- Specifications (2 pages) ,
- User manual (88 pages) ,
- User manual (46 pages)
Advertisement
Quick Links
2.4GHz 22Mbps Wireless
Network PC Card
Quick Installation Guide
System Requirements:
-
Windows 98, 98SE, Millennium Edition (ME), 2000 and XP computers
-
PC with Pentium II 300MHz system or above is recommended
-
Equipped with at least one 32-Bit PC Cardbus socket or PC Cardbus adapter.
-
One CD-ROM drive
Setup and Installing the 22Mbps Wireless Network PC Card
Note!
22M WLAN Adapter Utility Setup will disable the WinXP Zero Configuration Utility for Wireless LAN.
If you want to enable the 802.1X Authentication Security Function in WinXP Zero Configuration Service,
please exit from the 22M WLAN Adapter Utility Installation, and use the Win XP Zero Configuration Utility
only.
Installing Utility Program
1
Make sure that the
22Mbps Wireless
Network PC Card is
inserted into the Cardbus
slot.
Turn on the computer.
Insert the software CD
into the CD-ROM Drive.
Please note that the installation screens in this quick guide are captured from WindowsXP. The other
Windows systems will have similar screen for the installation procedure.
NOT
1
Advertisement

Summary of Contents for TRENDnet TEW-301PC
- Page 1 2.4GHz 22Mbps Wireless Network PC Card Quick Installation Guide System Requirements: Windows 98, 98SE, Millennium Edition (ME), 2000 and XP computers PC with Pentium II 300MHz system or above is recommended Equipped with at least one 32-Bit PC Cardbus socket or PC Cardbus adapter. One CD-ROM drive Setup and Installing the 22Mbps Wireless Network PC Card Note!
- Page 2 Click on the “PC Card/PCI Card” option on the left selection menu. Click on “Install” button to start Utility installation. InstallShield Wizard starts. Click “Next” to continue.
- Page 3 Click “Next” to install the program files in the default folder. Select the second option, and click “Finish” to complete the installation. - Turn off your computer - Insert the 22Mbps Wireless Network PC Card into the CardBus slot in your notebook - Turn on your computer - Continue with Driver Installation.
- Page 4 Installation of Driver Files Select the second option and click “Next” to continue. Select first option then click on the checkbox click “Browse” button to specify the driver file folder. Go to D:\Driver\WinXP Click “OK” Please note that letter “D:\” represents the CD-ROM driver letter, and select folder “Win98”...
- Page 5 Click “Next” to continue Click “Continue Anyway” to continue Click “Finish” to complete new hardware installation.
- Page 6 Configuring 22Mbps Wireless PC Card You can now launch the configuration utility by clicking on the utility program icon in the system tray on lower-right corner of the screen, or by double-clicking on icon in your desktop. The following screen would appear, and you can proceed with configuration of the 22Mbps Wireless Network PC Card by clicking Configuration page on the left menu.
- Page 7 SSID: Service Set Identifier, which is a unique name shared among all clients and nodes in a wireless network. The SSID must be identical for each clients and nodes in the wireless network. BSS Type: There are two types available for selection Infrastructure –...
- Page 8 Configuring TCP/IP Setting For 22Mbps Wireless PC Card Dynamic IP Address V.S. Static IP Address By definition Dynamic IP addresses are the IP addresses that are being automatically assigned to a network device on the network. These Dynamically assigned IP addresses will expire and may be changed over time.
- Page 9 The Local Area Connection Properties would appear. Select “Internet Protocol 22Mbps WLAN Adapter (TCP/IP)” and Click “Properties” to continue. Dynamically Assigned IP Address The TCP/IP Properties window appears. Select “Obtain an IP address automatically” if you are on a DHCP enabled network. Click “OK”...
- Page 10 Static IP Address Select “Use the following IP address” Enter the IP address and subnet mask fields. Enter the IP address of the Router in the Default gateway field. Enter the IP address of the Router in the DNS server field Click “Ok”...


