
Related Manuals for Westinghouse TM263


Summary of Contents for Westinghouse TM263
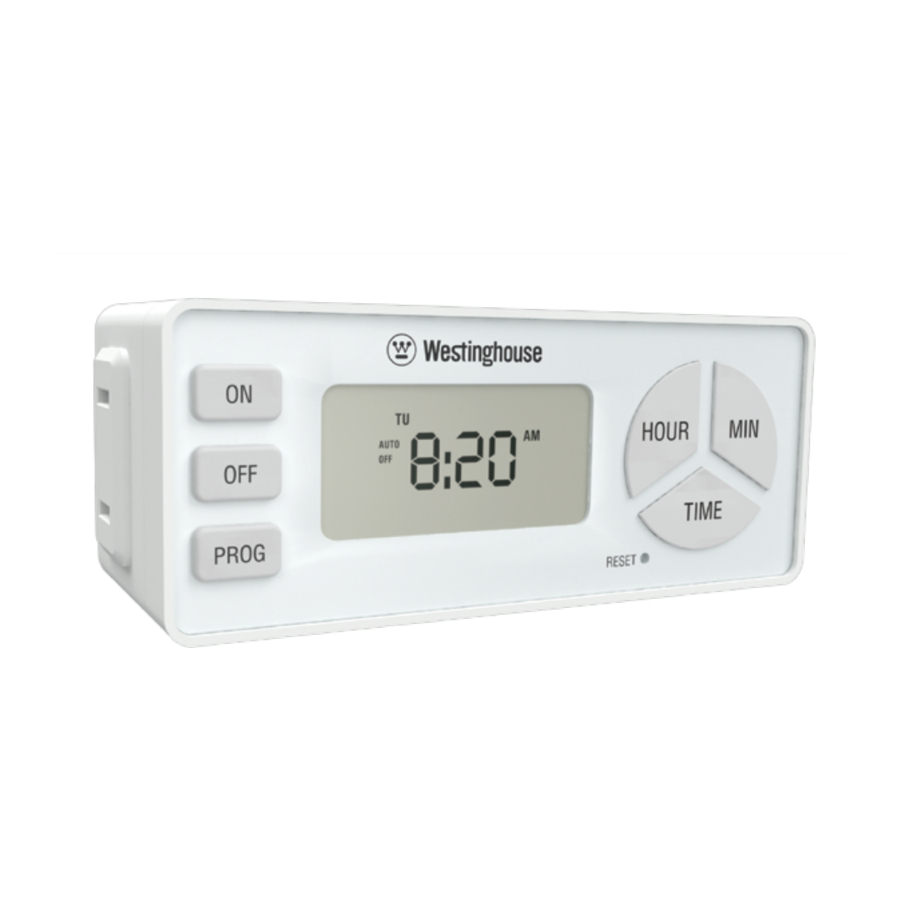
- Page 1 2-OUTLET DAILY DIGITAL BAR TIMERS 2-PRISE BARRE NUMÉRIQUE QUOTIDIENNE TEMPORISATEURS Customer Service / Service à la Clientèle 1-855-350-6868 • 10AM - 6PM, EST Monday to Friday / Lundi au Vendredi MODEL / MODÈLE #TM263...
- Page 2 OPERATING INSTRUCTIONS MODE D’OPÉRATION TO SET TO THE CURRENT TIME: Press and hold the TIME button. While holding, press the HOUR button until the current hour is displayed. Continuously pressing the HOUR/MINUTE button will cycle the time from AM to PM. POUR RÉGLER À...
-
Page 3: Program Setting
PROGRAM SETTING • Press the PROG button to select Program 1 or Program 2. • While holding down the ON button press the HOUR and MIN buttons to set the timer’s “on” time. • While holding down the OFF button press the HOUR and MIN buttons to set the timer’s “off”... -
Page 4: Timer Modes
PROGRAM SETTING • Press and hold the PROG button to select Program 1 or Program 2. • Press and hold the ON button to review the programmed “on” time Press and hold the OFF button to review the programmed “off” time. EXAMEN DES PROGRAMMES •... - Page 5 SECURITY MODE INSTRUCTIONS: Press the ON and OFF button at the same time. The SEC symbol will appear on the LCD display, indicating that the security feature has been enabled. In Security Mode, the timer controls your lighting/devices randomly to give the appearance that someone is home.
-
Page 6: Specifications
SPECIFICATIONS 2 polarized outlets Rated: 120VAC/60Hz/15A/1800W Resistive 5A/600W Tungsten 500VA Electronic Ballast Battery: 1.5v LR1130 CARACTÉRISTIQUES 2 prises polarisée Calibré à: 120VAC/60Hz/15A/1800W Resistif 5A/600W Tungstène 500VA Ballast Électronique Pile: 1.5v LR 1130 ITEM / ARTICLE # H28426 / 26425... - Page 7 WHAT THIS TIMER DOES: Your timer can be programmed to turn a lamp or other electric device on and off automatically, once per day.Before using the timer, make sure that the lamp works by plugging it into the wall outlet. While the lamp is on, unplug it from the wall. Plug the lamp into the timer and plug the timer into the wall.
-
Page 8: Battery Replacement
BATTERY REPLACEMENT • To remove drained battery, use straight head screw driver and pry out the battery holder from timer housing. Remove battery from battery holder. • Insert fresh AG10 LR1130 battery into battery holder. Make sure to correctly position the + positive side of the battery into the holder, by matching up the + plus sign on the battery to the + plus sign in a small circle on the battery... - Page 9 REMPLACEMENT LE LA PILE • Pour enlever la pile usagée, utiliser un tournevis droit, et détacher le support de la pile du boitier de la minuterie. Enlever la pile de son support. • Insérer une nouvelle pile AG10 LR1130 dans le support. Assurez-vous de bien positionner le + côté...
- Page 10 WARNING THIS DEVICE COMPLIES WITH PART 15 OF THE FCC RULES. OPERATION IS SUBJECTTO THE FOLLOWING TWO CONDITIONS: (1) THIS DEVICE MAY NOT CAUSE HARMFUL INTERFERENCE, AND (2) THIS DEVICE MUST ACCEPT ANY INTERFERENCE RECEIVED, INCLUDING INTERFERENCE THAT MAY CAUSE UNDESIRED OPERATION.
- Page 11 Westinghouse Electric Corporation. Used under license by The NCC. All rights reserved. Les termes et WESTINGHOUSE sont des marques de commerce de la société Westinghouse Electric. Utilisés sous licence par la société The NCC. Tous droits réservés. Manufactured and distributed by / Manufacturé...