Advertisement
Quick Links
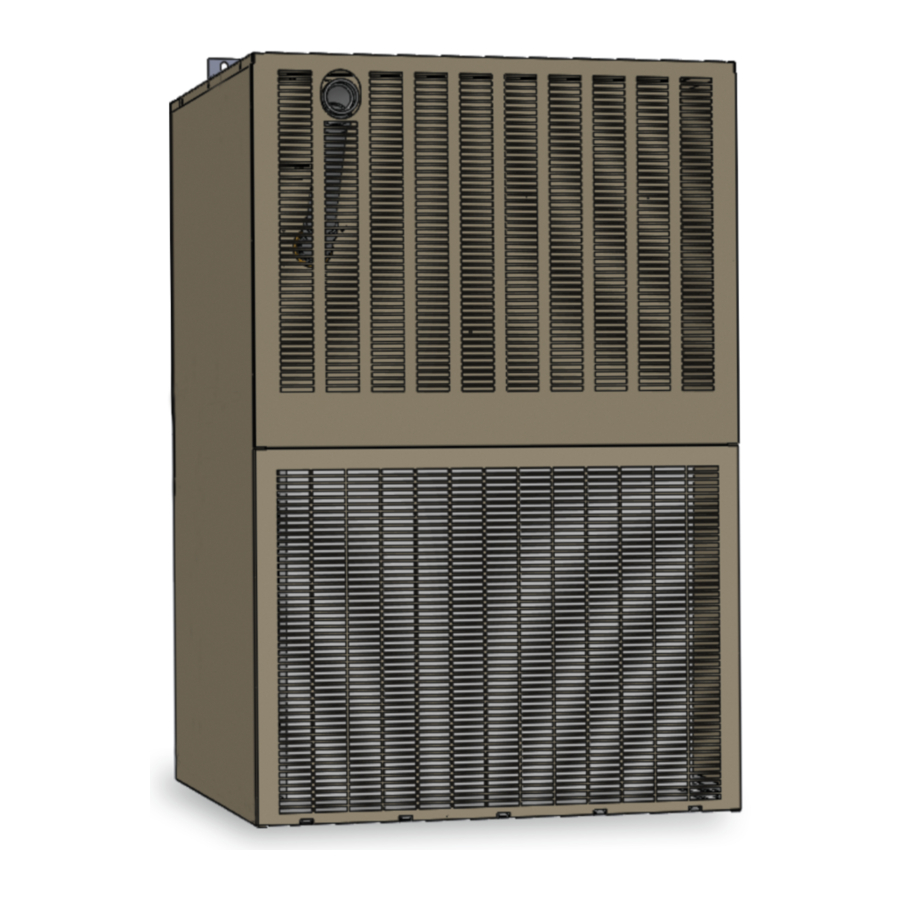
The indoor blower motor and the outdoor fan motor have
permanently lubricated bearings and do not require routine
service. The refrigeration system is sealed and factory charged
with R-410A so that routine maintenance is not required.
Cleaning of the outdoor coil, indoor coil, drain pan, and inside
the bottom of the chassis are recommended at least once a
year, and more often if the equipment is operated in a dusty
or hostile environment. The electrical controls do not require
routine service.
Power to the unit should always be turned off before performing
service or removing the cooling chassis from the unit. One
power connector and one control circuit connector are provided
for easy disconnecting and re-connecting of the wires between
the cooling chassis and cabinet. The controls enclosure cover
must be removed to allow access to the screws holding the
indoor blower cover plate to the cooling chassis and cabinet.
After reinstalling the cooling chassis, the indoor blower cover
plate and controls enclosure cover must be reinstalled.
!
WARNING
IF YOU TURN OFF POWER SUPPLY, TURN OFF
THE GAS. SEE HAzARD LEVELS, PAGE 3. THE
MATERIAL CONTAINED IN THE MAINTENANCE
AND SERVICE SECTION OF THIS MANUAL
IS DESIGNED TO AID A qUALIFIED SERVICE
PERSON IN MAINTAINING AND SERVICING
THIS EqUIPMENT. THIS UNIT WILL OPERATE
WITH
MINIMUM
ENSURE LONG LIFE AND SATISFACTORY
PERFORMANCE,
OPERATED UNDER NORMAL CONDITIONS
SHOULD bE INSPECTED AND CLEANED AT
THE START OF EACH HEATING SEASON.
IF THE HEATER IS OPERATING IN AN AREA
WHERE AN UNUSUAL AMOUNT OF DUST,
SOOT OR OTHER IMPURITIES ARE PRESENT
IN THE AIR, MORE FREqUENT MAINTENANCE
IS RECOMMENDED. WHEN ANY SERVICE IS
COMPLETE, bE CAREFUL TO REASSEMbLE
CORRECTLY TO ENSURE THAT NO UNSAFE
CONDITIONS ARE CREATED. WHEN RE-
LIGHTING, ALWAYS FOLLOW THE LIGHTING
INSTRUCTIONS ON THE HEATER.
Maintenance Schedule
At least every six weeks check the filter. Clean or replace as
necessary. A clean filter in addition to providing a comfortable
Installation Guide for Comfort Pack (CPG) Units
MAINTENANCE.
A
HEATER
THAT
environment ensures fuel-efficient operation and long heat
exchanger life. Do the following procedures at least annually.
• Clean all dirt, lint, and grease from the combustion air openings
and venter motor.
• Inspect the heat exchanger. Clean if needed.
• Check the burner for scale, dust, or lint accumulation. Clean if
needed.
• Check the vent system for soundness. Replace any parts that
do not appear sound.
• Check the wiring for any damaged wire. Replace damaged
wiring.
NOTE: USE ONLY FACTORY-AUTHORIzED
REPLACEMENT PARTS.
burner/Control Compartment
Heat Section burner/Control Compartment
Showing Locations of Burner Assembly and Controls
NOTE: Unit side panel is removed for clarity; side panel is not
removable. Access to the burner/control compartment is through
the small rear access panel as illustrated below.
TO
IS
Pressure Switch
DSI Integrated
Control Module
Figure 5
Gas Valve
Venter Motor
Burner Assembly
Burner
25
Advertisement

Related Manuals for National Comfort Products CPG41228-U

Summary of Contents for National Comfort Products CPG41228-U
- Page 1 Installation Guide for Comfort Pack (CPG) Units The indoor blower motor and the outdoor fan motor have environment ensures fuel-efficient operation and long heat permanently lubricated bearings and do not require routine exchanger life. Do the following procedures at least annually. service.
-
Page 2: Burner Service
Installation Guide for Comfort Pack (CPG) Units Inspect the Heat Exchanger Inspect and Clean the burner Remove the heat furnace baffle panel (see page 29). Remove any With the burner assembly removed, shine a flashlight on the dirt or dust accumulation. Visually check the heat exchanger for burner ribbons. -
Page 3: Burner Orifice
Installation Guide for Comfort Pack (CPG) Units Figure 6B CAUTIoN Secondary Air Shield Assembly w/ End Cap Removed Upper Burner Brackets DUE TO HIGH VOLTAGE ON THE SPARk WIRE AND ELECTRODE, DO NOT TOUCH WHEN ENERGIzED. SEE HAzARD LEVELS, PAGE 5. DSI Integrated Control Module - The module monitors the operation of the heater including ignition. -
Page 4: Limit Control
Installation Guide for Comfort Pack (CPG) Units If the compartment appears normal, reset by depressing the red Limit Control button on the switch. 15 to 20 minutes are required for the switch If it is determined that a limit control needs replacing, use only to cool sufficiently for resetting. - Page 5 Installation Guide for Comfort Pack (CPG) Units Directions to Slide Out the Furnace (After removing front panels) 1. Remove the (4) screws indicated at the right 3. Remove (2) right side screws and remove the front furnace baffle. Gas Line Front Furnace Baffle...
- Page 6 Installation Guide for Comfort Pack (CPG) Units Power Cord Pull Forward 4. Unplug (2) molex plugs before sliding out the heat exchanger/ furnace assembly. 5. Grasp the vertical heat exchanger “partition” firmly with your left hand. Lift Be careful not to tear the side and 6.
- Page 7 LP Kit (64 MBTU) National Comfort Products offers Architectural Louver Grilles for all models. Outdoor grilles provided by others must be approved by National Comfort Products to maintain unit performance and warranty coverage. See Architectural Louvered Grilles Specification Sheet for more details.
- Page 8 Installation Guide for Comfort Pack (CPG) Units Check Your Temperature Rise AS CLOSE AS POSSIBLE TO THE EVAPORATOR COIL BEHIND THE FILTER DOOR *Example shown has a ducted return The temperature rise should be as follows 28MBTU = 52.5°F Nominal (45°F to 60°F) 38MBTU = 52.5°F Nominal (45°F to 60°F) 51MBTU = 55°F Nominal (45°F to 65°F) 64MBTU = 67°F Nominal (60°F to 80°F)
- Page 9 Installation Guide for Comfort Pack (CPG) Units Comfort Pack Gas CFM and Temperature Rise 28,000 bTU Input UNIT SIzE COLOR SPEED .1” w.c. .2” w.c. .3” w.c. .4” w.c. .5” w.c. 26.6 26.9 27.3 28.6 30.5 Yellow 29.0 30.1 31.4 33.5 37.0 CPG41228...
- Page 10 Installation Guide for Comfort Pack (CPG) Units Comfort Pack Gas CFM and Temperature Rise 51,000 bTU Input UNIT SIzE COLOR SPEED .1” w.c. .2” w.c. .3” w.c. .4” w.c. .5” w.c. 48.4 49.1 49.7 52.1 55.6 Yellow 52.8 54.8 57.2 60.9 67.5 CPG41851...
- Page 11 Installation Guide for Comfort Pack (CPG) Units Comfort Pack Gas 80% Air Flow Data ESP (in. wc) / CFM Speed Models Color Yellow CPG412 Blue Black Orange Yellow CPG418 Blue Black Orange Yellow CPG424 Blue Black Orange Yellow CPG430 Blue Black Orange...
- Page 12 Installation Guide for Comfort Pack (CPG) Units...
- Page 13 Installation Guide for Comfort Pack (CPG) Units...
- Page 14 Installation Guide for Comfort Pack (CPG) Units...
- Page 15 Installation Guide for Comfort Pack (CPG) Units DSI INTEGRATED CONTROL MODULE CONTROL GREEN LED STATUS STEADY ON Normal operation, no call for heat FAST FLASH Normal operation, call for heat 1 FLASH In lockout from failed ignition or flame loss 2 FLASH Pressure switch does not close for 30 seconds 3 FLASH...
- Page 16 Installation Guide for Comfort Pack (CPG) Units TROUBLSHOOTING PROBLEM PROBABLE CAUSE REMEDY Venter motor will not start No power to unit Turn power, check supply fuses or circuit breaker No 24 volt power to integrated circuit board. Turn up thermostat; check control transformer output Integrated circuit board fuse blown.
-
Page 17: Replacement Parts Guide
Installation Guide for Comfort Pack (CPG) Units Replacement Parts Guide To assure accuracy in providing the correct parts, please provide the unit model designation and serial number with the parts order. The model designation breakdown is shown below: CAbINET PARTS ITEM DESCRIPTION PART NO. - Page 18 Installation Guide for Comfort Pack (CPG) Units Replacement Parts Guide (Continued) CHASSIS CHASSIS ITEM DESCRIPTION PART NO. MODEL ITEM DESCRIPTION PART NO. MODEL Air Divider 14256109D CP41.0-U1.0 Outdoor Coil Mount 14256113 base 14256642 Indoor Coil Cover 14256117 Indoor Coil 14208305 Indoor Coil Drain Pan 14256173 14208307...
- Page 19 Installation Guide for Comfort Pack (CPG) Units IMPORTANT!!! BEFORE REMOVING A WARRANTY COMPRESSOR, PLEASE FILL OUT THE FOLLOWING AND CALL (800) 523-7138. REMOVAL OF COMPRESSOR WITHOUT FACTORY VERIFICATION CAN LEAD TO WARRANTY CREDIT BEING DENIED Incoming Voltage to Compressor at Contactor is:__________Volts Compressor Starting AMP Draw:__________ Ω...
- Page 20 COMFORT PACk LIMITED WARRANTY 1. National Comfort Products warrants to its customers that its product shall be free from defects in material and workmanship under normal use and regular service and maintenance as follows: HEAT ExCHANGERS (Gas units only): for ten years from the date of original installation.
- Page 21 Installation Guide for Comfort Pack (CPG) Units The term “consequential damages” shall include, but not be limited to, loss of anticipated profits, business interruption, loss of use, revenue, reputation and data, costs incurred, including without limitation, for capital, fuel, power and loss or damage to capital or equipment.