Table of Contents
Advertisement
Quick Links
Advertisement
Table of Contents

Related Manuals for Verizon SKU2


Summary of Contents for Verizon SKU2
- Page 1 User Guide Network Adapter SKU2 MAE0340M-D315...
-
Page 2: Table Of Contents
1. Inside the box 2. Your Network Adapter 3. Setting Up Your Network Adapter Positioning Your Devicer Setup Requirements Setting Up 4. Login to Your Network Adapter Connect & Login by Computer 5. Web User Interface Settings 5.1.1 MoCA settings 5.1.2 Device settings 5.1.3... -
Page 3: Inside The Box
Inside the box Inside the product package you should find the following items. Contact Verizon if any item is missing or damaged. Network Adapter Power Adapter Ethernet Cable Coaxial Cable * 2 https://www.verizonwireless.com/support/... - Page 4 Wall Mount Screw Splitter https://www.verizonwireless.com/support/...
-
Page 5: Your Network Adapter
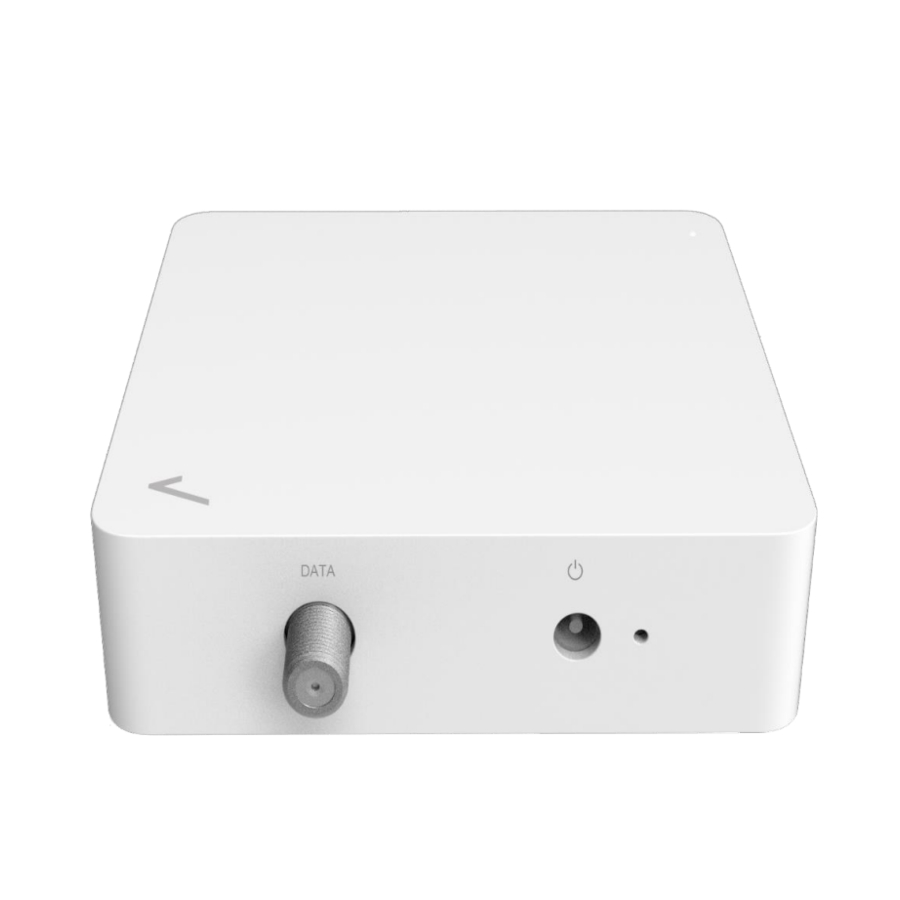
Your Network Adapter Your Verizon Network Adapter provides MoCA 2.5 and 2.5G Ethernet port for your devices. Take a moment to familiarize with your product. RF port DC port Reset RJ-45 port https://www.verizonwireless.com/support/... - Page 6 Wall Mount Please follow the steps as below. Screw Anchor Wall Wall https://www.verizonwireless.com/support/...
- Page 7 Reset Button If you experience difficulties with your device or you want to revert all settings that you have changed, the reset function allows you to reset the device back to its factory default state. Press and hold the reset button for 10-15 seconds to perform a factory reset (resets all settings back to factory defaults).
-
Page 8: Setting Up Your Network Adapter
Setting Up Your Network Adapter Positioning Your Devicer For the best transmission from the device: The equipment shall be mounting at heights less than 2 m. Keep the device away from direct sunlight. Setup Requirements To configure your network adapter via computer, you need a computer that meets the following system requirements: Ethernet RJ-45 (LAN) port (10Base-T/100Base-TX/1000BaseTX/2.5GBASE-T). -
Page 9: Setting Up
Setting Up 3.3.1 Use the MoCA Ethernet Adapter as a connector between the coax outlet and your personal devices. 1. Verify the router in your home is connected to a coax outlet. 2. Connect a coaxial cable from the coaxial wall port to the “Data” port of the Network Adapter. 3. - Page 10 3.3.2 Use the MoCA Ethernet Adapter as a connector between your router and your coax outlet. 1. Connect a coaxial cable from the coaxial wall port to the “Data” port of the Network Adapter. 2. Connect the provided splitter to your STB and Network Adapter if your service includes a TV subscription. 3.
-
Page 11: Login To Your Network Adapter
Login to Your Network Adapter You can find the Web UI login IP in the home router. And you can login to your network adapter’s Web User Interface (Web UI) to access and change any of your network adapter’s settings and functions, such as MoCA setup. You can login to the Web UI using a computer. - Page 12 Go to Security settings to change your Web UI login password, and remember to save your settings. Check 4. Web User Interface in this guide for more information about your network adapter’s settings. https://www.verizonwireless.com/support/...
-
Page 13: Web User Interface
Web User Interface Your network adapter’s Web User Interface (Web UI) allows you to set up and configure its various functions. You can access the Web UI anytime by entering the network adapter’s IP in the address bar of web browser on a device connected to the network adapter. Check your network adapter’s product label for your unique GUI Password. -
Page 14: Settings
Settings 5.1.1 MoCA settings This screen is the first screen you will see when accessing the Coax bridge. Most users will be able to configure the bridge and get it working properly using only the settings on this screen. The Preferred NC is related with MoCA spec. https://www.verizonwireless.com/support/... - Page 15 COAX Setup Adater Name The adapter name only serves as help to installers who wish to note location of the device. Network Search The device will auto select suitable channel within the frequency range defined in band. Enabled When network search is not ticked, the device will operate on the frequency specified in last operating frequency.
-
Page 16: Device Settings
5.1.2 Device settings This screen allows you to configure the IP mode. Select 'DHCP automatic configuration' if your network has a DHCP server. If you choose Static IP address, you must configure the IP address for each coax bridge (note that each IP address must be unique. The new IP address will be used only after reset). https://www.verizonwireless.com/support/... - Page 17 LOCAL Setup DHCP & Link Local Select 'DHCP automatic configuration' if your network has a DHCP server. automatic configuration Static IP Address Select 'Static IP Address' you must configure the IP address for each coax bridge. IP Address Enter the IP address. Netmask Enter the Netmask.
-
Page 18: Security Settings
5.1.3 Security settings This screen allows you to change the admin password for the bridge and the network security password for the Coax network. It is strongly recommended that you change the factory default password, the default network password is 99999999988888888. All users who try to access the bridge will be prompted for the bridge's password. -
Page 19: Status
Web GUI admin security Setup Old Password Enter the old password for authentication. New Password Enter your new password in the New Password field. Confirm Password Enter your new password again to confirm. MOCA network security Setup Security Enabled The Network Security allows the user to enable or disable network encryption on the coaxial network. New Password Network security password must be between 12 to 17 digits. - Page 20 Device Status Firmware Version Display the current firmware version. My MoCA Version Display the current MoCA version. Network MoCA Display the current network MoCA version. Version https://www.verizonwireless.com/support/...
-
Page 21: Phy Rates
IP Address Display the current IP Address. MAC Address Display the current MAC Address. Link Status Display the current Link status. Beacon Channel Display Beacon Channel frequency. Primary Channel Display primary channel frequency. Secondary Channel Display secondary channel frequency. First Channel Display first channel frequency. - Page 22 PHY Rates Unicast NPER Display NPER PHY rate in Mbps. Default is NPER. Unicast VLPER Display VLPER PHY rate in Mbps. https://www.verizonwireless.com/support/...
-
Page 23: Advanced
Advanced 5.3.1 Upgrade You must be very careful when upgrade firmware, it may damage your device and can’t work. You should be following the step and do not remove power. Use the Choose File button to select the new Hostless MoCA firmware image file (bin file). https://www.verizonwireless.com/support/... -
Page 24: Reset
Click the Upgrade button. Wait for the completion status screen to appear. A typical upgrade requires 60-90 seconds for the flash to be updated. Click the Reboot button. 5.3.2 Reset Click the button Reboot can reboot the system. Click the button Restores Defaults can restore the system to factory default values. Reboot may take about 10 seconds. - Page 25 Reset Reboot Reboot the system. Restore Defaults Click the button Restores Defaults can restore the system to factory default values. Reboot may take about 10 seconds. https://www.verizonwireless.com/support/...
-
Page 26: Troubleshooting
Windows, Mac OS, for detailed instructions how to do this. Where can I get more help? Visit https://www.verizon.com/support/residential/contact-us/contactuslanding.htm to find your nearest Verizon store or for 24/7 help with live chat and device-specific support. https://www.verizonwireless.com/support/... -
Page 27: Technical Specification
7. Technical Specification General SKU1 SKU2 MoCA Standard MoCA 2.5 MoCA 2.5 Coax In Frequency Extended D-Band Extended D-Band F-Connector F-Connector * 2 (for Data & Video) F-Connector * 1 (for Data) Ethernet Ports 2.5G RJ-45 * 1 2.5G RJ-45 * 1... -
Page 28: Regulatory Compliance Notices
8. Regulatory Compliance Notices FCC Class B Equipment This equipment has been tested and found to comply with the limits for a Class B digital device, pursuant to Part 15 of the FCC Rules. These limits are designed to provide reasonable protection against harmful interference in a residential installation. This equipment generates uses and can radiate radio frequency energy and, if not installed and used in accordance with the instructions, may cause harmful interference to radio communications.