Table of Contents
Advertisement
Quick Links
Advertisement
Table of Contents

Related Manuals for Belkin F5U501-MAC


Summary of Contents for Belkin F5U501-MAC
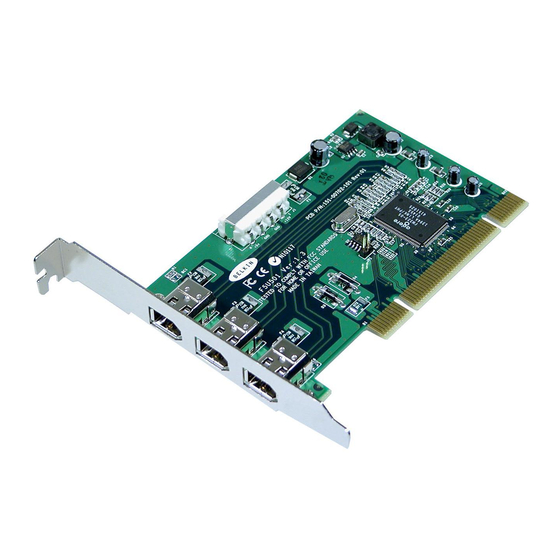
- Page 1 Belkin ® Components FireWire PCI Card Instruction Manual F5U501-MAC P73448-A...
-
Page 2: Introduction And System Requirements
Introduction and System Requirements Thank you for purchasing the Belkin IEEE 1394 PCI upgrade card. Now you can add three 400 Mbps FireWire ports to your Apple PowerMac computer and enjoy the blazing speed and convenient Plug-and-Play operation of next-generation FireWire devices. -
Page 3: Hardware Installation
2. Open the case of your computer. Refer to your computer user manual for details regarding how to do this. Be sure to touch any bare metal portion of your computer case to discharge yourself of any static electricity, which can damage your computer, or the FireWire card. - Page 4 Hardware Installation (continued) 3. Locate the PCI slots on your computer’s main circuit board. The PCI slots are white in color. Remove the metal plate that covers the rear slot corresponding to the PCI slot you wish to use. You may need a cross-head/Phillips screwdriver to remove any screws.
- Page 5 Hardware Installation (continued) 4. Remove the FireWire card from its protective static bag. Handle it by the metal bracket only, and do not touch the gold edge connectors. Insert the card into the PCI slot, carefully aligning the rear bracket to the computer case.
- Page 6 6. (Optional) If you are planning to connect multiple bus-powered FireWire devices to the Belkin IEEE 1394 PCI card, it may be necessary to draw auxiliary power from your computer’s power supply. This is accomplished by connecting a spare disk drive power cable to the power connector on the PCI card.
- Page 7 Hardware Installation (continued) 7. Close the computer case. 8. Reattach all peripherals to your computer, and turn the power on.
-
Page 8: Software Installation
NOTE: Apple FireWire 2.5 will not install on Mac OS 8.6. If you are using Mac OS 9.0 or Mac OS 9.0.4, it is not necessary to download Apple FireWire to use the Belkin FireWire PCI upgrade card. It is recommended however that the most recent release of Apple FireWire software be used. - Page 9 Software Installation (continued) 3. Select FireWire version 2.4 if you are using Mac OS 8.6. Select FireWire version 2.5 if you are using Mac OS version 9.0 or above.
- Page 10 6. The OS will decompress the disk image and the “FireWire” icom will be placed on the desktop. Double-click this icon. 7. There are four files in the disk image. Read “About FireWire” for more information, and then double-click the “Installer” icon to start the installation.
- Page 11 10. Installer will copy the necessary files. When the installation is complete you will see the following dialogue stating that the installation was successful. Click on “Restart” to restart the computer and the installation is complete. 11. After restart, you may delete the “FireWire 2.Xsmi” file. (continued)
- Page 12 Software Installation VideoShop 4.5.1 Installation 1. Launch the VideoShop 4.5.1 installer. Click "Continue". 2. Read the License Agreement. If you agree to the terms of the License Agreement, click "Accept" to continue. 3. The VideoShop Read Me file will now be displayed. Click "Continue". 4.
- Page 13 Software Installation 5. Make sure the installer is the only application running. Click "Continue". 6. Your VideoShop installation is now complete. Click "Restart". 7. After your computer restarts, locate the VideoShop 4.5.1 folder and click on the VideoShop icon. The program will launch and you will be prompted to enter your name and a registration number.
-
Page 15: Fcc Statement
Belkin Components warrants this product against defects in materials and workmanship for its lifetime. If a defect is discovered, Belkin will, at its option, repair or replace the product at no charge provided it is returned during the warranty period, with transportation charges prepaid, to the authorized Belkin dealer from whom you purchased the product. - Page 16 Fax: +44 (0) 1604678330 Belkin Components B.V. Diamantlaan 8 • 2132 WV Hoofddorp • The Netherlands Tel: +31 (0) 235698765 Fax: +31 (0) 235612694 © 2000 Belkin Components. All rights reserved. All trade names are registered trademarks of respective manufacturers listed.