Sony CDX-GT250MP Operating Instructions Manual
Car audio: fm/am compact disc player
Hide thumbs
Also See for CDX-GT250MP:
- User manual ,
- Specifications (2 pages) ,
- Operating instructions manual (92 pages)
Table of Contents
Advertisement
Available languages
Available languages
FM/AM
Compact Disc Player
Owner's Record
The model and serial numbers are located on the bottom of the unit.
Record these numbers in the spaces provided below.
Refer to these numbers whenever you call upon your Sony dealer regarding this product.
Model No.
To cancel the demonstration (DEMO) display, see page 4.
Pour annuler l'affichage de démonstration (DEMO), reportez-vous à la page 4.
CDX-GT350MP
CDX-GT250MP
©2010 Sony Corporation
Serial No.
4-191-888-21(1)
Operating Instructions
Mode d'emploi
US
FR
Advertisement
Chapters
Table of Contents

Related Manuals for Sony CDX-GT250MP


Summary of Contents for Sony CDX-GT250MP
- Page 1 The model and serial numbers are located on the bottom of the unit. Record these numbers in the spaces provided below. Refer to these numbers whenever you call upon your Sony dealer regarding this product. Model No. To cancel the demonstration (DEMO) display, see page 4.
- Page 2 (sold separately). Please see your nearest authorized Sony dealer for details on the satellite radio tuner module. “SAT Radio,” “SAT Radio Ready,” the SAT Radio and SAT Radio Ready logos and all related marks are trademarks of Sirius XM Radio Inc.
-
Page 3: Table Of Contents
Table of Contents Getting Started Playable discs on this unit ....4 Resetting the unit (CDX-GT350MP only) ....4 Canceling the DEMO mode . -
Page 4: Getting Started
Getting Started Playable discs on this unit This unit can play CD-DA (also containing CD TEXT) and CD-R/CD-RW (MP3/WMA files (page 12)). Type of discs Label on the disc CD-DA Resetting the unit (CDX- GT350MP only) Before operating the unit for the first time, or after replacing the car battery or changing the connections, you must reset the unit. -
Page 5: Detaching The Front Panel
Detaching the front panel You can detach the front panel of this unit to prevent theft. Caution alarm If you turn the ignition switch to the OFF position without detaching the front panel, the caution alarm will sound for a few seconds. The alarm will only sound if the built-in amplifier is used. -
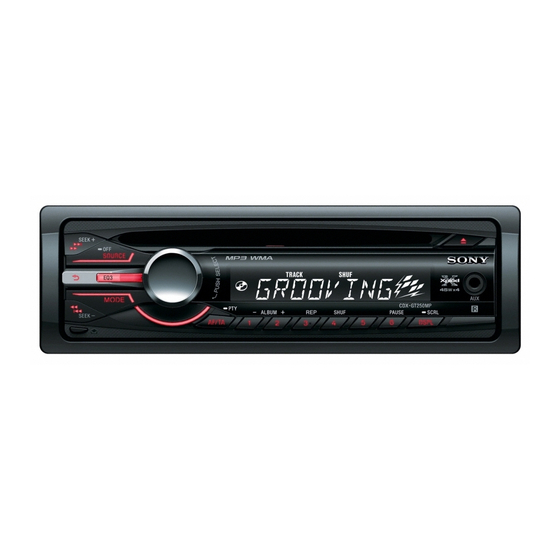
Page 6: Location Of Controls And Basic Operations
Location of controls and basic operations Main unit RM-X151 Card Remote Commander This section contains instructions on the location of controls and basic operations. For details, see the respective pages. The corresponding buttons on the card remote commander control the same functions as those on the unit. -
Page 7: Number Buttons
G AUX input jack page 11 To connect a portable audio device. H Z (eject) button To eject the disc. (front panel release) button page 5 (BACK) button To return to the previous display. K MODE button* page 8 To select the radio band (FM/AM). L PTY/CAT* button (CDX-GT350MP) page 8... -
Page 8: Radio
Radio Storing and receiving stations Caution When tuning in stations while driving, use Best Tuning Memory (BTM) to prevent an accident. Storing automatically — BTM Press (SOURCE/OFF) repeatedly until “TUNER” appears. To change the band, press (MODE) repeatedly. You can select from FM1, FM2, FM3, AM1 or AM2. -
Page 9: Setting Ct
Type of programs NEWS (News), INFORM (Information), SPORTS (Sports), TALK (Talk), ROCK (Rock), CLS ROCK (Classic Rock), ADLT HIT (Adult Hits), SOFT RCK (Soft Rock), TOP 40 (Top 40), COUNTRY (Country), OLDIES (Oldies), SOFT (Soft), NOSTALGA (Nostalgia), JAZZ (Jazz), CLASSICL (Classical), R AND B (Rhythm and Blues), SOFT R B (Soft Rhythm and Blues), LANGUAGE (Foreign Language), REL... -
Page 10: Other Functions
Other functions Changing the sound settings Adjusting the sound characteristics — BAL/FAD/SUB You can adjust the balance, fader, and subwoofer volume. Press the select button repeatedly until “BAL,” “FAD” or “SUB” appears. The item changes as follows: t MID* t HI* LOW* BAL (left-right) t FAD (front-rear) t SUB (subwoofer volume)*... -
Page 11: Using Optional Equipment
MONO* (Monaural Mode) Selects monaural reception mode to improve poor FM reception: “ON,” “OFF.” LPF* (Low Pass Filter) Selects the subwoofer cut-off frequency: “OFF,” “80Hz,” “100Hz,” “120Hz,” “140Hz,” “160Hz.” SW PHASE* (Subwoofer Phase) Selects the subwoofer phase: “SUB NORM,” “SUB REV.” HPF (High Pass Filter) Selects the front/rear speaker cut-off frequency: “OFF,”... -
Page 12: Additional Information
Playback of the following WMA files is not supported. – lossless compression – copyright-protected If you have any questions or problems concerning your unit that are not covered in this manual, consult your nearest Sony dealer. Folder (album) MP3/WMA file (track) -
Page 13: Maintenance
If the fuse blows again after replacement, there may be an internal malfunction. In such a case, consult your nearest Sony dealer. Cleaning the connectors The unit may not function properly if the connectors between the unit and the front panel are not clean. In order to prevent this, detach the front panel (page 5) and clean the connectors with a cotton swab. -
Page 14: Removing The Unit
Removing the unit Remove the protection collar. 1 Detach the front panel (page 5). 2 Pinch both edges of the protection collar, then pull it out. Remove the unit. 1 Insert both release keys simultaneously until they click. 2 Pull the release keys to unseat the unit. 3 Slide the unit out of the mounting. -
Page 15: Troubleshooting
Tone controls: Low: ±10 dB at 60 Hz (XPLOD) Mid: ±10 dB at 1 kHz (XPLOD) High: ±10 dB at 10 kHz (XPLOD) Power requirements: 12 V DC car battery (negative ground (earth)) Dimensions: Approx. 178 × 50 × 179 mm ×... - Page 16 Radio reception The stations cannot be received. The sound is hampered by noises. • The connection is not correct. t Connect a power antenna (aerial) control lead (blue) or accessory power supply lead (red) to the power supply lead of a car’s antenna (aerial) booster (only when your car has built-in FM/AM antenna (aerial) in the rear/side glass).
-
Page 17: Error Displays/Messages
The character cannot be displayed with the unit. If these solutions do not help improve the situation, consult your nearest Sony dealer. If you take the unit to be repaired because of CD playback trouble, bring the disc that was used at the time the problem began. - Page 18 (vendu séparément). Consultez votre détaillant agréé Sony le plus proche pour en savoir plus sur le fonctionnement du module récepteur radio satellite. « SAT Radio », « SAT Radio Ready », les logos SAT Radio et SAT Radio Ready, ainsi que toutes les marques associées sont des marques de...
- Page 19 Table des matières Préparation Disques pouvant être lus sur cet appareil ..4 Réinitialisation de l’appareil (CDX-GT350MP uniquement) ... . . 4 Annulation du mode DEMO ....4 Préparation de la mini-télécommande .
-
Page 20: Préparation
Préparation Disques pouvant être lus sur cet appareil Cet appareil peut lire des CD-DA (y compris ceux qui contiennent des informations CD TEXT) et des CD-R/CD-RW (fichiers MP3/ WMA (page 12)). Type Symbole indiqué sur le de disques CD-DA Réinitialisation de l’appareil (CDX-GT350MP uniquement) Avant la première utilisation de l’appareil ou après avoir remplacé... -
Page 21: Retrait De La Façade
Retrait de la façade Vous pouvez retirer la façade de cet appareil pour le protéger du vol. Alarme d’avertissement Si vous mettez la clé de contact en position OFF sans retirer la façade, l’alarme d’avertissement retentit pendant quelques secondes. L’alarme retentit uniquement lorsque l’amplificateur intégré... -
Page 22: Emplacement Des Commandes Et Opérations De Base
Emplacement des commandes et opérations de base Appareil principal Mini-télécommande RM-X151 Cette section contient les instructions relatives à l’emplacement des commandes et aux opérations de base. Pour plus de détails, reportez-vous aux pages correspondantes. Les touches correspondantes de la mini- télécommande commandent les mêmes fonctions que celles de l’appareil. - Page 23 E Fente d’insertion des disques Insérez le disque (côté imprimé vers le haut) ; la lecture démarre. F Fenêtre d’affichage G Prise d’entrée AUX page 11 Permet de raccorder un appareil audio portatif. H Touche Z (éjecter) Permet d’éjecter le disque. I Touche (déverrouillage de la façade) page 5...
-
Page 24: Radio
Radio Mémorisation et réception des stations Attention Pour syntoniser des stations pendant que vous conduisez, utilisez la fonction BTM (Mémorisation des meilleurs accords) afin d’éviter tout accident. Mémorisation automatique — BTM Appuyez plusieurs fois sur (SOURCE/OFF) jusqu’à ce que « TUNER » apparaisse. Pour changer de bande, appuyez plusieurs fois sur (MODE). -
Page 25: Sélection De Pty
Sélection de PTY Appuyez sur (PTY) pendant la réception FM. Exemple : CDX-GT350MP Le nom du type d’émission en cours apparaît si la station transmet des données PTY. Tournez la molette de réglage jusqu’à ce que le type d’émission souhaité apparaisse, puis appuyez dessus. -
Page 26: Autres Fonctions
Autres fonctions Changement des réglages du Réglage des caractéristiques du son — BAL/FAD/SUB Vous pouvez régler la balance gauche/droite, l’équilibre avant/arrière et le volume du caisson de graves. Appuyez plusieurs fois sur la touche de sélection jusqu’à ce que « BAL », «... -
Page 27: Utilisation D'un Équipement En Option
AUTO OFF Permet d’éteindre automatiquement après un laps de temps souhaité lors de l’arrêt de l’appareil : « NO », « 30S » (secondes), « 30M » (minutes), « 60M » (minutes). REAR/SUB* Permet de commuter la sortie audio : « REAR- OUT »... -
Page 28: Informations Complémentaires
Informations complémentaires Précautions • Si votre véhicule est resté stationné en plein soleil, laissez l’appareil refroidir avant de l’utiliser. • L’antenne électrique se déploie automatiquement. Condensation Si de la condensation s’est formée dans l’appareil, retirez le disque et attendez environ une heure pour que l’appareil puisse sécher ;... -
Page 29: À Propos Des Fichiers Wma
– fichiers avec protection des droits d’auteur Si vous avez des questions ou des problèmes concernant cet appareil qui ne sont pas abordés dans ce mode d’emploi, contactez votre détaillant Sony. Entretien Remplacement de la pile au lithium de la mini-télécommande Dans des conditions d’utilisation normales, la... -
Page 30: Démontage De L'appareil
Démontage de l’appareil Retirez le tour de protection. 1 Retirez la façade (page 5). 2 Pincez les deux bords du tour de protection, puis sortez-le. Retirez l’appareil. 1 Insérez simultanément les deux clés de déblocage jusqu’au déclic. 2 Tirez sur les clés de déblocage pour extraire l’appareil. -
Page 31: Dépannage
Accessoires/appareils en option : pour CDX-GT350MP Câble BUS (fourni avec un câble à broche RCA) : RC-61 (1 m), RC-62 (2 m) Adaptateur d’interface pour iPod : XA-120IP Récepteur HD Radio™ : XT-100HD Il est possible que votre détaillant ne dispose pas de certains accessoires énoncés ci-dessus. - Page 32 La fonction Auto Off est inopérante. L’appareil est en marche. La fonction Auto Off s’active lorsque l’appareil est éteint. t Éteignez l’appareil. Réception radio Impossible de capter des stations. Le son est parasité. • Le raccordement est incorrect. t Raccordez un câble de commande d’antenne électrique (bleu) ou un câble d’alimentation d’accessoires (rouge) au câble d’alimentation de l’amplificateur d’antenne du véhicule...
-
Page 33: Affichage Des Erreurs Et Messages
» Le caractère ne peut pas être affiché sur l’appareil. Si ces solutions ne permettent pas d’améliorer la situation, contactez votre détaillant Sony le plus proche. Si vous devez faire réparer l’appareil en raison d’un problème de lecture de CD, apportez le disque utilisé... - Page 36 Read Troubleshooting in these Operating Instructions. Reset the unit. (Only for models with a RESET button.) Note: Stored data may be erased. Please contact (U.S.A. only); Call http://www.sony.net/ Sony Corporation Printed in Thailand 1-800-222-7669 http://www.SONY.com...