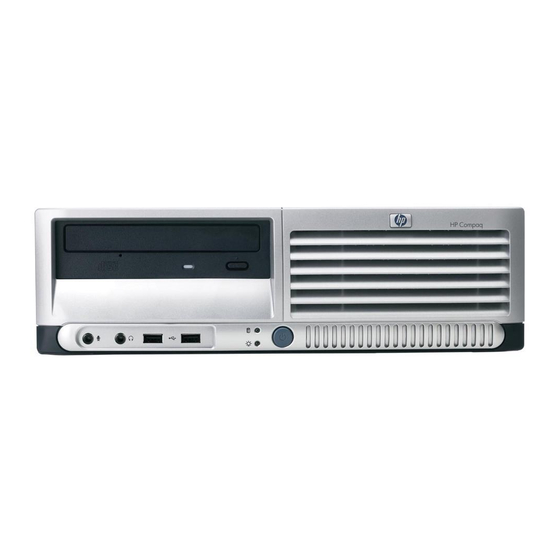
HP Compaq dc7700 Business PC Removal And Replacement Procedures
Hide thumbs
Also See for Compaq dc7700 Business PC:
- Troubleshooting manual (72 pages) ,
- Overview (57 pages) ,
- White paper (26 pages)
Table of Contents
Advertisement
Quick Links
12/16/2018
HP Compaq dc7700 Business PC - Removal and Replacement Procedures -- Small Form Factor (SFF) Chassis | HP® Customer Support
Laptops & 2-in-1s
HP Customer Support - Knowledge Base
Support Home
Products
PRODUCT HOME
HP Compaq dc7700 Business PC - Removal and Replacement Procedures
-- Small Form Factor (SFF) Chassis
Security Clip
Installing a Cable Lock
Installing a Padlock
Cable Connections
DDR2-SDRAM DIMMs
Populating DIMM Sockets
Replacing Memory
Drive Positions
Optical Drive
External 3.5-inch Drive
Primary Hard Drive
Type 1 Battery Holder
Type 2 Battery Holder
Type 3 Battery Holder
Adherence to the procedures and precautions described in this chapter is essential for proper service. After completing all necessary removal and
replacement procedures, run the Diagnostics utility to verify that all components operate properly.
Not all features listed in this guide are available on all computers.
NOTE:
Preparation for Disassembly
1.
Remove/disengage any security devices that prohibit opening the computer (
2.
Close any open software applications.
3.
Exit the operating system.
4.
Remove any diskette, compact disc. or media card from the computer.
5.
Turn off the computer and any peripheral devices that are connected to it.
Turn off the computer before disconnecting any cables. Regardless of the power-on state, voltage is always present
CAUTION:
on the system board as long as the system is plugged into an active AC outlet. In some systems the cooling fan is on even when the
computer is in the "Standby," or "Suspend" modes. The power cord should always be disconnected before servicing a unit.
https://support.hp.com/us-en/product/hp-compaq-dc7700-small-form-factor-pc/3232029/document/c00862331#AbT11
Desktops
Printers
Ink & toner
Software and Drivers
Diagnostic Tools
Displays & accessories
Business solutions
Contact Support
Business Support
Unlocking the Smart Cover Lock
Sign in / Register
Support
External Security Devices
and
).
1/29
Advertisement
Table of Contents

Related Manuals for HP Compaq dc7700 Business PC


Summary of Contents for HP Compaq dc7700 Business PC
- Page 1 12/16/2018 HP Compaq dc7700 Business PC - Removal and Replacement Procedures -- Small Form Factor (SFF) Chassis | HP® Customer Support Sign in / Register Laptops & 2-in-1s Desktops Printers Ink & toner Displays & accessories Business solutions Support...
-
Page 2: Unlocking The Smart Cover Lock
12/16/2018 HP Compaq dc7700 Business PC - Removal and Replacement Procedures -- Small Form Factor (SFF) Chassis | HP® Customer Support Need he Disconnect the power cord from the electrical outlet and then from the computer. trouble Disconnect all peripheral device cables from the computer. -
Page 3: Hood Sensor
12/16/2018 HP Compaq dc7700 Business PC - Removal and Replacement Procedures -- Small Form Factor (SFF) Chassis | HP® Customer Support Need he trouble Hood Sensor Preparation for Disassembly Prepare the computer for disassembly ( Computer Cover Remove the computer cover (... -
Page 4: Installing A Cable Lock
12/16/2018 HP Compaq dc7700 Business PC - Removal and Replacement Procedures -- Small Form Factor (SFF) Chassis | HP® Customer Support Installing a Cable Lock Need he trouble The cable lock may be used to secure the computer access panel to the chassis and, at the same time, secure the computer to a fixed object. -
Page 5: Front Drive Bezels
12/16/2018 HP Compaq dc7700 Business PC - Removal and Replacement Procedures -- Small Form Factor (SFF) Chassis | HP® Customer Support Front Drive Bezels Need he trouble Preparation for Disassembly Prepare the computer for disassembly ( Computer Cover Remove the computer cover ( Remove the drive bezel by pushing the top tab on the right side of the larger front bezel as shown (1) and rotating the drive bezel away from the larger front bezel (2). -
Page 6: Cable Management
12/16/2018 HP Compaq dc7700 Business PC - Removal and Replacement Procedures -- Small Form Factor (SFF) Chassis | HP® Customer Support Item Description Need he trouble 3.5” drive bezel Cable Management The Small Form Factor chassis is a very compact computer and proper routing of the internal cables is critical to the operation of the computer. Follow good cable management practices when working inside the computer. -
Page 7: Ddr2-Sdram Dimms
12/16/2018 HP Compaq dc7700 Business PC - Removal and Replacement Procedures -- Small Form Factor (SFF) Chassis | HP® Customer Support Cable Cable Designator Need he trouble Power Supply Diskette drive Power Supply CPU power, 6-pin Power Supply 1st SATA Hard drive... -
Page 8: Populating Dimm Sockets
12/16/2018 HP Compaq dc7700 Business PC - Removal and Replacement Procedures -- Small Form Factor (SFF) Chassis | HP® Customer Support performing dual channel mode. Need he trouble For proper system operation, the DDR2-SDRAM DIMMs must be: industry-standard 240-pin unbuffered PC2-4300 533 MHz-compliant, PC2-5300 667 MHz-compliant, or PC2-6400 800 MHz-compliant 1.8 volt DDR2-SDRAM DIMMs... -
Page 9: Replacing Memory
12/16/2018 HP Compaq dc7700 Business PC - Removal and Replacement Procedures -- Small Form Factor (SFF) Chassis | HP® Customer Support The system will operate in a higher-performing dual channel mode if the total memory capacity of the DIMMs in Channel A is equal to the total memory Need he capacity of the DIMMs in Channel B. -
Page 10: Pci Expansion Card
12/16/2018 HP Compaq dc7700 Business PC - Removal and Replacement Procedures -- Small Form Factor (SFF) Chassis | HP® Customer Support If you have locked the Smart Cover Lock, restart the computer and enter Computer Setup to unlock the lock. -
Page 11: Pci Express Expansion Card
12/16/2018 HP Compaq dc7700 Business PC - Removal and Replacement Procedures -- Small Form Factor (SFF) Chassis | HP® Customer Support Need he trouble Rotate the slot cover retention latch back in place to secure the expansion card. When you install an expansion card, make sure the metal bracket on the card slides into the slot on the back of the computer NOTE: then press down firmly on the card so that the whole connector seats properly in the expansion card slot. -
Page 12: Pci Riser Card Assembly And Backwall
12/16/2018 HP Compaq dc7700 Business PC - Removal and Replacement Procedures -- Small Form Factor (SFF) Chassis | HP® Customer Support PCI Riser Card Assembly and Backwall Need he trouble Unlocking the Smart Cover Lock If you have locked the Smart Cover Lock, use Computer Setup to unlock the lock (... - Page 13 12/16/2018 HP Compaq dc7700 Business PC - Removal and Replacement Procedures -- Small Form Factor (SFF) Chassis | HP® Customer Support Need he trouble Fan Shroud Remove the fan shroud by lifting it up and out ( Chassis Fan Remove the chassis fan ( Remove the long mounting screw that secures the system board tray to the chassis.
- Page 14 12/16/2018 HP Compaq dc7700 Business PC - Removal and Replacement Procedures -- Small Form Factor (SFF) Chassis | HP® Customer Support Need he trouble Install the serial connector into the new backwall using the two screws that were removed from the serial connector in a previous step. Reconnect the “Serial A”...
-
Page 15: Drive Positions
Make sure personal files on the hard drive are backed up to an external storage device before removing the hard drive. Failure to do so will result in data loss. After replacing the primary hard drive, you will need to run the Restore Plus! CD to load the HP factory-installed files. -
Page 16: External 3.5-Inch Drive
12/16/2018 HP Compaq dc7700 Business PC - Removal and Replacement Procedures -- Small Form Factor (SFF) Chassis | HP® Customer Support Need he trouble Disconnect the power and data cables from the rear of the optical drive. Rotate the drive cage down to its normal position before trying to remove the drive. -
Page 17: Primary Hard Drive
Make sure personal files on the hard drive are backed up to an external storage device before removing the hard drive. CAUTION: Failure to do so will result in data loss. After replacing the primary hard drive, you will need to run the Restore Plus! CD to load the HP factory-installed files. - Page 18 12/16/2018 HP Compaq dc7700 Business PC - Removal and Replacement Procedures -- Small Form Factor (SFF) Chassis | HP® Customer Support To prevent loss of work and damage to the computer or drive: If you are inserting or removing a hard drive, shut down ...
-
Page 19: Fan Shroud
The screws take the place of drive rails. You will need a Torx T-15 screwdriver to remove and re-install the guide screws. HP has provided four extra 6-32 standard guide screws on the front of the chassis, under the computer cover. The 6-32 standard guide screws are silver and are used only for the hard drive. -
Page 20: Front I/O Devices
12/16/2018 HP Compaq dc7700 Business PC - Removal and Replacement Procedures -- Small Form Factor (SFF) Chassis | HP® Customer Support When replacing the shroud, make sure that it does not get caught on the wires from either the fan or the speaker. - Page 21 12/16/2018 HP Compaq dc7700 Business PC - Removal and Replacement Procedures -- Small Form Factor (SFF) Chassis | HP® Customer Support When reinstalling the heatsink, make sure that its bottom has been cleaned with an alcohol wipe and fresh thermal grease has been Need he applied to the top of the processor.
-
Page 22: Power Supply
12/16/2018 HP Compaq dc7700 Business PC - Removal and Replacement Procedures -- Small Form Factor (SFF) Chassis | HP® Customer Support the system board. Need he trouble After installing a new processor onto the system board, always update the system ROM to ensure that the latest version of the NOTE: BIOS is being used on the computer. -
Page 23: Chassis Fan
12/16/2018 HP Compaq dc7700 Business PC - Removal and Replacement Procedures -- Small Form Factor (SFF) Chassis | HP® Customer Support Rotate the drive cage up and disconnect the power cables from all of the drives. Need he trouble Disconnect the power cables from the system board. - Page 24 12/16/2018 HP Compaq dc7700 Business PC - Removal and Replacement Procedures -- Small Form Factor (SFF) Chassis | HP® Customer Support PCI Expansion Card PCI Express Expansion Card Remove all PCI and PCI Express expansion boards ( Need he trouble...
-
Page 25: Drive Clutch Components
12/16/2018 HP Compaq dc7700 Business PC - Removal and Replacement Procedures -- Small Form Factor (SFF) Chassis | HP® Customer Support Need he trouble Heatsink Remove the heatsink from the system board and the system board tray ( To install the system board, reverse the removal procedure. -
Page 26: Power Switch Assembly
12/16/2018 HP Compaq dc7700 Business PC - Removal and Replacement Procedures -- Small Form Factor (SFF) Chassis | HP® Customer Support Need he Hold the drive cage in the upright position while removing the two screws that secure the clutch finger assembly to the drive cage. -
Page 27: Type 1 Battery Holder
12/16/2018 HP Compaq dc7700 Business PC - Removal and Replacement Procedures -- Small Form Factor (SFF) Chassis | HP® Customer Support The lifetime of the lithium battery can be extended by plugging the computer into a live AC wall socket. The lithium battery is... -
Page 28: Type 3 Battery Holder
12/16/2018 HP Compaq dc7700 Business PC - Removal and Replacement Procedures -- Small Form Factor (SFF) Chassis | HP® Customer Support Need he trouble Replace the computer access panel. Plug in the computer and turn on power to the computer. - Page 29 12/16/2018 HP Compaq dc7700 Business PC - Removal and Replacement Procedures -- Small Form Factor (SFF) Chassis | HP® Customer Support Contact us Go now See solutions Need he trouble Country/Region: United States About us Ways to buy Support HP Partners...