
Related Manuals for Sony NEX-7 Instruction Manual - Operations


Summary of Contents for Sony NEX-7 Instruction Manual - Operations
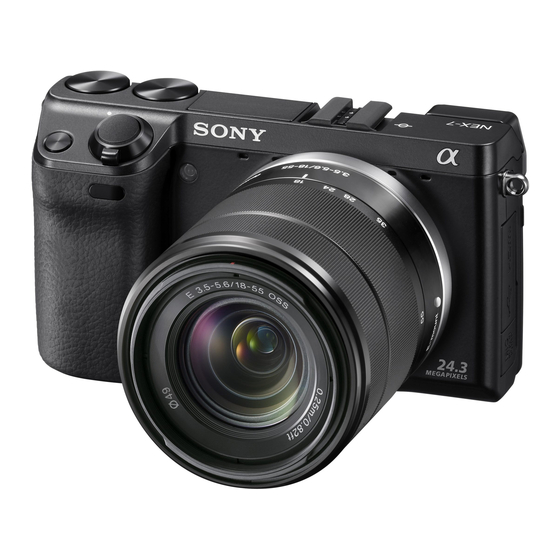
- Page 1 Interchangeable Lens Digital Camera Instruction Manual Operations E-mount NEX-7 Parts and controls Triple-dial-control Custom key assignment AF/MF button/AEL button Others...
-
Page 2: Table Of Contents
Table of contents This [Operations] describes basic operation of the camera, and some advanced operations using the major functions. See [Getting Started] for information on how to set up the camera, and the [Handbook] on the CD-ROM (supplied) for more detailed functions and operations. Getting Started Operations (This manual) - Page 3 Others Menu list... 30 The unique digital shooting functions... 39 α Handbook ... 42 Restriction of the functions ... 43 Number of recordable images... 46 List of icons on the screen... 49 Troubleshooting ... 52 Specifications ... 53 Index ... 56...
-
Page 4: Parts And Controls
Parts and controls All the major parts of your camera, and controls and buttons that are used for recording, playback, and setups are described here. -
Page 5: Recording
Recording Navigation button Selects the adjustment settings for the Triple-dial-control operation. Control dial R Sets the items that appear at the top right of the screen. Control dial L Sets the items that appear at the top left of the screen. ON/OFF (Power) switch Turns on the camera at ON, off the camera at OFF. - Page 6 (Flash pop-up) button* Pops up the built-in flash. Press the button when you want to fire the flash. Push the flash down to retract it when you do not want to fire the flash (page 44). button Selects the drive mode.
-
Page 7: Playback
Playback DISP button Switches the screen display. button Displays the image index. (Playback) button Switches between the shooting mode and the playback mode. (Delete) button Deletes the image when displayed at the lower right corner of the screen. Control wheel Selects the image. -
Page 8: Setup
Setup Soft key A Activates the function displayed at the upper right corner of the screen. Soft key C Activates the function displayed at the center on the right side of the screen. Navigation button Selects the adjustment settings for the Triple-dial- control operation. -
Page 9: Triple-Dial-Control
Triple-dial-control The Triple-dial-control allows you to adjust the various shooting settings quickly and intuitively, using the 3 dials and the Navigation button. -
Page 10: Triple-Dial-Control Operation
Triple-dial-control operation The Triple-dial-control allows you to adjust or set various shooting adjustment items, simultaneously, on a single screen. Even though you can set these functions separately on the menu screen, using the Triple-dial-control, you can adjust these functions interactively on the same screen. - Page 11 Set each settings by turning the control dials L/R and the control wheel. Navigation button Each time you press the button, the item toggles as follows. Exposure Settings Focus Settings White Balance Settings D-Range Settings Creative Style Settings Preventing the dials from operating incorrectly You can lock the control dials L/R and the control wheel.
-
Page 12: Functions Of The Control Dials
Functions of the control dials The control dials and the control wheel have different tasks, depending on the “Settings” currently in effect. See “Settings modes available” (pages 13 to 20) for more details. Exposure Settings* Shutter speed/ Focus Settings (AF mode) Focus Settings (MF mode) -
Page 13: Settings Modes Available
Settings modes available What you can set with each Settings mode are described here. indicates the default setting. Exposure Settings Shooting mode Control dial L Manual Exposure Shutter speed Shutter Priority Shutter speed Aperture Priority Aperture Program Auto Program shift •... -
Page 14: White Balance Settings
Control dial L (Multi) (Center) (Flexible Spot) Focus Settings (MF mode) You can set the enlarged position for manual focusing. You can adjust the scaling with soft key B or C. White Balance Settings The camera uses the 25 AF areas and focuses automatically. -
Page 15: Setting The Custom White Balance
Control dial L AWB (Auto WB) (Daylight) (Shade) (Cloudy) (Incandescent) (Fluor.: Warm White) (Fluor.: Cool White) (Fluor.: Day White) (Fluor.: Daylight) (Flash) (C.Temp./Filter) Adjusts the color temperature depending on the light (Custom) Setting the custom white balance Selecting [Custom] with the control dial L and pressing soft key B will display the [Custom Setup] screen. - Page 16 D-Range Settings Control wheel (Off) (D-Range Opt.) (Auto HDR) Control dial L AUTO, Lv1 – Lv5 (D-Range Opt.) AUTO, 1.0 EV – 6.0 EV (Auto HDR) Set the optimum level. Set the exposure compensation value (–5.0 EV to +5.0 EV). Set the mode.
-
Page 17: Creative Style Settings
To use the D-Range Settings effectively By combining the DRO/Auto HDR manual setting (exposure difference/ DRO-Level) and the exposure compensation, you can control the range of the contrast of light and shadow (gradations) to be reproduced. With DRO, set a DRO-Level to reproduce the shadow side, and set a minus value of exposure compensation to reproduce the light side. - Page 18 (Clear) (Deep) (Light) (Portrait) (Landscape) The saturation, contrast, and sharpness are (Sunset) (Night Scene) (Autumn leaves) (Black & White) (Sepia) Control wheel (Contrast) (Saturation) (Sharpness) For capturing images in a clear tone with limpid colors in the highlighted area, suitable for capturing radiant light.
-
Page 19: Picture Effect Settings
Picture Effect Settings Control dial L (Off) (Toy Camera) (Pop Color) (Posterization) (Retro Photo) (Soft High-key) (Partial Color) (High Contrast Mono.) (Soft Focus) Set the mode. Set the option. Does not use the Picture Effect function. Creates the look of a Toy Camera photo with shaded corners and pronounced colors. -
Page 20: Custom Settings
(HDR Painting) Creates the look of a painting, enhancing the colors (Rich-tone Mono.) (Miniature) Custom Settings You can change the mode of the function assigned to [Custom Settings 1, 2, 3]. Assign the function by selecting MENU t [Setup] t [Function Settings] t [Custom Settings 1, 2, 3]. -
Page 21: Custom Key Assignment
Custom key assignment You can assign the functions you frequently use to any one of 4 keys. This will be handy as you can call up the function by just pressing the key. -
Page 22: Assigning The Functions To The Custom Keys
Assigning the functions to the custom keys You can assign the functions you use frequently to the right key of the control wheel, soft key C, soft key B and AF/ MF button. Select MENU. Select [Setup] t [Custom Key Settings]. Select the function to be assigned. -
Page 23: Functions That Can Be Assigned
Functions that can be assigned The functions that can be assigned to each key are as follows. indicates the default setting. AF/MF button AF/MF control MF Assist Focus Settings Right Key Setting Shoot Mode AF/MF Select Autofocus Mode Autofocus Area Precision Dig. -
Page 24: Soft Key B Setting
Soft key B Setting Shoot Mode AF/MF Select Autofocus Mode Autofocus Area Precision Dig. Zoom Face Detection Smile Shutter Soft Skin Effect Quality Soft key C Setting Shoot Mode Custom [Custom] of [Soft key C Setting] You can set this item when you set [Soft key C Setting] to [Custom]. The selected items are displayed at the bottom of the screen, when you select CUSTOM with soft key C (the center of the control wheel). - Page 25 AF/MF Select Autofocus Mode Autofocus Area Face Detection Smile Shutter Soft Skin Effect Quality ISO ([Custom 1] default setting) White Balance ([Custom 2] default setting) Metering Mode DRO/Auto HDR ([Custom 3] default setting) Picture Effect Creative Style Flash Mode Not set ([Custom 4/5] default setting)
-
Page 26: Af/Mf Button/Ael Button
AF/MF button/AEL button You can switch focusing between auto and manual temporarily with the AF/MF button. You can lock the AE with the AEL button. -
Page 27: Switching The Focusing Mode With The Af/Mf Button
Switching the focusing mode with the AF/MF button The focusing mode switches from auto or direct manual to manual, and from manual to auto. Set the AF/MF/AEL switch lever to AF/MF. The button becomes the AF/MF button. Press the AF/MF button. The focusing mode switches while the button is held down (the default setting). -
Page 28: Locking The Ae With Ael Button
Locking the AE with AEL button Set the AF/MF/AEL switch lever to AEL. The button becomes the AEL (AE lock) button. Focus on the spot for which you want to set the exposure. Press the AEL button. The exposure is locked and Holding the AEL button down, focus on your desired subject and shoot. - Page 29 Others You will find all the setting items available (Menu), certain unique functions, the screen display, specifications, etc. here.
-
Page 30: Menu List
Menu list You can select and use various functions from the menu. When you press MENU, 6 menu items; [Shoot Mode], [Camera], [Image Size], [Brightness/Color], [Playback], and [Setup], appear on the screen. You can set various functions in each item. Items that cannot be set in the context are displayed in gray. - Page 31 Camera Allows you to set shooting functions, such as continuous shooting, self-timer, remote-control shooting, and flash. Drive Mode Flash Mode AF/MF Select Autofocus Area Autofocus Mode Object Tracking Prec. Dig. Zoom Face Detection Face Registration Smile Shutter Soft Skin Effect LCD Display (DISP) Finder Display(DISP) DISP Button(Monitor)
-
Page 32: Image Size
Image Size Allows you to set the image size and aspect ratio, etc. Still Image Size Aspect Ratio Quality 3D Panorama Image Size Panorama Direction Panorama Image Size Panorama Direction Movie File Format Record Setting The interlace or progressive figure varies depending on the countries/regions. 60i/60p or 50i/50p 60i or 50i 60p or 50p... - Page 33 Brightness/Color Allows you to make brightness settings such as metering mode, and color settings such as white balance. Exposure Comp. White Balance Metering Mode Flash Comp. DRO/Auto HDR Picture Effect Creative Style –5.0EV to +5.0EV ISO AUTO/100 - 16000 Auto WB/Daylight/Shade/Cloudy/Incandescent/ Fluor.: Warm White/Fluor.: Cool White/Fluor.: Day White/Fluor.: Daylight/Flash/C.Temp./Filter/Custom/ Custom Setup...
- Page 34 Playback Allows you to set playback functions. Delete Slide Show View Mode Image Index Rotate Protect 3D Viewing Enlarge Image Volume Settings Specify Printing Display Contents Multiple Img./All in Folder/All AVCHD view files Repeat/Interval/Image Type Folder View(Still)/Folder View(MP4)/AVCHD View 6 Images/12 Images Counterclockwise Multiple Img./Cancel All Images/Cancel All Movies(MP4)/Cancel All AVCHD view files...
- Page 35 Setup Allows you to make more detailed shooting settings, or change the camera settings. Shooting Settings AF/MF control Dial/Wheel Lock AF Illuminator Red Eye Reduction FINDER/LCD Setting Live View Display Auto Review Grid Line Sets how the AEL button works. (Hold/Toggle) Sets how the AM/FM button works.
- Page 36 Peaking Level Peaking Color MF Assist MF Assist Time Color Space SteadyShot Release w/o Lens Eye-Start AF Front Curtain Shutter Long Exposure NR High ISO NR Lens Comp.: Shading Lens Comp.: Chro. Aber. Lens Comp.: Distortion Movie Audio Rec Wind Noise Reduct. Enhances the outline of in-focus ranges with a specific color.
- Page 37 AF Micro Adj. Main Settings Menu start Function Settings Custom Key Settings Beep Language Date/Time Setup Area Setting Help Guide Display Power Save LCD Brightness Viewfinder Bright. Display Color Wide Image Playback Display HDMI Resolution CTRL FOR HDMI Finely adjusts the autofocused position, when using the LA-EA2 Mount Adaptor (sold separately).
- Page 38 USB Connection Cleaning Mode Version Demo Mode Reset Default Memory Card Tool Format File Number Folder Name Select Shoot. Folder New Folder Recover Image DB Display Card Space Eye-Fi Setup* Upload Settings * Appears when an Eye-Fi card (sold separately) is inserted in the camera. Do not use an Eye-Fi card inserted in the camera on an airplane.
-
Page 39: The Unique Digital Shooting Functions
The unique digital shooting functions Here we will introduce some of the unique functions achieved by full use of Sony imaging technology. Sweep Panorama/3D Sweep Panorama While you pan or tilt the camera, the camera shoots several images and composes them into a panoramic image. Sweep panorama mode allows you to shoot wide, panoramic scenes that cannot fit all at one time on the screen, without any breaks and discontinuity. -
Page 40: Anti Motion Blur
Tips for shooting a panoramic image Pan the camera in an arc with a constant velocity and in the same direction as the indication on the LCD monitor. [Sweep Panorama] is better suited for still subjects, rather than moving ones. Vertical direction Anti Motion Blur The camera combines 6 shots at high speed into 1 still image, so camera shake... -
Page 41: Manual Movie Recording
The difference between [Anti Motion Blur] and [Hand-held Twilight] functions Just as with [Anti Motion Blur], the camera combines 6 shots into 1 still image with [Hand-held Twilight] in [Scene Selection]. [Hand-held Twilight] is designed to be used when shooting a dark scene, such as a scene shot at night. -
Page 42: Α Handbook
α Handbook Refer to “α Handbook” included on the CD-ROM (supplied) for in-depth instructions on the many functions of the camera. For Windows users Turn on your computer, and insert the CD-ROM (supplied) into the CD-ROM drive. Click [Handbook]. Click [Install]. Start “α... -
Page 43: Restriction Of The Functions
Restriction of the functions Functions available for each shooting mode The functions you can use depend on the selected shooting mode. In the table below, indicates the function available. – indicates the function not available. The functions you cannot use are displayed in gray on the screen. Shoot Mode Exposure Comp. -
Page 44: Flash Modes Available
Flash modes available The flash modes you can select depend on the shooting mode and functions selected. In the table below, not available. The flash modes you cannot select are displayed in gray on the screen. Shoot Mode Flash Off (Intelligent Auto) (Sweep... - Page 45 Notes • The flash modes may be limited also by conditions other than the shooting mode. • Even if you select a workable flash mode, the flash does not fire unless it is raised. • You cannot use the wireless flash with the built-in flash. Use a wireless lighting ratio control flash (sold separately) or a wireless flash (sold separately).
-
Page 46: Number Of Recordable Images
The table shows the approximate number of still images that can be recorded on a memory card formatted with this camera. The values are defined using Sony standard memory cards for testing. The values may vary depending on the shooting conditions. - Page 47 Movies The table below shows the approximate recording times available. These are the total times for all movie files. Continuous recording is possible for approximately 29 minutes per recording. The maximum size of an MP4 movie file is about 2 GB. Capacity Record Setting 60i 24M(FX)
- Page 48 – Using a battery pack that is charged for an hour after the CHARGE lamp goes out. – Using Sony “Memory Stick PRO Duo” media (sold separately). • The measurement method is based on the CIPA standard. (CIPA: Camera & Imaging Products Association) Approx.
-
Page 49: List Of Icons On The Screen
List of icons on the screen Icons are displayed on the screen to indicate the camera status. You can change the screen display using DISP (Display Contents) on the control wheel. Shooting standby Movie recording Playback Display Indication Shoot Mode P A S M Scene Selection Scene Recognition... - Page 50 Display Indication 60i/50i Recording mode of movies 60i/50i 60p/50p 24p/25p 24p/25p Memory card/ Upload 123Min Recordable time of movies Remaining battery 100% Flash charge in progress AF illuminator Live view Does not record sound during movie recording SteadyShot/ SteadyShot warning Control dials L/R Overheating warning...
- Page 51 Display Indication White Balance 7500K A7 G7 DRO/Auto HDR Creative Style Picture Effect Smile detection sensitivity indicator Display Indication Focus status 1/125 Shutter speed F3.5 Aperture value Metered manual ±0.0 Display Indication Exposure ±0.0 compensation ISO400 ISO sensitivity AE lock Shutter speed indicator Aperture indicator...
-
Page 52: Troubleshooting
“α Handbook” (PDF) included on the CD-ROM (supplied). Remove the battery pack, wait for about 1 minute, re-insert the battery pack, then turn on the power. Reset the settings (page 38). Consult your Sony dealer or local authorized Sony service facility. -
Page 53: Specifications
Specifications Camera [System] Camera type: Interchangeable lens digital camera Lens: E-mount lens [Image sensor] Image sensor: 23.5 × 15.6 mm (APS-C format) CMOS image sensor Total pixel number of image sensor: Approx. 24 700 000 pixels Effective pixel number of camera: Approx. - Page 54 Mass (CIPA compliant): Approx. 350 g (12.3 oz) (including battery and “Memory Stick PRO Duo” media) Approx. 291 g (10.3 oz) (camera only) Operating temperature: 0°C to 40°C (32°F to 104°F) File format: Still image: JPEG (DCF Ver. 2.0, Exif Ver. 2.3, MPF Baseline) compliant, DPOF compatible 3D still images: MPO (MPF Extended (Disparity Image))
- Page 55 Filter diameter: 49 mm Dimensions (max. diameter × height): Approx. 62.0 × 60.0 mm (2 1/2 × 2 3/8 inches) Mass: Approx. 194 g (6.8 oz) Compensation effect : Approx. 4 steps The values for equivalent 35 mm- format focal length and angle of view are based on digital cameras equipped with an APS-C sized image sensor.
-
Page 56: Index
Index Numerics 3D Sweep Panorama... 39 AE lock ... 28, 35 AEL... 35 AF Illuminator ... 35 AF Micro Adj..37 AF/MF control ... 27, 35 AF/MF Select... 31 Anti Motion Blur ... 40 Aperture Priority ... 13, 30 Area Setting ... - Page 57 Intelligent Auto ... 30 ISO ... 33 Language... 37 LCD Brightness ... 37 LCD Display (DISP)... 31 Lens Comp.: Chro. Aber... 36 Lens Comp.: Distortion ... 36 Lens Comp.: Shading... 36 Live View Display ... 35 Long Exposure NR ... 36 Manual Exposure ...
- Page 58 White Balance... 14, 33 Wide Image... 37 Wind Noise Reduct... 36 Zoom... 5...
- Page 64 Additional information on this product and answers to frequently asked questions can be found at our Customer Support Website. Printed using VOC (Volatile Organic Compound)-free vegetable oil based ink. ©2011 Sony Corporation Printed in Thailand 4-408-688-11(1)