Table of Contents
Advertisement
Quick Links
Advertisement
Table of Contents
Troubleshooting

Related Manuals for AVERATEC N2700


Summary of Contents for AVERATEC N2700
-
Page 2: Before You Start
This equipment has been tested and found to comply with the limits for a Class B digital device, pursuant to part 15 of the FCC rules. These limits are designed to provide reasonable protection against harmful interference in a residential installation. - Page 3 This device complies with part 15 of the FCC Rules. Operation is subject to the following two conditions : 1. This device may not cause harmful interference. 2. This device must accept any interference received, including interference that may cause undesired operation Before You Start...
-
Page 4: Safety Guideline For Using Lithium Battery
(Danish) ADVARSEL! Lithiumbatteri --- Eksplosionsfare ved fejlagtig håndtering. Udskiftning må kun ske med batteri af same fabrikat og type. Levé det brugte batteri tilbage til leverandøren. (Deutsch) VORSICHT: Explosionsgefahr bei unsachgemäßem Austausch der Batterie. Ersatz nur durch denselben oder einen vom Hersteller empfohlenen gleich-wertigen Typ. Entsorgung gebrauchter Batterien nach Angaben des Herstellers. -
Page 5: Optical Device Drive Notice
Optical Device Drive Notice CAUTION This appliance contains a laser system and is classified as a “CLASS 1 LASER PRODUCT.” To use this model properly, read the instruction manual carefully and keep this manual for your future reference. In case of any trouble with this model, please contact your nearest “AUTHORIZED service station.”... -
Page 6: Macrovision Notice
6. Make sure that the power voltage is within its safety range and has been adjusted properly to the value of 100~240V before connecting the equipment to the power inlet. 7. Place the power cord in a way that people are unlikely to step on it. Do not place anything on the power cord. 8. -
Page 7: Weee Statement
WEEE Statement Before You Start... -
Page 8: Trademarks
Trademarks All trademarks are the properties of their respective owners. Microsoft is a registered trademark of Microsoft Corporation. Windows98/ME, 2000/XP are registered trademarks of Microsoft Corporation. PCMCIA and CardBus are registered trademarks of the Personal Notebook Memory Card International Association. Release History Version Revision Note... -
Page 9: Before You Read
AVERATEC is a trademark or registered trademark of TriGem Computer, Inc. in the United States and/or other countries. All other product and brand names are trademarks of their respective owners. -
Page 10: Table Of Contents
Table of Content Before You Start Regulations Information Safety Guideline for Using Lithium Battery Optical Device Drive Notice Macrovision Notice Safety Instructions WEEE Statement Trademarks Realease History Before You Read Chapter 1 Introduction Unpacking Introduction Chapter 2 Getting Started Connecting to a Power Source Turning On Your Notebook Computer Operating on Battery Power Installing and Removing the Battery Pack... - Page 11 Chapter 6 Running BIOS Setup Entering the BIOS Setup Screen Leaving the BIOS Setup Screen BIOS Action Keys Modifying the BIOS Settings Chapter 7 VGA Utilities Display Devices Display Settings Color Correction Hot Keys Launch Zoom Chapter 8 Troubleshooting Audio Problems Hard Disk Problems Optical Drive Problems Display Problems...
-
Page 12: Chapter 1 Introduction
Chapter Introduction Chapter 1 Introduction... -
Page 13: Unpacking
First, unpack the notebook from the shipping carton and check all items carefully. If any item is damaged or missing, please contact your local dealer immediately. Keep the box and packing materials in case you need to ship the unit in for service in the future. -
Page 14: Introduction
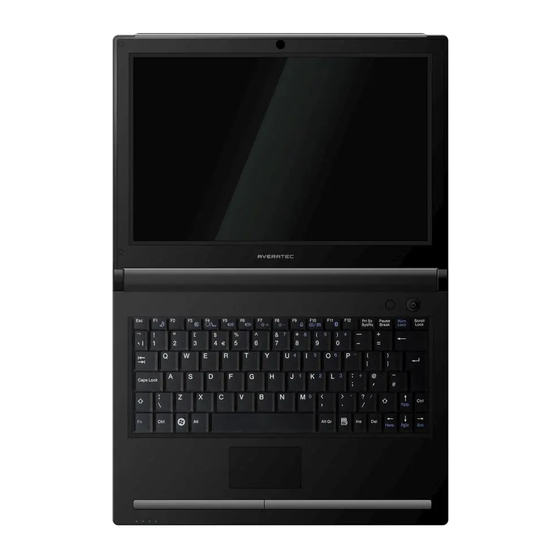
Congratulations on your purchase of the Notebook PC. Your Notebook features the latest advances in portable computing technology. The Notebook’s modular design provides maximum expandability without compromising portability. Opening the LCD Panel WARNING To avoid damage to the display panel: 1. - Page 15 With the LCD screen open, you will see several features important for operating your Notebook computer. Front View To open, lift the top cover (LCD Panel). The image of the top-open view and descriptions below will help you to get familiarized with the main features of your notebook.
- Page 16 1. LCD display 2. Integrated speakers 3. Built-in microphone 4. LED Status Indicator LED Graphic Symbol Blue light indicates the WLAN module is active. Persistent green light indicates the Silent mode is enabled. Blinking green light indicates the Suspend Mode is enabled. Blinking orange light indicates the battery is being charged.
- Page 17 9. Touchpad buttons 10. Touchpad 11. Keyboard 12. Power / Suspend button • Press momentarily to turn on the system. • Press and hold for at least 4 seconds to turn off the system. • Press the power / suspend button again to return from the suspend mode. •...
- Page 18 Left Views 1. Kensington lock 2. Ventilation grill 3. Power jack (DC-in) 4. VGA port 5. Network connector (LAN) Note When using a LAN, please use an EMI Shielding Cable to minimize an inteference when transmitting. 6. ExpressCard (New Card) slot The slot is where Express Card (Type 54) is inserted.
-
Page 19: Chapter 2 Getting Started
Right View 1. USB connectors 2. CD (CD-ROM/CD-RW/DVD-ROM/COMBO/DVD Dual) drive Depending on your model, the optical drive may vary. 3. CD/DVD eject button Chapter 2 Getting Started... - Page 20 Bottom View 1. Expansion compartment 2. Ventilation grill 3. Hard disk drive 4. Battery lock/unlock button 5. Battery pack Chapter 1 Introduction...
-
Page 21: Chapter 2 Getting Started
Chapter Getting Started Chapter 2 Getting Started... -
Page 22: Connecting To A Power Source
Connecting to a Power Source Connecting the AC Adapter A universal AC adapter is provided to supply your computer with power and also charge the computer’s battery pack. The adapter’s AC input voltage can range anywhere from 100 to 240 volts, covering the standard voltages available in almost every country. -
Page 23: Turning On Your Notebook Computer
Turning On Your Notebook Computer Turn on your Notebook by pressing the power button. Hold the button down for a second or two and release. The Power- On Self Test (POST) runs automatically. After the POST is completed, the computer reads the operating system from the hard disk drive into computer memory (this is commonly referred to as “booting”... -
Page 24: Installing And Removing The Battery Pack
The installed battery pack charges automatically any time the computer is connected to the AC adapter and an external power source. It is a good idea to occasionally discharge the battery pack fully to preserve its operating performance. Chapter 2 Getting Started... -
Page 25: Chapter 3 Using The Notebook Computer
Chapter Using the Notebook Computer Chapter 3 Using the Notebook Computer... -
Page 26: Adjusting The Lcd Screen Display
The LCD screen display can be adjusted by the following key combinations. KEYS Fn + F7 Increases the brightness level. Fn + F8 Decreases the brightness level. Fn + F4 Changes Display Mode: LCD-only, CRT-only and LCD&CRT. LCD screens are delicate devices that need careful handling. Please pay attention to the following precautions: •... - Page 27 You can hook up an external monitor through the 15-pin CRT connector. Three configurations are available: • LCD only • CRT only • Simultaneous display of the LCD screen and CRT monitor You can switch between these display configurations by pressing the key combination [Fn] + [F4]. Chapter 3 Using the Notebook Computer...
-
Page 28: The Notebook's Hot Key Controls
The Notebook’s Hot Key Controls Function Keys (Quick Keys) Graphic Symbol Action Fn + F1 Fn + F3 Fn + F4 Fn + F5 Fn + F6 Fn + F7 Fn + F8 Fn + F9 Fn + F10 System Control Enters Suspend Mode. -
Page 29: The Touchpad
The TouchPad The touchpad is a rectangular electronic panel located just below your keyboard. You can use the static-sensitive panel of the touchpad and slit it to move the cursor. You can use the buttons below the touchpad as left and right mouse buttons. The TouchPad is a pressure sensitive device. - Page 30 Double click the Synaptics Pointing Device icon in the task bar. After selecting the Pointer Options tab, set the point speed option in the Motion menu. Then select the Enhance pointer precision option and press the OK button. Chapter 3 Using the Notebook Computer...
- Page 31 Adjusting the touch pad sensitivity Double click the Synaptics Pointing Device icon in the task bar. Select the Device Settings tab, and see if the touch pad program is selected in the Devices menu. Then press the Settings button. Chapter 3 Using the Notebook Computer...
- Page 32 In the left menu, select the Touch Sensitivity item and move the touch sensitivity slider toward ‘Light Touch’. This function allows you to adjust how much force is required to use the touch pad. In general, to increase sensitivity shift the slide bar toward ‘Light Touch’. To decrease sensitivity, shift it toward ‘Heavy Touch’. Note If you want to use other functions for your touch pad, click on each tab and set the option properly.
-
Page 33: The Dvd Dual/Supermulti
The DVD Dual/SuperMulti The features of the DVD Dual/SuperMulti are listed below. • The Audio Play feature allows you to play music CDs • Front panel load/unload button • Supports CD-DA, CD-ROM mode 1 and mode 2, Multi-Session Photo CD¢‚, CD-I/Video CD (pcs.) •... - Page 34 To play a CD disc, follow the instructions listed below. 1. Push the DVD Dual/SuperMulti eject button on the CD drive door. Gently pull the tray all the way out. 2. Carefully lift the CD disc by the edges and make sure the shiny surface is face down (the side with no writing on it). Carefully insert the CD disc onto the tray.
-
Page 35: Power Saving Modes
Power Saving Modes This section contains information on the Notebook’s power system, including the AC Adapter, the battery system, recharging the battery, and tips for conserving battery power. The power system is comprised of two parts, the AC Adapter and the battery system. The AC Adapter converts AC power from a wall outlet to the DC power required by the computer. -
Page 36: Removing The Battery Pack
Removing the Battery Pack To remove the battery pack from its compartment, please refer to Inserting and Removing the Battery Pack. Before using the battery pack for the first time, the Smart Battery IC within the battery pack should be calibrated in order to get accurate reporting of remaining battery life status. - Page 37 To charge the battery, while the battery pack is in the notebook, plug the AC adapter into the notebook and an electrical outlet. The charging time is approximately 4-6 hours when the notebook is turned off and approximately 6-10 hours when the notebook is turned on.
- Page 38 When the pack initially reaches the “Battery Low” state approximately 7 ~ 10 minutes of the usable battery life is left. You will hear an audible beep signal every 15 seconds alerting you to the “Battery Low” status. When the battery power reaches the “Battery Low Low”...
-
Page 39: Adjusting The Brightness
WARNING Danger of explosion if battery is incorrectly replaced. Replace only with the same or equivalent type recommended by the manufacturer. Dispose of used batteries according to the manufacturer's instructions. Never remove the battery pack while the power is on as this may result in data loss when the system loses power. Adjusting the Brightness To adjust the brightness on the LCD screen, press and hold down the [Fn] key in the lower left hand corner of the keyboard and press the [F8] key to reduce the brightness or [F7] to increase the brightness. -
Page 40: Using The Windows
Using the Windows For Windows Vista help, click Start Help and Support icon will open the dialog box. Desktop may vary differently on the software installed in your notebook with different or additional shortcuts. @ @ @ @ @ @ @ @ @ @ @ @ @ @ @ @ @ @ @ @ @ @ @ @ @ @ @ @ @ @ @ @ @ @ @ @ @ @ @ @ @ @ @ @ @ @ @ @ @ @ @ @ @ @ @ @ @ @ @ @ @ @ @ @ @ @ @ @ @ @ @ @ @ @ @ @ @ @ @ @ @ @ @ @ @ @ @ @ @ @ @ @ @ @ @ @ @ @ @ @ @ @ @ @ @ @ @ @ @ @ @ @ @ @ @ @ @ @ @ @ @ @ @ @ @ @ @ @ @ @ @ @ @ @ @ @ @ @ @ @ @ @ @ @ @ @ @ @ @ @ @ @ @ @ @ @ @ @ @ @ @ @ @ @ @ @ @ @ @ @ @ @ @ @ @ @ @ @ @ @ @ @ @ @ @ @ @ @ @ @ @ @ @ @ @ @ @ @ @ @ @ @ @ @ @ @ @ @ @ @ @ @ @ @ @ @ @ @ @ @ @ @ @ @ @ @ @ @ @ @ @ @ @ @ @ @ @ @ @ @ @ @ @ @ @ @ @ @ @ @ @ @ @ @ @ @ @ @ @ @ @ @ @ @ @ @ @ @ @ @ @ @ @ @ @ @ @ @ @ @ @ @ @ @ @ @ @ @ @ @ @ @ @ @ @ @ @ @ @ @ @ @ @ @ @ @ @ @ @ @ @ @ @ @ @ @ @ @ @ @ @ @ @ @ @ @ @ @ @ @ @ @ @ @ @ @ @ @ @ @ @ @ @ @ @ @ @ @ @ @ @ @ @ @ @ @ @ @ @ @ @ @ @ @ @ @ @ @ @ @ @ @ @ @ @ @ @ @ @ @ @ @ @ @ @ @ @ @ @ @ @ @ @ @ @ @ @ @ @ @ @ @ @ @ @ @ @ @ @ @ @ @ @ @ @ @ @ @ @ @ @ @ @ @ @ @ @ @ @ @ @ @ @ @ @ @ @ @ @ @ @ @ @ @ @ @ @ @ @ @ @ @ @ @ @ @ @ @ @ @ @ @ @ @ @ @ @ @ @ @ @ @ @ @ @ @ @ @ @ @ @ @ @ @ @ @ @ @ @ @ @ @ @ @ @ @ @ @ @ @ @ @ @ @ @ @ @ @ @ @ @ @ @ @ @ @ @ @ @ @ @ @ @ @ @ @ @ @ @ @ @ @ @ @ @ @ @ @ @ @ @ @ @ @ @ @ @ @ @ @ @ @ @ @ @ @ @ @ @ @ @ @ @ @ @ @ @ @ @ @ @ @ @ @ @ @ @ @ @ @ @ @ @ @ @ @ @ @ @ @ @ @ @ @ @ @ @ @ @ @ @ @ @ @ @ @ @ @ @ @ @ @ @ @ @ @ @ @ @ @ @ @ @ @ @ @ @ @ @ @ @ @ @ @ @ @ @ @ @ @ @ @ @ @ @ @ @ @ @ @ @ @ @ @ @ @ @ @ @ @ @ @ @ @ @ @ @ @ @ @ @ @ @ @ @ @ @ @ @ @ @ @ @ @ @ @ @ @ @ @ @ @ @ @ @ @ @ @ @ @ @ @ @ @ @ @ @ @ @ @ @ @ @ @ @ @ @ @ @ @ @ @ @ @ @ @ @ @ @ @ @ @ @ @ @ @ @ @ @ @ @ @ @ @ @ @ @ @ @ @ @ @ @ @ @ @ @ @ @ @ @ @ @ @ @ @ @ @ @ @ @ @ @ @ @ @ @ @ @ @ @ @ @ @ @ @ @ @ @ @ @ @ @ @ @ @ @ @ @ @ @ @ @ @ @ @ @ @ @ @ @ @ @ @ @ @ @ @ @ @ @ @ @ @ @ @ @ @ @ @ @ @ @ @ @ @ @ @ @ @ @ @ @ @ @ @ @ @ @ @ @ @ @ @ @ @ @ @ @ @ @ @ @ @ @ @ @ @ @ @ @ @ @ @ @ @ @ @ @ @ @ @ @ @ @ @ @ @ @ @ @ @ @ @ @ @ @ @ @ @ @ @ @ @ @ @ @ @ @ @ @ @ @ @ @ @ @ @ @ @ @ @ @ @ @ @ @ @ @ @ @ @ @ @ @ @ @ @ @ @ @ @ @ @ @ @ @ @ @ @ @ @ @ @ @ @ @ @ @ @ @ @ @ @ @ @ @ @ @ @ @ @ @ @ @ @ @ @ @ @ @ @ @ @ @ @ @ @ @ @ @ @ @ @ @ @ @ @ @ @ @ @ @ @ @ @ @ @ @ @ @ @ @ @ @ @ @ @ @ @ @ @ @ @ @ @ @ @ @ @ @ @ @ @ @ @ @ @ @ @ @ @ @ @ @ @ @ @ @ @ @ @ @ @ @ @... - Page 41 Recycle Bin Used for storing deleted files in case you want to recover and save it in your system. The files will only be deleted from the Recycle Bin permanently only if you empty it by right clicking your mouse and select the “Empty Recycle Bin”. Start Button Allows easy access to all Windows programs.
- Page 42 Taskbar When you open a program, its icon is displayed at the taskbar for you to conveniently move between programs by clicking the relevant button. To add or remove toolbars from the taskbar: right click an empty spot on the taskbar, select Toolbars toolbar you want to add.
- Page 43 Control Panel It is in this area that you can change how Windows looks and works. Click Start interfaces - Classic View. @ @ @ @ @ @ @ @ @ @ @ @ @ @ @ @ @ @ @ @ @ @ @ @ @ @ @ @ @ @ @ @ @ @ @ @ @ @ @ @ @ @ @ @ @ @ @ @ @ @ @ @ @ @ @ @ @ @ @ @ @ @ @ @ @ @ @ @ @ @ @ @ @ @ @ @ @ @ @ @ @ @ @ @ @ @ @ @ @ @ @ @ @ @ @ @ @ @ @ @ @ @ @ @ @ @ @ @ @ @ @ @ @ @ @ @ @ @ @ @ @ @ @ @ @ @ @ @ @ @ @ @ @ @ @ @ @ @ @ @ @ @ @ @ @ @ @ @ @ @ @ @ @ @ @ @ @ @ @ @ @ @ @ @ @ @ @ @ @ @ @ @ @ @ @ @ @ @ @ @ @ @ @ @ @ @ @ @ @ @ @ @ @ @ @ @ @ @ @ @ @ @ @ @ @ @ @ @ @ @ @ @ @ @ @ @ @ @ @ @ @ @ @ @ @ @ @ @ @ @ @ @ @ @ @ @ @ @ @ @ @ @ @ @ @ @ @ @ @ @ @ @ @ @ @ @ @ @ @ @ @ @ @ @ @ @ @ @ @ @ @ @ @ @ @ @ @ @ @ @ @ @ @ @ @ @ @ @ @ @ @ @ @ @ @ @ @ @ @ @ @ @ @ @ @ @ @ @ @ @ @ @ @ @ @ @ @ @ @ @ @ @ @ @ @ @ @ @ @ @ @ @ @ @ @ @ @ @ @ @ @ @ @ @ @ @ @ @ @ @ @ @ @ @ @ @ @ @ @ @ @ @ @ @ @ @ @ @ @ @ @ @ @ @ @ @ @ @ @ @ @ @ @ @ @ @ @ @ @ @ @ @ @ @ @ @ @ @ @ @ @ @ @ @ @ @ @ @ @ @ @ @ @ @ @ @ @ @ @ @ @ @ @ @ @ @ @ @ @ @ @ @ @ @ @ @ @ @ @ @ @ @ @ @ @ @ @ @ @ @ @ @ @ @ @ @ @ @ @ @ @ @ @ @ @ @ @ @ @ @ @ @ @ @ @ @ @ @ @ @ @ @ @ @ @ @ @ @ @ @ @ @ @ @ @ @ @ @ @ @ @ @ @ @ @ @ @ @ @ @ @ @ @ @ @ @ @ @ @ @ @ @ @ @ @ @ @ @ @ @ @ @ @ @ @ @ @ @ @ @ @ @ @ @ @ @ @ @ @ @ @ @ @ @ @ @ @ @ @ @ @ @ @ @ @ @ @ @ @ @ @ @ @ @ @ @ @ @ @ @ @ @ @ @ @ @ @ @ @ @ @ @ @ @ @ @ @ @ @ @ @ @ @ @ @ @ @ @ @ @ @ @ @ @ @ @ @ @ @ @ @ @ @ @ @ @ @ @ @ @ @ @ @ @ @ @ @ @ @ @ @ @ @ @ @ @ @ @ @ @ @ @ @ @ @ @ @ @ @ @ @ @ @ @ @ @ @ @ @ @ @ @ @ @ @ @ @ @ @ @ @ @ @ @ @ @ @ @ @ @ @ @ @ @ @ @ @ @ @ @ @ @ @ @ @ @ @ @ @ @ @ @ @ @ @ @ @ @ @ @ @ @ @ @ @ @ @ @ @ @ @ @ @ @ @ @ @ @ @ @ @ @ @ @ @ @ @ @ @ @ @ @ @ @ @ @ @ @ @ @ @ @ @ @ @ @ @ @ @ @ @ @ @ @ @ @ @ @ @ @ @ @ @ @ @ @ @ @ @ @ @ @ @ @ @ @ @ @ @ @ @ @ @ @ @ @ @ @ @ @ @ @ @ @ @ @ @ @ @ @ @ @ @ @ @ @ @ @ @ @ @ @ @ @ @ @ @ @ @ @ @ @ @ @ @ @ @ @ @ @ @ @ @ @ @ @ @ @ @ @ @ @ @ @ @ @ @ @ @ @ @ @ @ @ @ @ @ @ @ @ @ @ @ @ @ @ @ @ @ @ @ @ @ @ @ @ @ @ @ @ @ @ @ @ @ @ @ @ @ @ @ @ @ @ @ @ @ @ @ @ @ @ @ @ @ @ @ @ @ @ @ @ @ @ @ @ @ @ @ @ @ @ @ @ @ @ @ @ @ @ @ @ @ @ @ @ @ @ @ @ @ @ @ @ @ @ @ @ @ @ @ @ @ @ @ @ @ @ @ @ @ @ @ @ @ @ @ @ @ @ @ @ @ @ @ @ @ @ @ @ @ @ @ @ @ @ @ @ @ @ @ @ @ @ @ @ @ @ @ @ @ @ @ @ @ @ @ @ @ @ @ @ @ @ @ @ @ @ @ @ @ @ @ @ @ @ @ @ @ @ @ @ @ @ @ @ @ @ @ @ @ @ @ @ @ @ @ @ @ @ @ @ @ @ @ @ @ @ @ @ @ @ @ @ @ @ @ @ @ @ @ @ @ @ @ @ @ @ @ @ @ @ @ @ @ @ @ @ @ @ @ @ @ @ @ @ @ @ @ @ @ @ @ @ @ @ @ @ @ @ @ @ @ @ @ @ @ @ @ @ @ @ @ @ @ @ @ @ @ @ @ @ @ @ @ @ @ @ @ @ @ @ @ @ @ @ @ @ @ @ @ @ @ @ @ @ @ @ @ @ @ @ @ @ @ @ @ @ @ @ @ @ @ @ @ @ @ @ @ @ @ @ @ @...
-
Page 44: Chapter 4 Desktop Operation
Chapter Desktop Operation Chapter 4 Desktop Operation... -
Page 45: Audio
Your notebook is capable of providing you with efficient and productive mobile computing, it also has the speed and capacity to service as a desktop system. This chapter discusses those functions of your notebook that are typical of desktop systems. Audio The Notebook’s built-in audio capabilities allow you to take advantage of a wide range of education and entertainment multimedia software. - Page 46 The Notebook is equipped with hot-key volume controls: Pressing the [Fn]+[F6] hot-key combination decreases the audio output volume, press the [Fn]+[F5] hot-key combination increases the audio output volume. Your notebook comes equipped with an integrated sound system capable of providing you with quality audio sound through the builtin speakers or through external speakers connected via the system ports.
-
Page 47: Chapter 5 Internet Connection
Chapter Internet Connection Chapter 5 Internet Connection... -
Page 48: Using A Wired Lan For Connection To The Internet
There are numerous ways to connect to the Internet. This may vary from the user’s working environment as well as system specifications. • Using a wired LAN • Using a wireless LAN Using a Wired LAN for Connection to the Internet For you connect to the Internet, a wired LAN environment normally uses the company’s LAN or a broadband modem. -
Page 49: Using Wireless Lan Network For Connection To The Internet
Using Wireless LAN Network for Connection to the Internet Chapter 5 Internet Connection... -
Page 50: Chapter 6 Running Bios Setup
Chapter Running BIOS Setup Chapter 6 Running BIOS Setup... -
Page 51: Entering The Bios Setup Screen
The Setup Utility is a hardware configuration program built into your computer’s BIOS (Basic Input/Output System). It runs and maintains a variety of hardware functions. It is menu-driven software, which allows you to easily configure and change the settings. The BIOS contains manufacture’s default settings for the computer’s standard operations. However, there are occasions when you may be required to modify the default settings in the BIOS. -
Page 52: Bios Action Keys
BIOS Action Keys Function Key Command Exit Enter Go to Sub Screen General Help Save and Exit <Tab> Select a field Select an item Select an item Lower value Higher value Description Leaves a sub-menu to return to the previous menu OR exits the BIOS setup while saving changes. -
Page 53: Modifying The Bios Settings
Modifying the BIOS Settings The Phoenix BIOS setup main menu is subdivided into sub-menus. Each menu item is described in this section. Under this menu, you may change time/date and view basic processor and system memory information. Chapter 6 Running BIOS Setup... - Page 54 Chapter 6 Running BIOS Setup...
-
Page 55: Chapter 7 Vga Utilities
Chapter VGA Utilities Chapter 7 VGA Utilities... -
Page 56: Chapter 7 Vga Utilities
After you have restarted Windows, click on the Intel® Graphics Media Accelerator Driver for Mobile icon on the lower right corner of the screen. Click on the Graphics Properties to enter the Intel® Graphics Media Accelerator Driver for Mobile display window. You can also click the touchpad or mouse right button and select the Personalize item. -
Page 57: Chapter 7 Vga Utilities
Select the Display Settings option to enter its window display. Click on the Advanced Settings tab to enter Generic PnP Monitor and Mobile Intel® 4 Series Express Chipset Family window display. Select the Intel ® Graphics Media Accelerator Driver for Mobile and click on the Graphics Properties tab. Chapter 7 VGA Utilities... -
Page 58: Display Devices
Display Devices This feature allows you to connect external display devices. Display Settings This feature allows you to adjust the color scheme, resolution, refresh rate for your display. Chapter 7 VGA Utilities... -
Page 59: Color Correction
Color Correction This feature allows you to adjust the color rate of your display. Hot Keys This feature allows you to set the corresponding hot keys in executing the program you frequently use. Chapter 7 VGA Utilities... -
Page 60: Launch Zoom
Launch Zoom This features allows you to enlarge some parts that you would like to see for a clearer view. Chapter 7 VGA Utilities... -
Page 61: Chapter 8 Troubleshooting
Chapter Troubleshooting Chapter 8 Troubleshooting... -
Page 62: Chapter 8 Troubleshooting
Your computer has been fully tested and complies with the system specifications before shipping. However, incorrect operations and/or mishandling may cause problems. This chapter provides a reference for identifying and correcting common hardware and software problems that you may encounter. When you encounter a problem, you should first try to go through the recommendations in this chapter. -
Page 63: Audio Problems
• If external devices such as USB cameras, scanners, printers do not function correctly when connected to the system, it is usually a problem with the device driver or the device itself. Consult the device’s manufacturer first before contacting TriGem USA support center. •... -
Page 64: Hard Disk Problems
• You will need to plug-in an external microphone to the microphone connector to record sound. • Double-click the speaker icon on the lower right corner of the taskbar to see if the microphone has been muted. - Click Options and select Properties. - Select Recording and click the OK button. - Page 65 • should back up your files as soon as possible. • Make sure the source of noise is indeed from the hard drive and not the fan or other devices. • Run Disk Cleanup utility in Windows. [Start > All Programs > Accessories > System Tools > Disk Cleanup] The system will prompt you for what to do.
-
Page 66: Optical Drive Problems
Optical Drive Problems • Try rebooting the system. • The disk is damaged or files are not readable. • After you have inserted a CD-ROM disk, it may take a moment before you can access its content. • The CD may not be properly seated in the tray. Make sure the disk is firmly seated onto the spindle. •... -
Page 67: Display Problems
Display Problems • Make sure the computer is not in the Standby or Hibernate suspend modes. The display is turned off to conserve energy in these modes. • The display resolution should at least be set to at least 1280x800 for optimal viewing. - Go to [Start >... -
Page 68: Cmos Battery Problem
• Please try to make sure the system doesn’t hang up and is still working. • You may be holding the keys down too long while you’re typing. • Keep the keyboard clean. Dust and dirt under the keys could cause them to stick. •... -
Page 69: Memory Problems
Memory Problems • Certain brands of memory module may not be compatible with your system. You should ask your vendor for a list of compatible DIMM. • The memory module may not be installed properly. Go back to Chapter 4 to review the details of this operation. •... -
Page 70: Performance Problems
• Make sure the card is fully inserted; the outer end of the card should be even with the edge of the computer. • Remove and insert the PC card again. • Make sure there is no IRQ conflict with the card. See Windows on-line help for solving IRQ conflicts. •... -
Page 71: Usb2.0 Problems
• Press CTRL+ALT+DEL to see if an application is still responding. • Restart the computer. • This may be normal for Windows when it is processing other CPU-intensive programs in the background or when the system is accessing slow-speed devices such the floppy disk drive. •... -
Page 72: Chapter 9 Specification
Chapter Specification Chapter 9 Specification... -
Page 73: Cpu
• Intel CPU : Core 2 Duo Support, up to 1066MHz, up to 3MB an 6MB L2 Cache Package : PGA Socket P pin out Memory • DDRII 667/800 • DDRII RAM socket * 2 • DDR2 up to 4GB total Core Logic Intel Cantiga GM45 + ICH9M Support DDRII 667/800 SO-DIMM module per channel... -
Page 74: Vga
• Supports DX9 & DX10 • Dynamic Video Memory Technology (DVMT) 4.0 support • WMV9(VC-1) and H.264(AVC)support • Spread spectrum clocking (SSC) support. • Analog CRT DAC interface support. Audio Codec • Support 7.1 multi-channels • Azalia standard support • Windows Vista Premium support IEEE 1394a •... -
Page 75: Card Reader (4 In 1)
Card reader (4 in 1) • Support SD/MMC/MS/MS-Pro card • PCI interface LAN Controller • Supports 10 and 100 Mb/sec. Full/Half Duplex operation • PCI-E interface Wireless LAN (Optional) • PCIe Mini card • 2 antenna supported • IEEE 802.11 a/b/g/Draft-N compliant Chapter 9 Specification... -
Page 76: Keyboard
Keyboard • 84/85 Keys K/B Pointing Device • PS2 Touch Pad with 2 buttons w/o scroll up/down • LCD is 12.1’’ WXGA, resolution 1280X800 • Glare & non Clare panel/Wide view type • Support SATA II HDD, 1 x 2.5’’( 9.5mm) •... -
Page 77: Ac-Adapter
AC-Adapter • Automatics Voltage adjustment between 100 and 240VAC 50/60Hz • 65 Watts, 2pin BIOS • Support Phoenix ACPI 3.0 BIOS Physical Outline • 296 x 227 x 26.3 - 31mm (w/o rubber foot) • 1.95Kg w/ 4 cells battery Camera module support (Optional) •...