Advertisement
Advertisement
Table of Contents

Related Manuals for Kogan 8KG Series


Summary of Contents for Kogan 8KG Series
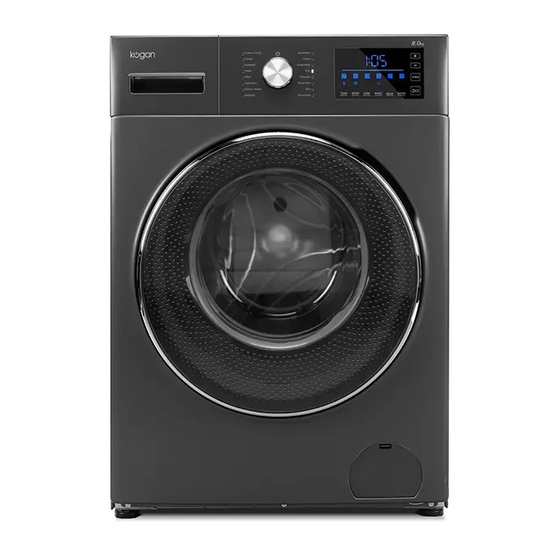
- Page 1 KOGAN 8KG SERIES 9 FRONT LOAD INVERTER WASHING MACHINE KAWFLWASM8A. KAWFLWASM8B...
-
Page 3: Safety And Warnings
Otherwise, an electric shock may occur. • Damaged or loose wires or plugs should not be used, turn off the power, cease use immediately, and contact Kogan.com support. • Do not damage the power cable. Do not damage, alter, forcibly bend, pull, twist, or mishandle the cable. - Page 4 Please unplug the unit during long periods of inactivity, such as going on holidays. • Contact Kogan.com if the machine requires maintenance or repairs. • If the power cord or supply cord is damaged, the manufacturer or its service agent or similarly qualified person must replace it in order to avoid a hazard.
-
Page 5: Product Overview
PRODUCT OVERVIEW Water Inlet Valve Control Panel Power Cord Detergent Case Frame Washer Door Wash/Spin Tub Adjustable Leg Additional components User Guide Water Supply Hose Lid (4 Piece) Spanner... -
Page 6: Installation
INSTALLATION Transportation Two people are required to carry the machine. One person on each side carries the machine by holding the feet of the machine. Location of washer The washing machine must be installed on the ground which must be hard, flat and skid- proof. - Page 7 Unscrew the bolts that are fixed before transportation by spanner (4 bolts). Remove the bolts horizontally. Fit the cover lid into the holes. • Hove the machine installed by o professional. • Keep the removed transit bolts in a safe location; you will need them during moving.
- Page 8 Opening plumb line Fundus Fundus Loosen Tighten Opening plumb Down Screw on the Lock nut by wrench Connecting the Supply Hose Check that the sealing washers are firmly seated. Attach the curved end of the hose to the inlet valve of the washing machine. Tighten the coupling nuts securely by hand.
- Page 9 • Do not use water which is hotter than 50°C. • If your faucet is not suitable, please consult your plumber. Installing Water Supply Hose to the Washer Turn the nut clockwise till the nut turned tight while holding the hose. Hose Turn the nut counterclockwise after turning the faucet off when you want to detach the water supply hose.
- Page 10 Drain Hose Drain Hose 1200mm Drain Hose Stay Prior to first use: Attention! • We recommend the user run the tub clean program before the first time washing. This is to remove any debris or dust from the tub, which would otherwise go onto your washing.
-
Page 11: Control Panel
CONTROL PANEL Knob Button Display Start/Stop: Press the button to start and press again to stop. Power Knob: Turn the power on or off. Please note, when a program has finished, the machine will turn off automatically. Display window introduction: •... - Page 12 Delay button: • Delay the start of your wash using this button. Oxygen Fresh button: • Used to enable the Oxygen Fresh function. • In some pogroms, the oxygen fresh function is limited. Rinse button: • Set the rinse times. •...
-
Page 13: Operation
OPERATION Note: Ensure transit bolts have been removed prior to operation. Failure to do so may result in damage. Normal Clothes Method Preparation • Put the clothes in and close the door. • Put the detergent or washing powder into the detergent box. •... - Page 14 Backpack Wash Method • Turn on the power and select the backpack program. Attention • This mode is only designed for washing the backpack with water. • Please take off any loose items or decorations before washing and wrap the strops tightly.
- Page 15 Cancel the buzzer • Turn of the buzzer when the program finishes. Set/Cancel method • Turn on the power and press the "start/stop" button until the buzzer sounds. When releasing the button, "cancel the buzzer" function will be shown and activated. If you repeat this, the setting will be cancelled.
- Page 16 LOCK AND UNLOCK METHOD Door Lock When the machine is working, the door locks automatically. It cannot be opened until the cycle is stopped. See below, Unlock When the machine is working, press the "start/stop" button. The door can be unlocked after the inner tub stops spinning.
- Page 17 • For the concentrated liquid detergents, dilute it with water by half and then pour into the detergent box. Softener • Put into the detergent drawer before washing, it will be poured into the machine automatically during the last round of rinsing. •...
- Page 18 PROGRAMS / MODES Washing Programs (quick reference) Cotton Eco Eco Cotton Wash Cotton Regular Cotton Wash MixWash Cotton and Synthetics Mixed Wash Jeans Wash Jeans Wool Wool Wash* Synthetic Synthetic Wash Winter clothes Down Jacket Wash* Quick wash Small Wash or Only Slightly Dirty Wash Setting for Clothes with a Deep Colour Colours or a Light Colour...
- Page 19 Washing Programs (detailed guide) Program Cotton Eco Application Used for energy efficient washing. Default time 5:39 Max. load (kg) Rated capacity Washing time (min) Rated capacity Temperature (°C) 40° C Rinse (cycles) Spin time (minutes) Spin speed (rpm) 1400rpm Stain Program Cotton Application...
- Page 20 Program Mix wash Application For a mixed load of synthetic and cotton textiles. Default time 1:03 Max. load (kg) ≤6kg Washing time (min) 15 minutes Temperature (°C) Default 30° C Rinse (cycles) 2 (0-6) Spin time (minutes) 6 minutes (8 min @ 1200 rpm; 9 min @ 1400 rpm;...
- Page 21 Program Jeans Application For denim jeans or similar hard- wearing cotton clothing. Default time 1:08 Max. load (kg) ≤5kg Washing time (min) 20 minutes Temperature (°C) Default 30° C (Cold-10-20-30-40) Rinse (cycles) 2 (0-6) Spin time (minutes) 6 minutes (8 min when speed is 1200 rpm; remaining time will be accumulated) Spin speed (rpm) Default 1000rpm...
- Page 22 Program Synthetics Application For synthetic or synthetic blend textiles. Default time 1:07 Max. load (kg) ≤6kg Washing time (min) 20 minutes Temperature (°C) Default 30° C (Cold-10-20-30-40-60) Rinse (cycles) 2 (2-6) Spin time (minutes) 5 minutes (6 min @ 1000 rpm; remaining time will be accumulated) Spin speed (rpm) Default 800rpm...
- Page 23 Program Backpack Application For washing backpacks that can be washed in water. Default time 1:51 Max. load (kg) ≤3kg Washing time (min) 50 minutes Temperature (°C) Default 40° C (Cold-10-20-30-40) Rinse (cycles) 3 (0-6) Spin time (minutes) 3 minutes Spin speed (rpm) Default 800rpm (400-600-800) Stain...
- Page 24 Program Underwear Application Used for washing underwears. Default time 1:21 Max. load (kg) ≤3kg Washing time (min) 20 minutes Temperature (°C) Default 30° C (Cold-10-20-30-40-60) Rinse (cycles) 3 (0-6) Spin time (minutes) 3 minutes (6 min @ 1000 rpm; remaining time will be accumulated) Spin speed (rpm) Default 800rpm (400-600-800-1000)
- Page 25 Program Rinse + Spin Application Separate rinse program with spin. Default time 0:21 Max. load (kg) ≤6kg Washing time (min) Temperature (°C) Rinse (cycles) 1 (0-6) Spin time (minutes) 6 minutes (8 min @ 1200 rpm; 9 min @ 1400 rpm; remaining time will be accumulated) Spin speed (rpm) Default 1000rpm...
- Page 26 Program Drum Application A drum cleaning program designed for use without laundry items. Default time 2:19 Max. load (kg) Washing time (min) 110 minutes Temperature (°C) 80° C Rinse (cycles) Spin time (minutes) 3 minutes Spin speed (rpm) 800rpm Stain...
-
Page 27: Cleaning And Care
CLEANING & CARE • To ensure the long life of the machine, perform regular cleaning and maintenance. • Ensure the filter is emptied often. • Always unplug the power before cleaning or performing general maintenance. Machine Body • Please use a soft cloth to clean the washing machines body after washing every time. - Page 28 Cleaning the Inlet Valve Please note, this should be completed once per year: Take out the inlet pipe. Take out the filter screen. Use a toothbrush to clean the filter screen and then assemble it again. Connect the inlet pipe after cleaning. Valve Cleaning the Tub It is recommended that this is completed once a month.
- Page 29 Cleaning the Pump Filter It is recommended that this is completed once a month. Insert a coin into the groove of the pump and press it. The filter cover can then be opened. If there is hot water in the machine, please wait for it to cool before opening the filter.
-
Page 30: Specifications
SPECIFICATIONS Rated wash capacity 8.0kg Rated spin capacity 8.0kg Rated dry capacity Rated dry power Max current Rated voltage 230-240V-50Hz Rated power 2000W Washing noise <54dB Spin noise <75dB Energy efficiency stars Water efficiency 4 stars Water consumption per wash Annual energy consumption 265kWh Washing performance... -
Page 31: Troubleshooting
TROUBLESHOOTING Fault Code Issue Inspection point Solution • Check the power outlet has power. • Check the outlet is turned on. Press the • Check if the house power has Start/Pause been tripped or is not on. Functioning button • Check the leakage protector switch. - Page 32 "Start/Pause" to restart. Press "Start/Pause" to proceed, if the Other code Alarm issue persists, contact Kogan.com support. No-Fault Code Condition Reason • The transit bolts have not been removed, view the Transit Bolts section of the manual Shaking/noisy/vibrating •...
- Page 33 • If the clothes are distributed unevenly, the washing machines will automatically odd water to stay in balance. • The rest time is calculated based on 15L/min inflow. So Residual time change according to different water pressure, the time will be longer or shorter.
- Page 34 NOTES...
- Page 35 NOTES...
- Page 36 Need more information? We hope that this user guide has given you the assistance needed for a simple set-up. For the most up-to-date guide for your product, as well as any additional assistance you may require, head online to help.kogan.com...