Table of Contents
Advertisement
™
Table of Contents
Section Code
Section
1
1
1
1
1
1
1
1
1
1
Mechanical Procedures
2
Part Replacement
4
7
8
Nautilus, Inc., www.NautilusInc.com, 5415 Centerpoint Parkway, Groveport, OH 43125 U.S.A. - Customer Service: North America (800) 605-3369, csnls@nautilus.com | outside U.S.
ORIGINAL MANUAL - ENGLISH VERSION ONLY
8027842.081520.A
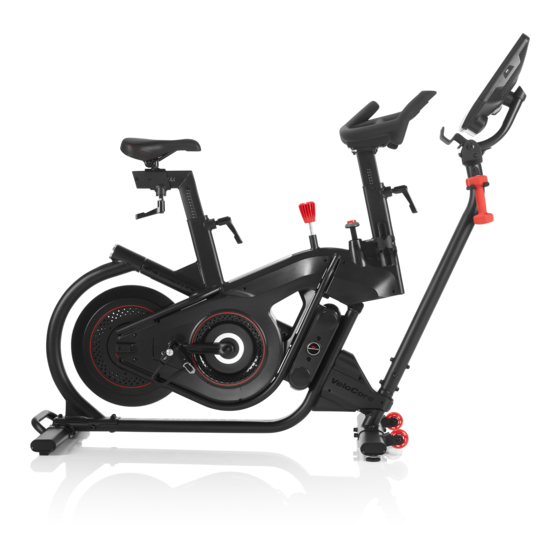
VeloCore
Bikes
™
™
Service Manual
Page Number
3
5
5
6
7
7
7
9
9
11
16
24
37
40
1
Service Manual
8027841.081520.A
Advertisement
Table of Contents

Related Manuals for Nautilus Bowflex VeloCore


Summary of Contents for Nautilus Bowflex VeloCore
-
Page 1: Table Of Contents
Replace the Crank Arm Replace the Resistance PCB Replace the Speed Sensor Nautilus, Inc., www.NautilusInc.com, 5415 Centerpoint Parkway, Groveport, OH 43125 U.S.A. - Customer Service: North America (800) 605-3369, csnls@nautilus.com | outside U.S. ORIGINAL MANUAL - ENGLISH VERSION ONLY 8027842.081520.A... - Page 2 This icon means a potentially hazardous situation which, if not avoided, could result in death or serious injury. Read and understand all Warnings on this machine. Nautilus, Inc., www.NautilusInc.com, 5415 Centerpoint Parkway, Groveport, OH 43125 U.S.A. - Customer Service: North America (800) 605-3369, csnls@nautilus.com | outside U.S. www.nautilusinternational.com | Printed United States and other countries. | The Bluetooth ®...
-
Page 3: Fcc Compliance
SAFETY WARNING LABELS AND SERIAL NUMBER Console instructions WARNING! machine. • Keep children and pets away. FCC Compliance void the user’s authority to operate the equipment. This product complies with part 15 of the FCC rules. Operation is subject to the following two conditions: (1) This device may not cause harmful interference, and (2) this device must accept any interference received, including interference that may cause undesired operation. - Page 4 SPECIFICATIONS 16” monitor 22” monitor Machine Weight without Dumbbells: 39.6 cm (15.6”) 54.6 cm (21.5”) 133.6 cm (52.6”) 9290.2 cm (1440 in Power Requirements Input Voltage: 151.8 cm 61.2 cm Output Voltage: (59.8”) (24.1”) center. 140.3 cm (55.3”) 151.8 cm 61.2 cm (59.8”) (24.1”)
-
Page 5: Maintenance
MAINTENANCE done. Worn or damaged components must be repaired or replaced immediately. Only manufacturer supplied components can be used to maintain and repair the equipment. Disconnect all power to the machine before you service it. Daily: NOTICE: Weekly: Note: Monthly or after 20 hours:... -
Page 6: Moving/Storing The Machine
The machine may be moved by one or more persons depending on their physical abilities and capacities. Make sure that you and Then rotate rollers. Push the machine into position. NOTICE: the computer operation. For safe storage of the machine, remove the power adapter and place in a secure location. -
Page 7: Emergency Stop
To stop the pedals immediately, push down hard on the Emergency Brake/Resistance Adjustment This bike cannot stop the Pedals independently of the Flywheel. Reduce the pace to slow the Flywheel and Pedals to a stop. Do not dismount the bike until the Pedals have come to a complete stop. - Page 8 If a USB Device is attached to the USB Port, the Port will attempt to charge the Device. Depending on the amperage of device, the power supplied from the USB Port may not be enough to operate the Device and charge it at the same time. ®...
-
Page 9: Mounting/Dismounting
Care should be used when mounting or dismounting the machine. Before mounting or dismounting the machine, be sure it is stabilized in the upright position with the Lean Lock Knob completely cause injury or damage to the equipment. Note: tightened. Pull the handle out to disengage and turn so that it points down, then release. Step off the machine before you adjust the seat. - Page 10 Foot pedals that are equipped for cycling shoes with cleats provide secure footing on the mechanism for the pedals and cleats (shoes). release. shoes with “Standard 2-Hole MTB SPD Cleat Mounts” (MTB SPD = Mountain Bike Shimano Pedaling Dynamics). 1. Be sure that the arrow on top of the Pedal points forward. 2.
-
Page 11: Demonstration Mode
To lock the Flywheel, turn the Then rotate the Emergency Brake/Resistance For safe storage of the machine, remove the power supply and place in a secure location. Be sure the machine is stabilized in the as described until the Flywheel is locked. Place the machine in a secure location away from children and pets. 0% - 100% range. - Page 12 Things to Check Solution No display/partial display/unit Check electrical (wall) outlet will not turn on plugged into the power inlet connector. Replace adapter or connection at unit connections/orientation connector should line up and snap into place. damage stuck in Pause mode Speed Sensor No Speed/RPM reading orientation...
- Page 13 Things to Check Solution Check pedal to crank pedal/ Pedals seem to skip or connection slip with a sudden increase in connection Clicking sound when pedaling Check pedal to crank connection pedals. Click, tick or knocking sound Tightly secure all hardware. Seat post movement Check adjustment handle Be sure the adjustment handle is securely tightened.
- Page 14 Maintenance Parts FF GG...
- Page 15 Console Drive Pulley Idler Pulley Flywheel Speed Sensor Magnet (5) Console Mast Speed Sensor G Seat Stem MM Power Inlet Seat with U.S./Canada machines) Seat End Cap PCB, Tillt Sensor Main Frame End Cap, Console Mast Transport Handle AA Main Shroud, Right Static Bumper Shroud BB Pivot Shroud, Right CC Fender, Right...
-
Page 16: Adjust The Belt Tension
Warnings on this machine. Nautilus, Inc., www.NautilusInc.com, 5415 Centerpoint Parkway, Groveport, OH 43125 U.S.A. - Customer Service: North America (800) 605-3369, csnls@nautilus.com | outside U.S. www.nautilusinternational.com | Printed States and other countries. | ORIGINAL DOCUMENT - ENGLISH VERSION ONLY This icon means a potentially hazardous situation which, if not avoided, could result in death or serious injury. - Page 17 Note: Locked position the locked position. Be sure the bike is stabilized in the upright position bike may become unbalanced and fall, which can cause injury or damage to the equipment. in and cause injury. pedals move normally with no skipping (slip), the tension is correct. Using a #2 Phillips Screwdriver, remove 3 screws (a) that attach...
- Page 18 Main shroud Center disc shroud Check the tension: pulleys and measure the distance. The Drive Belt should have only should turn only 90 degrees (1/4 turn, to vertical).
- Page 19 Using a 13 mm open end wrench, loosen the inner Nut on the Tensioner pivot bolt Tensioning Bolt. Using a 13 mm open end wrench or socket and wrench, adjust the mount plate outer Nut on the Tensioning Bolt: If the Drive Belt is too loose—turn the Nut on the Tensioning Bolt clockwise.
- Page 20 Warnings on this machine. Nautilus, Inc., www.NautilusInc.com, 5415 Centerpoint Parkway, Groveport, OH 43125 U.S.A. - Customer Service: North America (800) 605-3369, csnls@nautilus.com | outside U.S. www.nautilusinternational.com | Printed States and other countries. | ORIGINAL DOCUMENT - ENGLISH VERSION ONLY This icon means a potentially hazardous situation which, if not avoided, could result in death or serious injury.
- Page 21 Note: Locked position the locked position. Be sure the bike is stabilized in the upright position bike may become unbalanced and fall, which can cause injury or damage to the equipment. To adjust the bike’s lean tension, go to step 2. To adjust the bike’s vertical alignment, go to step 8.
- Page 22 Unlocked position To increase resistance— To decrease resistance— – same amount and direction as the upper cup. Check the lean tension. – achieved.
- Page 23 Unlocked position – – 11. Re-install the parts that were removed in reverse order. 12. Final Inspection Inspect your machine to ensure that all hardware is tight and components Do not use until the machine has been fully assembled and inspected for correct performance in accordance with the Owner’s Manual.
-
Page 24: Replace The Crank Arm
This icon means a potentially hazardous situation which, if not avoided, could result in death or serious injury. Read and understand all Warnings on this machine. Nautilus, Inc., www.NautilusInc.com, 5415 Centerpoint Parkway, Groveport, OH 43125 U.S.A. - Customer Service: North America (800) 605-3369, csnls@nautilus.com | outside U.S. www.nautilusinternational.com | Printed ORIGINAL DOCUMENT - ENGLISH VERSION ONLY This icon means a potentially hazardous situation which, if not avoided, could result in death or serious injury. - Page 25 Note: Locked position Be sure locked position. Be sure the bike is stabilized in the upright position with If the Lean Lock mechanism is not engaged, the bike may become unbalanced and fall, which can cause injury or damage to the equipment. Note: The Left Pedal is reverse-threaded.
- Page 26 Using a 16mm socket and wrench, remove the Crank Nut under the threaded Cap. Crank Nut Crank Shaft Puller is in the correct position, only 1-2 threads on the outer portion (CP2) Note: old parts. Crank Shaft ® ® Crank Nut NOTICE: ®...
- Page 27 10. To reinstall a Pedal, s and the Pedal does not turn smoothly into the Crank Arm, make sure that the threads are aligned correctly. Be sure that the Pedal is going on remove the Pedal and start again. Note: The Left Pedal is reverse-threaded. 15mm 13.
- Page 28 Warnings on this machine. Nautilus, Inc., www.NautilusInc.com, 5415 Centerpoint Parkway, Groveport, OH 43125 U.S.A. - Customer Service: North America (800) 605-3369, csnls@nautilus.com | outside U.S. www.nautilusinternational.com | Printed States and other countries. | ORIGINAL DOCUMENT - ENGLISH VERSION ONLY This icon means a potentially hazardous situation which, if not avoided, could result in death or serious injury.
- Page 29 Note: Locked position Be sure locked position. Be sure the bike is stabilized in the upright position with If the Lean Lock mechanism is not engaged, the bike may become unbalanced and fall, which can cause injury or damage to the equipment. NOTICE: operation.
- Page 30 I/O cable I/O cable Tilt sensor PCB Tilt sensor PCB mast mount. Lower wiring Lower wiring Using a 17 mm wrench or nutdriver, remove the thin Nut that harness harness Using a #2 Phillips screwdriver, remove the screws that attach Power inlet Power inlet Ziptie...
- Page 31 15. Re-install all remaining parts that were removed in reverse order. NOTICE: computer operation. 16. Final Inspection Inspect your machine to ensure that all hardware is tight and components Do not use until the machine has been fully assembled and inspected for correct performance in accordance with the Owner’s Manual.
- Page 32 Warnings on this machine. Nautilus, Inc., www.NautilusInc.com, 5415 Centerpoint Parkway, Groveport, OH 43125 U.S.A. - Customer Service: North America (800) 605-3369, csnls@nautilus.com | outside U.S. www.nautilusinternational.com | Printed States and other countries. | ORIGINAL DOCUMENT - ENGLISH VERSION ONLY This icon means a potentially hazardous situation which, if not avoided, could result in death or serious injury.
- Page 33 Note: Locked position Be sure the locked position. Be sure the bike is stabilized in the upright position bike may become unbalanced and fall, which can cause injury or damage to the equipment. Remove the Console mast cover and Console Mast End Cap. NOTICE: two people.
- Page 34 NOTICE: operation. NOTICE: people.
- Page 35 NOTICE: NOTICE: to remove all slack. NOTICE: This step may Do not crimp the onto the mast mount. Hand tighten Mast. NOTICE: Console Mast. Using a #2 Phillips screwdriver, re-install the Console. Install the Console Mast End Cap and Console mast cover. NOTICE: computer operation.
- Page 36 15. Final Inspection Inspect your machine to ensure that all hardware is tight and components Do not use until the machine has been fully assembled and inspected for correct performance in accordance with the Owner’s Manual.
-
Page 37: Replace The Resistance Pcb
Warnings on this machine. Nautilus, Inc., www.NautilusInc.com, 5415 Centerpoint Parkway, Groveport, OH 43125 U.S.A. - Customer Service: North America (800) 605-3369, csnls@nautilus.com | outside U.S. www.nautilusinternational.com | Printed States and other countries. | ORIGINAL DOCUMENT - ENGLISH VERSION ONLY This icon means a potentially hazardous situation which, if not avoided, could result in death or serious injury. - Page 38 Note: Locked position Be sure the locked position. Be sure the bike is stabilized in the upright position bike may become unbalanced and fall, which can cause injury or damage to the equipment. Using a #2 Phillips Screwdriver, remove 3 screws (a) that attach and then the top screws.
- Page 39 long #2 Phillips screwdriver, remove the indicated hardware (arrows) and remove the old Resistance PCB. Resistance PCB NOTICE: Resistance Cable Using a long #2 Phillips screwdriver, attach the new Resistance NOTICE: Re-install all remaining parts that were removed in reverse order. NOTICE: Final Inspection Inspect your machine to ensure that all hardware is tight and components...
-
Page 40: Replace The Speed Sensor
This icon means a potentially hazardous situation which, if not avoided, could result in death or serious injury. Read and understand all Warnings on this machine. Nautilus, Inc., www.NautilusInc.com, 5415 Centerpoint Parkway, Groveport, OH 43125 U.S.A. - Customer Service: North America (800) 605-3369, csnls@nautilus.com | outside U.S. www.nautilusinternational.com | Printed ORIGINAL DOCUMENT - ENGLISH VERSION ONLY This icon means a potentially hazardous situation which, if not avoided, could result in death or serious injury. - Page 41 Note: Locked position Be sure the locked position. Be sure the bike is stabilized in the upright position bike may become unbalanced and fall, which can cause injury or damage to the equipment. Using a #2 Phillips Screwdriver, remove 3 screws (a) that attach and then the top screws.
- Page 42 Cable support loop NOTICE: Speed sensor wire Resistance cable harness Speed sensor Using a #2 Phillips screwdriver, remove the indicated hardware Speed sensor Using a #2 Phillips screwdriver, install the new Speed Sensor. loop. NOTICE: Re-install all remaining parts that were removed in reverse order. NOTICE: Final Inspection Inspect your machine to ensure that all hardware is tight and components...