
Related Manuals for HTC GL 40 D


Summary of Contents for HTC GL 40 D
- Page 1 MANUAL HTC GL 40 D Translation of manual in original language www .htc-floorsystems.com/support...
- Page 2 Always specify the model and serial number when asking questions about your product. Trademarks HTC is a trademark owned by HTC Sweden AB. Other names and products mentioned in this manual may be registered trademarks owned by the relevant companies.
- Page 3 Sweden +46 (0)121-29400 Type of equipment: Dust extractor Make: Model: HTC GL 40 D Year of manufacture: See machine name plate Serial number: See machine name plate As the manufacturer, we hereby declare under our sole responsibility that the above product with serial numbers from 2010 onward conforms to the applicable regulations in directives MD 2006/42/EC, EMC 2004/108/EC and LVD 2006/95/EC.
-
Page 5: Table Of Contents
HTC GL 40 D Table of contents Introduction 1.1 General Information ............1.2 Responsibility ..............1.3 Manual ................1.3.1 Safety Instructions – Explanation of Symbols ..1.4 Transportation ..............1.5 On delivery ..............1.6 Unpacking the dust extractor ........... 1.7 Machine name plate ............ - Page 6 Table of contents HTC GL 40 D Maintenance and repairs 5.1 General Information ............5.2 Cleaning ................5.3 Daily ................5.3.1 Check the absolute filter ........5.3.2 Check the sock filter ........... 5.4 Every week ..............5.4.1 Check the side duct fan ........
-
Page 7: Introduction
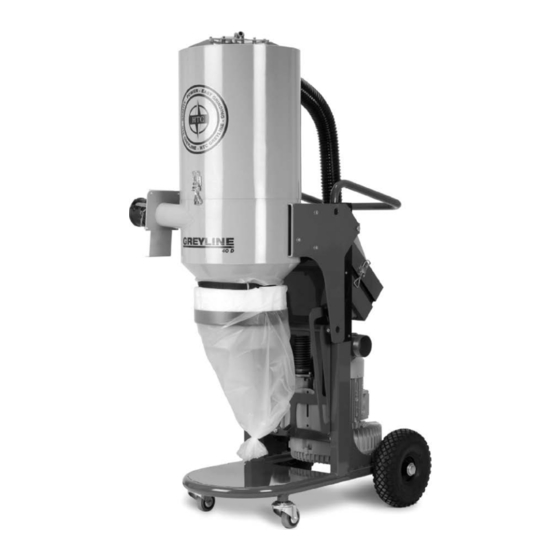
Introduction General Information The HTC GL 40 D (Greyline 40 Dust extractor) is a dust extractor that is best used together with HTC's smaller grinding machines in connection with dry grinding of stone and concrete floors, and in accordance with HTC's recommendations. The HTC GL 40 D is constructed with sock filter and absolute filter. -
Page 8: Transportation
Introduction HTC GL 40 D Note! This symbol means Note! and indicates a potential risk of material damage in the event of incorrect use of the machine. If you see this symbol next to a section of text, you must pay particular attention when reading through the text and not carry out any operations of which you are unsure. -
Page 9: Unpacking The Dust Extractor
HTC GL 40 D Introduction • Dust extractor • Manual disc • Suction hose with couplings • Locking key for control cabinet Unpacking the dust extractor Warning! Read carefully through the safety instructions and user manual before using the equipment. -
Page 10: Handling And Storage
Introduction HTC GL 40 D Year of manufacture Power (kW) Voltage (V) Current (A) Frequency (Hz) Weight (kg) Address field Handling and storage The dust extractor should be stored in a heated, dry area when not in use. Otherwise it may be damaged by condensation and cold. -
Page 11: Safety
HTC GL 40 D Safety Safety General Information This chapter contains all the warnings and notes that must be considered for the dust extractor. Warnings Warning! Read carefully through the safety instructions and user manual before using the equipment. Warning! Always use hearing protection when using the dust extractor. -
Page 12: Notes
Make sure your hands are not in the way when the upper cylinder sections tips against the handle. Notes Note! The dust extractor is best used together with HTC's grinding machines in connection with dry grinding of stone and concrete floors, and in accordance with HTC's recommendations. Note! - Page 13 HTC GL 40 D Safety Note! For the CE marking to be valid, the instructions in this manual must be followed. Note! The dust extractor should be stored in a dry, warm (above zero) location when not in use. Note! If the dust extractor is stored in a cold location (below zero), it must be placed in a warm location (above zero) for at least two hours before use.
-
Page 14: Machine Description
Machine description General machine description HTC GL 40 D is constructed from a number of main components, such as chassis, electrical cabinet, etc, see Figure 3-1, page 8 and Figure 3-2, page 9. Several different designs are available, adapted for different markets. For model variants, see the table in Technical data, page 33. -
Page 15: Description Of Controls - Keypad
HTC GL 40 D Machine description Figure 3-2. The back of the dust extractor Valve handle Handle Electrical connection Side duct fan Outlet, ventilation hose connection Guide Valve Description of controls - Keypad The picture below shows the keypad for the dust extractor. - Page 16 Machine description HTC GL 40 D Figure 3-3. Keypad I (ON)- Start the dust extractor: Press the button to start the dust extractor. LED Light- Tripped motor protection: When the light is illuminated, the dust extractor's motor protection has tripped. To reset the motor protection, see Resetting the motor protection, page 22.
-
Page 17: Usage
HTC GL 40 D Usage Usage General Information The following section describes the different positions for the dust extractor and how to change the waste bag (Longopac). The section also deals with the operation of the dust extractor. Warning! The dust extractor may only be used or repaired by personnel who have received the requisite theoretical and practical training and who have read the user manual. -
Page 18: The Dust Extractor's Operating Position
Usage HTC GL 40 D When the dust extractor is in the operating position, and you want to lower it to the transport position, do as follows: • Lift up the cylinder packet a little and then allow the whole guide packet, including the cylinder packet, to drop down in the guide slot provided. -
Page 19: Lower The Dust Separator To The Service Position
HTC GL 40 D Usage Figure 4-2. Operating position 4.2.3 Lower the dust separator to the service position The dust extractor can be lowered to the service position by releasing the upper cylinder section from the lower cylinder section, see Figure 4-3, page 14. -
Page 20: Lifting The Machine
Usage HTC GL 40 D 1. Release the two quick fasteners (see position A in Figure 4-3, page 14) that hold the absolute filter in place. Let the holder and hose hang freely behind the side duct fan, see Figure 4-3, page 14. 2. Release the quick fastener (see position B in Figure 4-3, page 14) that holds the upper and lower cylinder sections together, and then carefully tip the upper section towards the handle, see Figure 4-3, page 14. -
Page 21: Handling Longopac
HTC GL 40 D Usage Figure 4-4. Lifting eye Handling Longopac The dust extractor is provided with a roll of Longopac waste bags. 4.4.1 Removing the full waste bag 1. Seal the filled bag with a tie at the top. -
Page 22: Fitting Longopac
Usage HTC GL 40 D 3. Cut or slice off the bag between the ties, see Figure 4-5, page 16. Figure 4-5. Cut or slice off the bag. 4. Discard the full bag. 5. Pull down the roll of bags to the recommended length, around 500 mm. -
Page 23: Installing Extra Ventilation Hose
1. Using a suitable camlock coupling, fasten the ventilation hose to the outlet for ventilation hose connection, see Figure 3-2, page 9. Contact HTC for recommended connections or consult the Product Catalogue. - Page 24 Usage HTC GL 40 D Manual filter cleaning means that the filter is cleaned manually when the dust extractor's capacity to take up dust reduces. The slide gate is used to achieve negative pressure in the cylinder packet (position 1 and position 2 in Figure 3-1, page 8), in order to obtain as effective filter cleaning as...
- Page 25 HTC GL 40 D Usage 1. Move the slide gate up to its end position, see Figure 4-6, page 19. Then wait approx. 3 seconds. Figure 4-6. Push slide gate up 2. Press the valve handle in towards the upper cylinder section, so the valve cover opens for about 1 second.
-
Page 26: Making Operation Easier
Usage HTC GL 40 D 4. Press the valve handle in towards the upper cylinder section, so the valve cover opens for about 1 second. Then release the handle. 5. Repeat points 3-4 above as needed. 6. Push the slide gate down, see Figure 4-8, page 20. - Page 27 HTC GL 40 D Usage Figure 4-9. Making operation easier Tip! By arranging the hose and cable as shown in the picture, you avoid disruptive stoppages caused by having to re-position the cable and hose.
-
Page 28: Control Cabinet
Usage HTC GL 40 D Control cabinet Figure 4-10. Control cabinet Note! The dust extractor must not be connected to the mains supply when carrying out the points below. 4.8.1 Resetting the motor protection 1. Cut the power to the dust extractor by pulling the plug out of the electrical socket, see Figure 3-2, page 9. -
Page 29: Changing The Fuse
HTC GL 40 D Usage 4.8.2 Changing the fuse 1. Cut the power to the dust extractor by pulling the plug out of the electrical socket, see Figure 3-2, page 9. 2. Open the electrical cabinet. 3. Raise the fuse holder, see position 3 in Figure 4-10, page 22. -
Page 30: Maintenance And Repairs
Maintenance and repairs HTC GL 40 D Maintenance and repairs General Information We recommend regular inspection of the dust extractor. Warning! During maintenance and repairs, the power to the dust extractor must be disconnected. Warning! Use protective equipment such as safety shoes, safety goggles, protective gloves, breathing mask and ear muffs. - Page 31 HTC GL 40 D Maintenance and repairs 1. Loosen the two quick fasteners (A) that hold the absolute filter holder in place. Let the holder and hose hang freely, see Figure 5-1, page 25. 2. Lift out the absolute filter, see Figure 5-1, page 25.
-
Page 32: Every Week
Maintenance and repairs HTC GL 40 D 5.3.2 Check the sock filter Warning! In the case of careless handling, the dust extractor can overturn and cause both personal injury and damage to the equipment. Warning! The dust that is sucked up is harmful if inhaled. Follow local regulations and use breathing protection. -
Page 33: Every Month
HTC GL 40 D Maintenance and repairs Every month 5.5.1 Check the condition of the hoses. • Make sure that the hoses are undamaged and free from persistent dirt. Replace the hoses, if necessary. Every six months (or 600 hours) 5.6.1... - Page 34 Maintenance and repairs HTC GL 40 D 1. Take hold of the sock filter cassette and turn it slightly anticlockwise. 2. Pull the whole cassette straight out, see Figure 5-2, page 28. Figure 5-2. Change the sock filter cassette 3. Inspect the gaskets on the lower and upper cylinder section. In the case of damage, replace with new gaskets.
- Page 35 HTC GL 40 D Maintenance and repairs 5.7.3 Servicing the sock filter cassette Warning! The dust that is sucked up is harmful if inhaled. Follow local regulations and use breathing protection. To service the sock filter cassette, points 1 to 3 in Check the sock filter, page 26...
- Page 36 Maintenance and repairs HTC GL 40 D 1. Loosen the appropriate screw joint (position B in Figure 5-3, page 30) on the top of the sock filter cassette, so the top of the sock filter is released. Figure 5-3. Sock filter cassette 2.
-
Page 37: Repairs
Figure 5-4, page 30. Repairs All repairs that may need to be performed must be done by a HTC Service Centre that has trained service personnel and which uses HTC original parts and accessories. Contact your retailer if your machine requires servicing. For contact information, see Contact Information at the start of the manual. -
Page 38: Faultfinding
Faultfinding HTC GL 40 D Faultfinding General Information This chapter describes some of the faults that may occur and how to deal with them. If the error cannot be corrected, or if errors arise other than those described here, contact your nearest retailer. -
Page 39: Technical Data
HTC GL 40 D Technical data Technical data The tables and pictures below show the technical data and dimensions for the dust extractor. HTC GL 40 D HTC GL 40 D HTC GL 40 D 3x230V EU 3x400V EU 3x460V US... - Page 40 Technical data HTC GL 40 D Figure 7-1. Height and length of the dust extractor, in the transport position, in millimetres Figure 7-2. Height and length of the dust extractor, in the operating position, in millimetres...
- Page 41 HTC GL 40 D Technical data Figure 7-3. Width of the dust extractor in millimetres...
-
Page 42: Environment
Environment HTC GL 40 D Environment HTC products are constructed mainly of recyclable metal and plastic. The main materials used are listed below. Chassis Frame Metal, powder-coated Wheels Polyurethane-filled rubber wheels with steel rims Dust separator Lower cylinder Metal, powder-coated... -
Page 43: Warranty And Ce Marking
Warranty and CE marking Warranty This warranty only covers manufacturing defects. HTC bears no responsibility for damage that arises or occurs during transportation, unpacking or use. In no instance and under no circumstances shall the manufacturer be held responsible for damage and defects caused by incorrect use, corrosion or use outside the prescribed specifications. - Page 44 Head Office HTC Sweden AB HTC Floor system Ltd. Unit 4 kingston Business Park Box 69 614 22 Söderköping Dunfermline Court Maidstone Road Sweden Kingston Visiting address: Klevvägen 7 Milton Keynes 614 92 Söderköping MK10 0BY United Kingdom Sweden Phone: +44 (0)845 460 2500...