Advertisement
Available languages
Available languages
Quick Links
Installation Manual of Shower Toilet
CEAS5017-0110400T0 (305mm Hole distance)
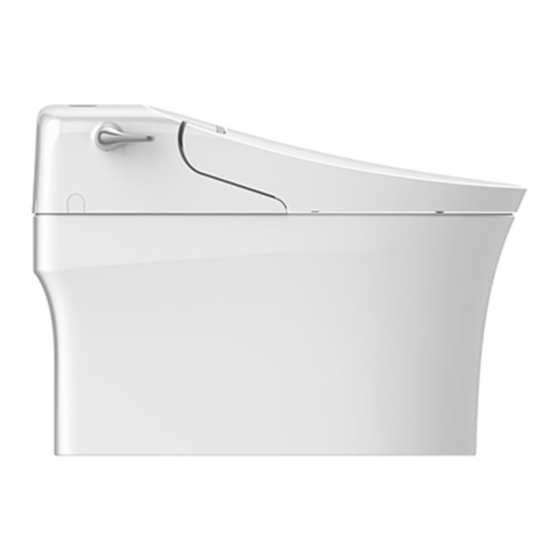
Aerozen G2 Integrated Shower Toilet
Installation Manual
Please strictly observe for your safety!
Description of Terms
Never disassemble, repair or modify the product if you are not a professional servicing technician.
※Risk of electric shock and fire, or injury to users due to incorrect activation of the product.
Ensure that the integrated shower toilet and the inside/outside of the remote controller and the
power plug are protected against splash of liquid such as water or detergent.
※Risk of electric shock or fire.
Be sure to connect grounding wire.
※Risk of electric shock in case of malfunction or electric leakage.
※If no grounding terminal is found on the socket, please consult with the electrical installation company.
Do not place the integrated shower toilet and the remote controller in a wet place subject to
splashing water.
※Otherwise, it may lead to electric shock or fire.
WARNING
Do not use damaged power plug and loosened power socket.
※Otherwise, it may lead to electric shock or fire.
The water supply hose must be connected to the running water. If the built-in filter gets clogged
easily with the dirt and fine particles in the pipe, install a filter unit connected to the running water.
※Cystitis or dermatitis may be caused, or electric shock and fire may be caused due to internal corrosion
Do not plug or unplug the power plug with wet hand.
※Risk of electric shock.
Be sure to install electric leakage protector.
※Risk of electric shock in case of malfunction or electric leakage.
※If no electric leakage protector is found, please consult with the electrical installation company.
Do not damage the power cord and make it broken; do not modify, fold, extend, curl or twine
the cord by force, or excessively press the cord by placing heavy stuff on top of the cord.
※Risk of electric shock or fire due to damage of the power cord.
Do not use power supply other than AC 220V.
※Otherwise, it may lead to electric shock or fire.
When removing the filter, water supply angle valve must be turned off. When installing the filter,
please tighten it properly without leaving any gap.
※Risk of water leakage of filter.
CAUTION
Be sure to fasten the water supply hose securely.
※Risk of water leakage due to loosely tightened nut.
Be sure to adjust the water supply angle valve and check for water leakage after installation.
※Risk of wetting the household property in case of water leakage.
Please remove all water to prevent freezing before the product is delivered to the customer.
※Risk of wetting the household property in case of water leakage due to freezing damage.
Do not insert the power plug into the power socket before the installation is completed.
※Risk of water leakage in case of a burnout.
To avoid accidents during use, please follow the precautions. Install the warm water
cleaning shower toilet safely.
Read the precautions before installation, and then install correctly to avoid accidents.
WARNING
Improper use of the product could lead to death or major injury.
CAUTION
Improper use of the product could lead to minor injury or property damage.
of machinery.
- 1 -
Advertisement

Related Manuals for American Standard Aerozen G2


Summary of Contents for American Standard Aerozen G2
- Page 1 Installation Manual of Shower Toilet CEAS5017-0110400T0 (305mm Hole distance) Aerozen G2 Integrated Shower Toilet Installation Manual To avoid accidents during use, please follow the precautions. Install the warm water Please strictly observe for your safety! cleaning shower toilet safely. Read the precautions before installation, and then install correctly to avoid accidents.
- Page 2 Recommended tools and materials (prepared by the customer) Sludge knife Adjustable wrench Slip-joint pliers Phillips screwdriver Wrench Spirit level Hacksaw Minus screwdriver Impact drill Silica gel Tapeline Power supply confirmation ● Use an AC 220V power socket with a minimum output of 300W. ●...
-
Page 3: Basic Dimensions
Basic Dimensions Unit: mm Dimensional drawings are available for each model. Finished wall 15 5 Finished ground Finished ground New effective length L=305 of the power supply: 1.0m Note: This dimensional drawing is for reference only and the specific dimensions of the product may vary within tolerances. - Page 4 Prepare the ground mounting hole A. Install the toilet flange on the ground B. Place the toilet on the ground and mark along the sewage outlet. bottom edge of the toilet and the ground mounting Connect the T-valve to the water supply hole.
- Page 5 Stick the strip Scrub the strip Fast strip Turn the toilet on its side and place it on the cushion After the strip is stuck, soak a piece of cloth and lightly, and then clean the installation surface on the wring the water out.
-
Page 6: Power Supply Connection
Power supply connection (1) Connect the power plug to power socket. (2) Confirm whether the power is on. Confirm that the E-bidet's power indicator is on. * Be sure to turn on the power after the E-bidet is installed. * When the power indicator is not on, press the restart button to confirm whether the power light is on. - Page 7 ● When installed on plasterboard or composite board ● For installation on a composite board wall 5mm or wall less than 5mm thick more thick, use a wooden tapping screw to secure the bracket onto the wall. a. Punch a hole 6mm in diameter on the composite board. (For plasterboard wall, punch a hole 5mm in diameter.) Bracket b.
-
Page 8: General Troubleshooting
When the spray intensity seems to be weakening Close Please clean the filter if the water jet is weak. Water supply angle valve Switch wrench (1) Close the switch wrench of water supply angle valve to stop water supply. (2) Remove the water supply hose equipped with the filter. * Remove the water supply hose equipped with the filter after loosening the hexagon nut. - Page 17 Manual Instalasi Toilet Pancuran CEAS5017-0110400T0 (Jarak Lubang 305mm) Manual Instalasi Toilet Pancuran Terintegrasi Aerozen G2 Harap dengan sungguh-sungguh Untuk menghindari kecelakaan selama penggunaan, harap mematuhi peringatan ini. Pasanglah pancuran pembersih air hangat dari toilet dengan aman. memperhatikan keselamatan anda! Bacalah peringatan sebelum instalasi, dan kemudian pasanglah dengan benar untuk menghindari kecelakaan.
- Page 18 Alat dan material yang dianjurkan (dipersiapkan oleh pelanggan) Pisau campuran bahan Kunci bengkel yang dapat disesuaikan Tang Obeng Phillips Kunci bengkel Pengukur kemiringan Gergaji Obeng Minus Bor pistol Gel silica Pita perekat Konfirmasi Aliran Tenaga Listrik ● Gunakan soket tenaga listrik AC 220V dengan output minimum sebesar 300W. ●...
- Page 19 Dimensi Dasar Gambar dimensional tersedia bagi setiap model. Unit: mm Dinding yang telah selesai 15 5 Lantai yang Lantai yang Panjang efektif baru L=305 telah selesai telah selesai dari aliran tenaga listrik: 1.0m Catatan: Gambar dimensional ini adalah untuk acuan semata dan dimensi spesifik dari produk dapat bervariasi di dalam batas toleransi.
- Page 20 Persiapkan lubang pemasangan (mounting hole) A. Pasanglah sambungan baut toilet pada B. Pasanglah toilet di tanah dan tandai di sepanjang outlet pembuangan di tanah. tepian dasar dari toilet dan lubang pemasangan. Sambungkan katup T ke katup (Garis kontur luar yang ditandai dalam Figur B penghenti aliran air.
- Page 21 Tempelkan pita perekat Gosoklah Pita Perekat Pita perekat cepat Balikkanlah toilet di sisinya dan tempatkan pada bantalan Setelah pita perekat melekat, basahilah sepotong dengan hati-hati, dan kemudian bersihkanlah permukaan kain dan peraslah airnya. Gunakan kain tersebut pemasangan di pinggiran bagian bawah. Rekatkanlah untuk menggosok pita perekat dengan ara dua pita perekat cepat di bagian dalam dengan meninggalkan lingkaran sampai permukaan menjadi tidak bersifat...
- Page 22 Sambungan aliran tenaga listrik (1) Sambungkan steker tenaga listrik ke soket tenaga listrik. (2) Pastikan bahwa tenaga listrik menyala. Pastikan bahwa indikator tenaga listrik E-bidet menyala. * Pastikan bahwa anda menyalakan tenaga listrik setelah E- bidet dipasang. * Pada saat indikator tenaga listrik tidak menyala, tekanlah tombol mulai kembali (restart) untuk memastikan apakah lampu tenaga listrik menyala.
- Page 23 ● Pada saat dipasang pada dinding gipsum (papan plaster) ● Untuk instalasi pada papan komposit 5 mm atau yang atau papan komposit dengan ketebalan kurang dari 5 mm. lebih tebal, gunakan skrup pengebor kayu untuk mengencangkan braket ke dinding. a. Buatlah lubang dengan diameter 6 mm pada papan komposit.
- Page 24 Pada saat intensitas pemancaran terlihat melemah Tutup Harap bersihkan filter jika jet air lemah. Katup penghenti aliran air Kran (1) Tutuplah kran katup penghenti aliran air untuk menghentikan aliran air. (2) Pindahkan selang aluran air yang diperlengkapi dengan filter. indahkan selang aliran air yang diperlengkapi dengan filter setelah melonggarkan mur heksagon.