Table of Contents
Advertisement
Quick Links
Advertisement
Table of Contents

Related Manuals for Fortinet FortiSIEM 500F

Summary of Contents for Fortinet FortiSIEM 500F
- Page 1 FortiSIEM - 500F Collector Configuration Guide Version 6.1.2...
- Page 2 FORTINET DOCUMENT LIBRARY https://docs.fortinet.com FORTINET VIDEO GUIDE https://video.fortinet.com FORTINET BLOG https://blog.fortinet.com CUSTOMER SERVICE & SUPPORT https://support.fortinet.com FORTINET TRAINING & CERTIFICATION PROGRAM https://www.fortinet.com/support-and-training/training.html NSE INSTITUTE https://training.fortinet.com FORTIGUARD CENTER https://fortiguard.com/ END USER LICENSE AGREEMENT https://www.fortinet.com/doc/legal/EULA.pdf FEEDBACK techdoc@fortinet.com Email: 11/10/2020 FortiSIEM 6.1.2 500F Collector Configuration Guide...
-
Page 3: Table Of Contents
Migrate Collector Installation Download the Bootloader Prepare the Bootloader Load the FortiSIEM 6.1.2 Image Migrate to FortiSIEM 6.1.2 Restore the HTTP Password File From Backup Re-Register to the Supervisor Reboot the Appliance FortiSIEM 6.1.2 500F Collector Configuration Guide Fortinet Technologies Inc. -
Page 4: Appliance Setup
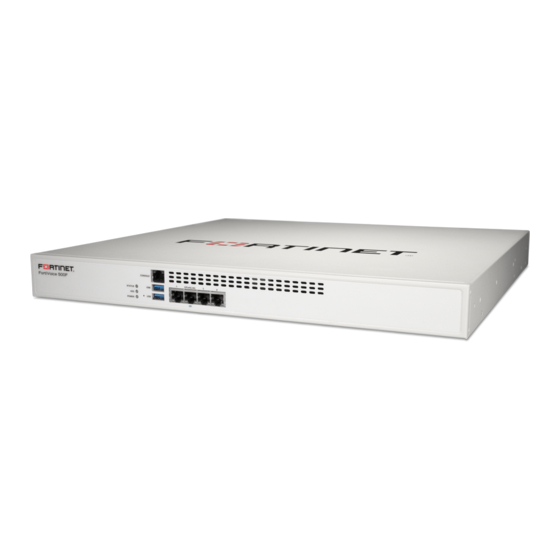
Step 6: Using FortiSIEM Step 1: Rack mount the FSM-500F Appliance 1. Follow FortiSIEM 500F QuickStart Guide to mount FSM-500F into rack. 2. Connect FSM-500F to the network by connecting an Ethernet cable to Port1. Before proceeding to the next step, connecting Ethernet cable to Port1 is required for Network configuration. -
Page 5: Step 4: Configure Fortisiem Via Gui
2. At the command prompt, go to /usr/local/bin and enter configFSM.sh , for example: # configFSM.sh A simple GUI will open. 3. In the GUI, select 1 Set Timezone and then press Next . FortiSIEM 6.1.2 500F Collector Configuration Guide Fortinet Technologies Inc. - Page 6 Appliance Setup 4. Select your Region , and press Next . 5. Select your Country , and press Next . FortiSIEM 6.1.2 500F Collector Configuration Guide Fortinet Technologies Inc.
- Page 7 9. When prompted, enter the information for these network components to configure the Static IP address: IP Address , Netmask , Gateway , DNS Server(s) .Configure the network by entering the following fields. Next . Press FortiSIEM 6.1.2 500F Collector Configuration Guide Fortinet Technologies Inc.
- Page 8 FortiSIEM OS update servers: os-pkgs- cdn.fortisiem.fortinet.com and os-pkgs-c8.fortisiem.fortinet.com . Press Next . 11. The final configuration confirmation is displayed. Verify that the parameters are correct. If they are not, then press Back to return to previous dialog boxes to correct any errors.
-
Page 9: Step 5: Register Collectors
Once the configuration is complete, the system reboots automatically. Step 5: Register Collectors Collectors can be deployed in Enterprise or Service Provider environments. Enterprise Deployments Service Provider Deployments Enterprise Deployments For enterprise deployments, follow these steps: FortiSIEM 6.1.2 500F Collector Configuration Guide Fortinet Technologies Inc. - Page 10 For Service Provider deployments, follow these steps. 1. Log in to Supervisor with Admin privileges. 2. Go to ADMIN > Settings > System > Event Worker and enter the IP of the Worker node. Click OK . FortiSIEM 6.1.2 500F Collector Configuration Guide Fortinet Technologies Inc.
- Page 11 Unlimited . Guaranteed EPS is the EPS that the Collector will always be able The last two values could be set as to send. It could send more if there is excess EPS available. FortiSIEM 6.1.2 500F Collector Configuration Guide Fortinet Technologies Inc.
-
Page 12: Step 6: Using Fortisiem
8. Go to ADMIN > Health > Collector Health to see the status of the Collector. Step 6: Using FortiSIEM FortiSIEM User Guide Refer to the for detailed information about using FortiSIEM. FortiSIEM 6.1.2 500F Collector Configuration Guide Fortinet Technologies Inc. -
Page 13: Factory Reset
Ubuntu Desktop Setup Files Rufus (Bootable USB Utility) USB Keyboard USB Mouse FortiSIEM Appliance Image VGA Monitor USB Thumbdrive 4 GB Thumbdrive (for Linux installation) 8 GB Thumbdrive (for FortiSIEM appliance FortiSIEM 6.1.2 500F Collector Configuration Guide Fortinet Technologies Inc. -
Page 14: Step 1: Create Bootable Linux Image
Step 3: Prepare 500F by removing FSM 1. Connect to the console/SSH of the FortiSIEM appliance. 2. Run the following command: execute fsm-clean 3. Allow this command to run and power-off the FortiSIEM appliance. FortiSIEM 6.1.2 500F Collector Configuration Guide Fortinet Technologies Inc. -
Page 15: Step 4: Configure 500F Bios To Boot Into Usb Drive
10. Once this is completed, power off the FortiSIEM appliance using the following commands: shutdown –h now 11. After shutdown, remove both USB drives from the FortiSIEM appliance. 12. Power on FortiSIEM appliance. 13. Reinstall FortiSIEM application (as in Factory Reset - step 2). FortiSIEM 6.1.2 500F Collector Configuration Guide Fortinet Technologies Inc. -
Page 16: Migrating From Pre-6.1.2 Fortisiem
Download the Bootloader Install and configure the FortiSIEM bootloader to start migration. Follow these steps: 1. Download the bootloader FSM_Bootloader_6.1.2_build0119.zip from the support site and copy it to the /images directory. FortiSIEM 6.1.2 500F Collector Configuration Guide Fortinet Technologies Inc. -
Page 17: Prepare The Bootloader
2. Run the prepare_bootloader script to install and configure the bootloader. This script installs, configures, and reboots the system. The script may take a few minutes to complete. # sh prepare_bootloader FortiSIEM 6.1.2 500F Collector Configuration Guide Fortinet Technologies Inc. -
Page 18: Load The Fortisiem 6.1.2 Image
Note: you might have to reboot the system manually if auto-reboot does not work. 4. In the FortiSIEM bootloader shell, choose FortiSIEM Boot Loader . Press Return. Load the FortiSIEM 6.1.2 Image Follow these steps to load the FortiSIEM image: FortiSIEM 6.1.2 500F Collector Configuration Guide Fortinet Technologies Inc. - Page 19 3. Run the load_image script to swipe the old image with the new image, for example: a. Change to the root directory and check the contents, for example: # cd / # ll FortiSIEM 6.1.2 500F Collector Configuration Guide Fortinet Technologies Inc.
-
Page 20: Migrate To Fortisiem 6.1.2
Mount the opt directory, for example: # mount /dev/mapper/FSIEM500F-phx_opt /opt c. Create images directory under / : # mkdir -p /images d. Copy backup files to /images directory from /opt/images directory: # cd /opt/images FortiSIEM 6.1.2 500F Collector Configuration Guide Fortinet Technologies Inc. - Page 21 3. Run the configFSM.sh command to configure the migration via a GUI, for example: # configFSM.sh 4. In the first screen of the GUI select 1 Yes to set a timezone. Press Next . FortiSIEM 6.1.2 500F Collector Configuration Guide Fortinet Technologies Inc.
- Page 22 5. Select a region for the timezone. In this example, US is selected. Press Next . 6. Select a timezone in the selected region. In this example, Pacific is selected. Press Next . FortiSIEM 6.1.2 500F Collector Configuration Guide Fortinet Technologies Inc.
- Page 23 7. Select a target to configure. In this example, the Collector is selected. Press Next . 8. Select option 5 migrate_6_1_1 . 9. Test connectivity by connecting to a well-known internet site. Press Next . 10. Press the Run command to complete migration, for example: FortiSIEM 6.1.2 500F Collector Configuration Guide Fortinet Technologies Inc.
-
Page 24: Restore The Http Password File From Backup
-rw-r--r-- 1 root root 62 Nov 3 13:36 passwds Re-Register to the Supervisor Run the following command; note the update option. This keeps old associations. # /opt/phoenix/bin/phProvisionCollector --update <user> <password> <Super IP or Host> FortiSIEM 6.1.2 500F Collector Configuration Guide Fortinet Technologies Inc. -
Page 25: Reboot The Appliance
Migrating from Pre-6.1.2 FortiSIEM Reboot the Appliance If the appliance does not reboot automatically, then manually reboot. FortiSIEM 6.1.2 500F Collector Configuration Guide Fortinet Technologies Inc. - Page 26 Fortinet. For absolute clarity, any such warranty will be limited to performance in the same ideal conditions as in Fortinet’s internal lab tests. In no event does Fortinet make any commitment related to future deliverables, features or development, and circumstances may change such that any forward-looking statements herein are not accurate.