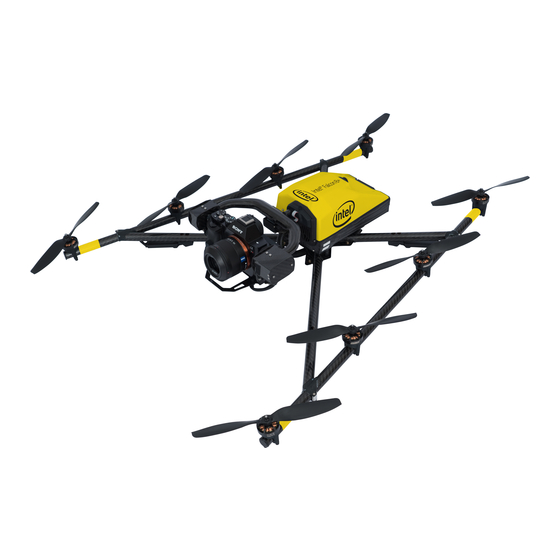
Intel Falcon 8+ Manual
Payload & compass calibration
Hide thumbs
Also See for Falcon 8+:
- User manual (233 pages) ,
- Flight manual (147 pages) ,
- Quick start manual (28 pages)
Advertisement
Available languages
Available languages
Quick Links
English
PAYLOAD & COMPASS CALIBRATION
The payload calibration and the compass calibration must be performed once with each payload. If the status display
shows the message
"No calib on payload found!",
shows the message
"No c.calib. matching pID, using
additionally. Once performed the payload calibration is stored in the payload and the compass calibration in the UAS.
Every time the payload is attached the correct calibration parameters are recalled automatically.
Payload calibration
The payload calibration can be done indoors with the
motors switched off.
1. Attach the payload with which the calibration shall be
performed.
2. Switch on the payload, the Intel® Falcon™ 8+ Drone
and the Intel® Cockpit Controller.
3. On the Intel® Cockpit Controller push the
of the status display and navigate to
Payload calib.
4. Make sure that the camera can turn freely from
the full down position to the full up position (with
the Inspection Payloads, you will need to raise the
Intel® Falcon™ 8+ a bit to make sure the payload does
not hit the ground when it tilts downwards).
5. Press
ENT
to start the calibration. The camera will
first rotate fully downwards and then progressively
move to the fully upwards position (do not touch the
Intel® Falcon™ 8+ during the process).
6. When the payload does not move anymore, switch off
the payload, the Intel® Falcon™ 8+ and Intel® Cockpit
Controller and restart the system.
It is important to restart the system
immediately after each calibration process.
Only after the restart the new calibration
parameters will become active.
7. Repeat the above steps once for every payload which
shall be used with the Intel® Falcon™ 8+.
Learn more:
http://intel.com/Falconmanual.
Disclaimer: The information contained herein is subject to change without notice. All statements, information and recommendations contained herein do not constitute a warranty of any kind, either expressed or implied.
Intel Deutschland GmbH | Konrad-Zuse-Bogen 4 | 82152 Krailling, Germany | wwww.intel.com/drones
you must perform the payload calibration first. If the status display
default.", you must perform the in-flight compass calibration
Compass calibration
The compass calibration needs to be done in flight while
outdoors.
1. Attach the payload with which the compass
calibration should be performed.
2. Take the Intel® Falcon™ 8+ out in the field to a
spot with good GPS reception and no magnetic
ENT
button
disturbances.
Settings >
3. Switch on the payload, flight system and Intel®
Cockpit Controller as usual and take off.
4. Have the Intel® Falcon™ 8+ hovering in GPS mode
in around 30m of altitude where no magnetic
disturbances are to be expected.
5. Push the
Intel® Cockpit Controller to enter the menu and
navigate to
6. Push
make a 400° turn.
7. Once the Intel® Falcon™ 8+ finished the turn, please
land, switch off the camera, the Intel® Falcon™ 8+
and the Intel® Cockpit Controller and restart the
complete system.
8. Repeat the above steps once for every payload which
shall be used with the Intel® Falcon™ 8+.
ENT
button of the status display on the
Settings > Compass calib.
ENT
to confirm. The Intel® Falcon™ 8+ will
It is important to land and restart the
system immediately after each calibration
process. Only after the restart the new
calibration parameters will become active.
© Intel Deutschland GmbH
Advertisement

Related Manuals for Intel Falcon 8+


Summary of Contents for Intel Falcon 8+
- Page 1 2. Switch on the payload, the Intel® Falcon™ 8+ Drone 2. Take the Intel® Falcon™ 8+ out in the field to a and the Intel® Cockpit Controller. spot with good GPS reception and no magnetic 3.
- Page 2 1. Fixez la charge utile avec laquelle la boussole doit être 1. Fixez la charge utile qui doit être calibrée. calibrée. 2. Allumez la charge utile, le drone Intel® Falcon™ 8+ et le 2. Emmenez le Intel® Falcon™ 8+ à l’extérieur, à un endroit Intel® Cockpit Controller.
- Page 3 Haftungsausschluss: Die hierin enthaltenen Angaben unterliegen Änderungen ohne Vorankündigung. Die hierin enthaltenen Aussagen, Informationen und Empfehlungen stellen keinerlei ausdrückliche oder still- schweigende Gewährleistung dar. Intel Deutschland GmbH | Konrad-Zuse-Bogen 4 | 82152 Krailling, Deutschland | wwww.intel.com/drones © Intel Deutschland GmbH...
- Page 4 Disclaimer: Le informazioni contenute nel presente documento possono subire variazioni senza preavviso. Tutte le dichiarazioni, le informazioni e i consigli contenuti nel presente documento non costituiscono una garanzia di alcun tipo, espressa o implicita. Intel Deutschland GmbH | Konrad-Zuse-Bogen 4 | 82152 Krailling, Germania | wwww.intel.com/drones © Intel Deutschland GmbH...
- Page 5 Wyłączenie odpowiedzialności: Niniejsze informacje mogą ulec zmianie bez konieczności zawiadamiania o ich dokonaniu. Żadne z zawartych w niniejszym dokumencie oświadczeń, informacji ani zaleceń nie stanowi bezpośredniej ani pośredniej gwarancji. Intel Deutschland GmbH | Konrad-Zuse-Bogen 4 | 82152 Krailling, Niemcy | www.intel.com/drones © Intel Deutschland GmbH...
- Page 6 1. Coloque a carga útil com a qual a calibração da bússola levada a cabo. dever ser levada a cabo. 2. Ligue a carga útil, o Intel® Falcon™ 8+ Drone e o Intel® 2. Coloque o Intel® Falcon™ 8+ no campo, num local com Cockpit Controller.
- Page 7 2. Conecte la carga útil, el dron Intel® Falcon™ 8+ y el de la brújula. Intel® Cockpit Controller. 2. Lleve el Intel® Falcon™ 8+ a un campo en el que haya 3. En el Intel® Cockpit Controller, pulse el botón un punto con buena recepción de GPS y esté libre de Status Display y vaya a Settings >...
- Page 8 8. Intel® Falcon™ 8+ ile kullanılacak her bir faydalı yük için yukarıdaki adımları tekrar edin. 7. Intel® Falcon™ 8+ ile kullanılacak her bir faydalı yük için yukarıdaki adımları tekrar edin.